
Carbamide Peroxide Trays for Safe Home Whitening
You're at the bathroom mirror with a syringe in one hand and a clear tray in the other, and the instructions in your head don't agree. One memory says overnight, another says 30 minutes, and your teeth still feel a little tender from yesterday. If you guess wrong, you don't get faster whitening. You get sore gums, sharp zingers, and gel wasted in the wrong place.
That's why it helps to think of carbamide peroxide trays as a dose control device, not a container you fill up and forget. The tray decides where the gel sits, the percentage decides how strong each minute is, and the clock decides how much total exposure your enamel gets. Change any one of those three and you've changed the treatment, even if the syringe looks the same.
Once you see it that way, the confusing parts get simpler. A lower strength worn longer can reach a similar shade to a stronger gel worn briefly. Extra gel squeezed onto your gums doesn't whiten your teeth faster. And a crown that was made to match your old shade won't follow your natural teeth as they lighten, no matter how carefully you fill the tray.
Why Carbamide Peroxide Trays Whiten Slowly
You're standing under bright bathroom light, tray pinched between two fingers, wondering if you really have to sleep in this thing to see any change. It's a fair question, because the tray looks inactive. There's no fizz, no heat, and no dramatic color shift while you watch. The work is happening, but it's happening on a slow schedule by design.
Think of the tray as a thin sealed pocket, more like a raincoat than a mouthwash. Mouthwash floods everything for a few seconds and leaves. A well fitting tray holds a small amount of gel against enamel and mostly off your gums for the full session, so the same tooth surfaces keep getting the same controlled contact night after night.
A Slow Trickle, Not a Flood
Carbamide peroxide doesn't whiten in the form you squeeze from the syringe. It breaks down gradually into hydrogen peroxide, which does the whitening, and urea. That slow breakdown is why tray gel feels gentler than a strong in office application. You're not getting the whole dose at once. You're getting a trickle over time, which is also why one session rarely tells the whole story.
If you want the chemistry in plain terms before you pick minutes, read how carbamide peroxide whitens teeth step by step. The practical point for tonight is simpler. Repeated, measured contact matters more than one heroic session, and the tray only works if it keeps gel on the tooth instead of letting saliva wash it away or letting it pool on soft tissue.
The tray isn't the whitening agent. It's the device that keeps a slow release gel in the right place long enough to work.
That slow approach has held up against faster treatment. In a randomized split mouth clinical trial involving 90 patients, tray applied 10% carbamide peroxide produced a degree of bleaching similar to an in office protocol using 35% hydrogen peroxide, regardless of whether light irradiation or combined home and in office treatment was added, as summarized in the American Dental Association whitening overview. The same overview notes that the American Dental Association has specifically recognized 10% ± 1% carbamide peroxide as safe and effective for at home bleaching with custom trays, while at home systems commonly range from 10% to 38%.
Stronger Doesn't Automatically Mean Whiter
Readers often assume the highest percentage on the box must give the whitest final shade. The head to head evidence doesn't support that shortcut. A stronger gel mainly changes speed and comfort, not your personal ceiling. Your starting shade, stain type, and consistency still set what you can reach.
In a randomized, double blind clinical trial of 92 participants, three weeks of at home treatment with either 10% or 16% carbamide peroxide significantly lightened the six maxillary anterior teeth compared with baseline, but the 16% group reported significantly more sensitivity during treatment weeks one and three (p=0.02 and p=0.01), according to the Operative Dentistry trial report. Both groups lightened. The stronger group paid for it with more sensitivity in those weeks.
That leaves you with a useful rule for shopping. Match concentration to your tolerance and the schedule you can finish, not to a hope that a bigger number guarantees a brighter endpoint. A well fitting tray matters just as much, because gel that stays on enamel can work while gel that leaks onto gums only irritates. The wear times that follow turn that rule into minutes you can use.
Wear Times for Each Gel Strength
Use this table first, then read the notes for your row. Time is your main control knob, so finding your percentage matters more than finding a schedule that worked for someone else's syringe.
| Gel strength | Daily wear | Typical course | Comfort note |
|---|---|---|---|
| About 10% carbamide peroxide | About 1 hour up to overnight | Often several weeks inside the 6 to 28 day range | ADA recognizes 10% ± 1% with custom trays |
| 16% carbamide peroxide | 90 minutes daily | 4 weeks in one follow up study | More sensitivity than 10% in weeks 1 and 3 of a 3 week trial, shade stable to 42 months after a finished course |
| Broad professional range, about 10 to 38% | About 2 to 10 hours, set by the formula | 6 to 28 days | Higher concentration, more transient sensitivity and gum irritation |
The broad range is the starting context, not your personal prescription. The American Dental Association reports that at home systems commonly contain approximately 10% to 38% carbamide peroxide, with daily schedules ranging from about 2 to 10 hours for 6 to 28 days, depending largely on concentration and formulation, in evidence cited with a clinical follow up study in the Journal of Esthetic and Restorative Dentistry. That same follow up used individualized trays and 16% carbamide peroxide for 90 minutes daily over four weeks and found whitening remained stable through 42 months.
Reading the Rows From Low to High
At about 10%, you're in the slow lane by design. A session can run a couple of hours, and some night formulas are made for overnight wear. One 10% night gel can show a change in as little as two hours, with overnight wear used for a stronger effect. That doesn't mean every 10% syringe should stay in all night. It means this strength is the one most often built for long, gentle contact.
At 16%, the studied rhythm gets shorter and more specific. The four week course above used 90 minutes daily, and the shade holding through 42 months argues for finishing a defined course instead of jumping to a stronger syringe when progress looks slow on day four. For PolaNight 16%, the trays can be left in for 90 minutes, or put in right before sleep for overnight whitening, which shows why you must follow your exact product label rather than mixing schedules.
- 22% night gel: For PolaNight 22%, the trays should stay in the mouth for no more than 45 minutes.
- Daytime formulas: Trays should stay in no more than 30 minutes, or 15 minutes for the twice daily treatment.
- Missed a night: Don't double the next session to catch up. Resume the labeled time.
Those short caps surprise people who learned whitening from overnight trays. They shouldn't. As concentration rises, each minute delivers more peroxide, so the session shrinks. Wearing a daytime or higher strength gel overnight isn't a shortcut. It's a different, larger dose than the maker planned.
When Comfort Changes the Clock
The main adverse effects are transient tooth sensitivity and oral irritation, and they become more prevalent as concentration increases, although they're generally mild and temporary. Treat that as feedback, not a test of willpower. Brief tingling that fades is common. Zingers that linger after the tray is out, or burning where gel touched your gums, tell you to pause and check fit and gel amount.
If sensitivity persists, stop and seek dental advice instead of compensating for missed sessions by doubling exposure. Also check where the gel ended up. Excess gel contacting your gums raises the chance of soft tissue irritation without improving whitening inside the tooth, which is why tray fit decides whether your chosen minutes help or hurt.
Custom Trays Versus Boil-and-Bite Trays
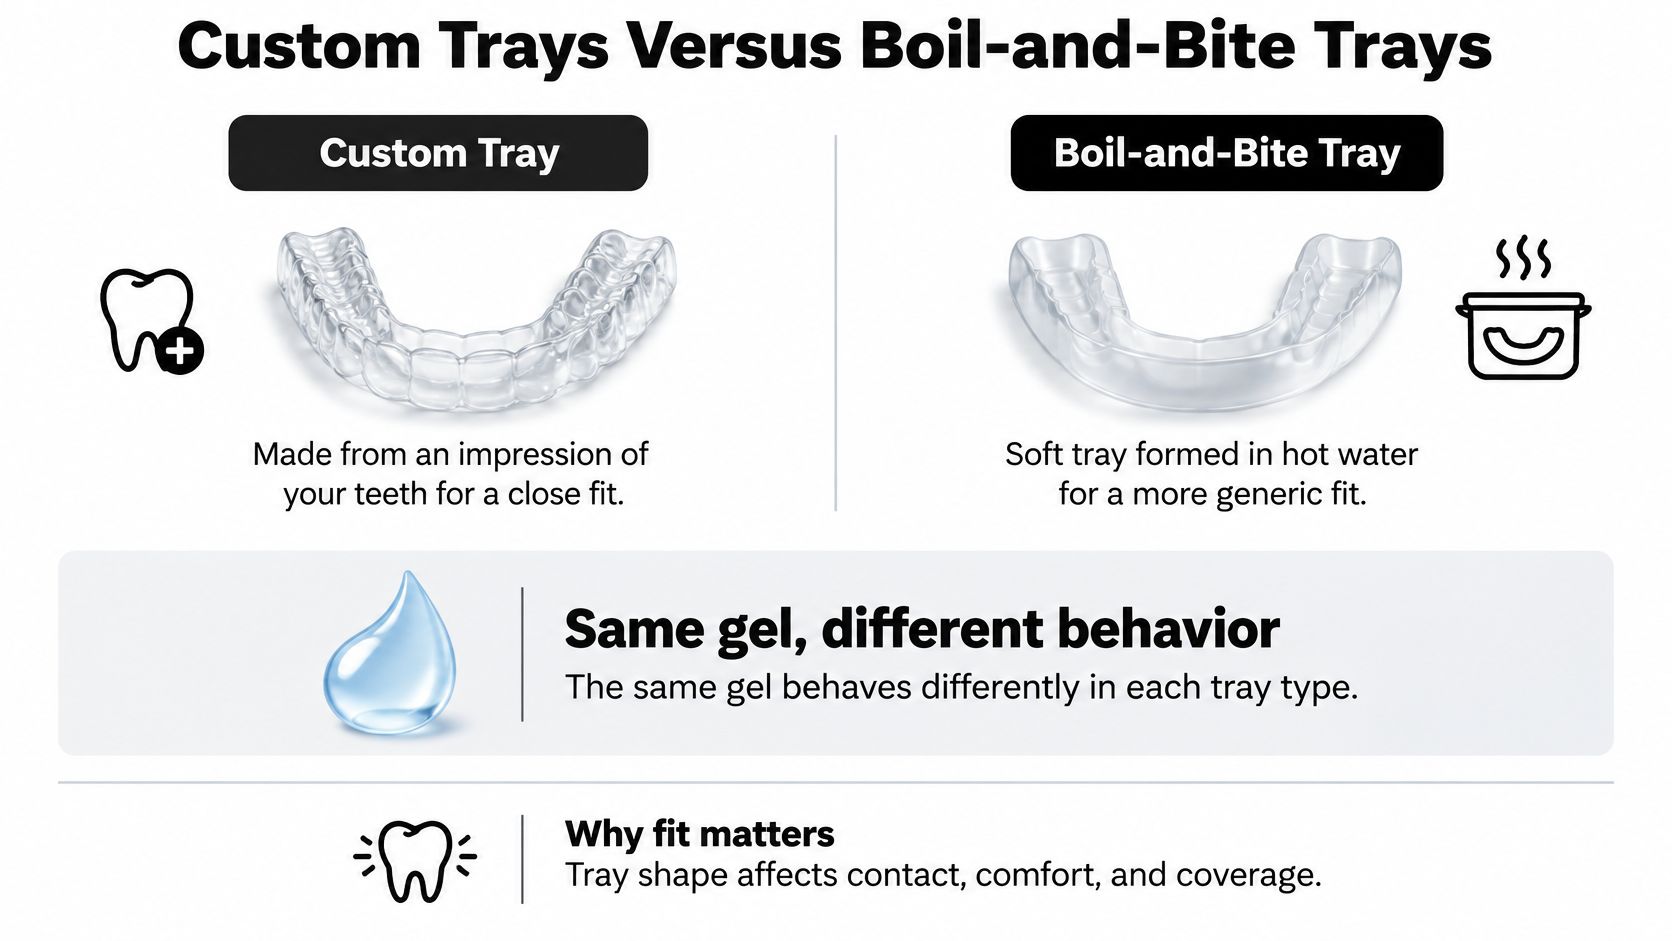
The same syringe behaves differently depending on the tray you put it in. A dentist-made tray seals like a well-fitted jacket. A boil-and-bite tray fits like a jacket you shaped yourself at the kitchen sink. Both can hold gel, but they don't control it the same way, and that control changes comfort and evenness.
This comparison shows where the two tray types split in daily use.
| Feature | Custom dentist tray | Boil-and-bite tray |
|---|---|---|
| How it is made | Impression or scan, trimmed to the gumline | Softened in hot water and bitten to shape |
| How gel is placed | A drop in each tooth compartment | A line of gel along the tray channel |
| Syringe split | Half the syringe upper, half lower | Half the syringe upper, half lower |
| Gel match | Night formulas meant for dentist fitted trays | Gels whose label allows custom or boil-and-bite |
| Spill and evenness | Less overflow when margins seal | More spill and patchier color if the bite is loose |
| Best for | Repeated courses and a stable gum seal | A first kit or travel when no custom tray exists |
How You Load Each Tray
Loading is where most mistakes happen, and the two tray styles ask for different hand movements. With compartmented trays, a drop of gel goes into each tooth compartment. With simpler trays, a line of gel goes along the entire tray. Either way, half the syringe is used for the upper tray and half for the lower, so don't squeeze a full syringe into one arch and hope for the best.
After loading, seat the tray and tap or press it lightly so the gel contacts each tooth. Firm pressing is not needed. You're making contact, not forcing gel into the enamel. Think of smoothing a sticker onto a window. Light, even contact works. Hard pressure just pushes the excess out the edges.
Practical rule: If gel squirts onto your gums when you seat the tray, you used too much, no matter what tray type you own.
Overloading trays with gel or pushing gel firmly into teeth is not necessary and may irritate gums. Wipe away overflow with a clean finger or tissue before you start your timer. That wiped gel wasn't going to whiten anything. It was only going to sit on soft tissue and make you want to quit early.
Which Tray Suits Your Situation
Choose a custom tray when you'll repeat courses, when your gumline is uneven, or when your gel is labeled for dentist fitted trays, including lower strength overnight formulas. The trimmed edge and close seal give you the most predictable contact and the least spill. It's the better tool when sensitivity to overflow has stopped you before.
Choose a boil-and-bite tray for a first kit, for travel, or when your gel label clearly allows either tray style. Form it carefully and test the seal before you add gel. If it rocks, gaps at the back, or lets saliva flood in when you close your lips, expect patchier color. Remolding a loose tray is smarter than adding extra gel to fill the gaps.
Two edge cases cause confusion. A snug clear retainer that seals well is sometimes used by people who already wear one, but a retainer with air gaps isn't a whitening tray, because gel won't stay evenly on the teeth. Orthodontic brackets also block an even seal, so whitening around them leaves uneven patches. Before any session, do a quick two point fit check. The gel stays on your teeth with your lips relaxed, and your gumline doesn't blanch or burn in the first minutes.
When Longer Wear Does Not Whiten More
You set a timer for the label's recommended wear time, then wonder whether leaving the trays in longer might brighten your teeth faster. Extra time and extra gel do not guarantee extra whitening. A tray works like a dose-control device: it keeps gel against the teeth, but it cannot make them absorb peroxide faster.
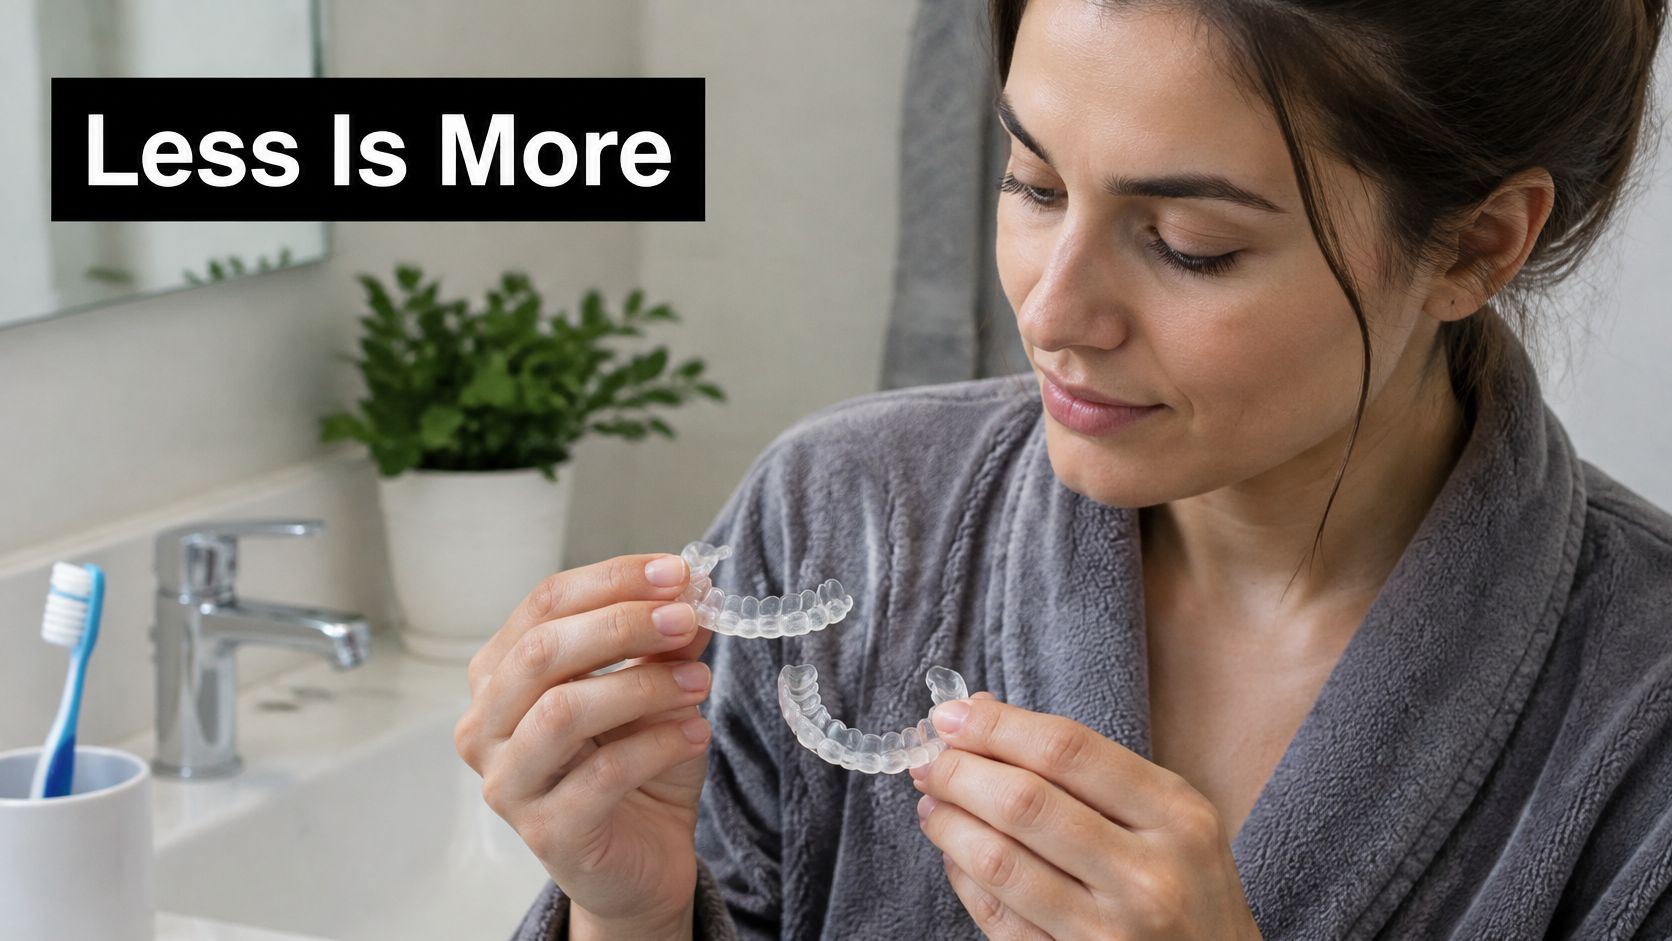
This photo shows the moment of overfilling, right at the sink before the timer starts.
A randomized clinical trial of 66 volunteers using 10% carbamide peroxide found that sensitivity was more pronounced in the first week for participants assigned longer daily wear times. The report also notes that other trials observed no sensitivity in 95% of participants with either one hour or overnight use, according to the Journal of Applied Oral Science report. These findings show why the product's instructions matter: overnight use may suit some low-strength night gels, while longer wear can increase sensitivity for some people.
The Reservoir Myth
A reservoir tray has a small scooped space over each tooth to hold gel. The extra space may seem useful, like a larger cup holding more water, but a bigger pool does not make peroxide work faster. Excess gel can sit in the tray or spill over its edge.
The same principle applies when loading a plain tray. A thin, even amount is enough to bring gel into contact with the teeth; extra gel does not reliably improve the result.
The video below shows how to handle a tray without filling it excessively.
A Simple Pause Rule
If sharp sensitivity rises during or after a session, shorten the next session or skip one rather than pushing through. If your gums burn, remove the tray and check whether gel has reached the tissue or the tray edge is pressing against it.
Rinse your mouth after removing the gel. If pain continues, stop whitening and seek dental advice. Sensitivity toothpaste with potassium nitrate or fluoride may help during a course, but it does not make excess gel or longer wear a better dose.
10% carbamide peroxide is a widely studied concentration and is generally associated with effective whitening and fewer adverse effects than stronger approaches. Follow the product's wear-time instructions, then adjust only if sensitivity calls for a pause or a shorter session. A manageable routine is more useful than a longer one you cannot comfortably continue.
Trays When Fillings Crowns or Veneers Show
After two weeks of careful tray use, you may notice that one front tooth still looks darker than the others. If it has a crown, the difference may be because your natural enamel lightened while the crown remained its original shade.
Natural teeth may whiten while crowns, veneers, and fillings do not predictably change shade. The result can be like painting a wall around a plastic panel: the wall changes color, but the panel does not. That contrast may make a smile look less even, especially around visible restorations.
What Bleach Can Do to Restorations
A review reports that aggressive bleaching may alter composite restorations, glass ionomer cements, sealants, and ceramic crowns. It also discusses a clinical study in which tested composites showed unacceptable color changes after home treatment with 10% carbamide peroxide or 10% hydrogen peroxide for 14 days. These findings show that some tooth-colored materials may change in ways you did not intend, even though they do not whiten like enamel. Read more in this review of bleaching and restorative materials.
Laboratory studies also find that some restorations change little, and any lightening may be detectable only with instruments. Materials can respond differently, so restorations may not match enamel after whitening. If you have fillings, review what to consider when whitening teeth with fillings before starting.
Three Cases That Decide Your Next Step
- A single back filling: It may be less noticeable when you talk. A dental check can confirm that the filling is sound before you use whitening trays.
- A front crown, veneer, or large bonding: Ask your dentist to assess it first. You may whiten your enamel, allow the shade to settle, and then discuss replacing or resurfacing the restoration to match.
- Recent bonding or a chipped-edge repair: Ask your dentist when to begin whitening. The restoration's shade and the whitening course should be planned together.
Shade matching is best considered after whitening has stabilized. Teeth may look brighter just after treatment and then settle, so matching a new crown immediately could mean choosing a shade that no longer fits.
Untreated decay, worn areas near the gumline, or recessed gums can make peroxide trays painful. A dental exam can help distinguish staining from damage or a restoration concern. If a visible restoration may not match your whitened enamel, plan the gel and any dental work together.
Rinse the Trays and Choose a Strength
The two minutes after you remove your trays decide whether tomorrow's session starts clean or starts with yesterday's gel and a sour film. Readers rush this part because the timer is done and bed is calling. Slow down just enough to do the steps in order, every time, until it's automatic like locking the front door.
The Rinse and Dry Routine
- Remove and clear: Take out both trays and wipe or rinse away loose gel so you don't swallow what's left.
- Rinse your mouth: After treatment, rinse the mouth with tepid water, not ice water, which can sting freshly whitened teeth.
- Brush gently: Brush gently with a mild toothpaste. Scrubbing hard right after a session only adds irritation.
- Rinse and dry the trays: Rinse the trays and let them dry thoroughly before storing, because a damp tray sealed in a case grows film and picks up stains.
- Store them flat: Keep trays in a clean case away from heat that can warp boil-and-bite plastic.
Skip harsh soaking unless your tray maker says otherwise, and never boil a custom tray to clean it. Heat that reshapes a tray ruins the seal you paid for, and a warped edge pushes gel onto your gums at the next session. If you want a fuller cleaning routine for stubborn film, follow how to clean whitening trays without damaging them.
Dry trays, labeled minutes, and a strength you can stand. That combination finishes more courses than any maximum strength syringe.
Picking Your Next Strength
Choose by comfort and tray type, not by chasing the biggest number. If sensitivity was your limit last time, start with a 10% gel labeled for your tray style. PolaNight 10 contains 10% carbamide peroxide, the lowest concentration in the PolaNight line, and that end of the range is where most sensitive users can complete a course. Completing a gentler course beats abandoning a stronger one halfway.
If you have a custom tray and tolerated your course well, moving up is a comfort and schedule decision, not a promise of a whiter endpoint. Shorter sessions may suit your evenings better, and that's a valid reason. At the far end of daytime options, PolaDay CP 35 contains 35% carbamide peroxide, which belongs in brief, label controlled sessions and never in an overnight routine borrowed from a weaker gel.
If you're using a boil-and-bite tray, pick a gel whose label allows that tray style instead of forcing a custom only night syringe into a loose fit. The gel and tray are a matched pair, like a key and a lock. A mismatch wastes gel and irritates tissue. Before you buy anything stronger, look in the mirror one more time and check whether visible crowns or veneers will still match when your enamel lightens. That ten second check can save you a replacement bill and a second course.
Ready to match a gel strength to the tray you already own, instead of guessing at the sink? At DentalHealth.com you'll find professional grade whitening gels, sensitivity toothpastes, and clear product details that state each formula's percentage and tray requirements up front. Browse the whitening range, read the wear directions before you order, and pick the strength you can wear calmly for the full course.