
How Do Teeth Whitening Kits Work and Why Results Vary
You've opened a whitening kit, found a syringe or strip packet marked with a peroxide percentage, and immediately wondered whether a higher number means a brighter smile. Then you notice that the instructions mention trays, wear time, sensitivity, and perhaps an LED light. The chemistry matters, but it's only one part of the result.
How do teeth whitening kits work? They use peroxide to change the molecules responsible for tooth discoloration. Your outcome also depends on how evenly the gel reaches each tooth, how long it stays active, the type of stains you have, and whether recession or sensitivity makes you shorten the treatment. Understanding those variables makes it easier to choose a kit without assuming that the strongest formula is automatically the right one.
The Basic Science Behind Whitening Kits
From peroxide to a lighter tooth
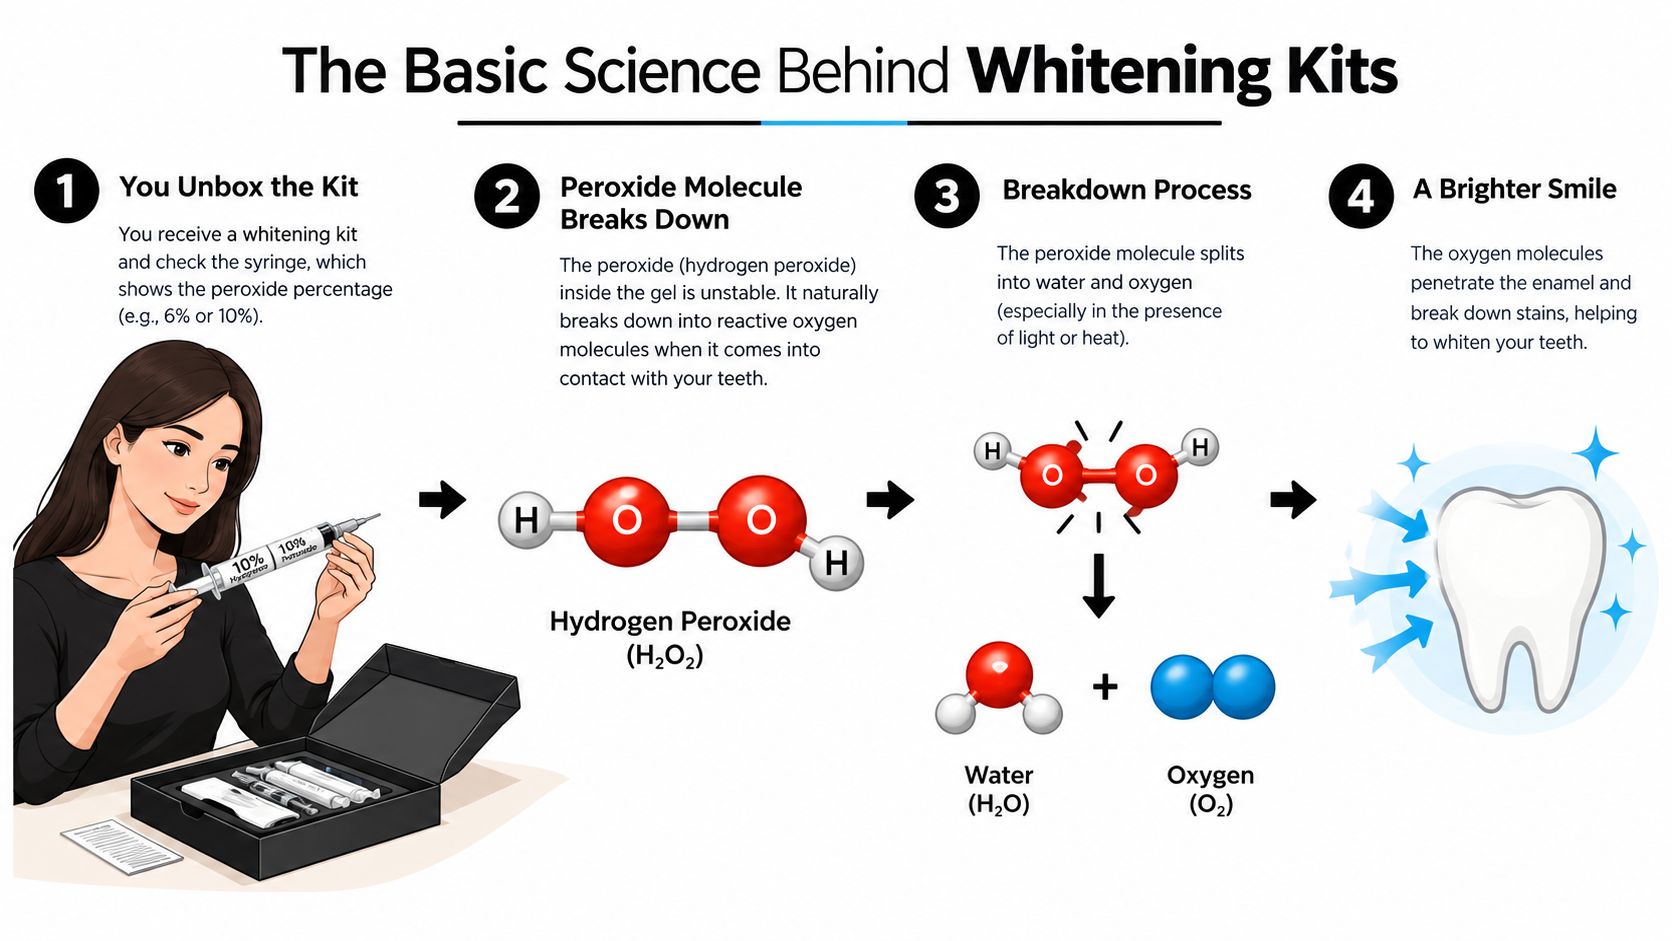
Most at-home whitening kits rely on hydrogen peroxide or carbamide peroxide. The American Dental Association explains that over-the-counter products generally use these peroxide-based bleaching compounds at lower concentrations than in-office or dentist-prescribed treatments. You can find a plain-language ingredient overview in this guide to what's in teeth whitening products.
The process begins when peroxide breaks down and releases highly reactive oxygen compounds. Those compounds move through the porous structure of enamel toward colored molecules, often called chromophores, that make the tooth look darker or more yellow. The oxygen changes the chemical structure of those stain molecules, so they absorb and reflect light differently. Your tooth hasn't been painted white. The molecules that created the darker appearance have been altered.
A useful comparison is a colored shirt left in bright sunlight. Over time, sunlight can break apart some of the chemical bonds in the dye, making the color look faded. Peroxide performs a similar chemical job inside the tooth, although the gel, concentration, exposure time, and stain type determine how much change takes place.
Why some stains lift faster
Surface discoloration from drinks and foods sits mainly on or near the enamel surface. Those stains may respond relatively quickly because the peroxide reaches them with less diffusion through the tooth.
Older or deeper discoloration is different. Some colored compounds sit farther into the tooth, including the dentin beneath the enamel. The gel must travel through enamel before it can affect those molecules, so the change may develop gradually. A tooth with a deep intrinsic stain may also remain darker than a tooth with mostly surface staining, even when both people use the same kit correctly.
The material itself sets another limit. Peroxide changes natural tooth structure, but it won't bleach crowns, veneers, fillings, or bonding in the same way. If a restoration appears lighter than the surrounding tooth after treatment, the issue isn't that the kit failed. The natural tooth changed while the restoration kept its original shade.
Practical rule: Judge a whitening plan by the type of discoloration and the condition of your teeth, not by the peroxide percentage alone.
Carbamide Peroxide vs Hydrogen Peroxide
Hydrogen peroxide is the direct bleaching agent. It begins reacting as soon as it contacts moisture and the tooth surface, so its activity rises quickly and then declines as the compound breaks down.
Carbamide peroxide works as a slower-release source of hydrogen peroxide. It breaks down into hydrogen peroxide and urea. A product containing 10% carbamide peroxide typically yields about 3.5% hydrogen peroxide, as described in the American Dental Association's whitening guidance. That conversion helps explain why carbamide peroxide products often feel less intense but remain active for longer.
The distinction affects how you use the kit. Hydrogen peroxide is common in products designed for shorter contact periods, such as many strips. Carbamide peroxide is often used in tray systems where the gel can remain in place for a longer period. Neither ingredient is automatically superior. One delivers a faster burst of activity, while the other spreads its activity over a longer window.
| Property | Carbamide Peroxide | Hydrogen Peroxide |
|---|---|---|
| Main role | A carrier that releases hydrogen peroxide gradually | The direct bleaching agent |
| Release pattern | Slower activity over hours | Faster activity after application |
| Typical practical use | Longer-wear tray systems | Shorter-wear strips, gels, or touch-ups |
| Example conversion | 10% carbamide peroxide yields about 3.5% hydrogen peroxide | Already present in its active form |
| Main trade-off | Gradual whitening may suit people who prefer a less intense exposure | Faster activity can require more attention to sensitivity and gum contact |
Why the formula around peroxide matters
A label tells you the active ingredient, but not the entire behavior of the gel. pH, stabilizers, glycerin, and thickening ingredients such as carbopol can affect how the product spreads, stays in place, remains stable in storage, and contacts the gums. A gel that runs quickly may reach the gumline more readily. A thicker gel may stay where it was placed but still cause irritation if the tray overflows.
Dentist-supervised night-guard whitening commonly uses 10% to 20% carbamide peroxide, equivalent to approximately 3.5% to 6.5% hydrogen peroxide, and may be applied twice daily for up to 2 weeks, according to the clinical review in the Journal of the American Dental Association30811-5/fulltext). The slower release of carbamide peroxide can make longer exposure practical, but you still need to follow the product's instructions rather than extending wear time because the gel feels mild.
Delivery Methods and Why They Change Results
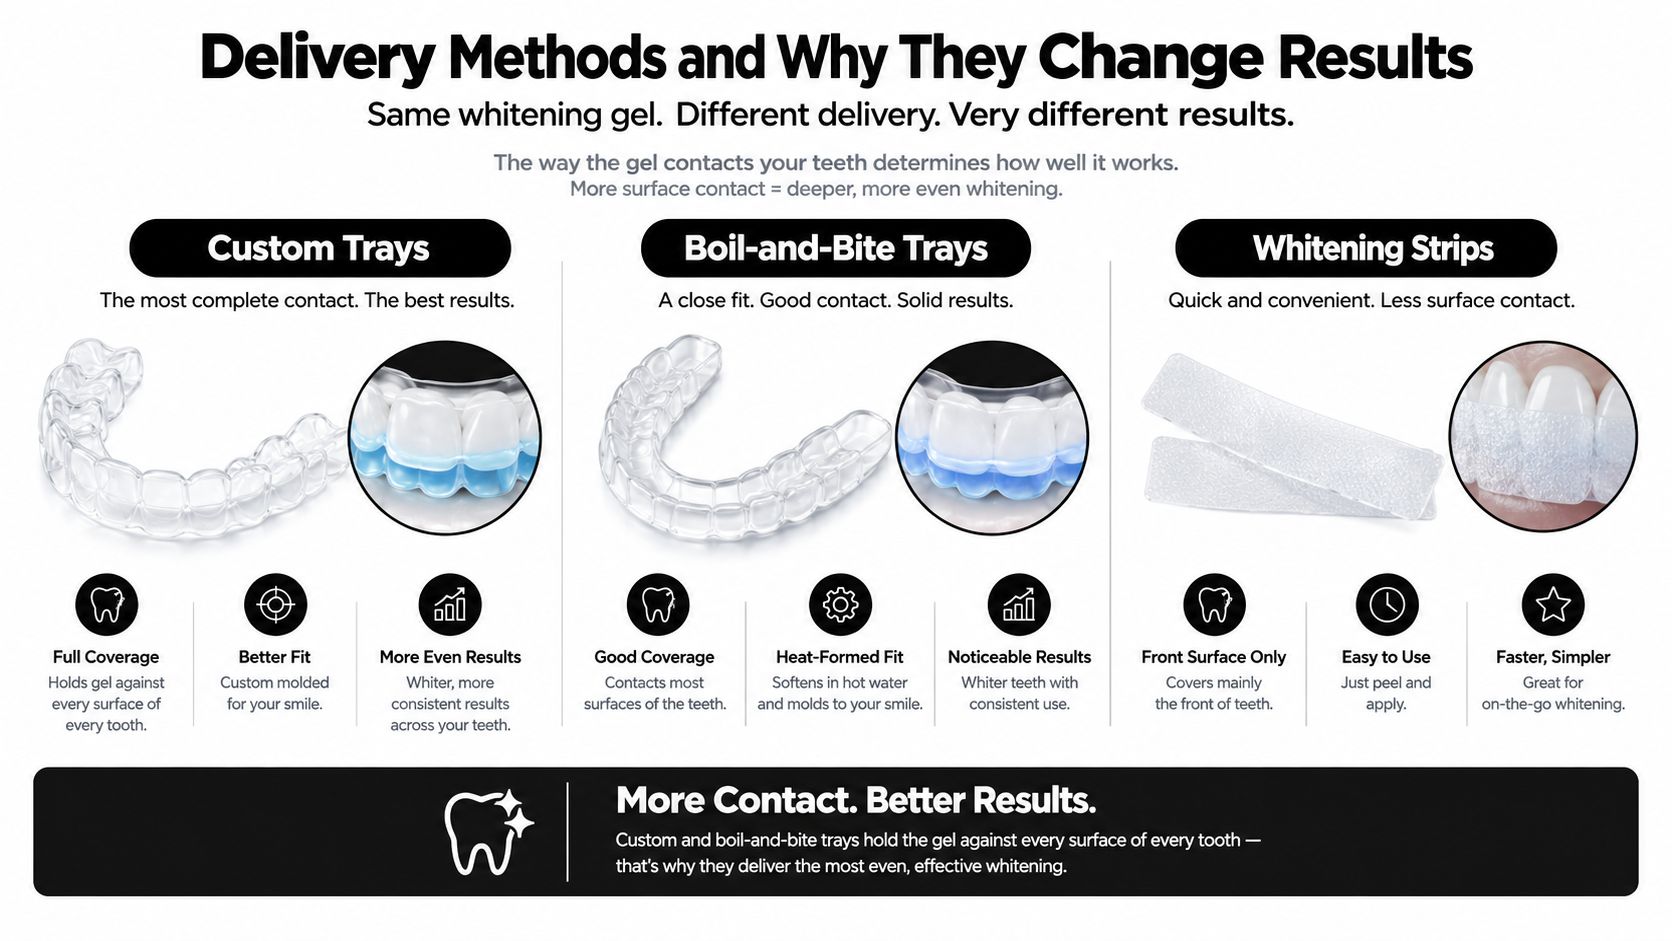
Two people can use the same peroxide concentration and finish with different results because the gel doesn't reach their teeth in the same way. Delivery controls contact, and contact controls the dose each area receives.
Custom trays offer the most controlled fit because they're shaped around an individual's teeth. Boil-and-bite trays can also hold gel across several surfaces, although their fit depends on how carefully they're molded. Strips are convenient and can work well on the front teeth, but they may not cover every contour or edge equally. A whitening pen gives you targeted control for a small area, yet its gel usually has less sustained contact than a tray.
The contact problem
Saliva dilutes peroxide and can wash gel away from the tooth. A well-fitting tray helps keep the material against the enamel, while a loose tray may let it pool near the gums or disappear before the intended wear period ends. Strips can wrinkle, lift around curved teeth, or leave narrow edges exposed. Those small differences can create pale bands, darker corners, or a patchy smile.
A pen has a different job. It can be useful for a localized touch-up, especially when a small area has picked up a new surface stain. It isn't a substitute for full-arch coverage when the goal is to change the overall shade of many teeth.
Fit matters more than shoppers expect
Gum overflow often explains why users blame the gel for burning or irritation. Too much product in a tray doesn't whiten better. It only increases the chance that peroxide will sit against soft tissue.
Use only the amount specified by the manufacturer, keep the tray or strip positioned as directed, and wipe away visible excess. If one part of a tray presses tightly while another leaves a gap, the uneven fit can affect both comfort and appearance. A professional can adjust a tray or identify an oral-health problem before you spend more time changing products.
Do LED Lights and Accelerators Actually Help
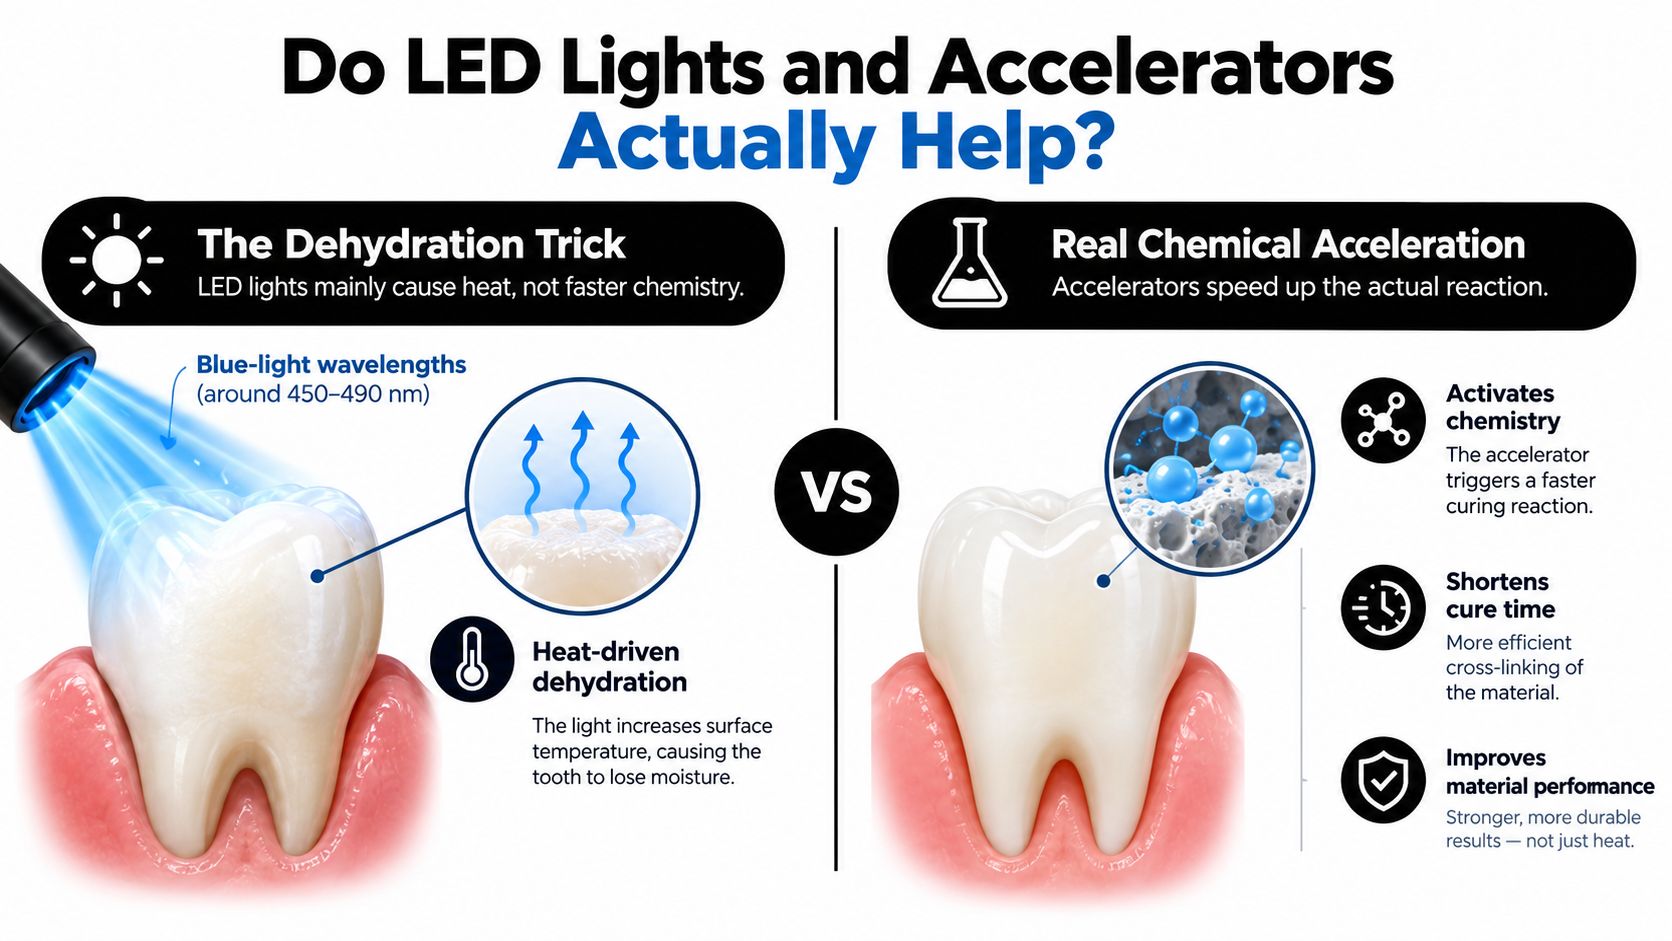
An LED attachment can make a kit look more advanced, but the light doesn't replace the peroxide. The bleaching action still depends primarily on the peroxide gel reaching stain molecules and remaining active for the intended period.
The evidence is less exciting than the marketing. An umbrella review found that light activation generally does not improve whitening results, while it may increase sensitivity. The same review also found that moderate peroxide concentrations can produce whitening comparable to higher concentrations with less discomfort, as reported in this clinical review of light activation and peroxide strength.
Temporary brightness versus lasting change
Some users think their teeth look brighter immediately after light-assisted whitening. That appearance can reflect temporary changes in tooth hydration as well as true stain oxidation. Once the tooth returns to its normal moisture level, the early visual effect may not represent the final result.
This distinction matters when you compare a light-equipped kit with a tray or strip that uses gel alone. Compare the shade under similar lighting after the treatment has finished, rather than judging the result immediately after removing the device.
A light may have a role in certain professional, higher-concentration procedures where a dental team controls the gel, protects the gums, and monitors the exposure. For a typical home kit, though, a more reliable improvement often comes from better fit, consistent use, and choosing a tolerable wear schedule.
If comfort is already a concern, don't add an accelerator before you know how your teeth respond to the gel by itself.
Here's a short visual explanation of the difference between peroxide activity and light claims:
You can also review this explanation of whether LED teeth whitening kits work before paying extra for a light.
Typical Whitening Protocols and Timelines
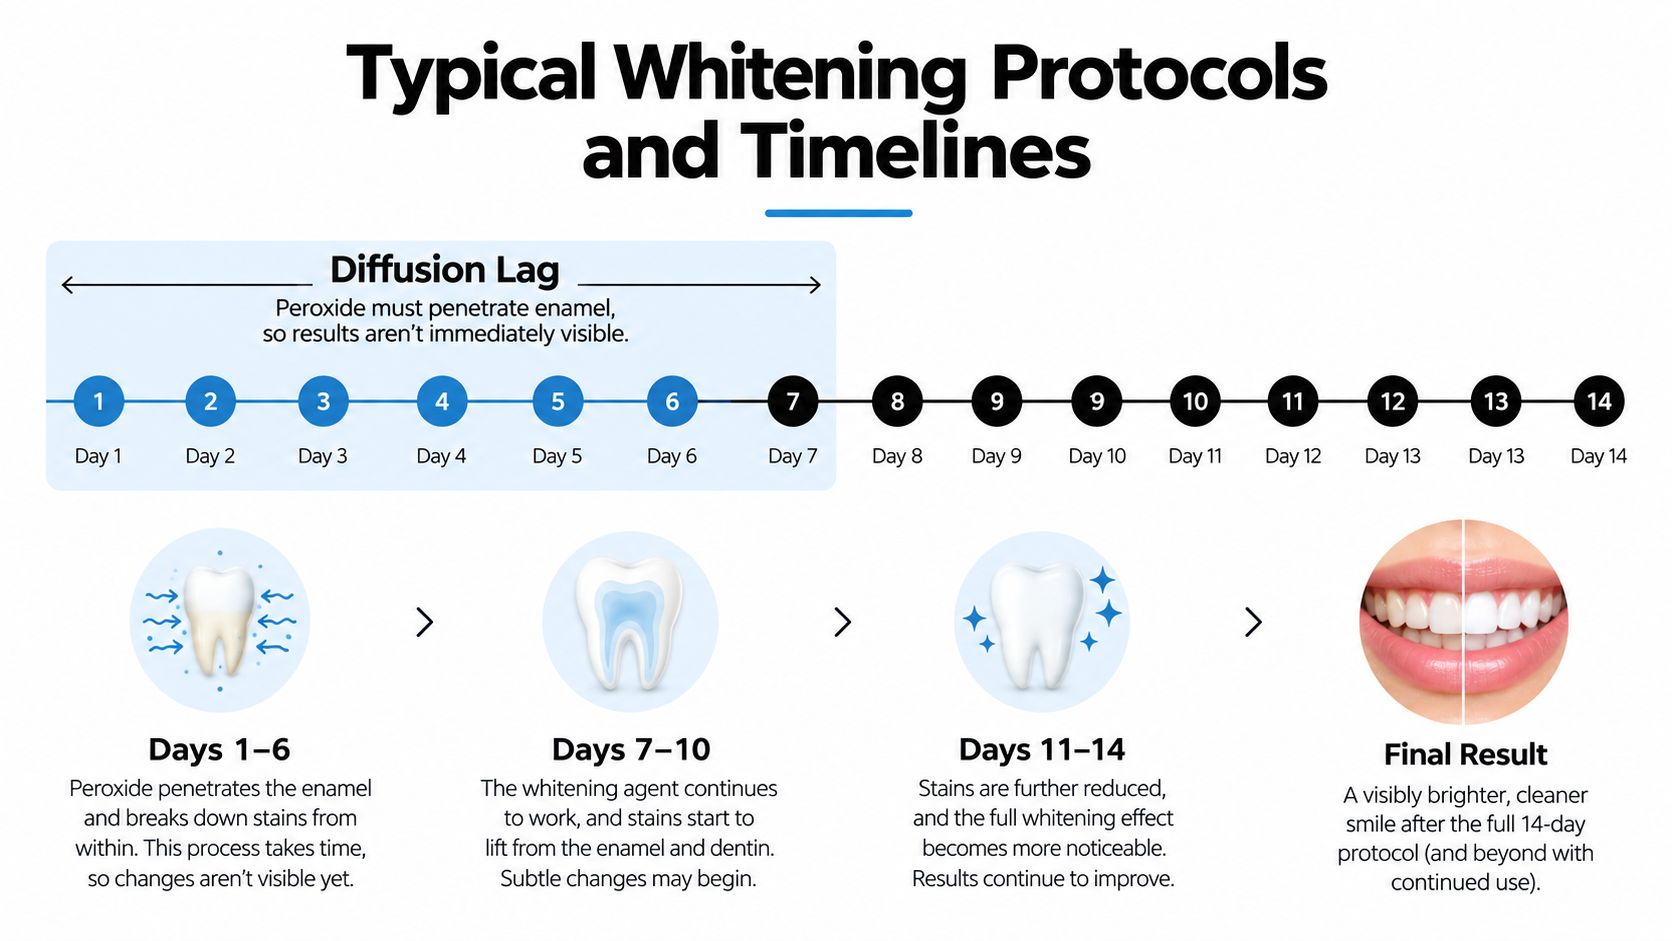
Home whitening often feels disappointing at first because the visible change may lag behind the chemical activity. Clinical sources note that a visible color change may not appear before about the seventh day of treatment, even though peroxide has been contacting the teeth earlier. The gel needs time to move through enamel and affect deeper discoloration.
A dentist-supervised home regimen commonly lasts up to 2 weeks, with the exact wear period depending on the product, concentration, and tray design. A short-wear hydrogen peroxide strip and a longer-wear carbamide peroxide tray may follow very different daily instructions, so copying one product's schedule onto another can increase irritation without improving the final shade.
A realistic way to read the timeline
During the early days, peroxide is working through the tooth structure, but the change may be too small to notice in a mirror. Around the first week, some users begin to see a clearer lift. Later applications can build on that change, especially when the person follows the prescribed contact time and avoids repeatedly washing the gel away.
Your curve may move more slowly if you use a lower concentration, wear the product for a shorter period, or have deeper intrinsic discoloration. It may also become harder to assess if you drink strongly staining beverages during the treatment, because new surface pigment can partly offset the whitening you're seeing.
Take a photo before starting and compare it under the same lighting after the recommended course. Don't evaluate every few hours. Teeth can look temporarily brighter immediately after treatment and then settle as they rehydrate.
When to stop
More applications aren't always better. If sensitivity increases, the gums become irritated, or the tray causes pressure in one area, pause and follow the product's safety instructions. Extending a course because the first few days produced no obvious change can turn a normal diffusion lag into unnecessary exposure.
Why Higher Peroxide Strength Is Not Always Better
A stronger formula can produce faster or greater whitening, but it also increases the likelihood of discomfort. In a 2025 clinical study, a 35% hydrogen peroxide protocol produced more whitening than a 6% protocol, while sensitivity occurred in 74% versus 44% of patients, respectively, according to the published clinical study.
That result changes the buying question. Instead of asking, “What is the strongest kit I can find?” ask, “What concentration can I use for the full recommended course without stopping?” A moderate formula used consistently may be more useful than a powerful formula abandoned after painful applications.
Reviews also indicate that 10% carbamide peroxide can achieve comparable whitening with less sensitivity than 20% to 22% formulations. Higher concentration affects the speed and intensity of exposure, but it doesn't remove the biological limits created by enamel, dentin, recession, or existing sensitivity.
| Concentration | Average Shade Change | Sensitivity Rate | Recommended Use |
|---|---|---|---|
| 6% hydrogen peroxide | Meaningful whitening, with less whitening than the stronger protocol in the cited study | 44% in the cited study | A lower-strength option when comfort is a priority |
| 10% carbamide peroxide | Clinically effective whitening in home tray studies | Lower sensitivity than stronger carbamide formulations in review evidence | A gradual home approach, particularly for people concerned about sensitivity |
| 20% to 22% carbamide peroxide | Comparable whitening may be possible, with more sensitivity than lower concentrations | Greater sensitivity than 10% carbamide peroxide in review evidence | An experienced-user option when lower strength is tolerated |
| 35% hydrogen peroxide | Greater whitening than the 6% protocol in the cited study | 74% in the cited study | Strong treatment requiring professional oversight |
The evidence doesn't support treating peroxide like a volume dial that you should turn all the way up. Use the lowest strength that can deliver your desired change within the product's instructions. If sensitivity appears early, reducing exposure or choosing a lower concentration is usually more sensible than pushing through it.
Who Gets the Best and Worst Results
Two people can follow identical tray instructions and still report very different experiences. One may have thick, relatively uniform enamel and mostly surface staining. Another may have exposed root surfaces, thin enamel, naturally darker dentin, or cracks that make peroxide feel sharp.
The difference isn't a matter of willpower. Tooth anatomy changes both the starting shade and the way nerves respond. Gingival recession exposes root surfaces that don't have the same enamel covering as the crown. Existing sensitivity can make an otherwise tolerable regimen feel unbearable. Lifestyle also matters because frequent exposure to coffee, tea, wine, or tobacco adds new pigment while the treatment is underway.
The randomized home-whitening study on sensitivity and gingival recession reported mild sensitivity in about half of users, moderate sensitivity in 10%, and severe sensitivity in 4%. The study also linked sensitivity with gingival recession. The ADA identifies tooth sensitivity and oral irritation as the most common adverse effects of home whitening, with higher concentrations tending to produce them more often.
Identify the stain before choosing the kit
Surface stains often respond more predictably because peroxide can reach them without as much diffusion through the tooth. Intrinsic discoloration sits deeper or results from changes within the tooth, so the response may be limited or slower.
Some gray, medication-related, trauma-related, or fluorosis-associated discoloration may not respond fully to peroxide alone. The same applies to visible restorations. A crown or veneer won't change shade along with natural enamel, so whitening before replacing a visible restoration can create a mismatch.
A quick pre-treatment check
Before starting, look closely at your smile and ask:
- Do cold drinks already cause sharp pain? Existing sensitivity deserves attention before whitening.
- Are roots exposed? Recession can increase the chance of discomfort.
- Do you see cracks, cavities, or gum inflammation? Treat active dental problems first.
- Are front teeth restored? Plan for the possibility that bonding, fillings, crowns, or veneers won't lighten.
- Are the stains gray, irregular, or deep? A dental examination may give you a more realistic answer than a stronger kit.
A dental professional should assess severe sensitivity, untreated decay, active gum disease, or unexplained discoloration before you begin.
Choosing the Right Kit for Your Teeth
Choose the kit by adjusting four practical dials: concentration, delivery format, wear time, and comfort support.
For a first home treatment, a lower-concentration carbamide peroxide product or a gentler strip can make sense if you don't have a history of sensitivity. Tray users often get more consistent coverage, while strips suit people who value a simple, shorter routine. Pens are better for localized maintenance than for changing the shade of every tooth.
Wear time should match the chemistry and your tolerance. A slower-release carbamide peroxide tray may suit someone who prefers gradual exposure. A shorter-wear hydrogen peroxide product may fit a busy routine, provided the user follows the instructions and doesn't compensate by applying extra gel.
LED accessories aren't essential for most home users. Evidence indicates that light activation generally doesn't improve the final result and may increase sensitivity, so spend first on a properly fitting delivery method. A potassium nitrate or fluoride desensitizing product may be worth considering if sensitivity has limited you before, but persistent pain still calls for a dental assessment rather than another accessory.
Skip home whitening until a dentist has checked you if you have:
- Active gum disease or bleeding gums
- Untreated cavities or cracked teeth
- Severe or persistent sensitivity
- Extensive visible restorations
- Unexplained darkening of one tooth
DentalHealth.com offers at-home whitening gels and kits from brands such as Opalescence, Philips Zoom, PolaDay, and Crest Whitestrips, along with trays and sensitivity-focused oral-care products. You can compare those options and read practical whitening guidance at DentalHealth.com.
Start by identifying your stain type and sensitivity history, then choose the gentlest format you can use consistently. Visit DentalHealth.com to compare professional-grade at-home whitening products, trays, and sensitivity support before beginning your routine.