

How to Fix Discolored Teeth for a Brighter Confident Smile
Ready to do something about discolored teeth? You’ve got a few different paths you can take, ranging from simple daily habit changes all the way to professional-grade treatments. The best route for you really comes down to what’s causing the staining and how significant it is.
Generally, you’re looking at four main options: tweaking your lifestyle, grabbing something over-the-counter, stepping up to a professional take-home kit, or visiting your dentist for an in-office treatment.
Your Path to a Whiter Smile Starts Here
A bright, confident smile is more within reach today than ever before. Not too long ago, professional whitening was a bit of a luxury, but the entire industry has changed. The global teeth whitening market has absolutely exploded and is projected to hit USD 10.6 billion by 2030.
What’s driving this? A massive surge in effective at-home solutions that deliver seriously impressive results. People are realizing they can get a professional-level experience right from their own bathroom.
This guide is designed to walk you through all your options, from the ground up. And while we’re zeroed in on teeth whitening, a truly radiant look often involves more. For some, achieving a picture-perfect smile is the final piece of the puzzle.
A Quick Look at Teeth Whitening Methods
To get a clearer picture of your options, it helps to see them side-by-side. Each method has its own strengths depending on the type of stains you're dealing with.
| Method | Best For | Effectiveness | Where to Get It |
|---|---|---|---|
| Daily Habits & Whitening Toothpaste | Mild, new surface stains from coffee, tea, etc. | Low to moderate. Good for maintenance. | Drugstore, Supermarket |
| Over-the-Counter (OTC) Products | Mild to moderate surface (extrinsic) stains. | Moderate. Can lift several shades. | Drugstore, Online Retailers |
| Professional Take-Home Kits | Moderate to heavy surface stains and mild deep stains. | High. Significant, noticeable results. | Dentist's Office, Specialized Online Stores |
| In-Office Professional Whitening | Stubborn surface stains and moderate to severe deep stains. | Very High. Fastest and most dramatic results. | Dentist's Office |
This table is just a starting point. As you can see, the right choice really depends on matching the treatment power to your specific needs for the best and safest results.
First, You Have to Understand the Stains
Before you can pick the right solution, you absolutely have to know what kind of discoloration you're up against. It’s the single most important factor in figuring out what will actually work.
- Extrinsic Stains: These are the ones on the surface of your enamel. Think of them as the usual suspects: coffee, tea, red wine, tobacco. The good news is that these are the easiest to lift with most whitening products.
- Intrinsic Stains: This type of discoloration is deeper, coming from inside the tooth in a layer called dentin. It can be caused by certain medications, an injury to a tooth, or even just your genetics. These stains are a lot more stubborn and usually need something stronger than what you'll find on a drugstore shelf.
For example, professional-strength take-home kits from brands like Opalescence or PolaDay are fantastic for bridging the gap. They have enough power to tackle tough extrinsic stains and even make a dent in milder intrinsic discoloration—a huge step up from typical OTC options.
Choosing the right method isn't just about brightness—it's about matching the treatment to the specific cause of your discoloration for safe, effective, and lasting results.
Getting this part right is the first real step toward a smile you’ll love. There’s a lot that goes into the process, and you can learn more about the crucial details in our guide on the 10 things you should know about teeth whitening.
Next up, we’ll dive deep into each method and give you the practical, step-by-step advice you need to get started.
Figuring Out What's Causing Your Tooth Discoloration
Before you even think about whitening, you need to play detective. The secret to getting the bright smile you want is figuring out what’s causing the staining in the first place. Not all tooth discoloration is created equal, and grabbing a one-size-fits-all solution is usually just a waste of time and money.
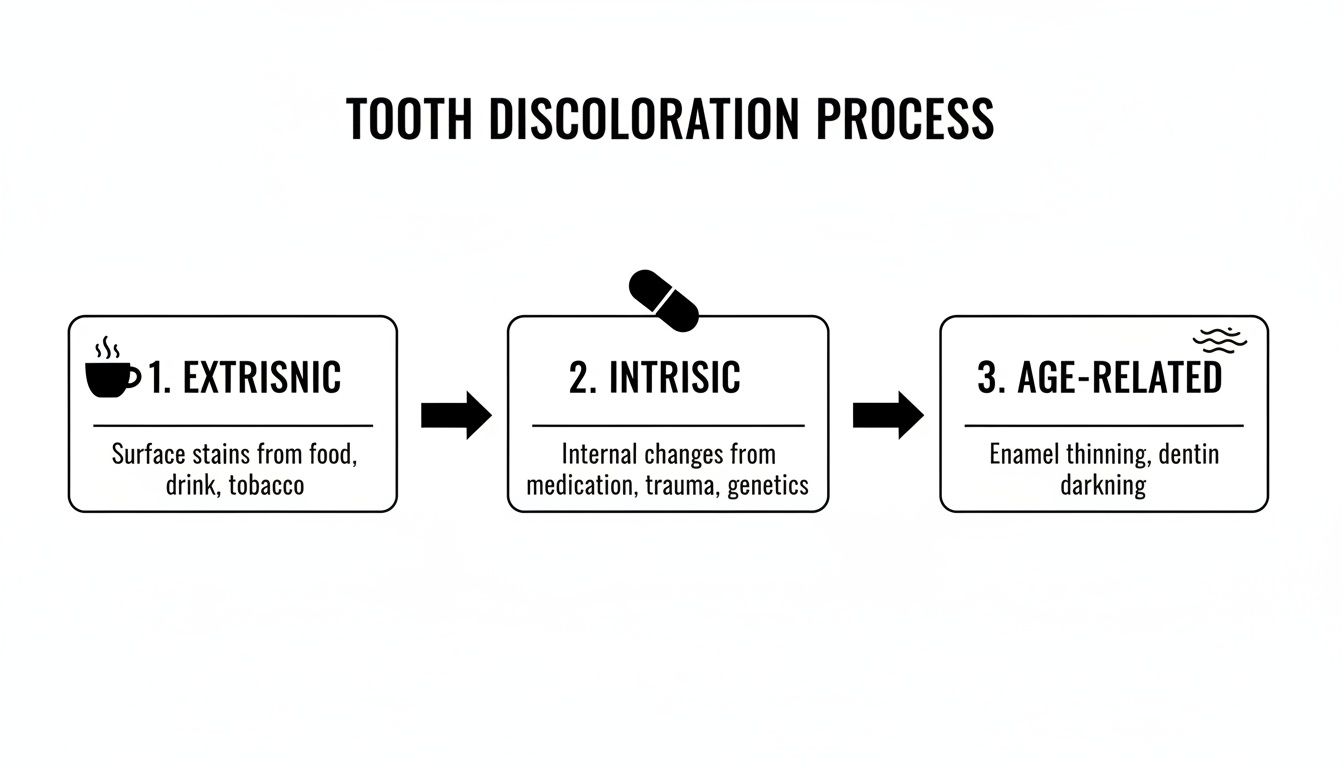
It’s simple, really. You wouldn't use a carpet cleaner to fix a scratch on your wood floors, right? In the same way, the whitening gel that lifts years of coffee stains won’t do a thing for a tooth that’s gone dark from an old sports injury. Let's dig into the three main culprits behind a dull smile.
Extrinsic Stains: The Surface-Level Offenders
Extrinsic stains are the most common reason for discolored teeth and, luckily, they're the easiest to deal with. These are the stains that camp out on the outer layer of your tooth—the enamel. They’re left behind by things called chromogens, which are basically the pigment-producing substances in many of the foods and drinks we love.
Just imagine your tooth enamel is like your favorite white coffee mug. After months of daily use, it starts to look a little dingy inside. The same thing is happening to your teeth.
Common sources of these surface-level stains include:
- Coffee and Tea: These are the classic culprits, leaving behind dark pigments that grab onto your enamel.
- Red Wine: Its deep color, combined with its acidity, can create some really stubborn stains.
- Dark Sodas and Berries: The old rule of thumb applies here: if it can stain a white t-shirt, it can definitely stain your teeth.
- Tobacco Use: Whether it's from smoking or chewing, the tar and nicotine create a nasty yellow or brown film.
Because these stains just sit on the surface, they respond really well to treatments designed to polish or bleach the enamel. This is where most over-the-counter products and professional whitening gels shine.
Intrinsic Stains: The Deeper Challenge
Now, let's talk about a tougher problem. Intrinsic stains come from inside the tooth, in the softer layer just under the enamel called dentin. Your dentin is naturally a bit yellowish, so anything that affects it can change your tooth's color from the inside out.
These stains are a whole different ballgame because they're part of the tooth’s actual structure. You can't just scrub them away. A perfect example is the discoloration caused by taking certain antibiotics as a child. The medication actually gets integrated into the tooth as it's forming, creating a permanent, built-in stain.
Key Takeaway: If your discoloration is grayish, bluish, or looks like bands across your teeth, it's a good bet you're dealing with intrinsic staining. This kind of discoloration needs a much stronger approach than what a box of whitening strips can provide.
Certain medications are well-known for causing this. One analysis of adverse event reports pinpointed 25 different drugs linked to tooth discoloration, with tetracycline antibiotics being a major offender. Since these stains are literally part of the tooth, standard products won't cut it, and you'll need to explore more intensive treatments. You can learn more from these findings on drug-induced staining.
Other common causes of intrinsic stains are:
- Trauma or Injury: A hard hit to a tooth can damage the nerve inside, causing it to "die" and turn a dark gray or brown over time.
- Too Much Fluoride: While fluoride is a hero for dental health, getting too much during childhood (a condition called fluorosis) can cause white spots or even brownish streaks on the enamel.
- Genetics: Let's face it, some of it is just luck. Some people are just born with thinner or more see-through enamel, which lets that yellowish dentin show through more.
Age-Related Discoloration: A Double Whammy
As we get older, it's totally normal for our teeth to lose some of their brightness. This isn't just one thing, but a tag-team effort from both extrinsic and intrinsic factors working together over many years. It’s a two-part process that slowly dulls your smile.
First, your enamel naturally gets thinner over the years from all that chewing and exposure to acidic foods. As this protective outer layer wears away, more of that yellowish dentin underneath starts to peek through, making your teeth look darker overall.
Second, your teeth have had a whole lifetime to collect extrinsic stains. That daily coffee habit you picked up in your twenties really starts to show by your forties and fifties. The combination of thinning enamel plus decades of built-up surface stains creates a compounded yellowing effect. Knowing that you're fighting a battle on two fronts is key to choosing a whitening strategy that's strong enough to tackle both.
Taking It Up a Notch With Professional At-Home Whitening Kits
When drugstore whitening strips and toothpastes just aren’t giving you the results you want, it's time to look at professional at-home whitening kits. These systems are the perfect middle ground between over-the-counter options and a trip to the dentist's office, delivering truly professional-grade results from your own home.
If you're dealing with moderate to heavy surface stains, or even some of the lighter types of deeper discoloration, this is your solution.
Unlike the one-size-fits-all approach of store-bought strips, these kits use custom-fitted trays and powerful whitening gels from trusted brands like Opalescence or PolaDay. This setup is key—it ensures the whitening agent gets full, even contact with your enamel while keeping it off your sensitive gums. The difference is a brighter, more uniform smile that you just can't get from a box at the pharmacy.
But before you start any whitening treatment, it helps to know what you're up against. Different types of stains respond to different treatments.
As you can see, stains from coffee and wine are one thing (extrinsic), but deeper discoloration from aging or other factors (intrinsic) needs a more powerful approach. That's exactly where these professional kits shine.
Setting Yourself Up for Whitening Success
Getting the best results from a professional kit begins before you even open the gel. Good prep work is absolutely essential for a treatment that’s both effective and comfortable. Think of it like priming a wall before you paint—you need a clean slate for the best finish.
The most important first step? Get a professional cleaning from your dentist. This clears away any plaque or tartar buildup that can block the whitening gel from actually reaching your tooth enamel. It ensures the gel can go to work directly on the stains for maximum impact.
While you're there, chat with your dentist about your whitening plans. They can give your teeth and gums a quick check to make sure they're healthy enough for whitening and might even suggest a specific gel concentration based on your sensitivity and the type of stains you have.
The Right Way to Apply Whitening Gel
Using a professional kit is pretty simple, but how you apply the gel makes all the difference. The goal is to use just enough gel to do the job, without it oozing onto your gums and causing irritation. Honestly, putting too much gel in the trays is the number one mistake I see people make.
Here's the simple protocol I recommend:
- Brush and Floss First: Always start with a completely clean mouth. Get rid of any food particles so the gel can make direct contact with your tooth surfaces.
- Use a Tiny Drop of Gel: Place one small dot of whitening gel inside the tray for each tooth you want to whiten. You only need it on the front part of the tray that will touch the visible surface of your teeth.
- Seat the Tray Gently: Place the tray over your teeth until it fits snugly. Don't press so hard that the gel squishes out onto your gums.
- Wipe Away the Excess: This is the most critical step for preventing irritation. Use a cotton swab, a soft toothbrush, or even your finger to immediately wipe away any gel that has squeezed onto your gum line.
A lot of people think that more gel means whiter teeth, faster. It doesn’t. All that extra gel does is irritate your gums and get wasted. In this case, less is definitely more.
If you want to explore other techniques, our guide on how to remove teeth stains at home has more great tips.
How to Choose Your At-Home Whitening Gel
Professional whitening gels aren't all the same. They come in different strengths, which dictates how long you need to wear your trays. It’s incredibly important to follow the directions for your specific product to whiten safely and keep sensitivity at bay.
The main active ingredient will either be carbamide peroxide or hydrogen peroxide. Carbamide peroxide is a slower-acting agent, which makes it great for gels designed for longer wear, even overnight. Hydrogen peroxide works much faster and is usually found in products meant for shorter, daytime sessions.
To make it easier to choose, here's a quick comparison of some popular professional-grade gels you can find right here at DentalHealth.com.
| Product (e.g., Opalescence PF, PolaDay CP) | Active Ingredient | Available Concentrations | Recommended Wear Time |
|---|---|---|---|
| Opalescence PF | Carbamide Peroxide | 10%, 15%, 20%, 35% | 30 minutes to overnight, varies by strength |
| PolaDay CP | Carbamide Peroxide | 35% | As little as 15 minutes, once a day |
| PolaNight | Carbamide Peroxide | 10%, 16%, 22% | Designed for 2+ hours or overnight wear |
| Opalescence Go | Hydrogen Peroxide | 6%, 10%, 15% | 15–60 minutes per day in pre-filled trays |
No matter which gel you choose, always start with the shortest recommended wear time for its concentration. This lets you see how your teeth react. If you feel fine, you can gradually work your way up to the maximum time.
Managing and Preventing Sensitivity
A little bit of tooth sensitivity is the most common side effect of whitening. Don't worry—it's almost always temporary and very manageable. It happens because the whitening agent opens up the microscopic pores (dentinal tubules) in your enamel for a short time, which can make the nerves inside more reactive to things like cold air or drinks.
A few proactive steps can make your whole experience much more comfortable:
- Use a Desensitizing Toothpaste: About a week or two before you start whitening, switch to a toothpaste with potassium nitrate or stannous fluoride. Keep using it throughout your treatment and beyond.
- Reduce Your Wear Time: If your teeth start feeling sensitive, simply wear your trays for a shorter period. You can also try whitening every other day instead of daily, which gives your teeth a break to recover.
- Try a Desensitizing Gel: Some brands offer special post-whitening gels with fluoride or potassium nitrate. You can pop these into your trays after a whitening session to soothe your teeth and help them remineralize.
- Avoid Temperature Extremes: While you're in the middle of a whitening cycle, try to steer clear of super hot coffee or ice-cold drinks, as these can be major triggers for sensitivity.
Everyday Habits for Preventing New Stains
You’ve put in the work to get a brighter, whiter smile. That’s the hard part. The last thing you want is for new stains to creep in and undo all that progress.
Fixing discoloration is only half the battle; keeping it that way is the real win. The good news is that a few simple, consistent habits can make a huge difference in how long your results last. Think of it as smile maintenance. You wouldn't scuff up a freshly painted wall, and the same idea applies here.
Master Your Brushing Technique
A solid prevention plan starts with great oral hygiene, but not all brushing is created equal. When your goal is preventing stains, you have to be a bit more strategic about your technique and your tools.
Start by upgrading to a high-quality whitening toothpaste. Look for one with gentle abrasives like hydrated silica or calcium carbonate. These ingredients are fantastic for polishing away the daily film left by coffee, tea, and food before those particles can get a permanent foothold on your enamel.
Timing is also key. After you have something acidic or heavily pigmented, wait about 30 to 60 minutes before brushing. Brushing right away can actually scrub the acids deeper into your enamel. Giving your saliva a little time to neutralize your mouth's pH is a much smarter move.
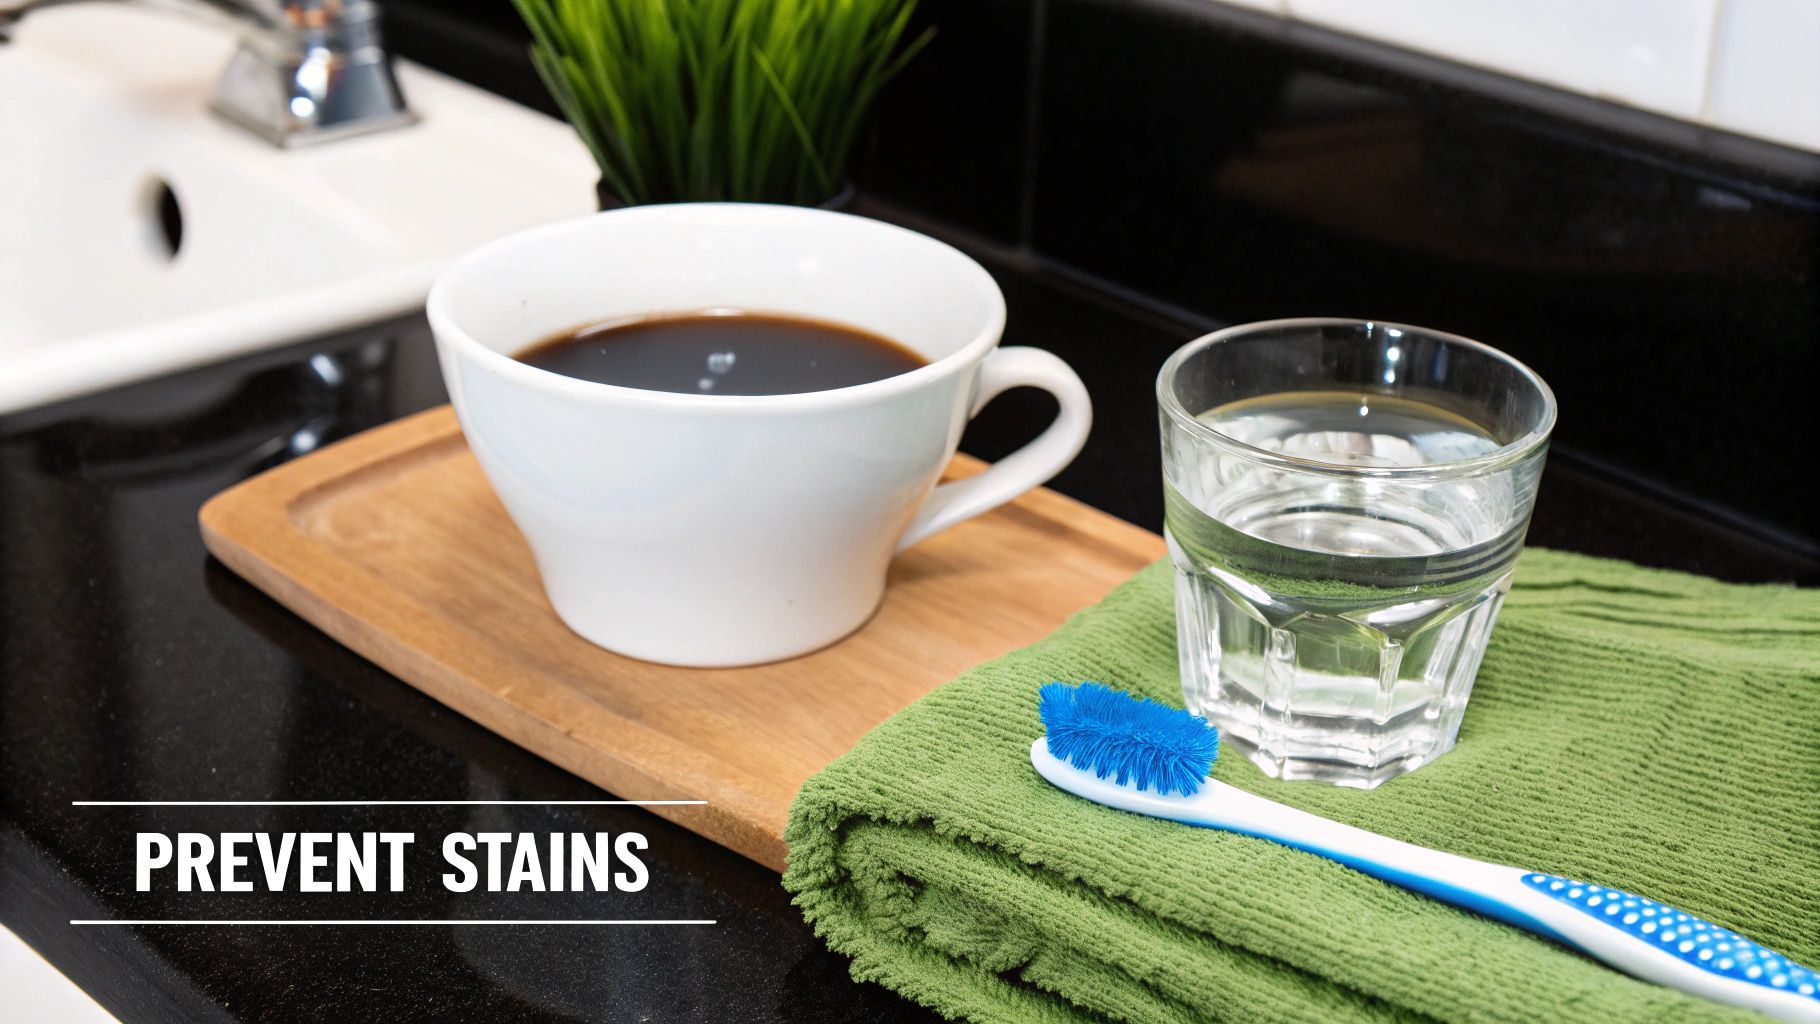
Implement Smart Rinsing Habits
Let's be realistic—you can't always brush your teeth after every single meal or cup of coffee. But you can almost always rinse. This simple, two-second habit is your secret weapon against staining when you're on the go.
As soon as you finish a dark soda, red wine, or coffee, just take a sip of water. Swish it around your mouth for about 30 seconds, then swallow or spit it out. This quick rinse washes away the chromogens—the pigment compounds that cause staining—before they have a chance to settle in.
Don't underestimate the power of a simple water rinse. It acts as an immediate reset for your mouth, clearing away residual sugars and staining agents that would otherwise linger on your teeth for hours.
Another game-changer? Use a straw for drinks like iced coffee, tea, or soda. It's a tiny adjustment, but it helps the liquid bypass the front surfaces of your teeth, which dramatically cuts down on direct contact and potential staining.
The Role of Over-the-Counter Whiteners
For daily upkeep and fighting off minor surface stains, over-the-counter (OTC) products are an essential part of your toolkit. Whitening strips and rinses are incredibly popular for a reason—they're convenient, accessible, and they work well for extrinsic stains (the surface-level stuff from daily life).
The numbers show just how common this approach is. Back in 2020, about 20.59 million Americans used whitening strips to tackle yellowing enamel. It’s clear that at-home systems have become a go-to for keeping teeth bright between more intensive treatments. You can dig into more teeth whitening statistics and trends to see the full picture.
Still, it’s important to know their limits. OTC products are great for:
- Light, recent stains: Perfect for handling the effects of your daily coffee habit.
- Maintenance: Excellent for touching up and extending the results from a professional kit.
- Convenience: Super easy to fit into your existing routine without much fuss.
Where they fall short is with deeper, intrinsic discoloration. If your stains are old and stubborn, you'll need the higher concentrations found in professional-grade kits to see a noticeable difference. Think of OTC options as your daily defense team, while professional treatments are the heavy-hitters you call in when things get serious.
Keeping Your Smile Bright and Comfortable
So you've achieved that whiter, brighter smile you were after. That's a huge win! But now comes the real work: keeping it that way while making sure your teeth feel great. Getting—and keeping—a brilliant smile is less about a one-time fix and more about a smart, long-term strategy for maintenance and comfort.
Think of it like getting in shape. You don't just work out once and call it a day. It’s the consistent, ongoing effort that keeps you looking and feeling your best. The good news is, a few simple habits are all it takes to protect your investment and enjoy your results for years to come.
Managing and Preventing Tooth Sensitivity
Temporary sensitivity is hands-down the most common side effect of teeth whitening, but it’s almost always manageable. It’s a completely normal reaction. The whitening agents temporarily open up the microscopic pores in your enamel, which can make the nerves inside a little more reactive to things like cold air or a sip of iced tea. With a little planning, you can whiten with little to no discomfort.
The smartest thing you can do is start using a desensitizing toothpaste about a week or two before you even start whitening. Look for active ingredients like potassium nitrate or stannous fluoride. These ingredients work by calming the nerves in your teeth, essentially building up a defense against sensitivity before it even has a chance to start.
You wouldn't run a marathon without stretching first, right? Think of using a desensitizing toothpaste as your pre-whitening stretch—it preps your teeth for what's to come and helps prevent any aches and pains later on.
Keep using that toothpaste throughout your whitening treatment and even for a while after you're done. This consistent use helps maintain a protective barrier against sensitivity triggers. If you want a deeper dive, our guide offers more detailed advice on how to reduce tooth sensitivity after whitening.
Strengthening Enamel After Whitening
Once you've finished a round of whitening, your goal should shift to strengthening and protecting your tooth enamel. The process can temporarily leave your enamel a bit more porous, so it's crucial to give it the building blocks it needs to remineralize for long-term health and comfort.
This is where remineralizing products are worth their weight in gold. Gels like MI Paste contain bio-available calcium and phosphate—the exact minerals your enamel is made of. Applying a remineralizing paste right after whitening helps replenish these lost minerals, making your teeth stronger and less vulnerable to future stains and sensitivity.
Here are a few quick tips for post-whitening care:
- Use a Remineralizing Paste: After your treatment is complete, apply a product like MI Paste or a prescription-strength fluoride gel for a few nights.
- Stick with Fluoride Toothpaste: For your daily routine, make sure your toothpaste contains fluoride to continuously reinforce your enamel.
- Limit Acidic Foods: For the first 24-48 hours after whitening, your teeth are extra susceptible. Try to avoid things like citrus fruits, soda, and vinegar-heavy dressings.
Creating a Sustainable Maintenance Plan
That brilliant new smile won't stay that way on its own. A simple, sustainable maintenance plan is the key to keeping your results looking fresh without having to do a full-blown whitening treatment every year. It’s all about small, consistent actions.
The cornerstone of any good plan is periodic touch-ups. You won’t need to go through the whole process again. Usually, a single touch-up session—maybe one night every couple of months—is all it takes to lift away new surface stains. Just keep your custom trays and a little extra whitening gel on hand for these quick refreshers.
Don’t underestimate the power of your daily habits, either. Continuing to use a high-quality whitening toothpaste helps polish away new stains before they can set in. And simple tricks, like rinsing your mouth with water after your morning coffee or using a straw for dark sodas and teas, can make a huge difference in how quickly your teeth re-stain. This combo of occasional touch-ups and smart daily habits is the secret to a bright, comfortable smile that lasts.
Knowing When to See a Dental Professional
While professional at-home whitening kits are fantastic for tackling many types of discoloration, they definitely have their limits. Knowing when to put the DIY efforts on pause and call your dentist is a critical part of the process—not just for getting the results you want, but for your overall oral health.
Simply put, some situations just call for a professional diagnosis and a more specialized treatment plan. If you’ve given a high-quality whitening system a fair shot and you're seeing little to no improvement, that’s a pretty clear sign you might be dealing with something more complex than everyday surface stains.
Stains That Don't Respond to At-Home Whitening
Some types of stains are notoriously stubborn and won't budge, even with the strongest over-the-counter gels. These are almost always intrinsic stains, meaning the discoloration is coming from inside the tooth structure itself. Trying to bleach these at home usually just leads to frustration and a blotchy, uneven result.
It's time to book a dental appointment if you think your discoloration might be from:
- Medications: Staining from antibiotics like tetracycline taken during childhood is a classic example. This creates deep, intrinsic discoloration that standard whitening gels just can't lift.
- Fluorosis: If you have white spots or brownish streaks on your teeth, it could be from excessive fluoride exposure while your teeth were developing. This also requires specialized cosmetic treatments.
- Trauma or Injury: Has a tooth turned gray or dark brown after a knock or injury? This often points to a damaged nerve. Whitening won't fix the underlying problem, and a dentist needs to evaluate it to make sure there are no other health issues.
- Tooth Decay: Discoloration can also be one of the first signs of a cavity or internal decay. This is a health issue that needs dental treatment, not just a cosmetic touch-up.
Keep in mind that at-home whitening agents are only designed to work on natural tooth enamel. They will have zero effect on dental work like crowns, veneers, or fillings. If you whiten your natural teeth, these restorations will suddenly look darker or more yellow in comparison, creating a mismatched smile.
Professional Solutions for Stubborn Discoloration
When at-home methods just aren't cutting it, your dentist has a whole arsenal of advanced options that can deliver the results you're after. The first step is always a professional consultation to figure out exactly what’s causing the staining and which approach is right for you.
Depending on your specific situation, your dentist might bring up a few options:
- In-Office Power Bleaching: This procedure uses a much higher concentration of whitening gel, often activated by a special light. The result? Rapid and dramatic whitening, often in just a single visit.
- Dental Bonding: For one or two problem teeth, bonding is a fantastic and economical choice. A dentist applies a tooth-colored resin over the discolored area, effectively masking the stain.
- Porcelain Veneers: These are ultra-thin shells of ceramic that are permanently bonded to the front of your teeth. Veneers offer a complete smile makeover and can cover up severe stains that are resistant to every other form of whitening.
Deciding to see a professional isn't giving up; it's a smart move. It’s the safest and most effective path to achieving that bright, even smile you really want.
Answering Your Top Teeth Whitening Questions
When you start looking into how to fix discolored teeth, a few common questions always pop up. It's totally normal. Getting some straight answers will help you know what to expect and feel a lot more comfortable with the process.
How Long Will My Whitening Results Actually Last?
This is the big one, right? You want to know if the effort is worth it. The truth is, your results can last anywhere from a few months to even a couple of years, but it really comes down to your daily habits.
If you're a big fan of coffee, tea, or red wine, you'll probably see new stains creep back in more quickly. The same goes for smoking—it's one of the fastest ways to yellow your teeth again. Think of it this way: anything that can stain a white t-shirt can stain your teeth. Good oral hygiene is your best defense. Brushing consistently and doing occasional touch-up treatments will go a long way in keeping your smile bright.
Can I Whiten My Crowns, Veneers, or Fillings?
The short answer is no. Whitening gels and products are formulated to work on natural tooth enamel only. Dental work like crowns, veneers, and fillings are made from porcelain or composite resin, and these materials simply will not change color.
If you try to whiten your teeth when you have this kind of work, you could end up with a very noticeable, uneven look where your natural teeth are brighter than your dental restorations. It's always best to have a chat with your dentist before starting any whitening regimen so you can explore the right options for your specific situation.
A Quick Note on Safety: It's natural to wonder if whitening is safe for your enamel. When you follow the directions, modern whitening products are perfectly safe. In fact, many professional-grade gels now include ingredients like potassium nitrate and fluoride to actually help strengthen your enamel and keep sensitivity to a minimum.