
How to Use Carbamide Peroxide Teeth Whitening
You're standing in front of a row of whitening syringes, comparing labels that read 10%, 16%, 20%, or 35% carbamide peroxide. The instinct is understandable: choose the strongest gel and finish faster. In practice, the concentration that works best is often the one your teeth and gums can tolerate consistently, because stronger isn't automatically better when sensitivity forces you to stop.
Carbamide peroxide whitening is straightforward when you control three variables: gel strength, tray contact, and wear time. Use too much gel, leave it in too long, or increase the concentration without accounting for your sensitivity history, and a routine designed to brighten your smile can leave you with sharp nerve pain or irritated gums.
Understanding Carbamide Peroxide Concentrations
Carbamide peroxide is a peroxide-based whitening ingredient that breaks down gradually in the mouth. As it decomposes, it releases hydrogen peroxide, which then oxidizes pigmented molecules responsible for tooth discoloration. This slower release explains why carbamide peroxide trays usually require longer contact than faster, higher-intensity in-office treatments.
The modern tray-based approach was formalized in the late 1980s with 10% carbamide peroxide, a formula chemically equivalent to about 3.6% hydrogen peroxide. Haywood and Heymann's nightguard vital bleaching method used a thin custom tray worn for several hours at home, commonly for one to two weeks. That protocol established the basic pattern still used in many dentist-supervised home systems, gradual whitening through controlled exposure rather than a single intense session. Learn how carbamide peroxide whitens teeth
Why the 10% baseline matters
A 10% gel isn't a weaker version of a stronger product. It represents a well-studied balance between bleaching activity and tolerability. Reviews describe dentist-supervised nightguard bleaching as commonly using 10% to 20% carbamide peroxide, with lower strengths worn for longer periods and higher strengths used for shorter sessions. The clinical review of home bleaching protocols explains why the active ingredient's release pattern matters as much as the number printed on the syringe.
Hydrogen peroxide and carbamide peroxide also shouldn't be compared as if their percentages mean the same thing. The chemical equivalence between 10% carbamide peroxide and approximately 3.6% hydrogen peroxide gives you a useful reference point, but product instructions still control the actual application schedule.
Practical rule: Treat the concentration and wear-time instructions as a matched pair. Never select a higher percentage and keep the overnight schedule used for a lower-strength gel.
Before buying, check whether the product is intended for custom trays, boil-and-bite trays, or another delivery system. A professional-grade syringe can work well, but the tray must hold gel against the facial surfaces of the teeth without routinely covering the gums.
Choosing the Right Strength for Your Teeth
The right percentage depends less on how quickly you want a change and more on how your teeth respond to peroxide. A first-time user with no history of sensitivity may tolerate a moderate-strength product, while someone with exposed root surfaces, gingival recession, or previous whitening pain usually has more to gain from starting low.
A study comparing 10% and 16% carbamide peroxide over three weeks found comparable whitening effectiveness and safety, while the 16% regimen caused significantly more sensitivity during the first and third weeks. Read the concentration comparison. That's the central trade-off: a stronger gel may shorten individual wear sessions, but it doesn't necessarily produce a better final shade.
Carbamide peroxide concentration guide
| Concentration | Daily wear time | Sensitivity risk | Best for |
|---|---|---|---|
| 10% | Often about 8 hours, commonly overnight, when prescribed | Lower relative risk and the most established home-bleaching benchmark | First-time users, sensitivity-prone teeth, gradual whitening |
| 15% to 16% | Often several hours, according to the product and dentist's directions | More likely to cause sensitivity than 10% | Users who want a middle ground between comfort and shorter wear |
| 20% to 22% | Commonly about 3 to 4 hours for many supervised protocols | Higher irritation burden than lower strengths | Users who already tolerate peroxide and want shorter sessions |
| 35% and other higher-strength options | Use only according to specific professional instructions | Greater need for careful tray fit, conservative exposure, and supervision | Experienced users with a dentist-approved plan |
The wear-time ranges above reflect clinical guidance, not permission to improvise. The European Commission's opinion centers on 3.6% hydrogen peroxide, equivalent to 10% carbamide peroxide, and states that products above 0.1% hydrogen peroxide, equivalent to 0.3% carbamide peroxide, should be used under dentist supervision. Review the regulatory and clinical discussion
A recent systematic review reported that 10% carbamide peroxide had a 67% lower sensitivity risk than 20% to 22% carbamide peroxide, with similar color change. See the systematic review. My practical decision rule is simple:
- Choose 10% if comfort, predictability, or sensitivity control matters most.
- Consider 15% or 16% if you've tolerated whitening before and want a shorter routine.
- Reserve 20% to 22% for users who understand their sensitivity response and can follow the shorter schedule precisely.
- Don't choose 35% merely because it's available. Higher strength makes tray fit and professional guidance more important, not less.
For a fuller comparison of gel formulas and delivery options, review this guide to types of teeth whitening gel.
Preparing and Loading Your Whitening Trays
Tray technique determines whether the gel stays on your enamel or spreads onto your gums. Most irritation from home whitening isn't caused by a mysterious reaction. It follows a predictable mistake, usually overfilling the tray or seating it with too much pressure.
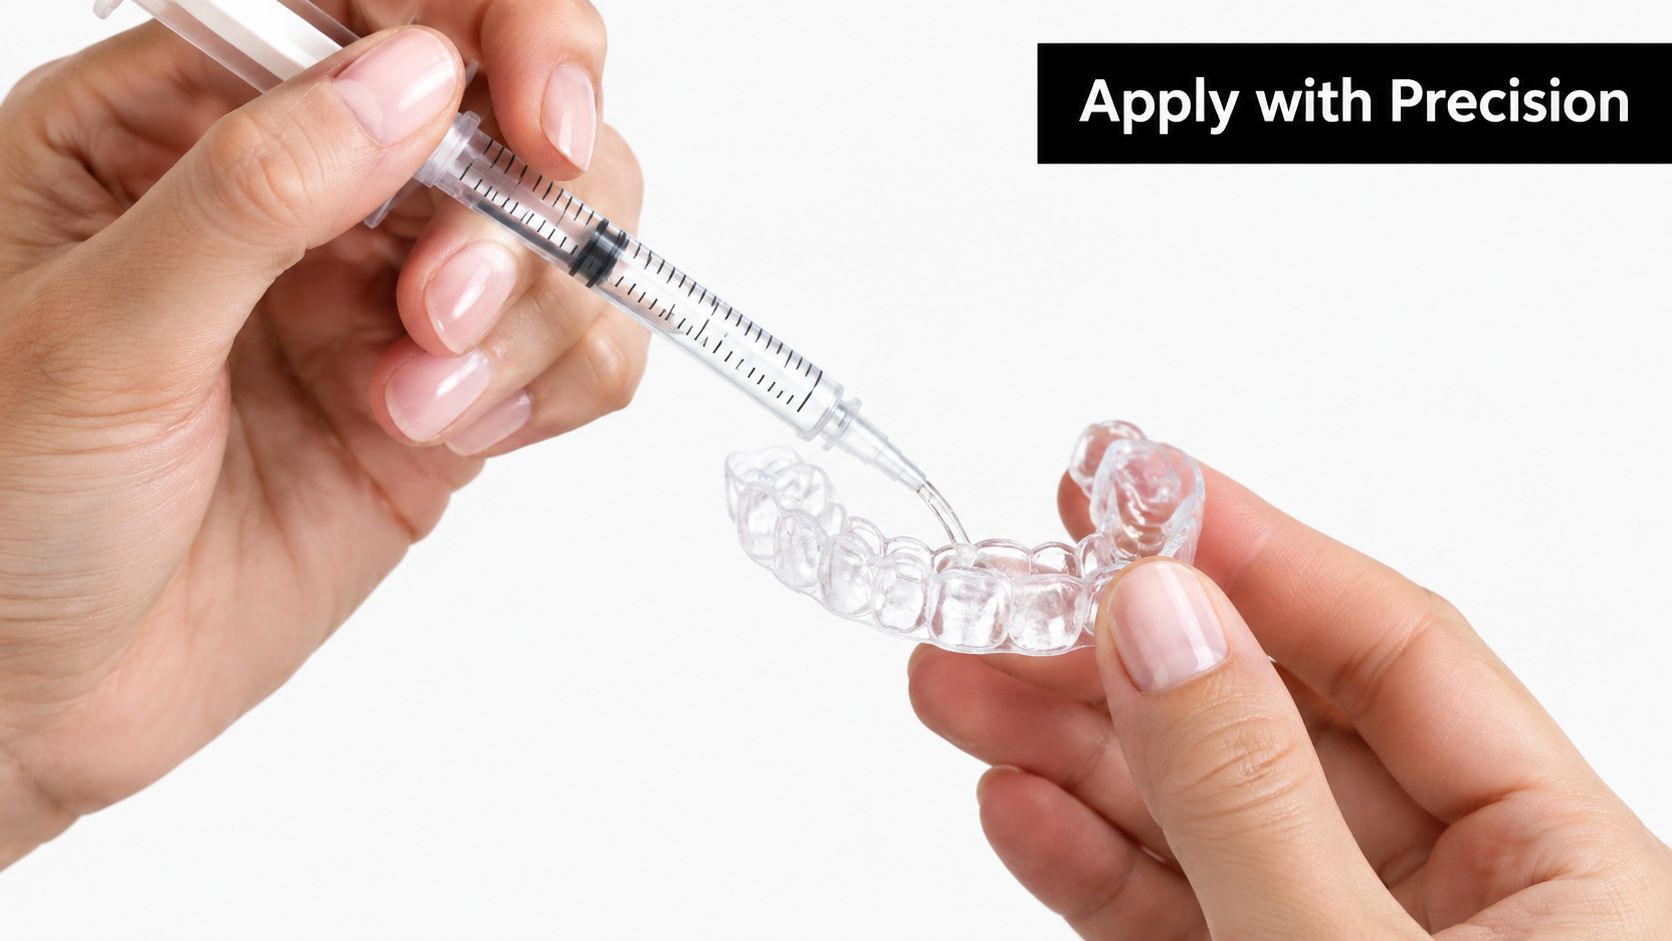
Load the tray with restraint
Start with clean, dry trays and inspect them for cracks, sharp edges, or distortion. Place a small bead of gel inside the facial surface of each tooth compartment, rather than filling the entire tray. The exact amount depends on the tray and syringe instructions, but the guiding principle is consistent: more gel doesn't mean more whitening.
Keep the syringe tip away from the gumline while dispensing. If you're using a custom tray, place the bead toward the front, or facial, side of each tooth pocket so the gel contacts enamel when the tray seats. Follow this guide to using dental whitening trays
Seat the tray slowly from one side to the other. Press it into position without biting hard, because force can squeeze gel over the edges. Once the tray is seated, use a clean cotton swab, tissue, or fingertip to remove any gel that has escaped onto the gums.
Check the soft tissues before starting
Your gums should feel normal before you begin. Don't apply whitening gel over active ulcers, cuts, or visibly inflamed tissue. If a tray edge rubs the gum, stop and have the fit assessed rather than trying to compensate by adding less gel indefinitely.
Wait before eating or drinking according to the product instructions, and avoid swallowing visible excess gel. The tray should feel secure but not painfully tight. A properly loaded tray has enough gel to maintain contact with the tooth surfaces and not enough to ooze across the gumline.
Use the product's instructions as the final authority for your specific tray and concentration. This video demonstration of tray application can help you visualize the loading and seating sequence.
Managing Wear Time and Sensitivity Spikes
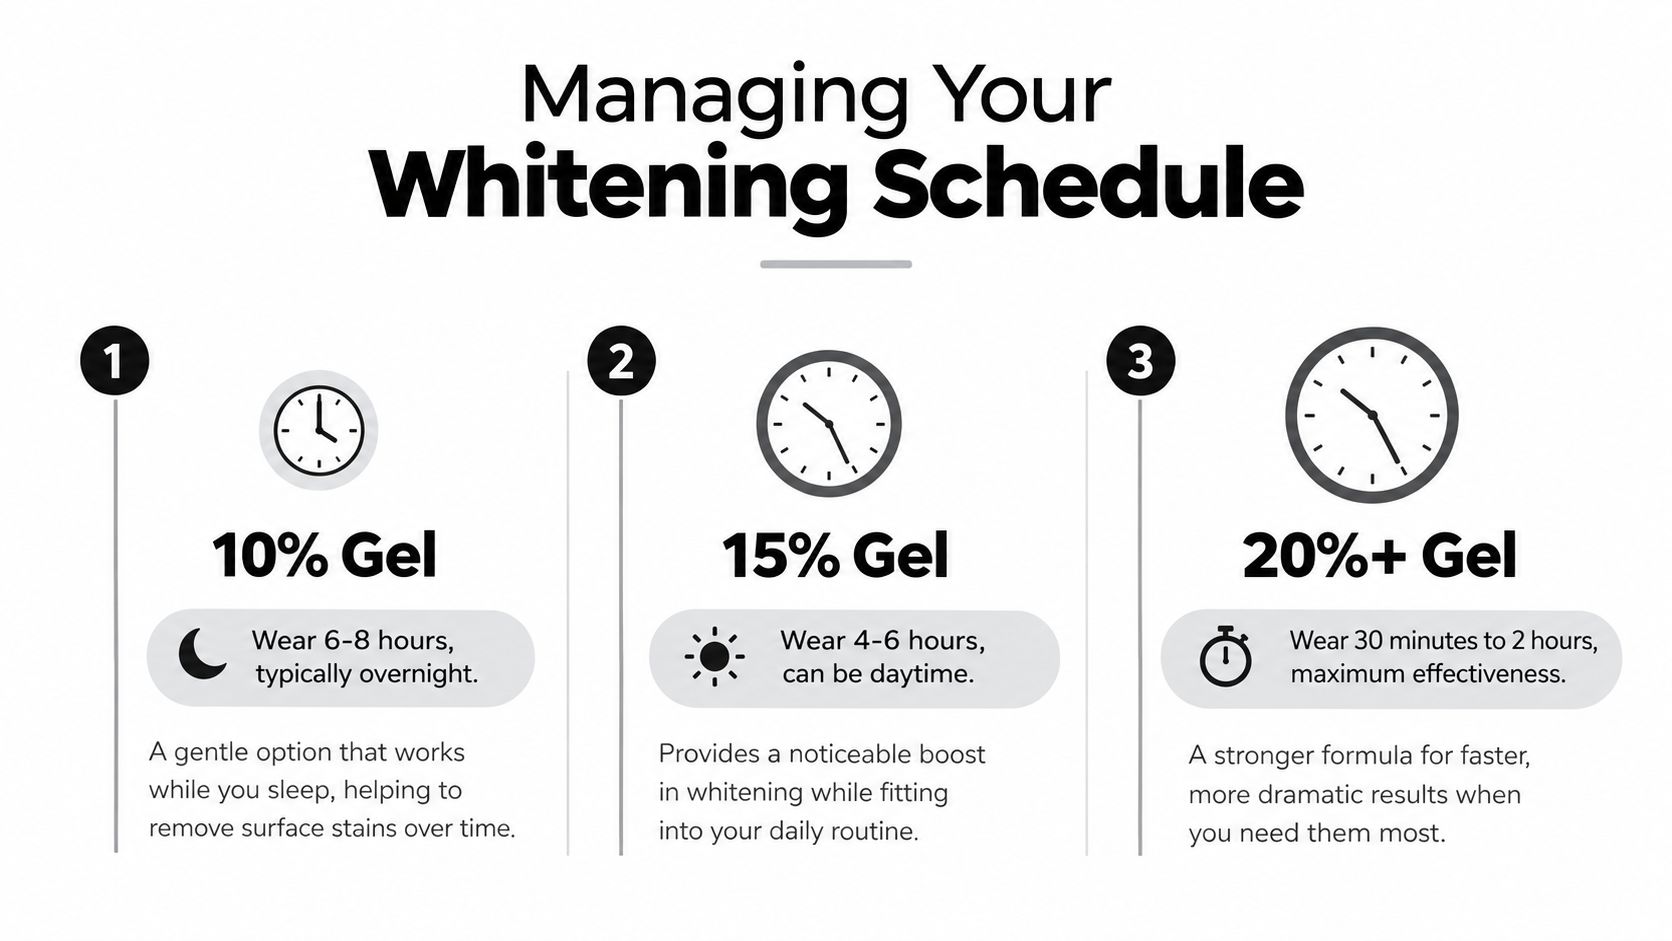
A stronger gel can shorten each session, but it can also raise the chance of sensitivity. Match wear time to the prescribed concentration, and treat the label or your dentist's instructions as the controlling schedule. Clinical reviews commonly describe 10% carbamide peroxide as an approximately 8-hour regimen, while 15% to 20% formulas are often worn for about 3 to 4 hours. Do not transfer timing from one syringe to another, even when the trays look identical. Review the evidence on sensitivity and home bleaching
Sensitivity may begin after several applications. One review reported first onset around day 4.8, with symptoms lasting about five days in the described evidence. Another home-whitening study recorded 54% mild sensitivity, 10% moderate sensitivity, and 4% severe sensitivity, with symptoms declining as treatment continued.
Use a response-based protocol
Mild, brief sensitivity calls for less exposure at the next session. Shorten the wear period or take a treatment day off, then resume only after the teeth feel settled. If symptoms return, reduce exposure again or ask about a lower concentration. Read the clinical sensitivity findings
Sharp or lingering pain needs a different response from a brief reaction to cold air or water. Remove the tray, rinse thoroughly, and pause whitening. Arrange a dental assessment if pain persists, remains focused in one tooth, starts without an obvious trigger, or occurs with a crack, cavity, swelling, or gum inflammation.
A conservative routine is straightforward:
- Begin with the prescribed schedule, using a thin amount of gel and no extra applications.
- At the first meaningful sensitivity spike, shorten the next wear period or take a rest day.
- If sensitivity continues, stop whitening until symptoms settle and ask about a lower concentration or desensitizing plan.
- Restart gradually, rather than returning immediately to the longest permitted session.
Sensitivity is a signal to adjust exposure, not evidence of a stronger whitening effect.
Troubleshooting Irritation and Gum Burns
A whitening tray can cause two different problems that patients often lump together. Tooth sensitivity usually feels like a quick electric response to cold, air, or touch. A gum burn is more likely to appear as a localized white patch, soreness, redness, or peeling where peroxide gel remained against the tissue.
Remove the tray as soon as you notice gum discomfort. Rinse with water, wipe away remaining gel, and stop treatment until the area looks and feels normal. Don't place more gel over a visibly irritated area, and don't keep using a tray that repeatedly presses against the same part of the gum.
Why desensitizing products aren't universal fixes
Desensitizing toothpaste can be useful, but it isn't a guaranteed solution for every carbamide peroxide protocol. A 2024 systematic review found reduced sensitivity after home bleaching with 22% carbamide peroxide, but not after home bleaching with 16% carbamide peroxide. Review the evidence on desensitizing toothpaste
That finding changes how I recommend these products. Use a sensitivity toothpaste as an adjunct, not as permission to overfill trays or extend wear time. A fluoride toothpaste or professionally recommended desensitizing gel may support comfort, but the first intervention remains exposure control.
If the gums are irritated, changing the gel strength won't correct a tray that doesn't fit.
Check the tray for excess material, distortion, and overextension onto the gingiva. If the same tooth produces intense pain each time, whitening may be revealing an underlying issue rather than causing a routine sensitivity response. A dental examination is appropriate before restarting.
Post-Whitening Care and Enamel Protection
After each session, remove the tray and rinse it with cool water. Brush gently with a soft toothbrush, but don't scrub aggressively in an attempt to remove every trace of gel. Clean the tray separately, let it dry, and store it in its case away from heat that could distort the plastic.
Whitening changes the appearance of stains, but it doesn't make crowns, fillings, veneers, bridges, or implants change color. Existing dental work may therefore look different from the surrounding natural enamel after treatment. If you have visible restorations, discuss the expected result with a dentist before choosing a stronger regimen.
Protect the result without over-treating
Keep your normal oral-hygiene routine consistent, and be thoughtful about foods and drinks that commonly darken teeth. Rinsing with water after staining beverages helps reduce residue, while brushing twice daily supports plaque control without adding unnecessary peroxide exposure.
Remineralizing products, including fluoride toothpaste or products such as MI Paste Plus when professionally recommended, may fit into an aftercare routine. They don't replace correct tray loading or solve a poorly tolerated concentration, but they can support a broader enamel-care plan.
The most durable approach is maintenance through restraint. Don't repeat a full whitening course every time the shade looks slightly less bright. Use the lowest effective concentration, follow the product schedule, and address sensitivity early instead of escalating treatment.
DentalHealth.com offers professional-grade whitening gels such as Opalescence, Zoom, and Pola products, along with sensitivity and remineralizing care options. Visit DentalHealth.com to compare gels and supporting products, then choose a routine that matches your tray type, concentration, and comfort needs.