

How to Whiten Teeth at Home Fast A Realistic Guide
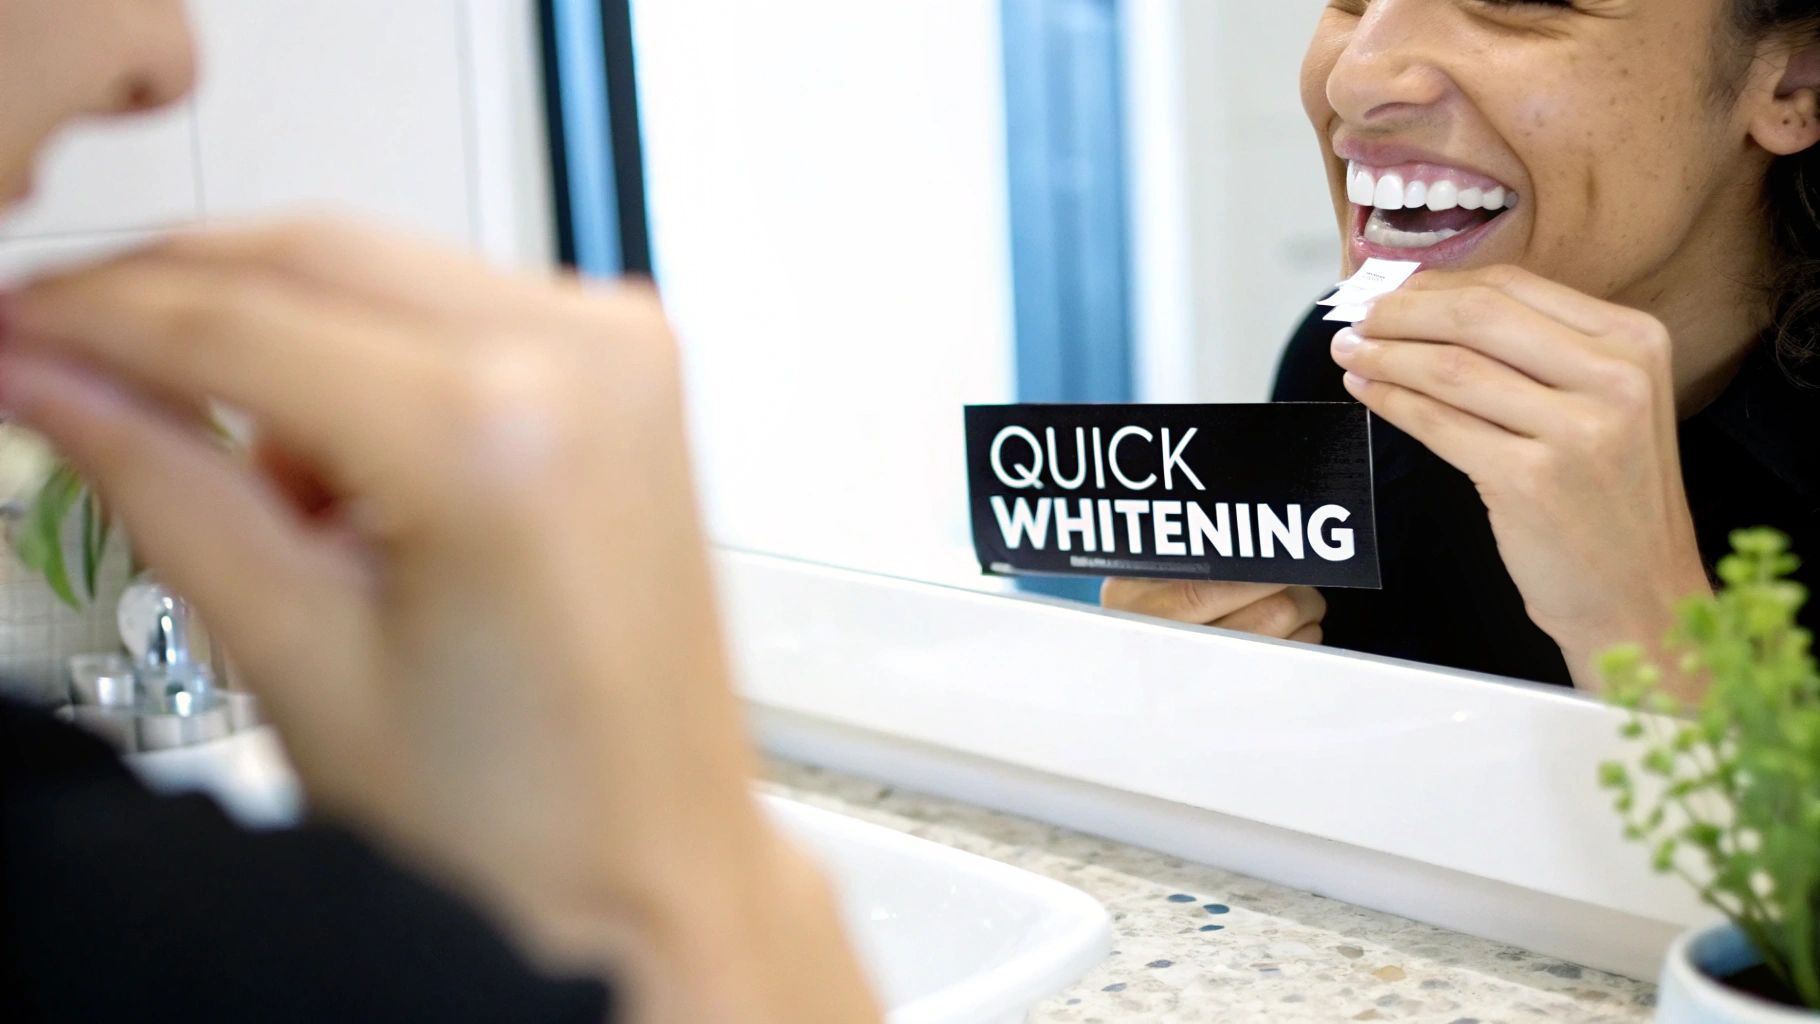
If you want to whiten your teeth fast at home, you need to reach for products that pack a punch. We're talking about options with a higher concentration of a real whitening agent, like peroxide-based strips or kits that use an LED light. These methods are specifically designed to give you noticeable results in as little as 3 to 7 days, going way beyond just scrubbing off surface stains to actually lighten the shade of your teeth.
A Practical Look at Fast At-Home Teeth Whitening
Getting a brighter smile on a tight timeline is absolutely possible. The secret is knowing the difference between your everyday maintenance products and true, active whitening treatments. A whitening toothpaste might be great for lifting the coffee stains from this morning, but it's not going to dramatically shift your tooth color in a weekend. For that kind of speed, you need a product that contains an active bleaching agent like hydrogen peroxide or carbamide peroxide.
These are the workhorses of teeth whitening. They actually penetrate your tooth enamel to break apart the discolored molecules that cause both the stains on the surface (extrinsic) and the deeper-set discoloration (intrinsic). This is the key difference that separates a rapid whitening kit from something that works more gradually over weeks or months.
Comparing the Fastest Whitening Methods
The shelves are crowded with options, but a few consistently rise to the top for their speed and effectiveness. The real trick is to find the right balance between how quickly you want to see results and how sensitive your teeth are.
- Whitening Strips: These aren't your grandma's whitening strips. Modern versions, often labeled "professional effects" or similar, are thin, flexible strips coated in a more potent peroxide-based gel. They're designed to create visible change within about a week of daily use.
- LED Accelerator Kits: A popular choice for speed. These kits usually come with a whitening gel you apply to a mouth tray. Then, you pop in a blue LED light device. The idea is that the light helps to kickstart the chemical reaction of the peroxide, potentially delivering results in just a few days.
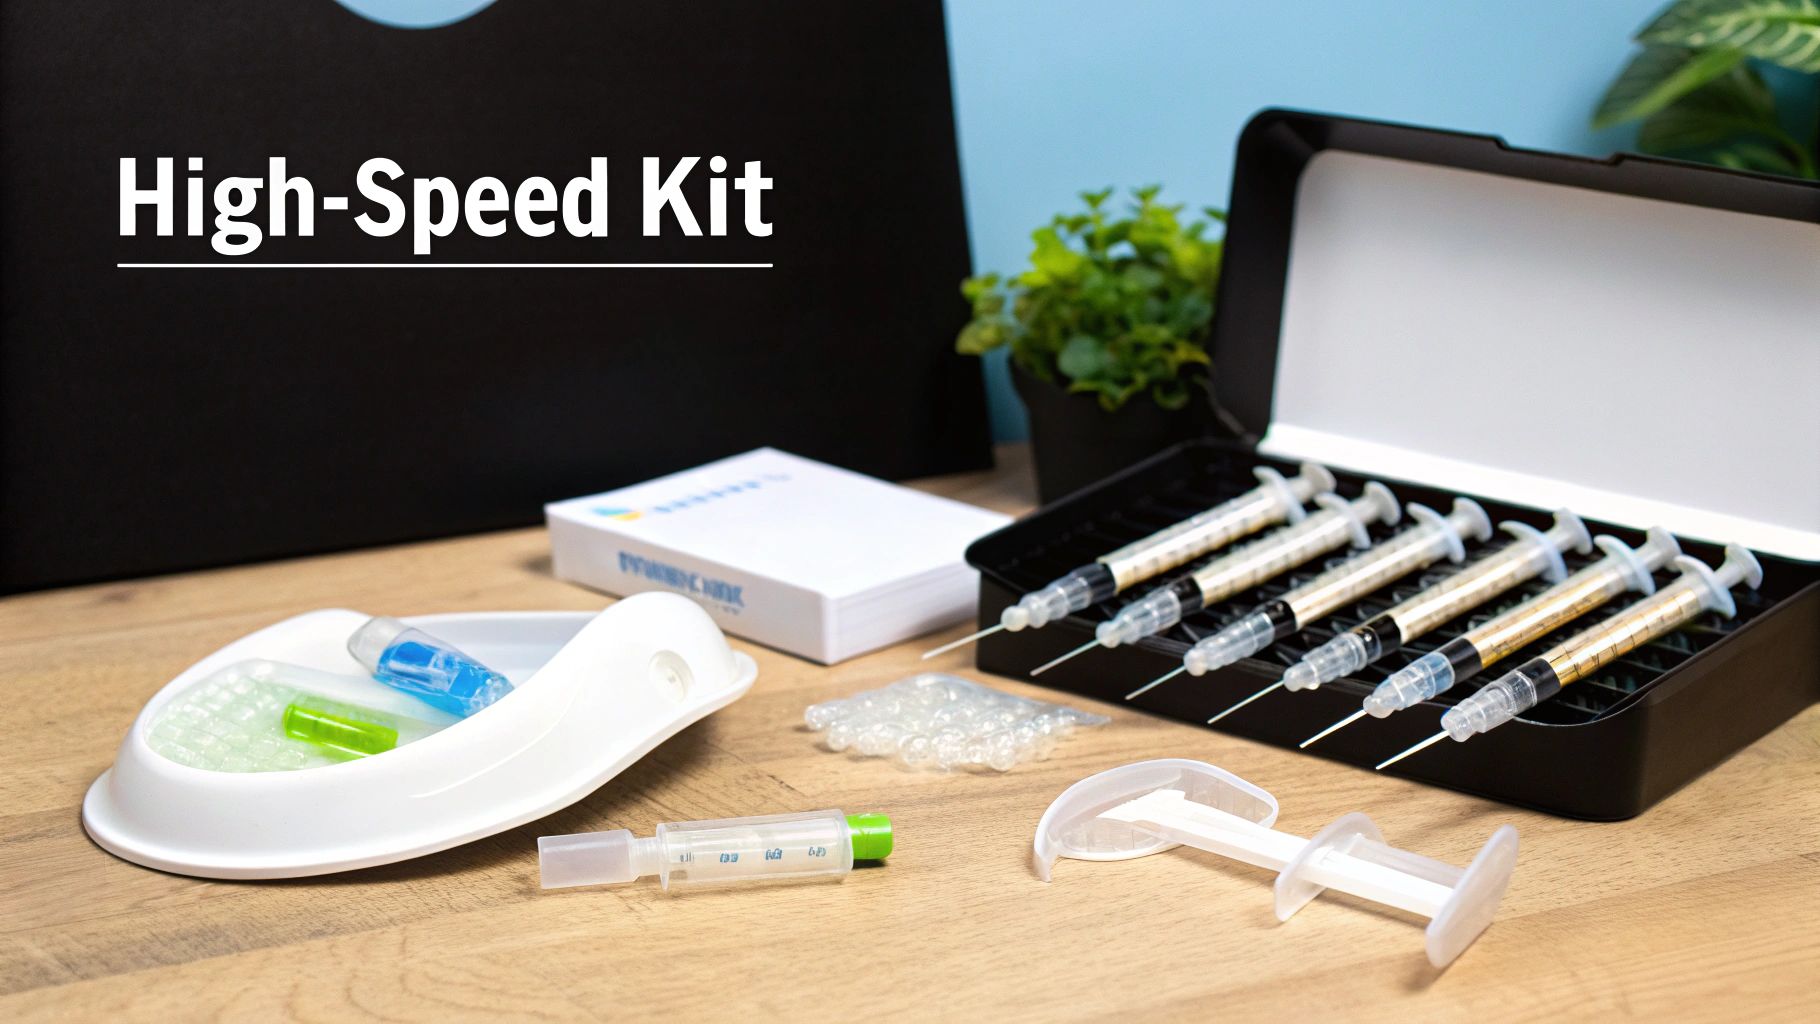
- High-Concentration Gels with Trays: This is the closest you can get to professional-grade whitening at home. These systems use a powerful carbamide peroxide gel that you apply using either custom-fit or moldable thermoforming trays. They deliver fantastic results but also come with a higher risk of sensitivity if you're not careful.
The chart below gives you a quick visual on the typical timelines you can expect from the most common at-home methods.
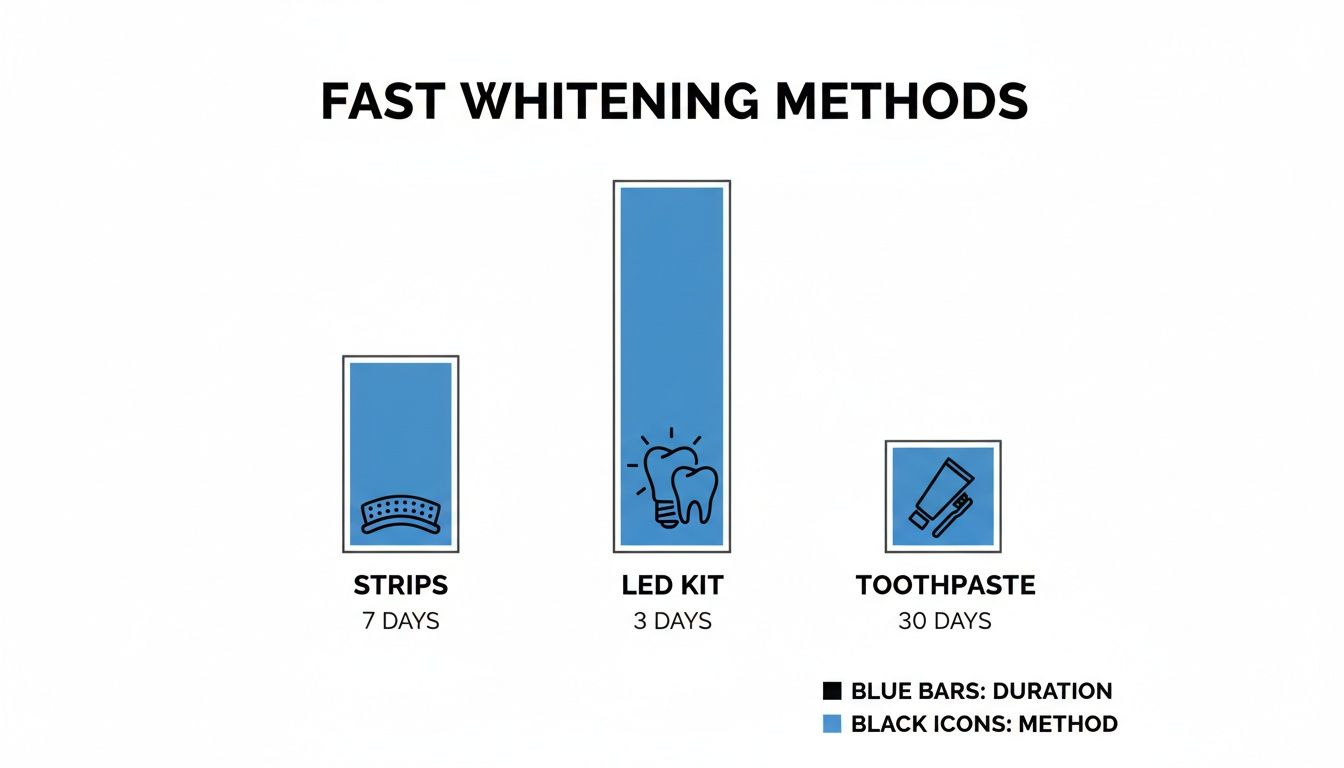
As you can see, there's a big gap in the timeline between active treatments like LED kits and maintenance products like your daily whitening toothpaste.
To help you decide, here's a quick breakdown of the fastest options.
Comparing the Fastest At-Home Whitening Methods
| Whitening Method | Time to Noticeable Results | Best For | Common Sensitivity Level |
|---|---|---|---|
| LED Whitening Kits | 3-5 days | Quick results for a specific event or deadline. | Moderate |
| Whitening Strips | 5-7 days | Convenient, no-mess daily application. | Low to Moderate |
| High-Concentration Gels | 7-10 days | Deeper, more stubborn stains and professional-level results. | Moderate to High |
Ultimately, the best choice depends on your timeline and how your teeth typically react to whitening products.
Setting Realistic Expectations
Even though speed is the goal, it's so important to keep your expectations in check. An at-home kit, no matter how good, simply won't give you the same instant, blindingly white results as an in-office professional treatment. Dentists use much, much higher concentrations of bleaching agents in a carefully controlled environment.
"One-day at-home whitening can provide noticeable improvement for surface stains, but don’t expect dramatic results like you’d get from professional treatments. For important events, start your whitening routine a few days in advance for the best results.”
Before you dive in, it’s a good idea to understand the 10 key things you should know about teeth whitening to make sure your experience is both safe and effective. It's also smart to be aware of all your choices; you can explore the best teeth whitening options available to get a fuller picture of what's out there.
At the end of the day, the fastest at-home methods can definitely lighten your teeth by several shades, giving you a smile that's visibly brighter in about a week.
Choosing the Right High-Speed Whitening Kit
When you need to brighten your smile quickly, navigating the dozens of whitening products on the shelf can feel a little overwhelming. If you want to cut through the noise, you have to look past the flashy packaging and zero in on the active ingredients that actually get the job done.
The two workhorses of at-home whitening are hydrogen peroxide and carbamide peroxide.
Hydrogen peroxide is the sprinter of the two. It gets to work almost immediately, breaking down quickly and releasing most of its whitening power within the first 30 to 60 minutes. This fast-acting nature makes it the go-to ingredient for shorter treatments like whitening strips and many LED kits.
Carbamide peroxide, on the other hand, is more of a marathon runner. It's a more stable compound that gradually breaks down into hydrogen peroxide over several hours. About 50% of its power is released in the first two hours, but it can continue working for up to six more. This slow-and-steady approach is why you’ll often find it in professional-grade gels made for custom trays that you wear for longer periods.
Understanding Peroxide Concentrations
When you check a product label, you'll see a percentage next to the main ingredient, but they aren't directly comparable. A 10% carbamide peroxide formula is roughly equivalent to a 3.5% hydrogen peroxide one. So, if you see a kit advertising 35% carbamide peroxide, you know you're looking at a potent, high-speed option.
The right choice for you often comes down to balancing your personal sensitivity levels with your daily schedule.
- Hydrogen Peroxide: Perfect if you want to get your whitening done in short, quick sessions and you don't struggle with sensitivity. Its rapid action can sometimes feel a bit intense for some people.
- Carbamide Peroxide: An excellent pick if you'd rather whiten overnight or if your teeth are on the sensitive side. The slower release is often much gentler on your teeth and gums.
Getting familiar with the science behind these ingredients is the key to making a smart purchase. You can find some fantastic guides that dive deeper into the specifics of carbamide peroxide teeth whitening if you want to learn more.
Technology That Accelerates Results
Beyond the peroxide itself, some kits include technology to give your results a boost. The most common you'll see is a blue LED light. The idea is that this specific wavelength of light helps to activate the peroxide gel, kicking the stain-lifting chemical reaction into a higher gear. While the long-term effectiveness is still debated, many people find it gives their initial results a noticeable pop.
The application method also makes a huge difference. Custom-fit or moldable trays, like the ones included in more advanced kits, are designed to keep the whitening gel in close, even contact with every nook and cranny of your teeth. This helps you avoid the splotchy or uneven results that can sometimes happen with generic, one-size-fits-all strips. Prefilled systems like Opalescence Go 15% whitening trays offer a fantastic middle ground—they’re convenient but still provide excellent coverage.
In the world of at-home whitening, hydrogen peroxide consistently comes out on top for sheer power. Research shows its potent oxidative ability delivers a more significant tooth color difference compared to other agents, effectively tackling both surface and deep-set stains.
Ultimately, the best kit for you is one that fits your lifestyle, respects your sensitivity level, and delivers the results you need in a timeframe that works for you.
How to Prepare for a Safe Whitening Treatment
Jumping into a powerful whitening treatment without any prep is a bit like trying to paint a dirty wall—you just won't get the results you're after. To really whiten teeth at home fast, and do it safely, you need to set the stage for success. Think of it this way: a clean, healthy mouth is the perfect canvas for any whitening agent.
The absolute most important first step is making sure your teeth and gums are healthy. Whitening gels, especially the high-concentration formulas, can cause some serious pain if they find their way into an untreated cavity or irritate already-inflamed gums. I always strongly recommend a quick dental check-up before starting any intensive whitening regimen. Your dentist can give you the all-clear, confirming you don't have any underlying issues that the treatment could make worse.
Your Pre-Treatment Checklist
Once your dentist gives you the green light, a few simple moves on the day of your first treatment can make a world of difference. This isn't just about avoiding discomfort; it's about making sure the gel can do its job effectively.
- Start with a Clean Slate: Give your teeth a good brush and floss about 30 minutes before your session. This clears away any plaque or tiny food particles that could physically block the whitening gel from making full contact with your enamel.
- Dry Your Teeth: Right before you put on the strips or apply the gel, gently pat your teeth dry with a clean tissue. A dry surface helps the whitening product stick much better and work more efficiently.
- Protect Your Gums: If your kit doesn't come with a gum barrier, you can dab a little petroleum jelly along your gumline. It creates a simple, effective shield to help prevent chemical irritation.
This little bit of prep work ensures the whitening agent is working on your tooth enamel, not on last night's dinner.
A common mistake people make is brushing immediately before applying whitening strips. This can actually make your gums more sensitive and prone to irritation. Giving your mouth that 30-minute buffer is a small trick, but it really helps improve comfort during the treatment.
Perform a Simple Patch Test
Before you commit to a full-mouth application, it's always a smart idea to do a quick patch test to see how you react. This is especially crucial if you're trying a new product or a higher peroxide concentration for the first time.
Just apply a tiny dab of the whitening gel to one tooth or a small, out-of-the-way spot on your gums. Let it sit for about 5-10 minutes, then rinse it off. If you feel any major stinging, burning, or sharp discomfort, that's a sign the product might be too aggressive for you. This simple check can save you from a whole lot of unnecessary pain and irritation.
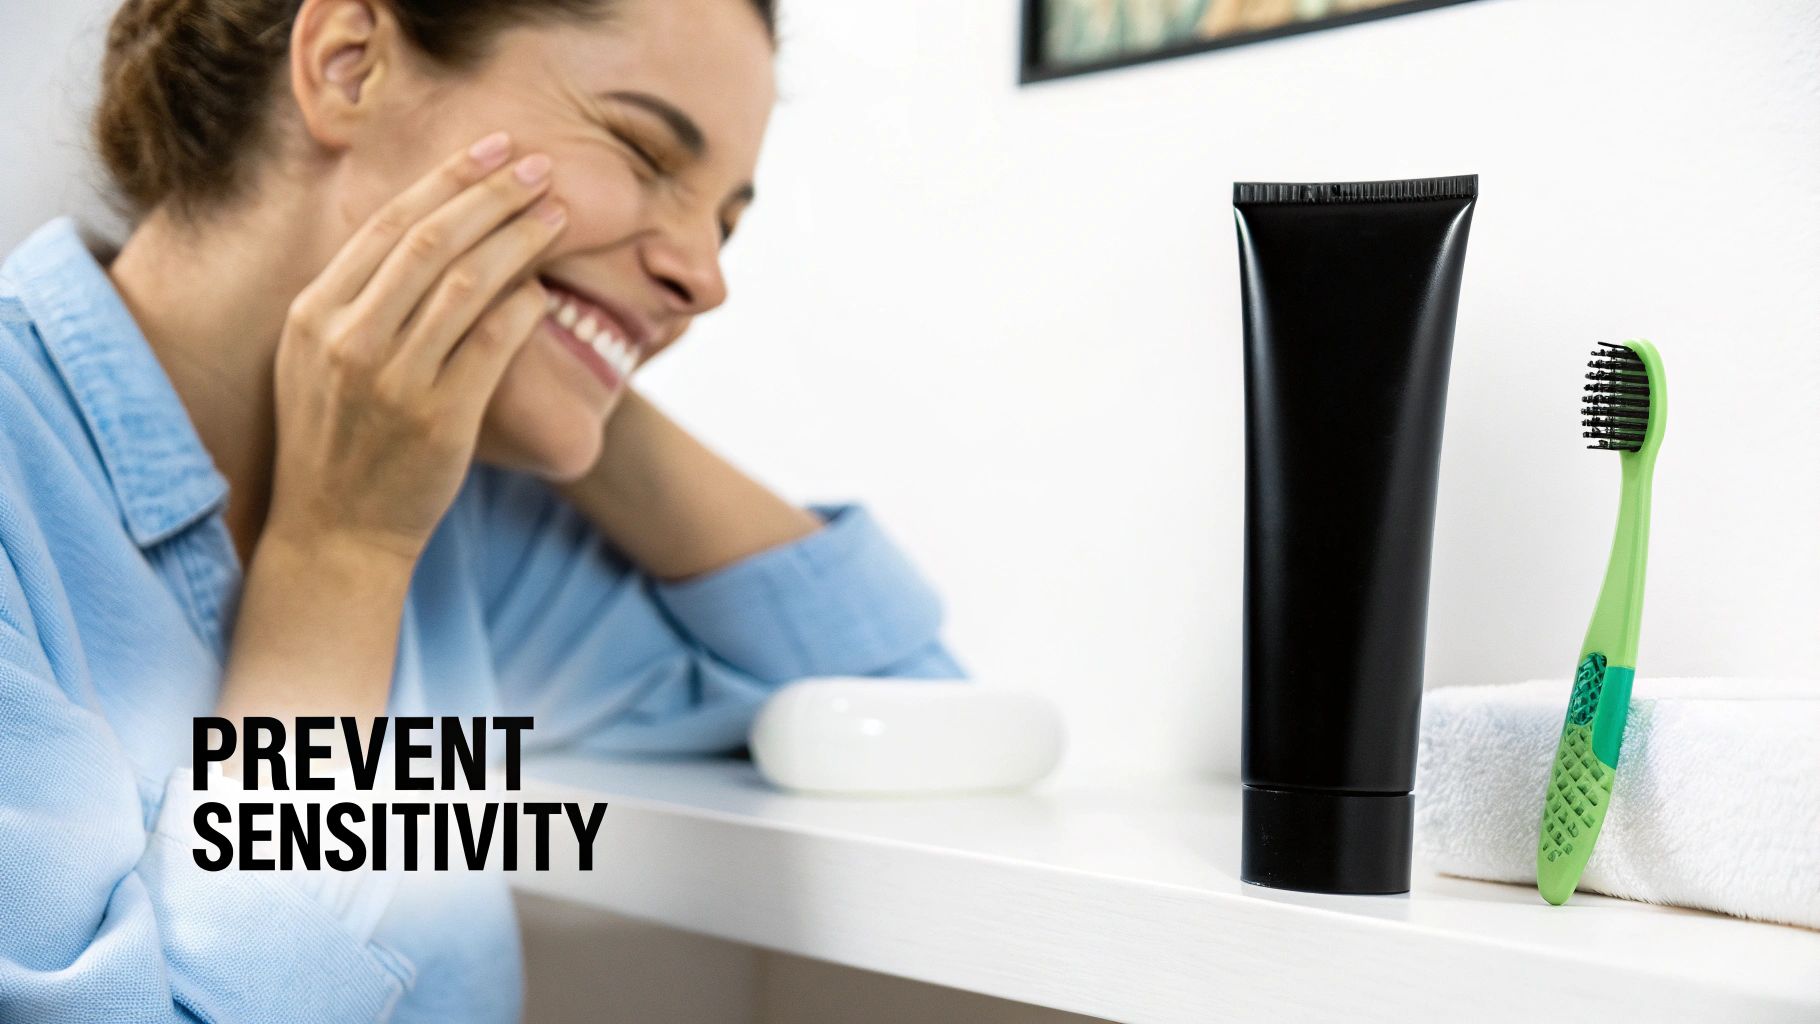
Managing and Preventing Tooth Sensitivity
Let's be honest: the most common thing that trips people up when whitening their teeth at home is sensitivity. That sudden, sharp "zing" is no fun, but it's almost always temporary. More importantly, it's completely manageable.
Think of sensitivity not as a roadblock, but as a signal from your teeth telling you to tweak your approach. With a little bit of prep work and a few smart adjustments, you can get the bright smile you're after without the discomfort.
Proactive Steps for Comfortable Whitening
A little preparation goes a long way. By making a couple of simple changes to your routine a week or two before you even start whitening, you can create a much more comfortable experience.
- Switch to a Desensitizing Toothpaste: About two weeks before you plan to start, begin using a toothpaste made for sensitive teeth. Look for one with potassium nitrate or stannous fluoride. These ingredients work by blocking the tiny pathways to your tooth's nerve.
- Strengthen with Fluoride: Adding a fluoride rinse to your nightly routine is a great way to fortify your enamel. Fluoride helps remineralize your teeth, making them stronger and less porous.
These small habits can make a huge difference in how your teeth feel during the whitening process. For a deeper dive into the science, our guide on how Fluoridex can help reduce tooth sensitivity explains more about these powerful ingredients.
What to Do if Sensitivity Strikes
Even with the best prep, you might still feel a twinge, especially if you're using a faster-acting kit. Don't panic and definitely don't give up. Just listen to your teeth and make a couple of simple adjustments.
The first thing to try is reducing how long you wear the trays or strips. If the box says 30 minutes, dial it back to 15 or 20. You'll still see results, just with a little less intensity.
Another highly effective trick is to whiten less often. Instead of daily treatments, try whitening every other day. This gives your teeth 24 hours to rehydrate and recover, which is often all they need to feel comfortable again.
One of the biggest mistakes I see people make is trying to "push through the pain" for quicker results. It's totally counterproductive. Taking a day or two off won't hurt your progress and will make the whole experience much more pleasant.
It's also worth remembering that the strength of the whitening gel matters—a lot. Research shows that at-home products with lower concentrations of carbamide peroxide, around 10-16%, still deliver fantastic long-term results with way less sensitivity. In fact, one study found that only about 15% of patients reported mild sensitivity with a 10% gel. For more on this, check out these teeth whitening statistics on LoudFamilyDentistry.com. It's a classic trade-off: a bit more patience for a lot more comfort.
Making Your Whitening Results Last Longer
You’ve put in the work to get that brighter, whiter smile. The last thing you want is for a few sips of coffee or a plate of pasta to undo all that effort. Protecting your results is all about a few smart habits, especially in the first couple of days after you finish your last treatment.
Right after a whitening session, your tooth enamel is a little more porous than usual. This is totally normal, but it means your teeth are temporarily like tiny sponges, ready to soak up any color they come in contact with. This is why the first 48 hours are so crucial.
Protecting Your Freshly Whitened Smile
During this critical window, your main goal is to sidestep the most common staining culprits. A few simple adjustments here will make a massive difference in how long your results hold up, saving you from needing to do another full whitening cycle anytime soon.
Some of the biggest offenders you'll want to avoid are:
- Dark Beverages: Coffee, black tea, red wine, and colas are notorious for leaving their mark.
- Colorful Sauces: Think tomato sauce, soy sauce, and rich curries.
- Vibrant Berries: Blueberries, blackberries, and even pomegranates can quickly discolor enamel.
- Tobacco Products: Smoking or chewing tobacco is one of the fastest ways to bring back that yellow tinge.
Sticking to a "white diet" for just two days gives your enamel time to remineralize and become much more resistant to new stains.
Making simple swaps can be incredibly effective. For instance, sipping on white tea instead of black or opting for a white wine spritzer over red wine helps you enjoy social situations without compromising your smile.
Beyond that initial 48-hour period, a couple of long-term strategies will keep your teeth looking their best. One of the easiest tricks in the book is to use a straw when drinking things like iced coffee or soda. This little habit bypasses your front teeth, minimizing direct contact with the staining liquid.
Also, get into the habit of rinsing your mouth with plain water after eating or drinking something colorful. It's a small action that washes away staining compounds before they have a chance to settle in, and it delivers huge preventative benefits over time.
Maintaining Your Results with Touch-Ups
Even with the most careful habits, life happens. Your teeth will naturally pick up some surface stains over time. The real key to long-lasting brightness isn't avoiding everything forever—it's performing periodic maintenance. Instead of waiting for your teeth to yellow significantly, just do a quick touch-up session.
For most people, a single application of their whitening strips or a night with their gel trays once every 2-3 months is all it takes. This quick refresh lifts away recent surface stains and brings back that just-whitened glow. It's a much gentler approach for your teeth, it's more cost-effective, and it ensures your smile stays consistently bright all year round.
What About Natural Whitening Methods?
If you’ve spent any time online looking for whitening solutions, you’ve probably stumbled across countless DIY recipes using ingredients from your kitchen pantry. The idea is tempting—why not try something simple and "natural"? But it's crucial to know what you're actually doing to your teeth and to separate the genuinely helpful tips from fads that could do more harm than good.
Unlike the peroxide-based kits we've been talking about, most natural methods work very differently. They don't chemically change the deep, intrinsic color of your teeth. Instead, they rely on mild abrasion to physically scrub away surface stains. Think of it more like polishing a scuffed floor than bleaching a white shirt. It can make a difference, but the results are almost always more subtle and take longer to see.
Breaking Down Common DIY Ingredients
Let’s get real about what these popular "natural" whiteners are doing.
- Baking Soda: This is the classic home remedy. Its slightly abrasive texture is pretty effective at polishing away extrinsic stains left behind by coffee, tea, or red wine. A gentle scrub can certainly make your teeth look brighter.
- Activated Charcoal: Working on the same principle as baking soda, activated charcoal is porous and abrasive. The idea is that it binds to surface stains and lifts them away. My main concern here is its abrasiveness—if you're too aggressive with it, you could risk wearing down your precious enamel over time.
- Oil Pulling: This ancient practice involves swishing oil (usually coconut) in your mouth for 15-20 minutes. While it's great for your gums and can help reduce plaque, its direct whitening power is pretty minimal. The "whitening" people report is likely just the effect of having cleaner, healthier teeth and gums overall, not a true shade change.
The appeal here is obvious, but how well do they actually work? Scientific reviews are mixed. One four-week study did find that ingredients like baking soda and charcoal created a statistically significant whitening effect, even comparable to some commercial gels. But again, this was by physically removing surface stains. If you want to dig into the science, you can explore the full findings on natural whitening agents yourself. The takeaway is that they can work, but they aren't playing the same game as peroxide.
Here's the most important thing to remember: natural doesn't automatically mean safe. I've seen way too many online recipes that call for acidic ingredients like lemon juice or apple cider vinegar. These things can cause permanent, irreversible erosion of your tooth enamel. Always be skeptical of DIY dental advice.
At the end of the day, while some of these methods can offer a bit of a brightening boost for surface stains, they simply can't deliver the fast, dramatic results you get from peroxide-based treatments. It's better to think of them as a gentle maintenance tool, not a shortcut to a brilliantly white smile.
Your Fast Whitening Questions, Answered
Even with a solid plan, it's totally normal to have a few last-minute questions. When it comes to your smile, you want to feel 100% confident before you start. Let's dig into some of the most common things people ask about getting whiter teeth at home, quickly.
How Quickly Can I Realistically Expect to See Results?
This is the big one, right? The honest answer is that it really depends on the method you've chosen.
If you're using high-concentration strips or a quality LED kit, many people start to see a noticeable difference within just 3-4 days of consistent use. Some even say they see a little bit of a lift after the very first application.
But getting to that final, dazzling shade you're hoping for almost always takes the full treatment course—usually about 10-14 days. In the world of at-home whitening, "fast" means seeing visible changes in a few days, not a Hollywood transformation in a few hours. It’s definitely a process.
Can I Whiten My Teeth Faster by Leaving Products on Longer?
It's a tempting shortcut, but please, don't do this. Pushing the time limit won't magically speed up your results in a meaningful way. What it will do is dramatically spike your risk of painful tooth sensitivity and gum irritation.
These formulas are balanced to work safely within a very specific timeframe. The peroxide needs a set amount of time to do its job; leaving it on longer just exposes your teeth and gums to potential chemical burns and serious discomfort. For the best (and most comfortable) results, always follow the package instructions to the letter.
A critical mistake is thinking "more is more." The key to successful at-home whitening isn't longer exposure—it's consistent application over the recommended treatment period. Patience and following the guidelines will get you better, safer results every single time.
What Foods and Drinks Should I Avoid After Whitening?
Right after a whitening session, your tooth enamel is a bit more porous than usual. Think of it like a sponge, ready to soak up stains. For at least 48 hours after you finish your full treatment, it's a very smart move to avoid the usual dark-staining suspects.
The main offenders include:
- Coffee and black tea
- Red wine
- Dark sodas
- Berries and dark juices
- Tomato sauce, soy sauce, and curries
To keep your new smile bright for the long haul, try to enjoy these in moderation. Here’s a pro tip: use a straw for staining drinks to bypass your front teeth, and always give your mouth a quick rinse with water right after you're done.
When Should I Avoid At-Home Teeth Whitening?
Yes, there are definitely times when you should put the whitening kit on hold. It's crucial not to whiten if you have any untreated dental work that needs to be done. Things like cavities, gum disease, or exposed tooth roots are big red flags. Whitening gel can seep into these vulnerable areas and cause some serious pain.
Whitening is also generally not recommended for anyone who is pregnant or nursing, mainly because there isn't enough research on the effects.
Finally, and this is a big one, remember that whitening agents only work on your natural tooth enamel. They will not change the color of dental work like:
- Crowns
- Veneers
- Fillings
- Bridges
If you have any of these restorations on your front teeth, whitening could create a mismatched, uneven look. When in doubt, a quick chat with your dentist is always the safest and smartest first step.
At DentalHealth.com, we provide access to the professional-grade products dentists trust for safe and effective results. From high-concentration whitening gels to sensitivity-relief toothpastes, find everything you need to achieve and maintain your brightest smile, delivered right to your door. Explore our curated selection at https://dentalhealth.com.
Article created using Outrank