
Lumi Brite Whitening Guide: How the System Works
You're standing at a dental front desk with two estimates in hand. One covers a professional whitening appointment, while the other covers a tray-and-gel routine at home. Both mention LumiBrite, but they don't feel like the same treatment. The question isn't whether LumiBrite whitens teeth. It's whether the chairside or take-home format suits your sensitivity, schedule, existing dental work, and expectations.
This guide translates the system from peroxide chemistry to practical chair time. It also separates documented product information from broad shade marketing, so you can discuss the right protocol with a dental professional instead of choosing a concentration by guesswork.
Why Lumi Brite Comes Up in Whitening Searches
LumiBrite appears in whitening searches because it covers two different treatment experiences under one professional system. A dental office may offer a supervised, high-concentration appointment for someone who wants a rapid colour change, or prescribe a take-home gel and tray routine for someone who prefers control over the pace.
That distinction matters. “LumiBrite whitening” doesn't identify one single gel, one wear schedule, or one expected result. The chairside product uses hydrogen peroxide directly, while the take-home products use carbamide peroxide at several concentrations. Those formulas release their active peroxide differently, so the concentration and contact time have to be considered together.
A clinical study indexed in PubMed's evaluation of LumiBrite reported that LumiBrite produced clinically perceptible bleaching efficacy comparable to Opalescence and strawberry extract in a controlled evaluation of natural whitening agents. The significance isn't that every patient will get the same result. It's that LumiBrite was assessed with measurable spectrophotometric outcomes rather than only anecdotal before-and-after impressions.
The choice behind the brand name
A useful way to think about the system is to separate the decision into four questions:
- How quickly do you need a change? Chairside treatment is designed for a concentrated appointment, while take-home whitening spreads exposure across repeated tray sessions.
- How much control do you want? Home treatment lets a clinician adjust concentration or wear time in response to sensitivity.
- What kind of staining do you have? Natural enamel commonly responds more predictably than restorations or some deeper internal discolouration.
- What already exists in your smile? Crowns, veneers, bonding, and tooth-coloured fillings don't change shade in the same way as natural teeth.
Practical rule: Treat the advertised shade ceiling as a possibility, not a promise. Your starting colour, stain type, enamel, restorations, and comfort during treatment all influence the final appearance.
The rest of the decision becomes clearer once the two LumiBrite formats are placed side by side.
What Lumi Brite Whitening Actually Is
LumiBrite is a professional whitening system with chairside and take-home formats. The dental professional chooses the format, records a starting shade, checks the health of the teeth and gums, and provides the product or trays with instructions. That clinical involvement distinguishes it from picking an unexamined over-the-counter product and applying it without a baseline assessment.
The two formats
The chairside system is used in a dental office. Product information identifies it as a 35% hydrogen peroxide formulation, and descriptions report whitening of up to 7 shades in 30 minutes and up to 12 shades in 60 minutes. These figures come from the product description, so they should be discussed as reported ceilings rather than guaranteed outcomes. The formulation also includes fluoride, which is intended to support post-treatment remineralization and help reduce demineralization risk during peroxide exposure. See the LumiBrite chairside product information for the documented formulation and reported treatment claims.
The take-home system uses custom trays or professionally fitted trays with syringes containing 16%, 22%, or 32% carbamide peroxide. The dental office may take impressions or use a scan, check the tray fit, establish a shade baseline, and explain how much gel to place in each reservoir. A close fit helps keep the gel where it belongs, on the tooth surface rather than spreading over the gums.
| Format | Peroxide Type | Typical Concentration | Wear Time | Where Dispensed |
|---|---|---|---|---|
| Chairside | Hydrogen peroxide | 35% | Up to 30 or 60 minutes, depending on protocol | Dental office |
| Take-home | Carbamide peroxide | 16%, 22%, or 32% | Overnight, 1 to 2 hours, or short twice-daily sessions, depending on concentration | Dental office with home-use instructions |
The LumiBrite whitening collection shows the take-home format as a tray-based professional product. Product history also identifies a take-home version marketed around 3 minutes per day over 2 weeks, with whitening of up to 9 shades, and notes a 32% formulation and an initial Amazon listing in 2015. Those details describe a particular product-history source, not every current clinical protocol.
Active Ingredients and How They Lift Stains
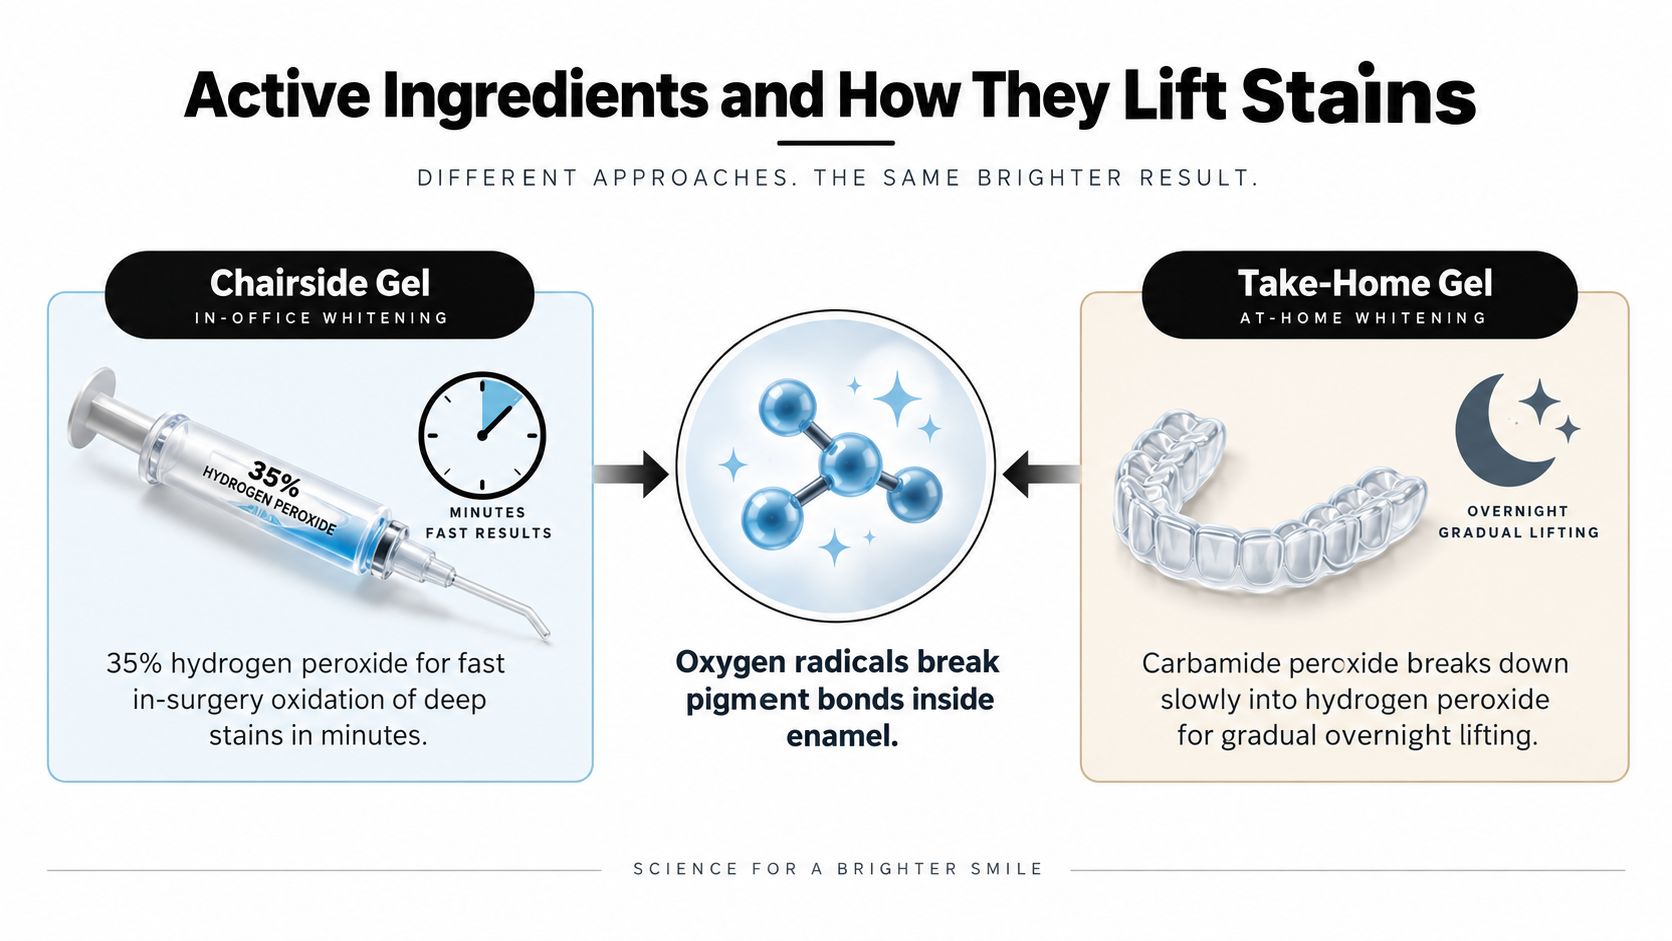
Whitening changes coloured molecules, often called chromophores, within or on the tooth structure. Peroxide breaks down into reactive oxygen species that disrupt the bonds behind darker colouring. The tooth is not scrubbed white. Instead, pigment molecules become less able to absorb and reflect light in the same way, so the surface appears lighter.
Why hydrogen peroxide feels faster
The chairside gel contains 35% hydrogen peroxide, according to the professional product description. Because hydrogen peroxide is already the active peroxide molecule, it can begin releasing reactive oxygen during the supervised appointment. Its higher concentration supports a faster oxidation process, which helps explain the focus on controlled application, gum protection, and monitoring.
That speed suits someone with a short timeline, but it also makes placement and exposure time important. Concentrated peroxide can irritate soft tissues if it spreads beyond the intended area. Readers seeking broader background on the risks of concentrated peroxide can review that information before discussing chairside treatment.
Why carbamide peroxide works differently
Take-home gels use 16%, 22%, or 32% carbamide peroxide. Carbamide peroxide gradually decomposes into hydrogen peroxide and urea. The slower release works with a fitted tray, keeping the gel against the teeth for longer than a chairside application.
The practical trade-off is concentration versus contact time. Higher concentrations generally require shorter wear periods, while lower concentrations can suit longer exposure. The exact schedule belongs to the product instructions and dental professional's plan, not to a patient's guesswork. This distinction matters for readers comparing a rapid appointment with a slower option that may be easier to adjust around sensitivity.
Carbamide peroxide chemistry is explained in plain language in this guide to how carbamide peroxide whitens teeth.
Some formulas also contain fluoride or potassium nitrate. Fluoride may support remineralization, while potassium nitrate is commonly used in products designed to address sensitivity. Their inclusion and amounts vary, so a dentist or hygienist should confirm what is in a specific syringe.
The active ingredient can lighten natural tooth structure, but it does not change the colour of existing restorations. That distinction helps determine whether whitening will create a shade mismatch around fillings, crowns, or veneers.
How to Use the Take-Home Kits Safely
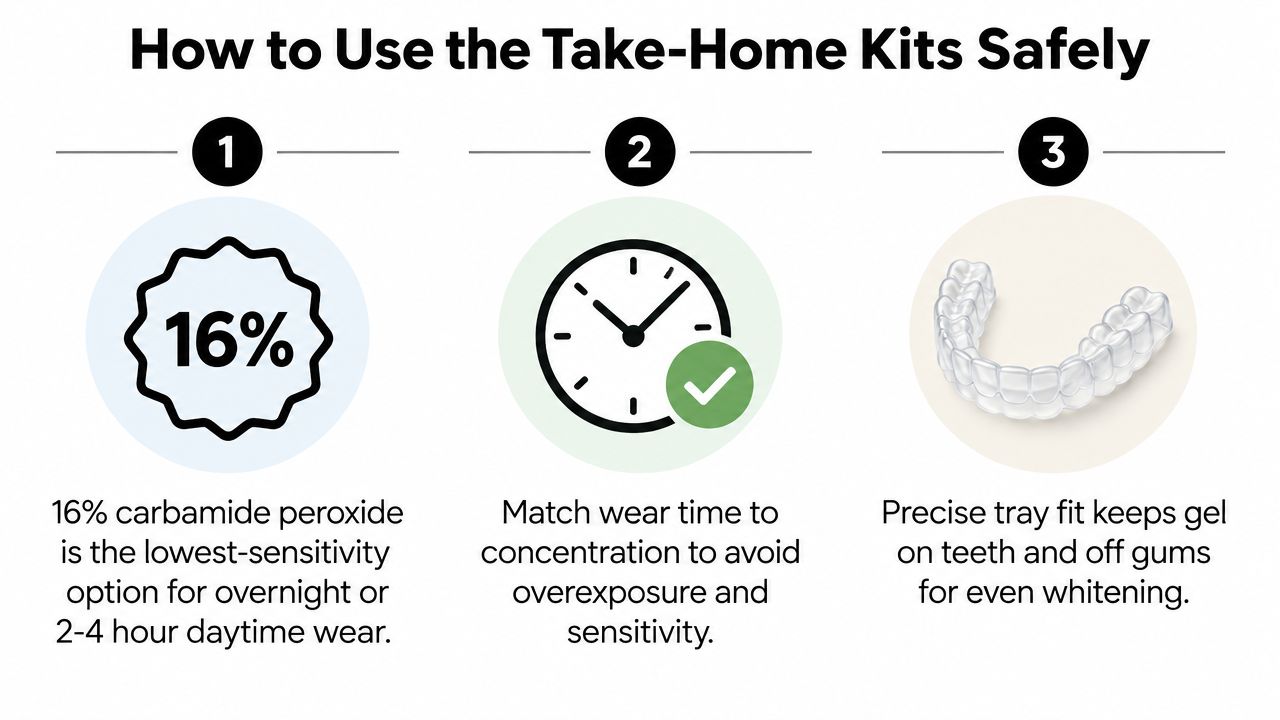
A take-home session can feel simple until the gel reaches a sensitive gumline. The safer approach is to balance three connected factors: concentration, wear time, and tray fit. Raising concentration or extending wear time changes the amount of peroxide exposure, while a loose tray can move gel onto the gums.
Begin with a dental check and the instructions supplied for your specific product. The documented LumiBrite schedule describes overnight wear for 16% carbamide peroxide, 1 to 2 hours for 22%, and 10 to 15 minutes twice daily for 32%, according to Safco Dental's LumiBrite take-home guidance. Use the schedule for the formulation you received rather than copying a routine from another kit.
A careful tray routine
- Prepare the mouth. Brush and floss before loading the tray. Clean surfaces give the gel more even contact, while flossing clears material from between teeth.
- Load sparingly. Place a small bead in the reservoir for each tooth, following your dental office's instructions. Extra gel does not automatically improve whitening. It can overflow onto the gums and create irritation.
- Seat and check. Press the tray into position, then remove visible overflow with a clean, dry finger or cotton roll. The tray should remain stable without pressing against a sore or damaged area.
- Respect the session. Do not eat, drink, or smoke while wearing the tray. Avoid acidic beverages during treatment, and do not combine whitening with chlorhexidine unless your clinician directs you to do so.
- Rinse after removal. Rinse your mouth and tray with water. A clinician may suggest a neutral fluoride rinse based on your sensitivity and enamel needs. Follow the product's brushing instructions instead of brushing aggressively immediately after removal.
Sharp, persistent “zingers” mean you should pause and contact the dental office. Adding gel or extending the next session can increase discomfort. The take-home carbamide peroxide instructions explain general tray handling, but your dentist's directions take priority when they differ.
Keep the capped syringe in a cool, dark place according to the product label. Heat and light can affect peroxide stability. Check the printed expiration date, and ask the dispensing office how long an opened syringe remains suitable for use.
Lumi Brite Compared to Opalescence, PolaDay, and Zoom
A patient with sensitive teeth may value adjustable tray wear more than a rapid appointment. Someone with a fixed deadline may prefer supervised chairside treatment. Comparing LumiBrite with Opalescence, PolaDay, and Zoom only helps when the format, peroxide chemistry, delivery method, and supervision model are kept separate.
LumiBrite's verified chairside formulation uses 35% hydrogen peroxide. Its take-home options use 16%, 22%, or 32% carbamide peroxide. Hydrogen peroxide is ready to act when applied, while carbamide peroxide breaks down more gradually in the tray. The concentration therefore matters, but so do isolation, wear time, and the patient's sensitivity.
| Brand & Format | Peroxide Type / Strength | Delivery and Supervision | Practical Fit |
|---|---|---|---|
| LumiBrite chairside | 35% hydrogen peroxide | Gel applied in the dental office, with gum isolation and clinician-controlled timing | Suits a patient who wants a concentrated appointment and can be screened for sensitivity |
| LumiBrite take-home | 16%, 22%, or 32% carbamide peroxide | Custom tray used at home, with wear time selected according to the product strength and dental instructions | Suits a patient who wants adjustable sessions and can follow tray and gel instructions |
| Opalescence | Hydrogen peroxide or carbamide peroxide, depending on product | Professional take-home trays and in-office options, depending on the product selected | Requires comparing the exact formula and protocol, not just the brand name |
| PolaDay | Hydrogen peroxide formula | Tray-based take-home delivery | May fit someone who prefers a home tray, with wear time and sensitivity managed through the product instructions |
| Zoom | Product-specific whitening formula | Commonly associated with a supervised in-office appointment | May fit someone prioritising chairside oversight and a defined appointment |
How to make the comparison clinically useful
Opalescence overlaps with LumiBrite because it includes professional tray and in-office pathways. PolaDay is generally considered alongside other tray-based systems, while Zoom is associated with supervised chairside whitening. The practical question is not which brand sounds strongest. It is whether the peroxide carrier and delivery method suit the patient's teeth, schedule, and tolerance.
For LumiBrite's reported shade outcomes, see the earlier product discussion in section 2. Those figures are product-level claims, not a promise that every patient will reach the same result. Existing crowns, veneers, bridges, implants, and tooth-coloured fillings also retain their original shade, so a faster change in natural enamel can make a mismatch more visible.
Sensitivity should carry the same weight as speed. Higher-concentration chairside treatment places more of the process under professional control, while a take-home tray allows the clinician to modify wear time or pause between sessions. That difference matters for a patient with a history of sharp sensitivity, exposed roots, or uncertain enamel condition.
A clinician's screening questions are more useful than a simple fastest-whitening ranking. They connect the chemistry to the person using it, which is what determines whether LumiBrite's chairside or take-home format is the better match.
Who Lumi Brite Is Best For and Who Should Skip It
A brighter smile isn't automatically a good reason to whiten today. The first question is whether the teeth, gums, and restorations can tolerate the treatment and produce an even-looking result.
Stronger candidates
LumiBrite is more likely to fit someone with generally healthy natural enamel and surface or age-related staining from drinks, foods, or tobacco. A person who wants a professionally guided treatment and can follow a defined tray or chairside protocol may also be a practical candidate.
Restorations require a separate conversation. Composite, porcelain, crowns, veneers, bridges, implants, and tooth-coloured fillings don't whiten like natural teeth. If those restorations sit near the front teeth, whitening natural enamel first may leave a shade mismatch that requires later replacement or adjustment.
The most reliable starting point is an examination, not a product page. A dentist can assess the cause of discolouration, record a shade baseline, inspect the gums, and identify decay or enamel damage before peroxide is applied.
Situations that call for caution
Speak with a dental professional before choosing a higher-concentration take-home gel if you have recession, exposed root surfaces, a history of sharp sensitivity, cracked enamel, or a tooth that hurts in one specific spot. Those signs may indicate a problem that whitening won't solve.
A person with several visible restorations may also need a cosmetic plan before bleaching. Whitening first and replacing a restoration later can be sensible in some cases, but the timing should be planned so the new restoration matches the settled natural shade.
Reasons to postpone or skip whitening
Do not use whitening as a workaround for untreated dental disease. Active decay, inflamed or untreated periodontal tissues, open pulpal exposure, and significant enamel damage deserve assessment first. Pregnancy, nursing, and treatment for anyone under 16 should also be discussed with a clinician, with manufacturer deferral guidance taken into account.
Deep internal stains can respond less predictably than common surface stains. Fluorosis banding, medication-related changes, trauma-related colour, and a single darkened tooth may need a different approach than peroxide whitening.
A sensible screening question: “Will whitening make my natural teeth brighter while leaving my visible dental work unchanged?” If the answer could create a mismatch, solve the shade plan before starting gel.
Choosing Between Chairside and Take-Home Lumi Brite
If your event is in three days, a supervised appointment may fit better than waiting through repeated tray sessions. With three weeks available, take-home trays may offer more control, especially if sensitivity or visible restorations affects the plan. The right choice depends on how quickly you need a change, how your teeth respond, and whether your dental work will match the final shade.
Chairside LumiBrite suits people who value speed and professional monitoring. The chemistry and treatment times described earlier support a concentrated visit, while the dental team manages isolation, gel placement, and comfort. That direct oversight can matter if you are unsure how your teeth or gums will react.
Take-home LumiBrite suits a flexible schedule or a patient who wants the pace adjusted. Rather than committing to one intensive appointment, a clinician can select a suitable starting approach, review sensitivity, and change the routine when needed. The tray format also makes it easier to pause between sessions.
Use these questions to narrow the decision:
- Timeline: An approaching event favours chairside treatment. A less urgent goal leaves room for trays.
- Sensitivity history: Previous sharp sensitivity or exposed areas calls for a cautious, adjustable plan, with the clinician deciding whether a gentler option is appropriate.
- Starting shade: A darker shade may make faster treatment appealing, but stain type and tooth structure still affect the result.
- Restoration profile: Crowns and bonding do not whiten with natural teeth. If several are visible, shade matching may matter more than speed.
A combined plan can also be discussed, such as supervised chairside treatment followed by selected take-home maintenance. It should follow professional instructions, not involve adding peroxide independently.
Both options belong to the LumiBrite system, yet the experience differs in procedure, carrier, contact time, tray fit, and oversight. Those practical differences, rather than the product name alone, should guide the choice.
Maintenance, Touch-Ups, and Knowing When to Stop
Whitening results don't stay fixed forever. Everyday exposure to staining foods, drinks, and tobacco can gradually alter natural tooth colour, while restorations remain unchanged. Maintenance should therefore protect the shade without turning every minor change into a reason for repeated high-concentration treatment.
Start with the habits that reduce new stain exposure. Rinse with water after strongly coloured drinks, keep up routine brushing and flossing, and ask your dental professional whether a whitening toothpaste is appropriate for your enamel and sensitivity. A straw may reduce contact with some beverages, but it doesn't replace regular dental care or make acidic drinks harmless.
Build maintenance around your response
A dental office can help decide whether a touch-up is appropriate and which concentration to use. A lower-concentration take-home protocol may provide more control for someone who develops sensitivity, while a person with persistent discomfort may need an examination rather than another session.
Store remaining gel exactly as the label directs, with the syringe capped and protected from heat and light. Don't use expired material, and don't assume that a stored syringe remains effective indefinitely after opening.
Stop signals matter
Pause whitening and contact a dental professional if you notice:
- Persistent sensitivity: Sharp sensations that continue after the session or worsen with each application.
- Gum irritation: Whitening or soreness that doesn't settle after removing the tray.
- A single painful tooth: Localized pain can point to decay, a crack, or pulpal irritation rather than ordinary whitening sensitivity.
- An uneven result: A restoration or internally discoloured tooth may need separate treatment planning.
The central maintenance rule is simple: don't respond to disappointing colour by increasing concentration, gel volume, or wear time on your own. A reassessment can reveal whether the problem is stain type, tray fit, restoration mismatch, or an untreated dental condition.
DentalHealth.com offers professional-grade at-home whitening gels and related sensitivity and remineralization products, including LumiBrite options, with product information to help you compare protocols. Visit DentalHealth.com to review the available whitening products and choose questions to discuss with your dental professional before starting.