
Teeth Whitening Kit How to Use Step by Step
You've opened the whitening kit, set the trays on the bathroom counter, and found a syringe with a percentage printed on it. Now you're wondering how much gel to squeeze out and whether you can leave the trays in while you sleep. A friend's overnight routine might sound convenient, but it isn't a substitute for your product's instructions.
Using a teeth whitening kit starts with matching the gel to its labeled wear time, not filling the tray or setting the longest timer you can tolerate. Before that first session, there's another check worth making: whether the teeth you want to lighten are natural teeth, restorations, or a mixture of both.
Teeth and Restorations to Sort Out First
A front-tooth crown won't catch up with its neighbors just because you keep bleaching. Peroxide lightens natural tooth structure, while crowns, veneers, implant crowns, and tooth-colored fillings generally retain their manufactured shade. The American Dental Association's whitening guidance identifies restorations as an important limitation and recommends addressing dental disease before treatment.
Say a crown currently blends into your smile. If the surrounding natural teeth become lighter, that same crown may suddenly look darker. The crown hasn't changed, but its surroundings have.
That's why treatment order matters more than achieving the whitest possible shade. When a new visible restoration is planned, discuss whitening the natural teeth before the dentist selects its final color. Don't assume an existing restoration can be bleached to match afterward.
Identify what you're trying to lighten
Different kinds of discoloration need different expectations:
- Surface staining: Coffee, tea, wine, tobacco, and strongly colored foods can contribute to discoloration. A dental cleaning may be useful before deciding how much bleaching you need.
- Deeper natural color: Discoloration within a tooth may respond differently from surface staining. Don't promise yourself an even result before a dentist has identified the cause.
- Restorative material: Ceramic, tooth-colored fillings, crowns, and sealants don't reliably lighten with peroxide. More gel won't solve that mismatch.
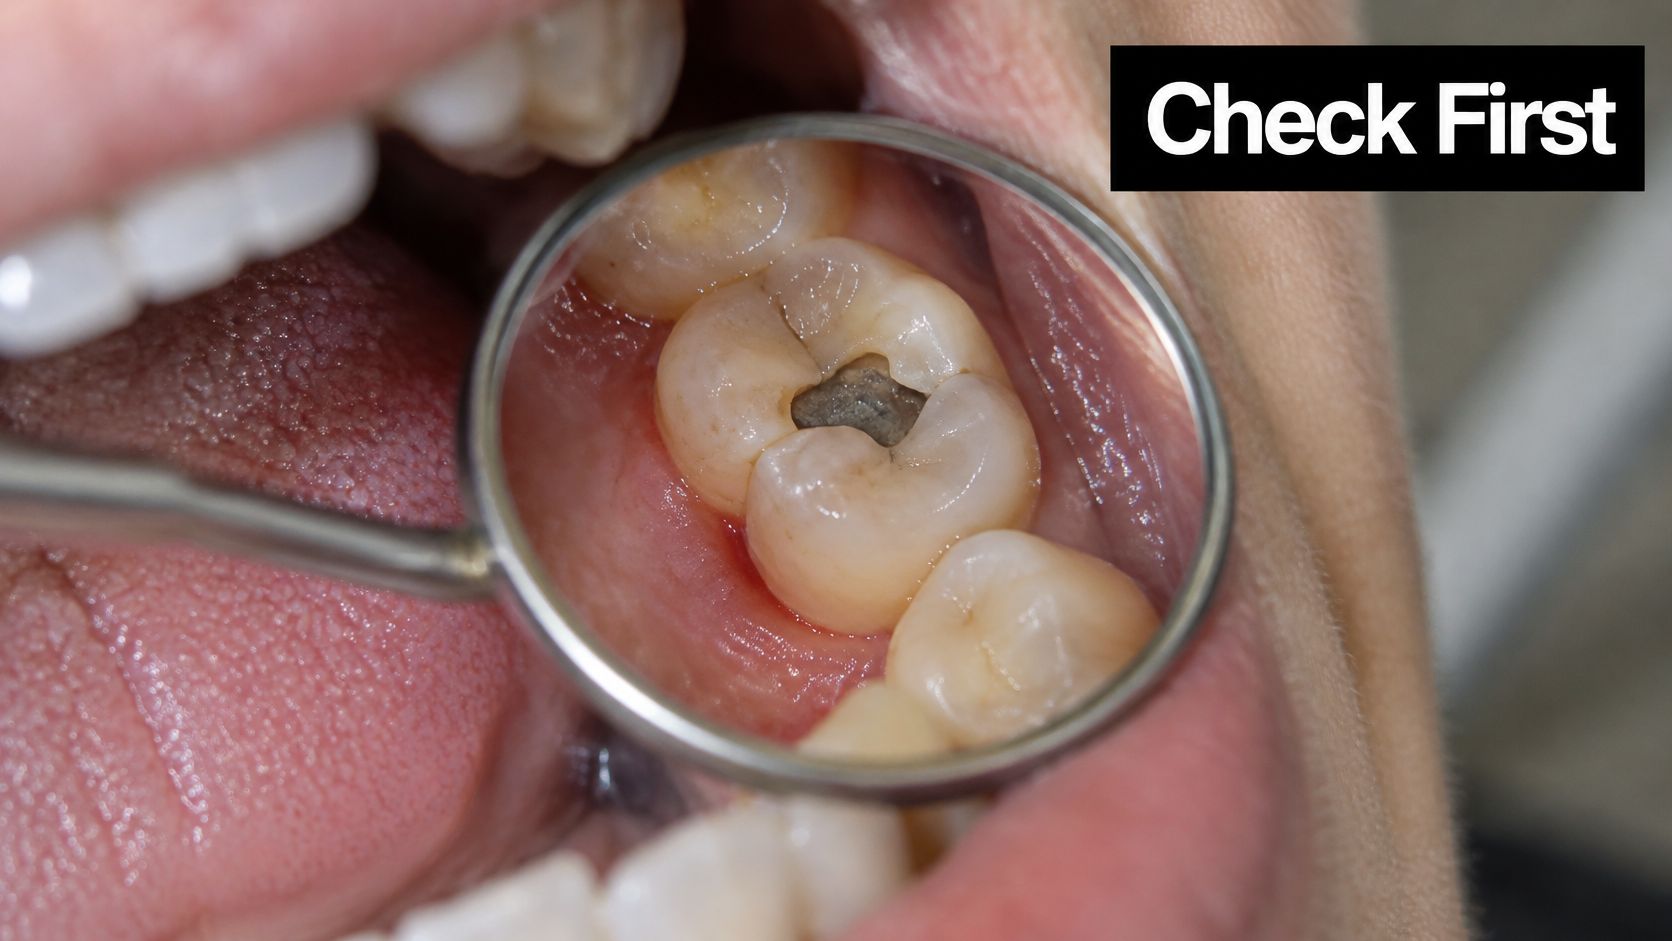
An isolated dark tooth deserves an assessment rather than a concentrated spot of bleach. The same applies to a gray-looking exposed root or a patch that looks different from the rest of the tooth.
A visible filling is also a reminder to check what's natural tooth and what's restorative material.
Treat problems before adding peroxide
Pause if you have untreated decay, bleeding or inflamed gums, exposed roots, or a broken filling. Bleaching doesn't repair these problems, and peroxide can make already sensitive areas uncomfortable.
Have the tray checked, too. A tray that pinches, rocks, or pushes gel onto the gum line needs attention before you begin a prolonged course.
Our guide to teeth whitening with fillings can help you prepare questions for that appointment. Point out every visible restoration, including older bonding you may no longer think about.
Before opening the syringe: If a front tooth has a visible filling or crown, book a shade check. A coordinated smile is a better goal than lighter natural teeth beside a restoration that no longer matches.
Wear Times That Match the Gel
Two people can wear trays overnight and have very different experiences because they're using different gels. One may be following an approved overnight schedule; the other may be exceeding the instructions for a stronger product.
There's no universal whitening-kit timer. Find both the peroxide type and its percentage on your syringe or packaging before choosing a session length. If either is missing, don't guess.
The American Dental Association describes at-home systems containing approximately 10% to 38% carbamide peroxide, with a cited systematic review reporting daily applications of 2 to 10 hours and courses lasting 6 to 28 days. Those are reported ranges across protocols, not permission to choose any duration within them.
Wear time by whitening gel strength
Use this table to identify the instruction you need, not to replace the leaflet. The product's specific formulation and directions control the timer.
| Gel strength | Daily wear | Course length | What changes |
|---|---|---|---|
| About 10% carbamide peroxide | Longer contact may be prescribed; overnight only when explicitly allowed | Follow the product's stated course | Milder gel may need longer contact, not extra gel |
| About 10–16% carbamide peroxide | Multi-hour or overnight use only when labeled | Follow the dentist's treatment plan | Common home-tray formulations still have product-specific schedules |
| Up to about 38% carbamide peroxide | Use the shorter session specified for that formulation | Follow the package or prescription | Stronger formulations require particular care with exposure and gum contact |
| Hydrogen peroxide home gels | Follow their own labeled sessions, not a carbamide-peroxide timer | Complete only the stated course | The peroxide type matters as well as the percentage |
A percentage alone doesn't tell the whole story. Hydrogen peroxide and carbamide peroxide aren't interchangeable, so don't compare their numbers as though they were the same ingredient. Likewise, a light attached to a mouthpiece doesn't authorize a longer session.
For more help interpreting tray instructions, use our guide to how long to wear teeth bleaching trays.
Product examples are not interchangeable schedules
Specific directions show why borrowing someone else's routine causes confusion:
- PolaNight 10: It can show a difference in as little as two hours, and its directions also allow overnight wear.
- PolaNight 16%: The trays can be worn for 90 minutes or put in before sleep for overnight whitening.
- Lumibrite 22%: Each treatment uses one to two hours of tray wear, with use allowed twice daily for 14 days.
These are separate product instructions, not steps on a universal concentration chart. Don't transfer the overnight option from one formulation to another just because both use trays.
Write the permitted duration and frequency somewhere you can see them before loading the gel. If your dentist has given you personalized instructions, resolve any apparent conflict with the package before starting.
Timer rule: Match the product name, peroxide type, and percentage. Ignore every timer that belongs to a different gel.
How to Load and Wear the Kit
A tray should hold a controlled amount of gel against your teeth. It shouldn't feel like a reservoir of liquid, and gel shouldn't spread across your gums when you seat it.
Use the visual sequence as a handling reminder, but take the wear time from your own label. Any generic timer shown in a diagram does not override your formulation's instructions.
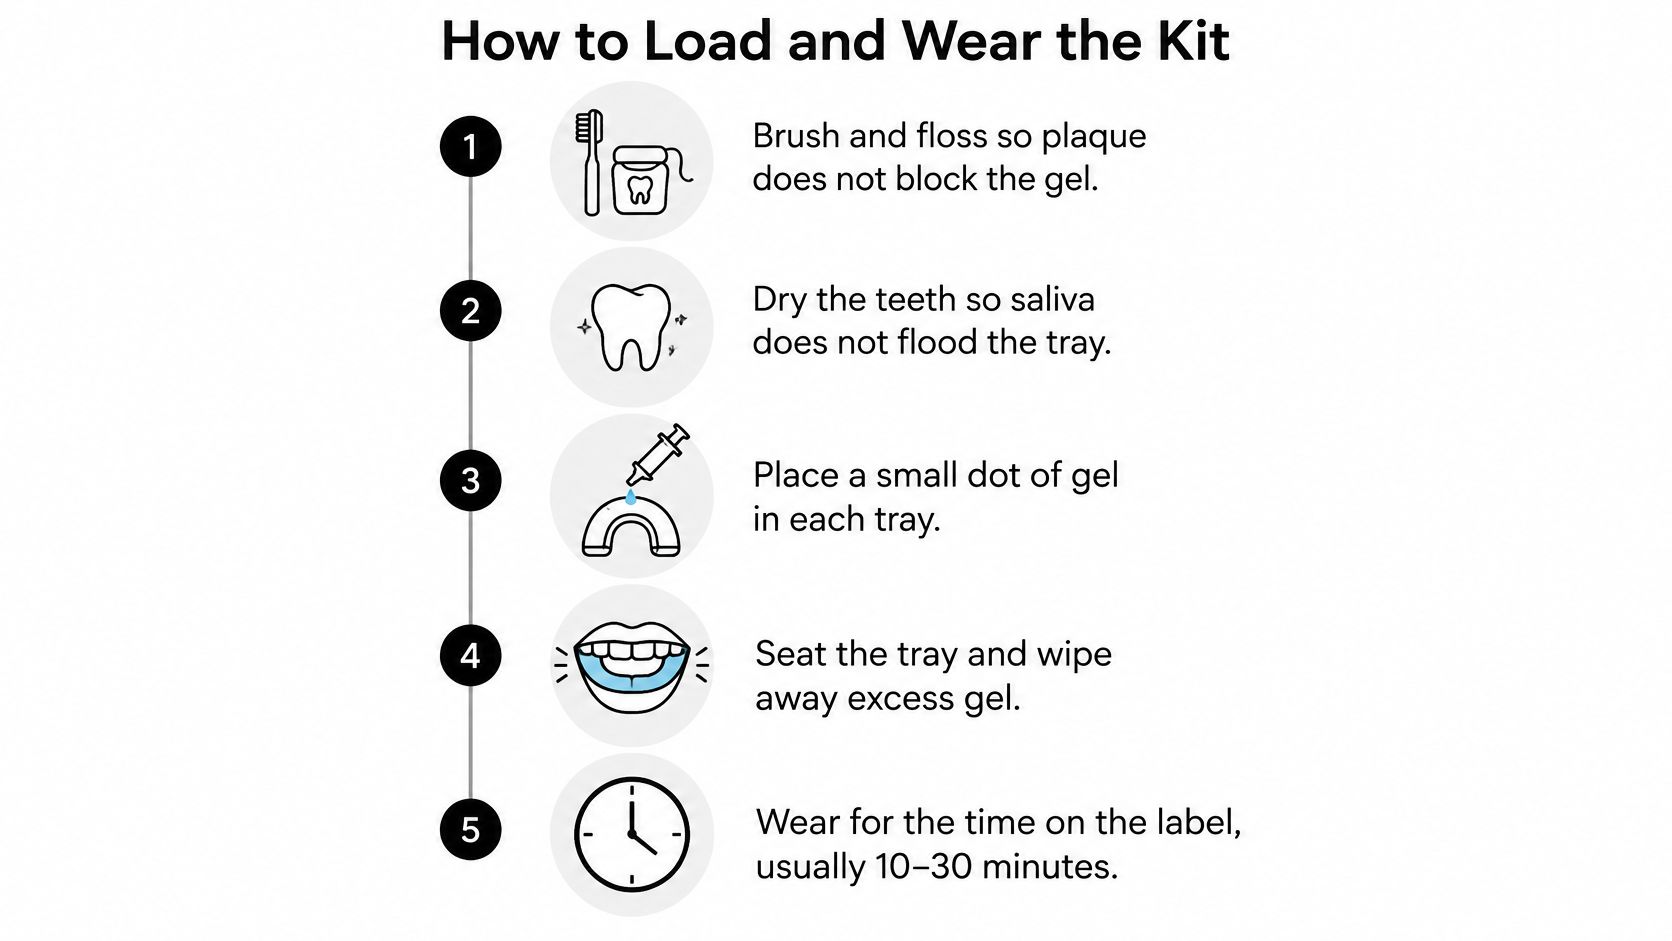
Prepare, load, and seat the tray
- Brush and floss gently. Remove food debris and plaque before application so the gel can contact the teeth. Don't scrub hard to prepare for whitening or floss forcefully enough to injure the gums.
- Manage excess moisture. Swallow, then gently blot the tooth surfaces if your instructions call for drying. You don't need to make your mouth completely dry; the aim is to avoid seating a tray flooded with saliva.
- Apply a barrier only when directed. Before a Lumibrite 22 bleaching session, rub a little petroleum jelly onto the lips and gums as instructed. Don't assume every kit requires this step or coat the tooth surfaces with it.
- Measure the gel rather than filling the tray. With compartmented trays, place a small drop in each directed tooth compartment. With a simpler tray, the directions may call for a thin line along the tray's tooth-facing surface.
- Check the syringe instructions before dividing the dose. Where the kit specifies a full syringe for a dual-arch session, divide it between the upper and lower trays as directed. That isn't a universal syringe rule: syringe sizes and the number of treatments they contain differ.
- Seat each tray with light pressure. Tap or press gently so the gel contacts the teeth. Clenching or firmly squeezing the tray only forces material toward the gums.
- Remove visible overflow immediately. Use a clean finger or cotton swab to wipe gel off the gum line and lips. If there's substantial overflow, review the amount you loaded before the next session rather than accepting leakage as normal.
Start the timer only after checking the fit
- Confirm that the tray sits comfortably. It should stay seated without pinching or requiring a clenched jaw. A retainer is suitable only if your dentist has approved it for the particular whitening protocol; don't assume every clear appliance is a whitening tray.
- Wear it for the prescribed session. Set a timer and don't add more gel partway through. A PolaNight 22% syringe is intended for one session, while splitting a PolaDay treatment into separate shorter sittings uses more product.
- Remove the trays when time is up. Ease them off without pulling sharply against the gums. If significant pain, soreness, or burning develops before the timer finishes, remove them early rather than pushing through.
There's no need to imitate an office treatment by extending a home session. An ADA clinical text describes a randomized 90-patient split-mouth trial in which home treatment with 10% carbamide peroxide produced bleaching comparable to in-office 35% hydrogen peroxide, although schedules and individual results differ.
For a moving demonstration of tray handling, use the video alongside, not instead of, your written product directions.
Aftercare When the Trays Come Out
Start aftercare as soon as you remove the trays. Rinse your mouth with tepid water, brush gently with a mild toothpaste, then rinse the trays and let them dry thoroughly before storing them.
Use comfortable water, not a hot rinse. If your mouth feels tender, there's no benefit in following the session with a strong, stinging mouthwash.
Check around the gum line for remaining gel rather than brushing harder. The goal is to clear residue, not polish the new shade into place.
Clean the tray without damaging it
Rinse every tooth compartment and inspect the tray in good light. Follow its cleaning instructions for any residue that water alone doesn't remove, and avoid hot water that could distort the appliance.
This is the part of the routine that makes the next session easier to prepare.
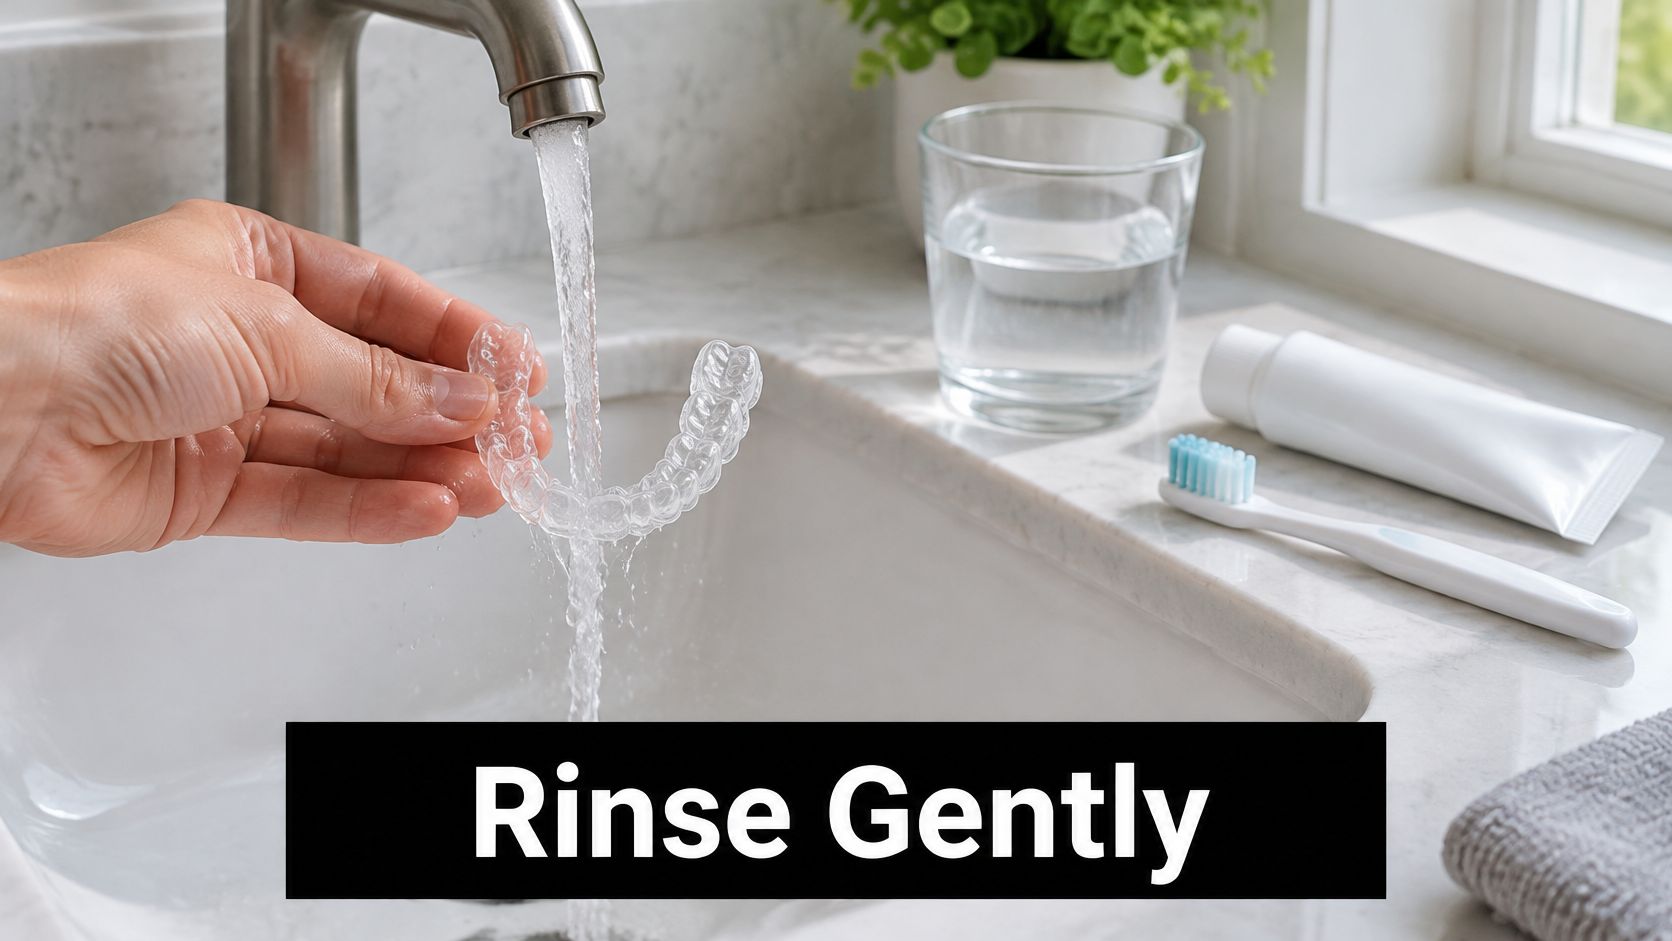
- Inspect before drying: Don't put away a tray with visible gel or debris in its grooves.
- Let it dry fully: Shake off excess water and allow the tray to air-dry before closing the case.
- Keep the shape intact: Don't use boiling water, a dishwasher, or another heat source to speed cleaning or drying.
- Check it before reuse: If it looks damaged, no longer fits, or develops a persistent film, seek cleaning or replacement advice.
Keep the rest of the evening simple
Follow any food and drink restrictions printed on your kit. You don't need to invent a rigid white-food diet or assume that one colored food cancels the entire treatment.
A practical evening routine is to whiten after dinner, complete the rinse and cleanup, and choose water afterward. If your teeth feel sensitive, avoid very cold or acidic drinks rather than testing the discomfort repeatedly.
Coffee, black tea, red wine, cola, soy sauce, berries, and smoking are reasonable things to set aside immediately afterward, particularly when your product instructions recommend avoiding staining substances. Don't interpret this as a precise, universal stain-absorption window.
Keep aftercare gentle. Extra scrubbing and extra bleaching aren't ways to protect the result.
For dry lips, apply a plain lip balm after removing residual gel. Persistent gum changes or mouth soreness need attention rather than another layer of balm.
If you use sensitivity toothpaste or a remineralizing paste, follow its own directions between sessions. Don't mix it into the bleaching gel or add it to the tray unless your dentist specifically instructs you to.
Finish with a storage check: dry trays, tightly capped syringe, and storage according to the package, away from inappropriate heat. Refrigerate only when the product instructions call for it, and don't bring the next session forward because the equipment is ready.
Sensitivity and Other Setbacks
A sharp zing when cold water touches a tooth is a reason to pause, not proof that the gel is working especially well. In a randomized comparison summarized in the Cochrane review of home-based tooth bleaching, 20% of participants using 5% carbamide peroxide reported temporary sensitivity after one week, compared with 53% using 10% carbamide peroxide.
That comparison doesn't predict your personal reaction. It does show why increasing the concentration isn't a shortcut to the same experience.
Whitening setbacks and what to change
| Symptom | Likely cause | What to do |
|---|---|---|
| Zing with cold drinks | Peroxide-related tooth sensitivity; stronger formulations can increase the risk | Pause and ask about shortening the next permitted session or skipping a day; trial shorter wear before an approved overnight routine |
| White or sore gums | Gel contacting soft tissue, often through overflow or poor fit | Remove the tray, rinse, and pause until the tissue returns to normal; correct loading or fit before restarting |
| Pain or sores beyond several days | Persistent irritation or an untreated dental problem | Stop and see a dentist before another session |
Suppose cold water catches a tooth the morning after whitening. Don't immediately repeat the same session to finish the course faster. Allow the symptoms to settle and ask your dentist whether the schedule, strength, or tray needs adjusting.
For PolaNight 10, the sensitivity instructions provide a cautious progression: try a two-hour treatment first, then consider overnight treatment the next time only if there are no adverse reactions. That option belongs to that product, not every gel labeled for home use.
Gum changes need a different response
White patches on the gums after tray use suggest that gel sat on tissue. Remove the tray and rinse away the gel; don't apply more bleach to make the surrounding area match.
Before restarting, inspect where the tray edge sits and how much gel you used. A tray that repeatedly leaks despite careful loading needs a fit check, not a stronger barrier or firmer bite.
Severe sensitivity, ulcers, or persistent irritation warrant stopping treatment and contacting a dentist. Don't wait for several more applications to see whether your mouth gets used to it.
- A brief reaction that settles: Review the permitted schedule and discuss a gentler approach before continuing.
- Repeated discomfort at the same spot: Ask for an assessment rather than treating the whole mouth more aggressively.
- Pain that persists or worsens: Stop bleaching and arrange dental care.
A slow start isn't an instruction to increase the dose
Home whitening can lighten teeth, but the evidence doesn't support a guaranteed shade change on a fixed personal deadline. The Cochrane review found benefits compared with placebo over the treatment periods it examined, while rating the certainty of evidence low to very low.
Judge progress under similar lighting rather than repeatedly checking wet teeth in different mirrors. If you're unsure whether anything has changed, ask your dentist to assess the result before changing the plan.
Extra gel never fixes a stall. It's more useful to review the diagnosis, the product instructions, and whether treatment remains appropriate.
Choose a Known Kit and Begin
If a kit has no clear label or instructions, leave it capped. A UK Trading Standards report cited by the Royal College of Surgeons in Ireland in 2024 found that some home-use whitening kits sold through the mail might be unsafe. The finding concerns the products covered by that report, not every online retailer.
Choose a kit that identifies its peroxide type and strength, wear schedule, and storage directions. Attractive packaging or an LED mouthpiece cannot replace those details.
Choose instructions you can actually follow
- Already have dentist-fitted trays: Use a formulation and schedule your dentist approves for those trays.
- Considering an overnight routine: Check that the exact product allows overnight wear and follow its instructions.
- Considering stronger gel: Choose a strength suited to your treatment plan. A higher percentage does not mean every gel should stay in the tray for the same amount of time.
Wear time follows the gel's strength and instructions, much like cooking time depends on the recipe. The product label is the authority. Whitening natural teeth before color-matching crowns or fillings also matters: restorations do not whiten like natural teeth, so ask your dentist about shade matching before treatment.
Our guide to teeth whitening kits recommended by dentists can help you compare products without treating every kit as interchangeable. DentalHealth.com stocks whitening lines such as PolaNight, PolaDay, and Lumibrite, so you can compare the gels discussed in this guide.
Use a clearly identified gel for its labeled duration. If key instructions are missing, leave the syringe capped until you can resolve them.
Before starting, confirm that your mouth is comfortable and the tray fits properly. Set out a timer and cleanup supplies, then follow the product's directions.
DentalHealth.com offers at-home whitening gels and kits, along with sensitivity toothpastes and remineralizing pastes. Visit DentalHealth.com to compare product descriptions and choose a formulation that fits your dentist's advice and tray requirements.