
Teeth Whitening Trays Before and After: Realistic Results
Most shopping advice treats a glossy teeth whitening trays before and after photo as a verdict. If the after shot is bright, the product worked, and a stronger gel would have worked faster. That shortcut skips the only questions that predict your result: what is discoloring the teeth, whether restorations are in the smile, and whether you can keep the routine going.
A shade reading is not the same thing as a smile you like in daylight. A modest, even change can look better than a larger, patchy one. Light, camera exposure, dry enamel, and a picture taken minutes after the trays come out can all flatter the frame. Spend a little time on those limits before you spend money on a kit.
Why Before and After Photos Can Mislead You
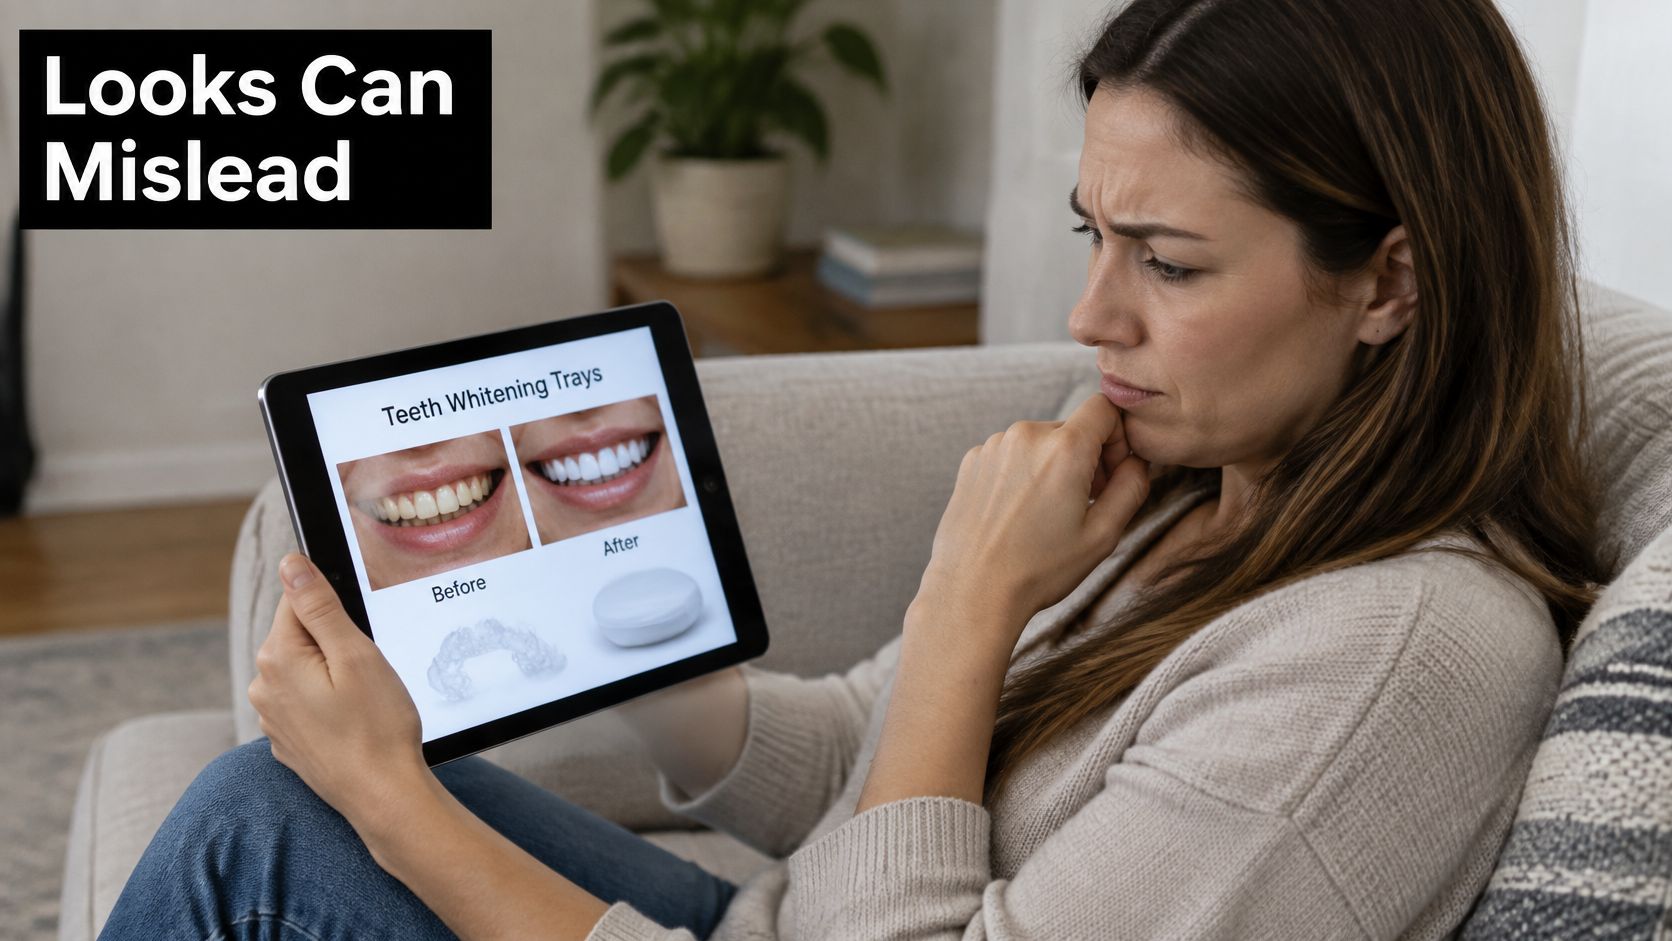
You are on the couch with a tablet, flipping paired smiles. The dull shot sits on the left. The bright shot sits on the right. It is natural to wonder whether your teeth could land in that same place if you ordered the trays tonight.
They might not, and that isn't a failure of effort. A shade-guide improvement measures color on natural tooth structure. An attractive smile is a different judgment. It depends on evenness, on the cause of the color, and on whether a crown or filling is sitting in the frame. A small, even shift often reads as healthier than a bigger jump that leaves one tooth behind.
A car photographed in a showroom after a wash, and the same car after a week of rain, share the same paint. The conditions made the picture. Whitening galleries work in a similar way.
What the camera quietly changes
- Lighting: A window or a ring light can lift every tooth at once.
- Camera exposure: A brighter setting cleans the picture without cleaning the enamel.
- Dehydration: Teeth look lighter while they are dry, then settle as saliva returns.
- Timing: A shot taken right after you remove the trays catches a temporary look, not the color you will see at dinner.
The American Dental Association's whitening overview states that bleaching changes natural teeth, not tooth-colored crowns, implants, fillings, or other restorations. Whitening can therefore create a mismatch rather than a uniformly brighter smile. Trays also don't correct intrinsic discoloration from restorations, some medication-related staining, enamel defects, or fluorosis the way they treat many surface stains.
An impressive after photo is not a reason to raise the concentration or stretch the wear time.
That same overview notes that temporary sensitivity and gingival inflammation are common adverse effects. A painless-looking gallery can't tell you whether the routine would be tolerable in your mouth.
Read the picture for clues, not for a target shade. Notice the light, the dryness, and whether every visible tooth is natural. The practical questions are what a course tends to feel like, what changes the outcome, and how to record your own baseline so you aren't arguing with someone else's camera.
What to Expect Over the Course of a Whitening Plan
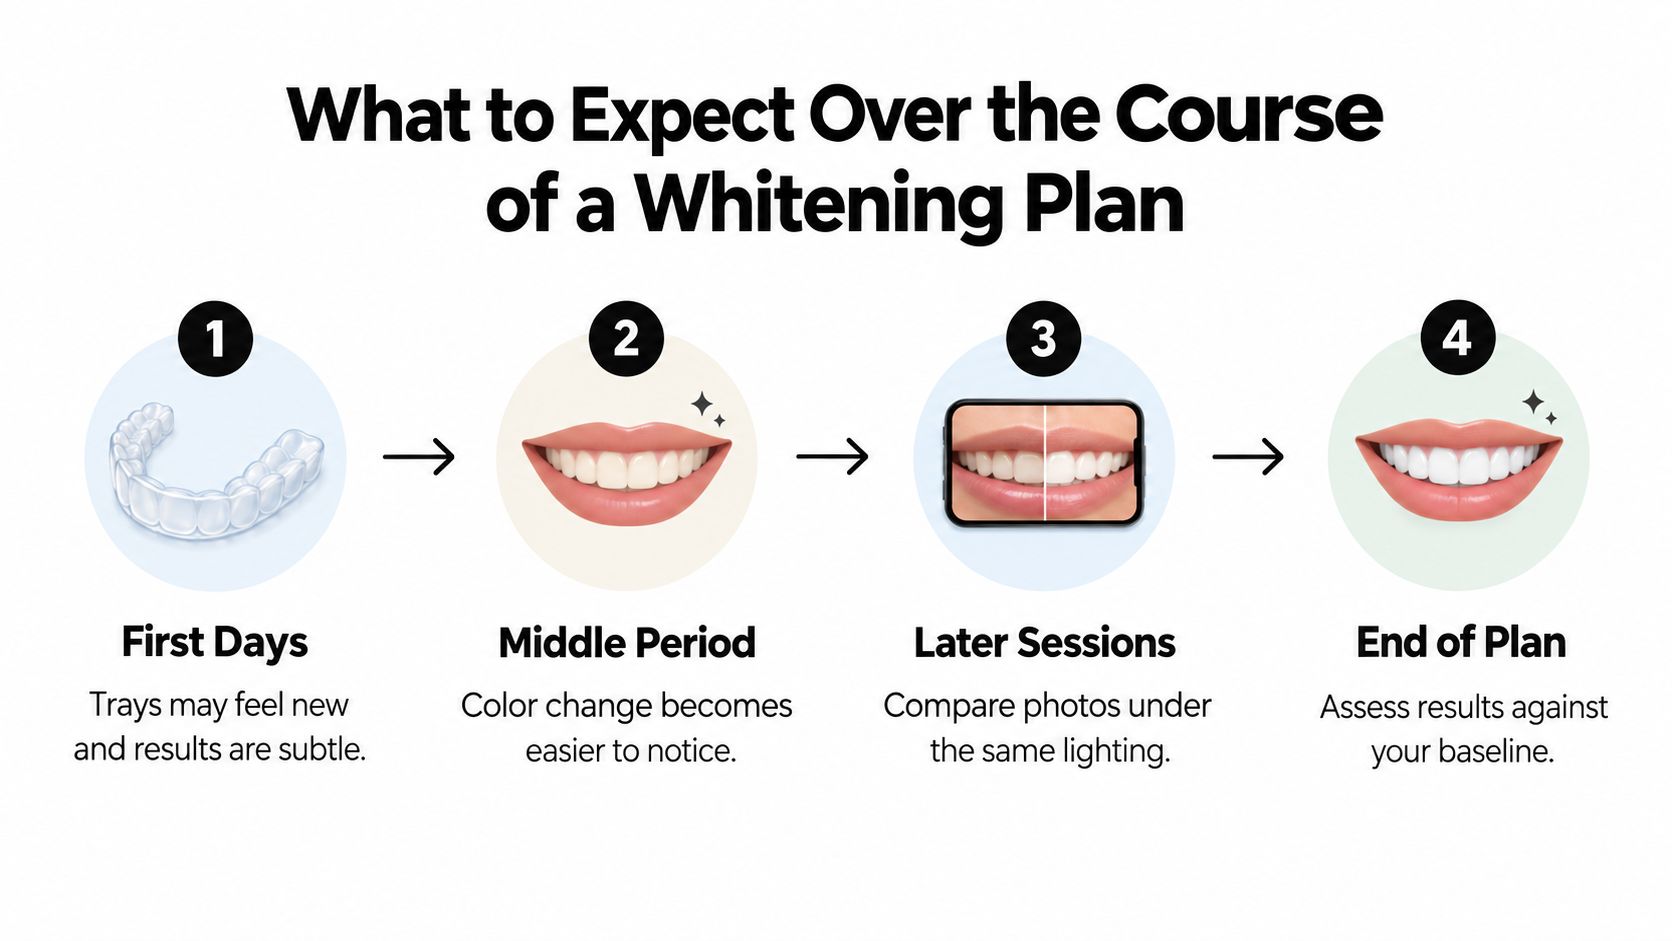
Treat the course as checkpoints, not a single reveal. Comparing the first evening with the third rarely shows much. Comparing images taken at the same points, in the same light, tells a clearer story. Nothing here is a guaranteed number of days or shades. The gel, the fit, and how often you wear the trays all move the pace.
The first days feel mostly like equipment
The trays are new in your mouth. You notice the edges, the taste, and whether gel creeps toward the gums. Color change is usually subtle. If you stare after the first wear, you mostly see the same smile, sometimes a little drier and briefly lighter. That early look is a poor scorecard. Use it to learn the routine: how much gel, how the tray seats, and how your teeth feel an hour later.
Say you wear the trays after dinner and check the mirror before bed. Any lift you think you see may fade by morning once the enamel is wet again. That isn't the whitening "wearing off" in a dramatic way. It's a reminder to judge color at a calm, repeated moment, not at the peak of dryness.
The middle is when comparison starts to help
If your stains are the kind trays can reach, this is when a change is usually easiest to notice. Friends may not comment. You might see it only when an older photo sits next to a new one from the same corner of the bathroom. Consistency matters more than intensity. Skipped nights stretch this stretch of the plan. Wearing the trays as the product directs keeps the checkpoints comparable.
There still isn't a shade everyone should hit. One person with tea stains may notice a change sooner than a friend whose color sits deeper in the tooth. Both can be using the product correctly.
The finish is a decision, not a trophy
Later sessions are for comparing under the same lighting, not hunting a bigger jump. At the end you choose whether to continue, pause, or switch to a gentler routine. A pause is a normal decision. It isn't a failed course. Results aren't guaranteed, and stopping while the smile still looks even can be the better call.
Seeing the wear itself, before any gel is loaded, makes those checkpoints easier to picture.
How Stain Type Shapes Your Whitening Outcome
Two people can use the same trays and walk away with different smiles. Galleries hide that split because they show the winner, not the starting stain. The useful question is where the color lives.
Think of a sponge. Coffee on the surface wipes off more readily than color that has soaked into the material. Surface stains from coffee, tea, wine, and tobacco often sit where a peroxide gel can reach them through enamel. Intrinsic discoloration sits within the tooth. It may come from the way the tooth formed, from trauma, or from medicines taken years ago. Trays don't move those causes on the same schedule, and some of them barely move at all.
A fuller look at what causes tooth discoloration helps you name your own pattern before you judge any photo.
Natural teeth and restorations don't share a result
Bleaching changes natural enamel and the dentin under it. It doesn't recolor a tooth-colored crown, implant crown, filling, or other restoration. Whiten the natural teeth beside a front crown and the crown stays put. The smile can look more uneven than it did on day one, even though the gel "worked."
| What you see | How trays tend to act |
|---|---|
| Brown lines from coffee or tea | Often the most predictable surface change |
| A single dark tooth after an old injury | May lag behind the neighbors |
| White flecks or bands | Can look more obvious if the background lightens |
| A crown or filling in the smile | Stays the original lab color |
Match the cause before you trust an after shot
Enamel defects, fluorosis, and some medication-related staining respond differently from a surface film. Fluorosis can leave chalky patches. If the surrounding enamel lightens and the patch doesn't, the contrast grows. Medication-related bands can need a different plan entirely, sometimes one that isn't trays.
Before you interpret any before-and-after, ask a dentist to look for restorations, decay, cracks, and enamel defects. Decay under a whitening plan isn't a cosmetic detail. Peroxide against a cracked or decayed tooth is a reason to stop and get it checked, not a reason to buy a stronger syringe. A five-minute exam beats a month of comparing your face with a stranger's gallery.
How Gel Concentration and Sensitivity Affect Your Pace
"Stronger gel, faster whitening" is the line most ads imply. The evidence is pickier than that. An updated systematic review of 32 studies found that at-home bleaching produced lower sensitivity intensity and greater color change on one measurement than in-office treatment, though the evidence quality was low. It found no significant difference in the overall risk of sensitivity or in shade-guide-unit change between the techniques, as reported in this systematic review of at-home and in-office bleaching.
So a higher-strength product is not automatically the better whitening. As noted earlier, sensitivity and gum irritation are the common adverse effects. They become more prevalent at higher concentrations, and they are generally mild and temporary. For some people, sensitivity peaks early and eases over about a week. Don't treat that week as a schedule. It doesn't apply to every gel or every mouth.
When pain should change the plan
Ordinary zings with cold air are different from pain that stops you mid-task. Sharp pain is a reason to pause, not a reason to "push through" the syringe. Pre-existing sensitivity should change the plan before the first wear: shorter sessions, a lower concentration, or a delay until a dentist has checked recession, cracks, or decay.
- Pause after sharp pain: Give the teeth a break instead of adding nights to prove the kit works.
- Watch the location: Severe or localized pain can point to an untreated dental problem, not ordinary bleaching sensitivity.
- Don't read comfort as power: A painless course is not proof of superior whitening. It may be a gentler dose on stains that were easy to move.
A custom-fitted tray hugs the teeth and keeps more gel off the gums than a loose, one-shape tray. Less gum exposure means less of the burning, redness, or white spotting people blame on "strong teeth" when the gel was on soft tissue. If irritation shows up, wipe away the extra gel and stop until the tissue looks normal. Practical notes on teeth whitening gel side effects are worth reading before you lengthen a wear time on your own.
The best result is the lightest shade you can keep without a routine that hurts too much to finish.
A slower course you can stand beats a stronger product that lives in a drawer after night three. Whitening you abandon isn't faster. It's unfinished.
Documenting Results So Your Photos Mean Something
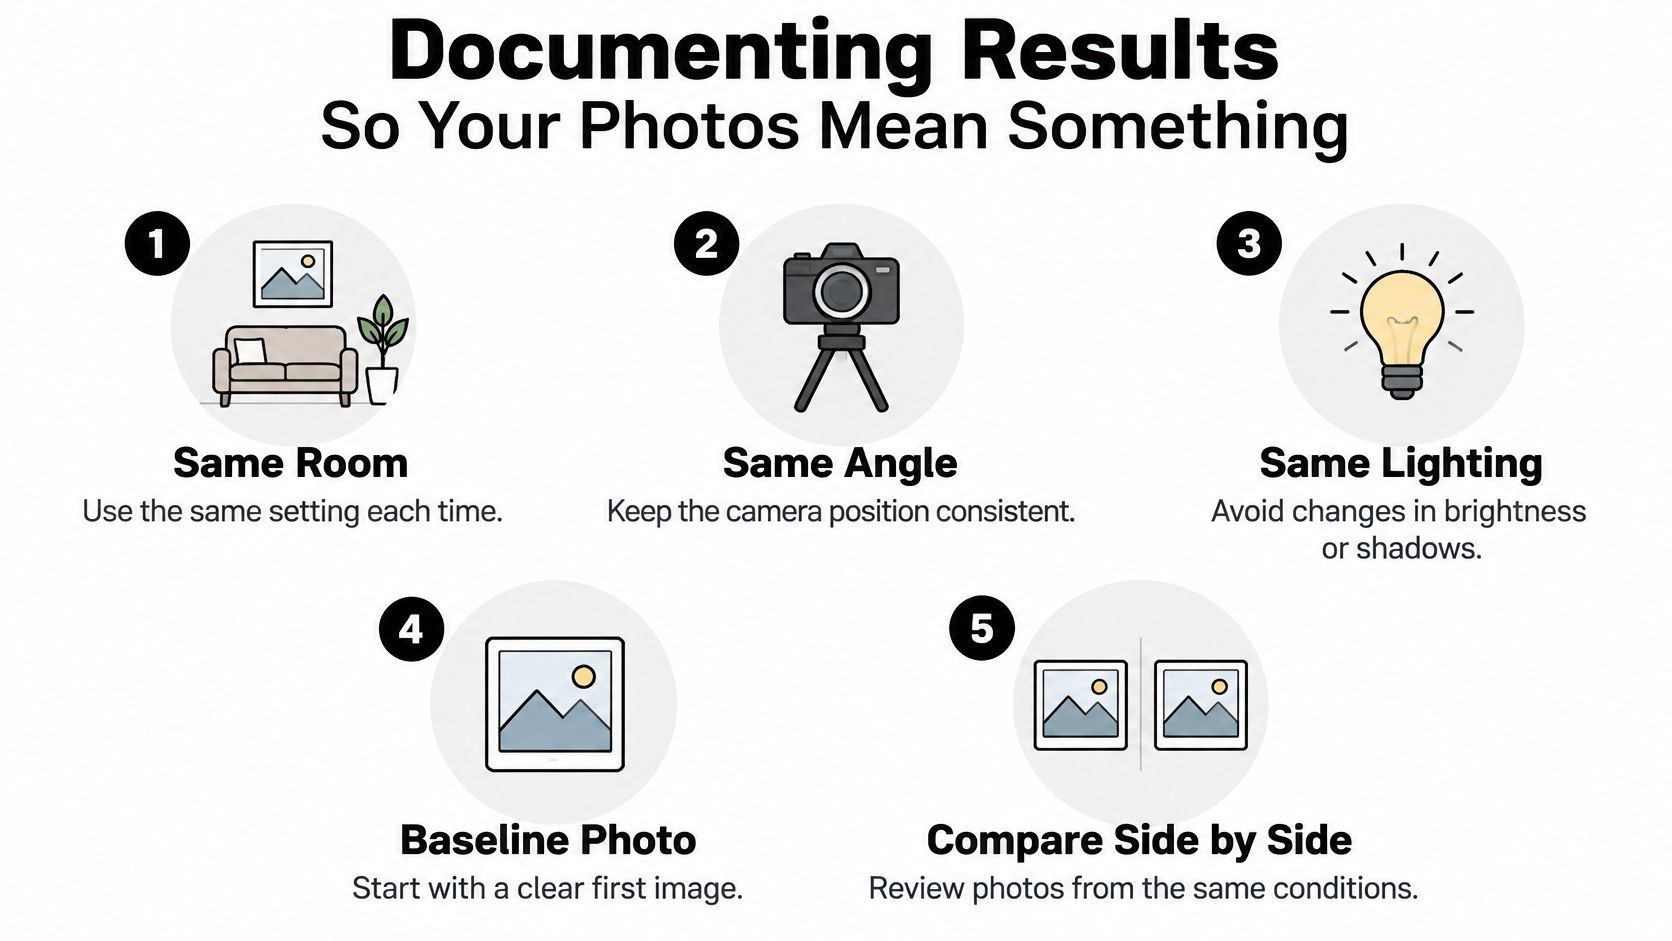
A photo from a different room, a different angle, or right after brushing tells you almost nothing about change over time. Your own teeth whitening trays before and after set only works if the conditions stay boring on purpose.
Build one setup and refuse to "improve" it
Pick the setup on a normal day, before the first session, and write it down.
- Same room: Face a window or a lamp you can turn on every time. Don't chase a "better" bathroom next week.
- Same angle and distance: Phone at lip level, arm's length, or propped on a book. A closer lens makes teeth look larger and sometimes lighter.
- Neutral background: A plain wall beats a bright shirt or a yellow lamp that throws color onto enamel.
- Shade reference in the frame: A tab from a whitening shade guide, held beside the smile, gives you something more stable than memory.
Take the baseline photo before the first tray, when teeth are normally wet, not after a long whitening wear. Dehydrated enamel looks lighter and will make later photos seem like a relapse. Repeat at fixed points, such as before a session once or twice a week, not after every tray while teeth are dry.
Keep a log the dentist can read
| Field | What to write |
|---|---|
| Date | The day of the photo, not "around last week" |
| Product | Name and concentration actually used |
| Wear | How long the trays were in |
| Symptoms | Zings, gum spots, or a tooth that aches in one spot |
| Notes | Lighting the same, or anything that changed |
That log is also how you spot a mismatch. If several natural teeth shift and a crown or filling stays put, the photos will show a patch, not a failure of the camera. Side-by-side frames from the same setup make that obvious. Random selfies from a restaurant do not.
If a localized ache shows up in the notes, bring the log and the photos to a dentist instead of buying a different strength to "finish the job."
How to Choose Between Whitening Options at DentalHealth.com
Choice is about fit, not about a promised shade. DentalHealth.com stocks professional-style gels and kits, including Opalescence and Zoom, plus high-concentration carbamide peroxide options such as PolaDay CP 35%. Those names describe a category. They don't document how many shades your teeth will move.
Match the product to the constraint you already know
Higher-concentration carbamide peroxide gels are aimed at people whose dentist has already said a stronger at-home gel is appropriate, and who have tolerated whitening before. They ask for careful tray fill, attention to gum contact, and a willingness to stop. They are a poor default if cold water already bothers you.
Familiar kit systems such as Opalescence or Zoom take-home gels suit someone who wants a named peroxide system and clear wear directions, and who can compare a slower stretch of use with a stronger syringe. Pick from your stain type and your history, not from an after photo on a product page. If a front tooth is a crown or a filling, ask the dentist whether whitening the neighbors will make that restoration look darker before you open anything strong.
Support products sit beside the gel, not instead of it. Sensitivity toothpastes and rinses such as Fluoridex, and remineralizing pastes such as MI Paste Plus, are there for people building a calmer routine around sensitive teeth. They don't replace a check for decay or a crack. Use them as part of a plan you can describe to your dentist, including which gel you are considering.
A phone line for questions and fast U.S. shipping matter when a syringe runs out mid-course or you need to confirm which concentration is in the box. They don't replace the exam. Bring the product name, your photos, and your symptom notes to the dental visit before you lock in a strength. If the dentist wants a different sequence, such as treating a problem tooth first, that advice outranks the label on the kit.
Putting Your Whitening Plan into Action Safely
The gallery shot is a tempting promise. Your own plan turns it into evidence you can use. Start with the cause. Have a dentist identify surface stain, deeper discoloration, restorations, decay, cracks, or enamel defects before you treat a photo as a goal. Then pick a pace you can repeat next week, not the strongest syringe on the shelf.
Document the start under one light, one angle, and one wet-tooth baseline. Repeat on that setup. When the frames show an even, modest change and your notes stay quiet, you are getting the result that matters. When a crown stays dark while neighbors lighten, the log has done its job. It showed a mismatch early, which is more useful than another week of gel.
Pain is a stop sign with a location on it. Generalized, mild sensitivity that fades can fit the common pattern described earlier. A sharp, local ache is a reason to pause and get the tooth checked. Chasing the whitest frame while symptoms pile up makes the routine something you quit, which leaves you with an unfinished course and a misleading last photo.
The concrete first step is small. Save the baseline picture today, before any tray goes in. Write the date on it. Then look at gels, kits, and sensitivity products only after you can say what kind of stain you have and whether a restoration is in the smile. A painless, even, sustainable result is a better target than the most dramatic teeth whitening trays before and after image on your phone.
DentalHealth.com carries professional-style whitening gels and kits, including Opalescence, Zoom, and PolaDay options, plus sensitivity and remineralizing products for a pace you can keep. If you are comparing trays with a realistic photo plan instead of a gallery fantasy, browse the whitening and sensitivity shelves and keep your baseline picture handy. Visit DentalHealth.com when you are ready to match a product to the plan you and your dentist can sustain.