
White Spots on Teeth After Braces Treatment: What to Do
If white marks appear when your braces come off, is the right question how to whiten them, or whether the enamel is still losing mineral?
White spots on teeth after braces treatment are usually an enamel-health issue before they're a whitening issue. The chalky area may represent early decay beneath a surface that hasn't broken down. That doesn't mean you automatically need a filling, but it does mean the first decision should be whether the spot is active, stable, or already damaged.
A useful treatment plan separates two outcomes: stopping further mineral loss and improving appearance. You can achieve the first without completely achieving the second, so a visible mark isn't necessarily proof that treatment has failed.
Whether Your White Spots Will Fade on Their Own
Some white spots improve gradually, while others remain visible and need professional treatment. Small, surface-intact lesions have more opportunity to improve than areas where the enamel has become pitted or developed a cavity.
These marks aren't ordinary surface stains that brushing can polish away. When the acid challenge stops, saliva and fluoride can support mineral replacement, a process called remineralization. The surface may become healthier even if the underlying opacity doesn't disappear completely.
Long-term follow-up of patients after orthodontic treatment has documented spontaneous improvement, but that's not a promise of complete disappearance or a reason to postpone assessment. The sensible question is whether your lesion can safely be monitored while you improve daily care.
What the appearance can tell you
Use this table to organize your observations, not to diagnose the depth or activity of a lesion.
| Appearance | Likely outcome | Next step |
|---|---|---|
| Small, smooth, chalky, no cavity | May gradually lighten with good cleaning and fluoride exposure, although complete disappearance isn't guaranteed | Improve hygiene and ask the dentist about fluoride |
| Chalky, rough or pitted, still visible after cleaning | Less likely to improve sufficiently through home care alone | Dentist assessment for suitability for infiltration, microabrasion, or other care |
| Brown, grey, enlarging or cavitated | Doesn't reliably self-resolve; color alone cannot establish activity | Prompt clinical assessment, including whether restorative care is needed |
Smooth doesn't automatically mean harmless, and dark doesn't automatically mean active decay. Dentists consider texture, surface integrity, progression, and your overall caries risk together.
Evidence for fluoride prevention also needs careful interpretation. A Cochrane review of fluorides during fixed-brace treatment found low-certainty evidence that professionally applied fluoride foam reduced new lesions in one study, but preventing a new spot isn't the same as making an existing mark disappear.
What you can check at home
Look in daylight and compare the mark with neighboring enamel. Take dated photographs from a similar angle, with similar lighting, rather than relying on memory or comparing a wet tooth with a very dry one.
- Track the outline: Note whether the affected area seems larger or has developed a depression.
- Record symptoms: Write down sensitivity, discomfort, or food catching near the spot.
- Avoid testing with sharp tools: Don't scrape the enamel or try to probe a suspected hole yourself.
Practical rule: Home photographs help document change. They don't establish whether decay is active.
This week, arrange an examination and bring any photographs taken before or after braces removal. Don't wait for the next annual visit to see whether a deep-looking or changing spot improves.
How White Spots Form and Who Is at Risk
Brackets and wires act like little fences around parts of a tooth. Plaque collects along those boundaries, and the toothbrush has to reach around them rather than sweep across an unobstructed surface.
Bacteria in plaque turn dietary sugars into acids. Those acids dissolve enamel mineral beneath a relatively intact outer surface, leaving microscopic pores that scatter light differently from sound enamel. That's why the area can look chalky and opaque, sometimes tracing the former bracket position.
A systematic review in Oral Health & Preventive Dentistry describes these as early caries lesions and notes that they can become clinically visible within approximately four weeks of fixed-appliance placement. Prevention therefore needs to start when the braces go on, not when they come off.
How common are they really?
Published estimates differ substantially because investigators don't always count the same thing. A study counting every affected tooth surface will answer a different question from a study counting patients with any visible mark.
A review available through PubMed Central describes published prevalence estimates ranging from approximately 2% to 97% across studies. That spread isn't a meaningful prediction for an individual patient. It reflects differences in definitions, populations, and assessment methods.
For a more consolidated estimate, a 2025 systematic review and meta-analysis of 57 studies involving 9,101 orthodontic patients reported pooled patient-level prevalence of 55.06%, pooled incidence of 34.2%, and higher odds with conventional fixed appliances than other appliances (OR 4.7).
Prevalence means the proportion with lesions at assessment. Incidence concerns newly developed lesions during the period studied. Neither figure means that every identified lesion will become a permanent visible mark or a cavity.
These findings justify deliberate prevention and earlier checks. They don't justify blaming patients or assuming that braces always damage teeth.
Separate daily habits from treatment factors
Some risks are directly manageable at home. Others belong in a discussion with your orthodontist, particularly appliance choice and treatment duration.
| Risk factor | Can you change it? | What the evidence shows |
|---|---|---|
| Conventional fixed appliances | Not while they're prescribed and fitted; appliance choice is a clinical decision | Higher odds of lesions than with other appliances |
| Longer treatment duration | Partly, within the treatment plan | Greater prevalence is associated with longer treatment |
| Plaque retention around brackets | Yes | A consistently reported modifiable contributor |
| Frequent dietary sugar and acidic drinks | Yes | Repeated acid challenges encourage mineral loss |
| Low fluoride exposure | Yes | Fluoride supports remineralization and resistance to further mineral loss |
| Missed hygiene steps | Yes | Plaque can remain at the gumline, between teeth, and beneath wires when these areas aren't cleaned |
Treatment length isn't a reason to rush orthodontic movement or request premature removal. Keep scheduled appointments, follow appliance instructions, and ask whether avoidable delays are affecting your plan.
Likewise, needing extra cleaning help isn't a character judgment. A large brush may clean the visible faces of brackets while missing the narrow strip between the bracket and gum.
A cleaning routine with a reason for each step
- Brush with fluoride toothpaste after meals when practical. Clear food and plaque rather than merely freshening your mouth, and maintain the regular brushing schedule your dental team recommends.
- Angle the bristles toward the gumline and around each bracket. Approach above and below the wire so you clean the edges where plaque collects.
- Use an interdental brush or floss threader beneath wires. Choose an interdental brush that passes comfortably without forcing it, and ask your hygienist to demonstrate the difficult areas.
- Keep sugary and acidic drinks to mealtimes. Avoid carrying soda or juice to sip throughout the day, since repeated exposures leave fewer opportunities for recovery.
- Discuss professionally applied fluoride at check-ups. Your dentist can match additional protection to your caries risk instead of assuming that every patient needs the same product.
For help understanding toothpaste choices during orthodontic care, our guide to fluoride toothpaste for braces explains how fluoride fits into that routine.
Prevention isn't about brushing harder. It's about reaching the plaque-retentive edges consistently.
Say you brush carefully but always skip beneath the wire because floss is awkward. An interdental brush demonstrated by your hygienist may address that specific gap more effectively than replacing your toothpaste alone.
After removal, the brackets are gone, but your dentist still needs to assess the enamel they surrounded. Easier cleaning improves the conditions for recovery; it doesn't tell you how much mineral was lost.
How Dentists Assess a White Spot
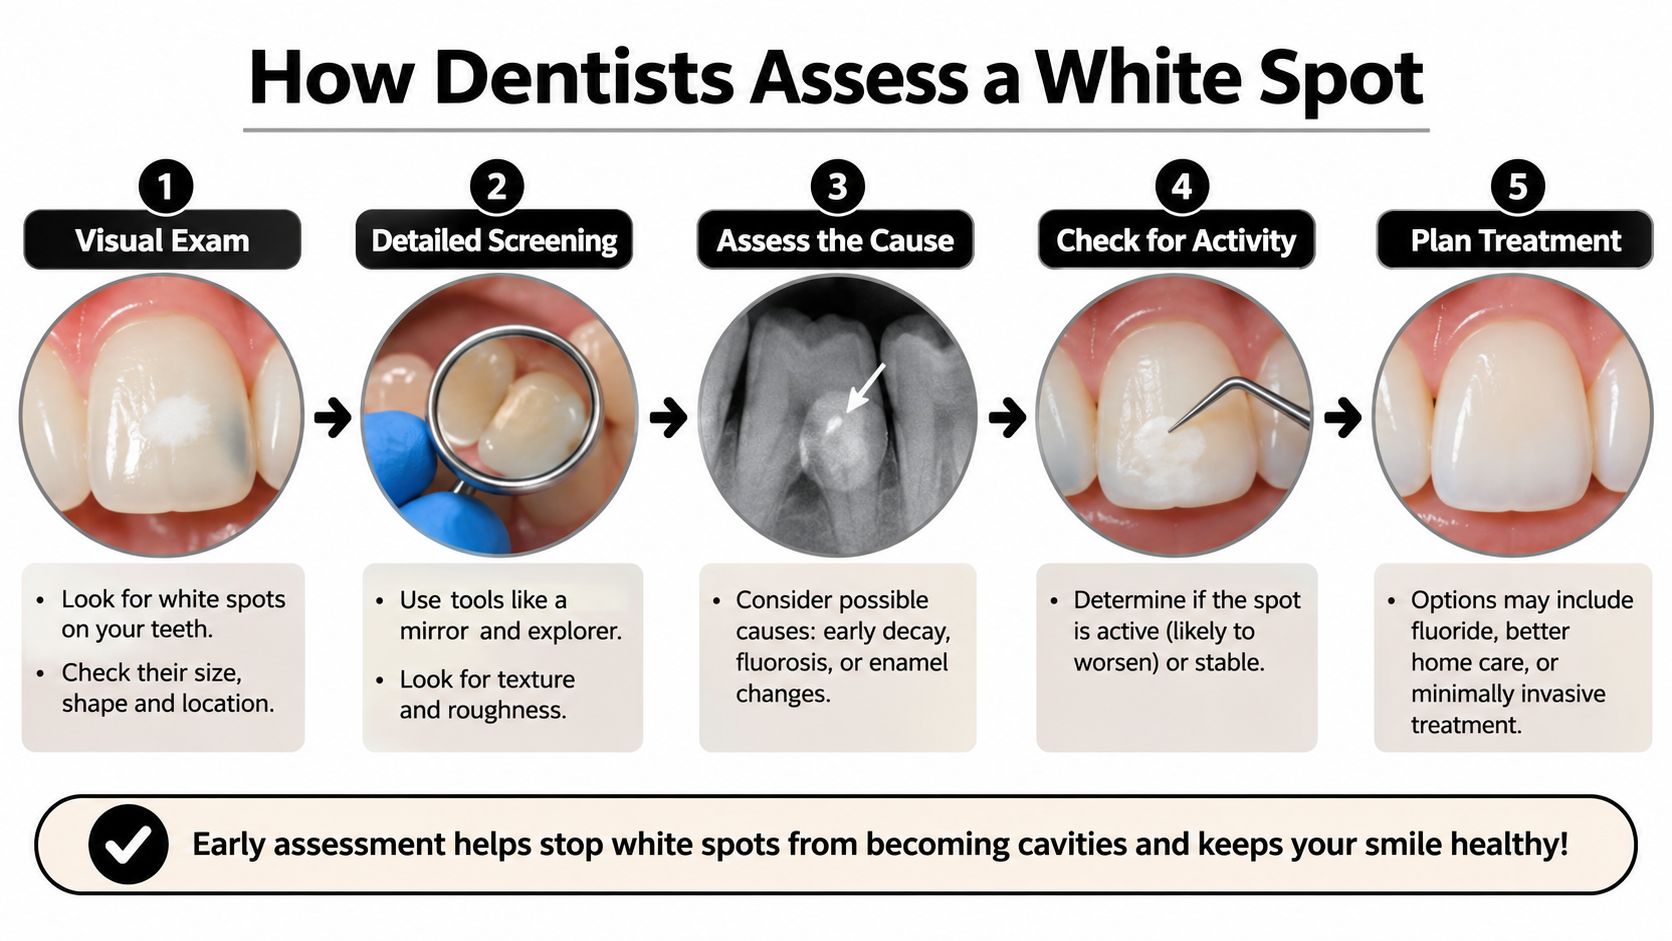
The examination should establish whether the lesion needs monitoring, mineral support, cosmetic treatment, or restoration. Activity and surface integrity matter more than whiteness alone.
This overview shows how assessment connects to treatment planning.
What happens during the examination
- Professional cleaning removes misleading deposits. Plaque can hide a lesion or make an area look different from the enamel underneath.
- Controlled drying makes the surface easier to assess. Because dehydration changes opacity, the dentist interprets the appearance under consistent conditions rather than treating every bright patch as equally severe.
- Visual inspection compares neighboring enamel. Good lighting helps the clinician examine the lesion's boundaries, location, and relationship to the former bracket.
- Baseline photographs document the starting point. Images taken from repeatable angles help distinguish genuine progression from differences in lighting or memory.
- Gentle surface assessment checks integrity. The dentist may use an appropriate instrument carefully to assess texture and detect breakdown, without forcefully poking fragile enamel.
- Color is recorded alongside other findings. Chalky white, brown, and grey areas deserve attention, but color alone doesn't reliably establish whether a lesion is active or how deep it extends.
- Your risk history explains the current conditions. The clinician reviews plaque control, diet, fluoride use, and orthodontic history because a treatment won't remain effective if the main causes continue.
- A written plan sets the next review. You should leave knowing what to use, what changes to report, and when the enamel will be reassessed.
Ask for a decision you can understand
A useful question is, “What makes you think this spot is active or stable?” Ask the clinician to show you the area and explain whether the surface is intact.
If observation is recommended, clarify what would trigger treatment. Monitoring should mean an agreed home-care plan and scheduled comparison, not being told to wait.
The following video provides additional context for a conversation about white spots with your dental team.
A good result from the appointment is a clear record, an understandable diagnosis, and a recall date. A single photograph or quick glance can't always establish the course of a lesion, particularly if no earlier record exists.
Treatment Options Compared by Goal
Choose treatment by the job it needs to do: support mineral repair, stop progression, or improve appearance. These goals overlap, but the procedures aren't interchangeable.
A systematic review in BMC Oral Health supports conservative approaches including topical fluoride and resin infiltration. The practical sequence is to improve plaque control and dietary habits, introduce appropriate mineral-support measures, and consider cosmetic or restorative intervention when the diagnosis warrants it.
Compare the purpose before the product
For prevention during braces, the Cochrane evidence summary on fluorides reports low-certainty evidence from a study of 95 patients in which professionally applied 12,300-ppm fluoride foam every two months reduced new-lesion incidence from 49% to 12%. That result concerns a particular professional prevention regimen, not a home treatment for removing existing marks.
| Option | Main goal | Evidence and limits | Where delivered |
|---|---|---|---|
| Fluoride varnish | Mineral repair and lesion arrest | Can improve white-spot outcomes; complete cosmetic disappearance isn't assured | Dental office |
| Professionally applied high-fluoride foam | Prevent new lesions during braces | Encouraging prevention evidence, but certainty is low | Dental office |
| Prescription high-fluoride toothpaste | Support remineralization | Requires appropriate prescribing and age suitability; not a guaranteed cosmetic fix | Prescribed, used at home |
| CPP-ACP products such as MI Paste | Mineral support | A conservative adjunct, not a replacement for plaque control or treatment of a cavity | Home use with dental guidance |
| Resin infiltration | Seal porosity and mask the white appearance | Can improve appearance in suitable lesions; complete blending and long-term durability aren't guaranteed | Dental office |
| Microabrasion | Remove a superficial enamel layer to reduce discoloration | Best considered for suitable shallow defects; removes enamel rather than replacing mineral | Dental office |
| Whitening | Change overall tooth color and contrast | Doesn't rebuild mineral or reliably eliminate the lesion | Home or office under appropriate guidance |
Mineral repair and masking are different outcomes
Fluoride supports mineral redeposition and lesion arrest. Resin infiltration uses a low-viscosity resin to enter and seal microscopic pores, often reducing the optical difference between the lesion and surrounding enamel. A lesion can therefore look better after infiltration without having been rebuilt through remineralization.
Combined treatment may address both health and appearance, but there isn't a universal combination that guarantees lasting invisibility. Also, preventing additional lesions doesn't necessarily mean that an existing lesion will become smaller.
Treatment checkpoint: Ask what success will look like, a stable surface, fewer new lesions, less visible opacity, or a repaired cavity.
For a practical example of what a professional fluoride appointment may involve, the information about fluoride treatments at Paul L. Gregory, DDS can help you prepare questions for your own dentist. The relevant choice remains the regimen suited to your examination findings.
If a calcium-phosphate product is suggested, our guide to MI Paste explains its intended role. Confirm suitability with your dentist, including any relevant milk-protein allergy, rather than adding multiple products without a plan.
A broken-down surface may require restorative care instead of a cosmetic procedure. Match the treatment to the diagnosis and intended outcome, and expect professional supervision for decisions beyond ordinary toothpaste.
Whitening Spotted Teeth Without Making Them Worse
Whitening may make the overall tooth color more even, but it isn't a treatment for mineral loss. It can also change the contrast unpredictably, leaving a white lesion just as noticeable or temporarily more obvious against the surrounding enamel.
The important decision isn't which gel is strongest. It's whether your teeth and gums are ready for bleaching at all.
Settle these conditions first
Before starting, ask your dentist to confirm the following:
- The surface is intact: There's no untreated cavity or other defect that needs care first.
- The lesion is stable or being appropriately managed: A changing mark needs assessment rather than an attempt to hide it.
- Your gums are healthy: Bleeding, inflammation, and irritated areas should be addressed before gel is introduced.
- Sensitivity has been evaluated: Existing discomfort needs an explanation, not a shorter bleaching session.
- The whitening plan is approved: Your clinician has considered the product, tray fit, contact time, and your expectations.
Say your spots are stable but still visible when you smile. Your dentist might discuss whether whitening would improve the overall shade or whether a targeted treatment would better address the unevenness.
That's a different conversation from whitening a rough, enlarging area that hasn't been examined. In that situation, cosmetic treatment should wait.
Use trays gently, not forcefully
Overloading trays with gel or pushing gel firmly into teeth isn't necessary and may irritate gums. Use the amount specified for the prescribed product, seat the tray lightly, and have your dentist check it if gel repeatedly escapes onto the gumline.
Don't extend wear time or add extra sessions because one spot looks stubborn. A persistent opacity isn't evidence that you need a higher concentration.
Stop treatment if your teeth or gums become painful, and contact your dental team before restarting. Aggressive bleaching on compromised enamel can increase sensitivity, so don't treat discomfort as proof that the product is working.
Our guide to things you should know about teeth whitening can help you prepare for that discussion. Keep your prescribed enamel-care routine consistent rather than replacing it with whitening gel.
The timing rule is simple: whiten only after the lesion has been treated or confirmed stable. If a spot becomes rough, darker, or larger during the process, pause and arrange an examination.
Book a Dental Check Before Spots Turn Permanent
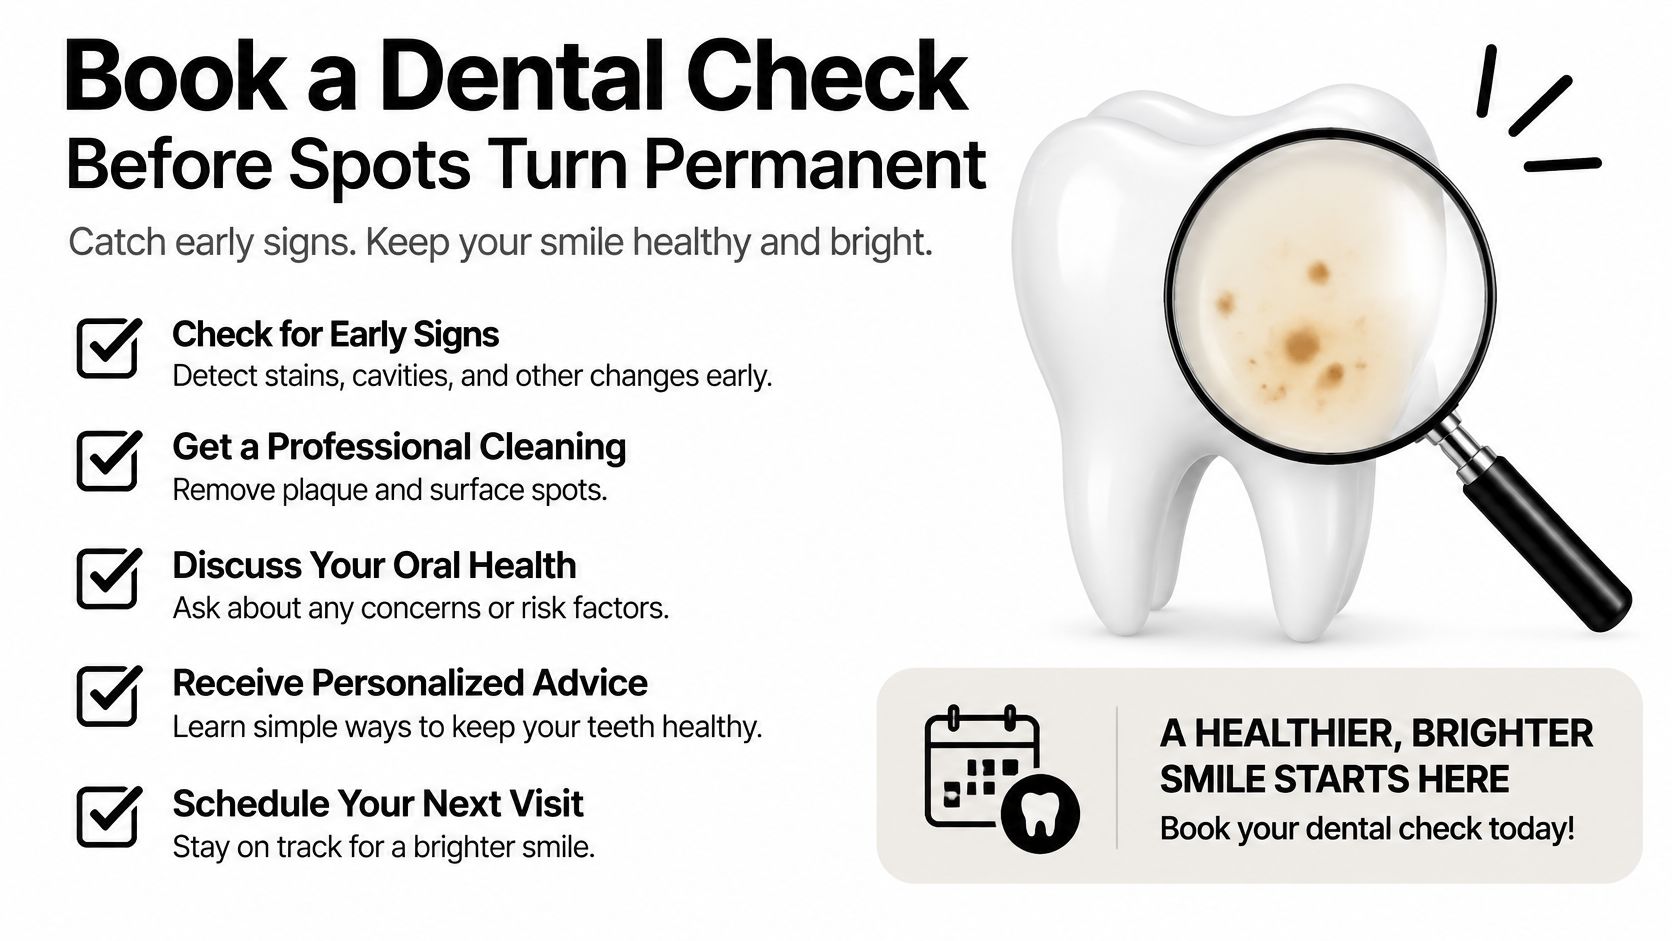
Booking an assessment doesn't commit you to cosmetic treatment. It gives you a baseline and helps preserve the option of conservative care before surface breakdown limits the choices.
Use this checklist to identify changes worth reporting.
Signs to bring to your dentist
- Color change: A spot becomes brown, grey, or black, particularly if that change is new.
- Surface damage: You notice roughness, pitting, a hollow, or an edge that catches food.
- Progression: The patch appears to grow or spread between visits.
- Symptoms: Sensitivity or pain develops around the affected tooth.
- Local inflammation: Food repeatedly traps nearby or the surrounding gums bleed.
- Persistent opacity: The mark remains conspicuous despite consistent cleaning and the recommended home-care routine.
These signs don't all mean you need a filling. They mean that choosing treatment from appearance alone is no longer a sensible approach.
Bring dated photos, notes about sensitivity, and a realistic list of your usual sugary foods and drinks. Include any fluoride, remineralizing, or whitening products you're already using so the dentist can check the whole routine.
Ask for a documented baseline at or before braces removal when possible, plus an agreed recall date. Your orthodontist and general dentist can coordinate care, with the next routine visit providing an opportunity to compare findings unless an earlier review is needed.
If a spot is changing, ask for clinical assessment rather than waiting to see what happens. This week, contact your orthodontist or general dentist and request an enamel assessment with a written monitoring or treatment plan.
At DentalHealth.com, we offer professional-grade at-home dental care products and practical guides to fluoride care, remineralizing pastes, whitening, and sensitivity. After your dentist identifies what your white spots need, visit us to explore products that fit that plan rather than choosing a whitening treatment by appearance alone.