
Zoom at Home Trays Explained
You're comparing whitening options late at night, wondering whether Zoom at-home trays can deliver a noticeably brighter smile without the sharp sensitivity some people associate with professional whitening. The key decision isn't choosing the highest peroxide percentage. It's matching the gel chemistry, wear time, tray fit, and your sensitivity history to a routine you can follow safely.
Understanding Zoom At-Home Trays and How They Work
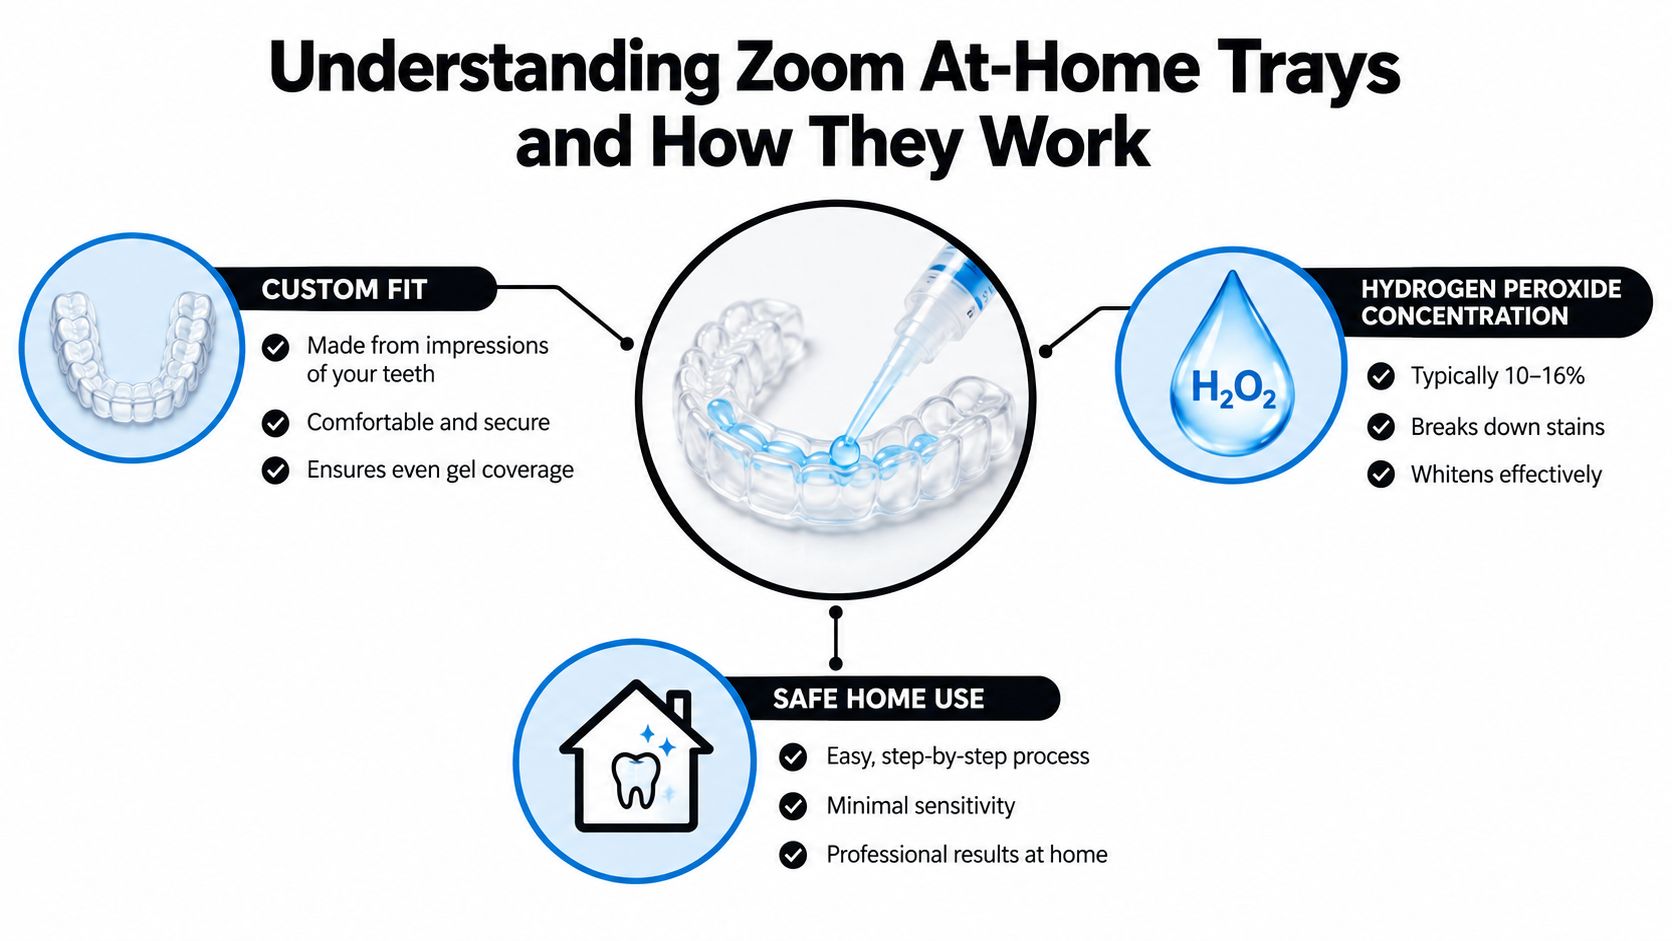
Zoom take-home whitening pairs a custom-fitted tray with a peroxide-based gel. Your dentist shapes the tray around your teeth and gum line, rather than relying on a generic mold or strip. The result is closer to a custom sleeve than a one-size-fits-all cover: the gel can remain against the visible tooth surfaces while reducing unnecessary contact with the gums. Philips describes Zoom take-home trays as dentist-prescribed and custom-fitted.
The gel provides the active chemistry. Carbamide peroxide gradually breaks down into hydrogen peroxide, producing oxidizing molecules that move through enamel and dentin. These molecules react with chromogenic compounds, the stain molecules associated with darker or yellowed tooth color. The process changes stain compounds within the natural tooth structure, rather than applying a temporary paint or coating.
Why the custom fit matters
A well-adapted tray spreads a controlled film of gel across the tooth surfaces. You still need to use a small amount, seat the tray fully, and wipe away overflow. The close fit makes consistent contact easier than an improvised or poorly fitting alternative.
Your wear schedule also affects the experience. A dentist may prescribe daytime use or a longer overnight schedule, depending on the product and your treatment needs. Stronger gel can suit someone seeking a shorter routine, while a lower concentration with longer wear may fit a person who is more sensitive or prefers gradual treatment. The prescribed exposure time acts like a boundary. Extending it does not automatically produce faster whitening and can increase irritation.
What the evidence actually shows
A recent U.S. clinical study followed 42 participants using NiteWhite with 22% carbamide peroxide once daily for 14 days. The maximum reported improvement was 9 shade levels on the VITA Bleachedguide 3D-Master scale, and 100% of participants reported little-to-no sensitivity after the treatment period. Philips provides the product-specific clinical details.
Those results offer a product-specific benchmark, not a guaranteed outcome for every patient. Starting shade, stain type, tray adaptation, adherence to the schedule, and existing restorations can all change the visible result. Crowns, veneers, and composite fillings do not lighten in the same way as natural enamel, so whitening may create a color mismatch that should be discussed with a dental professional.
Comparing Zoom Take-Home Kits to In-Office Whitening
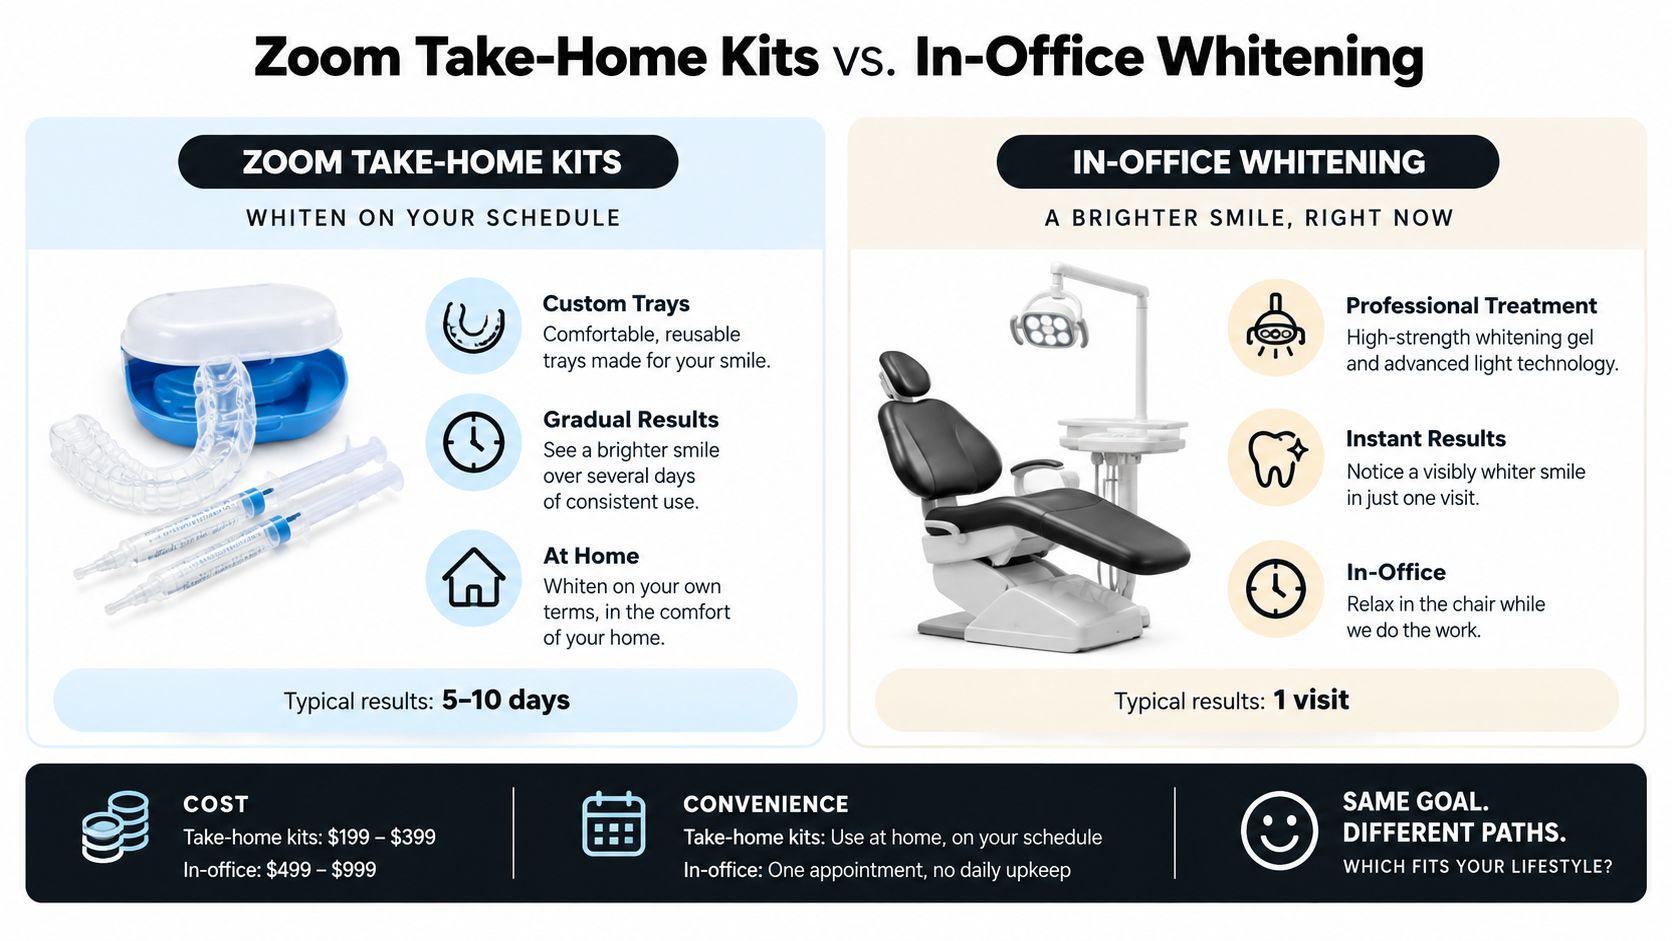
The main difference between take-home and in-office whitening is pace and control. An in-office session concentrates the treatment into a supervised appointment, while custom trays spread exposure across a home routine. Neither choice is automatically right for every smile.
In-office whitening may suit someone with a firm deadline, such as an upcoming event or professional photograph. A dental professional controls isolation, gel application, and exposure during the appointment. The trade-off is that the treatment demands a scheduled visit and can produce a more noticeable short-term sensitivity response for some patients.
Take-home treatment asks for patience and consistency. You receive trays that you can use according to the prescribed schedule, and you can discuss adjustments if sensitivity develops. That flexibility can be valuable for people who prefer gradual change or who have previously reacted to whitening.
A practical side-by-side view
| Consideration | Zoom take-home trays | In-office whitening |
|---|---|---|
| Pace | Gradual change over a prescribed series of applications | Concentrated treatment during a dental appointment |
| Daily involvement | Requires you to load, wear, clean, and store the trays | Most treatment steps happen in the dental office |
| Schedule | Can fit around home routines, subject to professional instructions | Requires an appointment at a specific time |
| Sensitivity response | Exposure can be paused or adjusted only with dental guidance | The dentist manages the treatment directly, but short-term sensitivity may be more noticeable |
| Best match | Patients who value flexibility and gradual whitening | Patients who prioritize speed and clinical supervision |
The word “professional” doesn't mean “instant.” Dentist-directed trays can still provide a structured treatment with a defined concentration, wear period, and follow-up plan. In-office care may be more convenient for a deadline, while trays can be easier to integrate into ordinary life.
Decision rule: Choose the approach you can complete correctly, not merely the approach that sounds strongest.
Before either option, a dental examination matters. Untreated decay, cracks, leaking restorations, or inflamed gums can make whitening uncomfortable and may need attention first. A clinician can also identify restorations that won't change shade, preventing an uneven result.
Choosing the Right Peroxide Concentration and Wear Schedule
If you have a busy evening routine or a history of sensitivity, the strongest gel may not be the easiest one to finish. For Zoom at-home trays, the practical choice depends on how peroxide strength, contact time, tray fit, and tolerance work together.
Hydrogen peroxide acts more directly and is often prescribed for shorter exposure. Carbamide peroxide releases hydrogen peroxide gradually, so it can suit longer wear periods. Comparing the percentages across these two ingredients without considering release speed is like comparing two clocks by their numbers alone. The wear schedule and formulation matter as much as the label strength. Learn how carbamide peroxide whitens teeth.
The American Dental Association reports that dentist-dispensed tray systems commonly range from 10% to 38% carbamide peroxide, with schedules of 2 to 10 hours per day for 6 to 28 days. The ADA explains tray concentrations, exposure, peroxide chemistry, and sensitivity. Your dentist may prescribe a narrower range after considering your enamel, gums, restorations, and sensitivity history.
A useful decision matrix
| Gel Concentration | Active Ingredient | Recommended Wear Time | Best For |
|---|---|---|---|
| Lower concentration | Carbamide peroxide | Longer schedule as prescribed | Patients prioritizing a slower, comfort-focused routine |
| Moderate concentration | Carbamide peroxide | Several hours or overnight, depending on the product | Patients seeking a balance between pace and tolerability |
| Higher concentration | Carbamide peroxide or hydrogen peroxide | Shorter exposure when prescribed | Patients who need a faster routine and tolerate peroxide well |
These categories help frame a conversation with your dentist, rather than replace a prescription. Current Zoom materials include 22% carbamide peroxide NiteWhite, while other protocols use hydrogen peroxide or different carbamide-peroxide strengths. The prescribed wear time comes from the formulation and clinical instructions, not the percentage alone.
A 2024 U.S. study involving 279 participants compared several at-home regimens. Average 14-day shade changes ranged from 5.5 to 8.9 VITA shade units, and the 22% carbamide-peroxide NiteWhite group averaged 8.9 shades. Philips summarizes the study and tested regimens in its clinical material. These results reflect study conditions, so they are not a promise of the same outcome for every patient.
Sensitivity should guide the conversation before treatment begins. The ADA notes that it can affect up to two-thirds of users early in treatment, often beginning within 2 to 3 days and resolving around the fourth day after treatment ends. Tell your dentist about previous sensitivity so the gel strength or wear schedule can be adjusted safely.
Step-by-Step Guide to Using Your Custom Whitening Trays
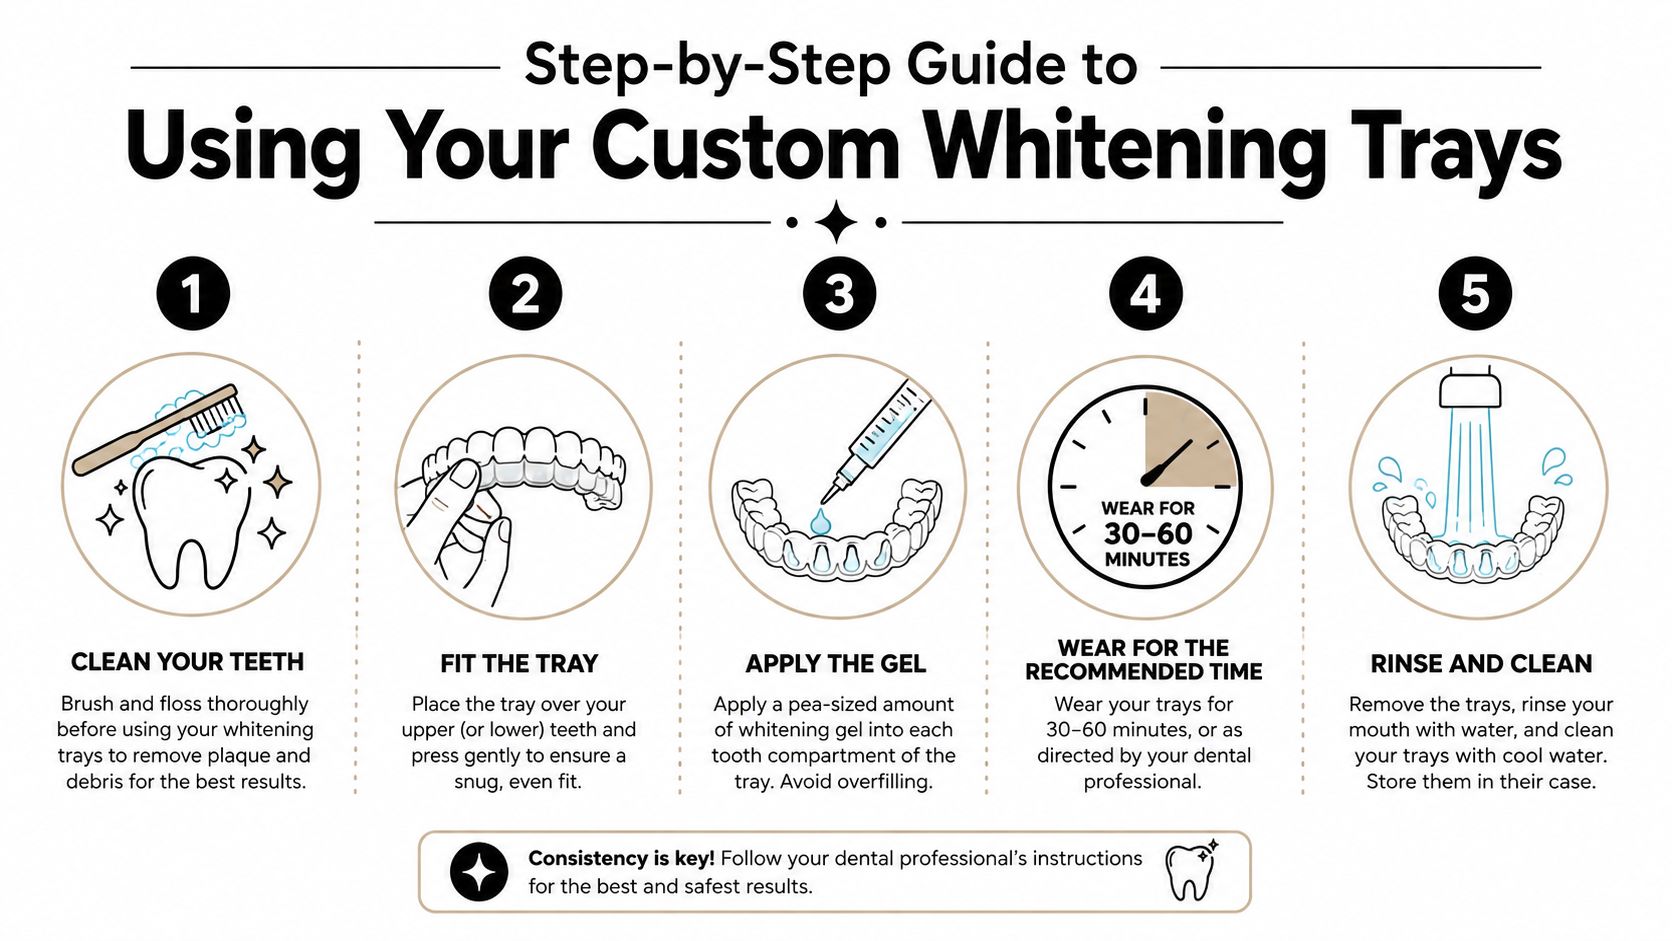
Your technique affects both comfort and efficiency. The objective is simple: place enough gel to contact the teeth, avoid flooding the tray, follow the prescribed wear period, and remove residue promptly.
Prepare before loading
Brush and floss gently, then inspect the trays. They should be clean, intact, and seated comfortably. Don't whiten over obvious gum inflammation or dental pain without speaking with a dental professional first.
Apply a small amount of gel to the appropriate tooth compartments. More gel doesn't create a proportionally brighter result. It mainly increases the chance that material will press against the gums and cause irritation.
Seat, check, and wear
Place the tray over the teeth and press it into position without forcing it. Check the gum line in a mirror. If gel has squeezed onto the gums, wipe it away with a clean finger, cotton swab, or tissue.
Wear the trays for the exact period provided for that product. Some formulas suit shorter daytime exposure, while others are intended for a longer schedule. The Philips implementation guidance emphasizes even loading, full seating, prompt removal of excess gel, and cleaning after use.
Here's a helpful demonstration of tray placement and routine care:
Clean and store carefully
After the session, remove the trays and rinse your mouth. Rinse the trays with cool or lukewarm water, brush them gently with a soft toothbrush if needed, and let them dry before storing them in their case. Avoid hot water, which can distort the plastic and change the fit.
For a fuller routine, follow this guide to using dental whitening trays. Contact your dentist if the tray suddenly feels tight, develops a sharp edge, or no longer covers the teeth evenly.
Managing Sensitivity and Maximizing Your Whitening Results
A brief cold “zing” after whitening can be uncomfortable without meaning the treatment has harmed your teeth. Peroxide passes through enamel and dentin toward the tooth nerve, which can make teeth react to cold drinks or air. The sensation usually reflects how much exposure you tolerate, so gel strength and wear time should be treated as adjustable parts of the routine, not targets to push.
Sensitivity often starts early in treatment and generally settles after treatment ends. Responses differ, however. Persistent, severe, or worsening pain needs assessment by a dental professional rather than a longer break or more gel.
Adjust exposure, don't improvise
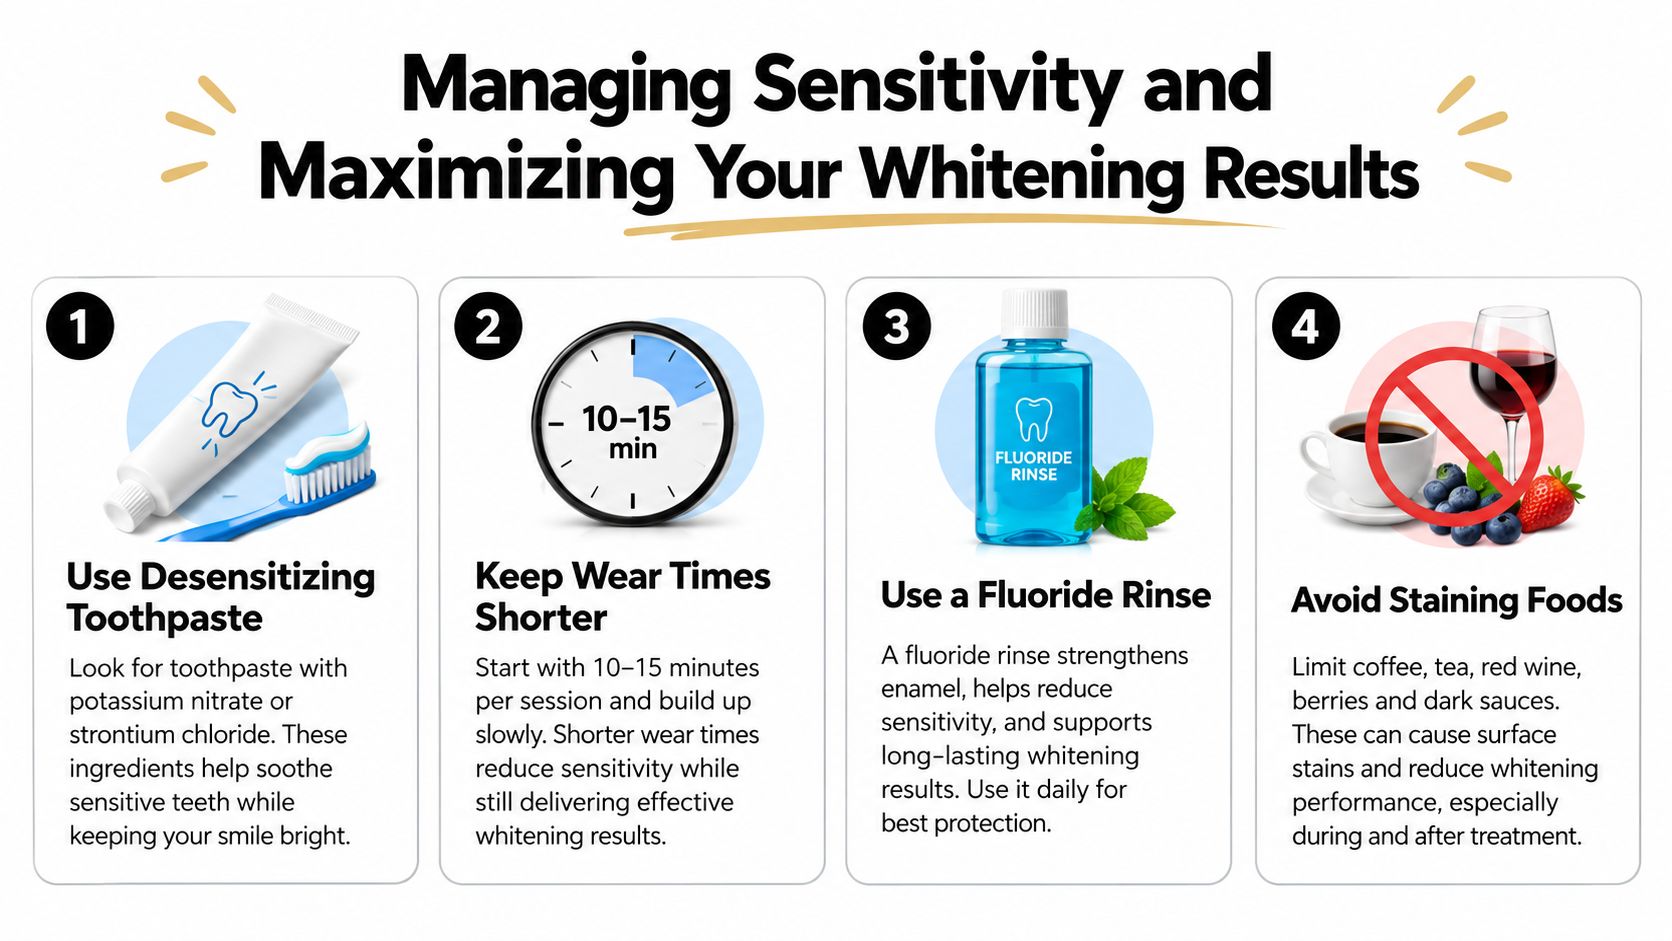
If sensitivity develops, avoid adding gel or extending wear time to reach a lighter shade sooner. Ask your dentist whether a shorter session, a rest day, or a lower peroxide concentration fits your teeth and schedule. A stronger gel may shorten each session, while a milder formula may be easier to tolerate over a longer routine. The right choice depends on the product directions and your oral health.
A toothpaste made for sensitivity may reduce discomfort. Your dental professional might also recommend fluoride or remineralizing products as part of everyday care. Brush gently after removing the trays, especially when the gums feel tender.
Comfort strategy: A slower course you complete is more useful than an intense routine you abandon halfway through.
Set expectations before you start
Whitening changes natural tooth structure. Crowns, veneers, and composite restorations don't bleach like natural enamel, so a restoration on a visible tooth may look different once nearby teeth become lighter. Discuss visible restorations with your dentist before treatment if future color matching may matter.
The type of stain also affects the result. Surface discoloration may respond more readily than deeper intrinsic staining. Your starting shade, enamel characteristics, tray fit, gel concentration, wear schedule, and consistency all influence the final appearance.
For practical steps, read this guide on how to reduce tooth sensitivity after whitening. Keep the routine gentle, follow the prescribed schedule, and judge progress over the full course rather than chasing a particular shade in less time.
Finding the Best Replacement Gels and Maintenance Products
Your trays may remain useful after the first whitening course, provided the replacement gel suits the tray system and your dentist's instructions. Check the peroxide concentration, active ingredient, storage requirements, and expiration date. A syringe that looks similar may require a different wear schedule or may not fit your custom trays safely.
Begin with the product label and the instructions provided with your original treatment. Confirm whether the gel is intended for daytime or nighttime wear, follow its storage directions, and check the expiration date before use. Teeth and gums can also change after the original fitting. If the trays feel tight, loose, or irritating, ask a dentist to check their fit before restarting.
Build a maintenance routine around your mouth
Maintenance involves more than repeating whitening sessions. It also means limiting discomfort, keeping the trays clean, and protecting your teeth and gums.
- Sensitivity care: Keep sensitivity toothpaste available if peroxide causes temporary discomfort.
- Remineralizing support: Ask your dental professional whether a remineralizing paste suits your oral-health needs.
- Tray hygiene: Clean and dry the trays after every use, then store them in their case.
- Fit checks: Stop using a tray that has warped, cracked, or developed an irritating edge.
- Stain awareness: Rinse after strongly colored foods and drinks, and continue regular brushing and professional dental care.
DentalHealth.com lists professional at-home products such as Philips Zoom DayWhite 14% and Philips Zoom NiteWhite 22%, plus whitening gels, sensitivity products, and remineralizing pastes. Product instructions can help you compare options, while a dentist should determine the concentration and schedule if you have sensitivity, gum problems, cracks, untreated decay, or visible restorations.
A replacement syringe should support a defined maintenance routine, not lead to repeated courses without review. If your teeth look darker again, a dental assessment can distinguish new staining from a restoration mismatch, a tray problem, or an oral-health concern. That information helps protect your comfort and maintain the result.
DentalHealth.com offers Zoom-compatible at-home whitening products, replacement gels, sensitivity care, and remineralizing options. Visit DentalHealth.com to compare supplies and choose products that match your trays and dentist-guided treatment plan.