
Zoom Whitening at Home: How It Really Works
You want a brighter smile, but the thought of spending a long appointment in a dental chair may not fit your schedule. At the same time, store-bought strips can feel unpredictable, especially if they slip onto your gums or leave some teeth looking brighter than others. Zoom whitening at home sits between those choices, using professional guidance, a dental whitening gel, and trays designed to keep the product against the teeth.
The important question isn't only how white your teeth look when treatment ends. It's how comfortably you can complete the regimen, whether the shade change suits your teeth and dental work, and how easily you can maintain the result afterward. A gradual, supervised approach can make long-term upkeep more manageable than relying on a single dramatic whitening session.
Understanding Zoom Whitening at Home
Consider someone preparing for photographs who wants a professional result but can't return to the dental office repeatedly. An in-office treatment may offer speed, while generic strips may offer convenience without the same degree of tray fit or professional oversight. A Philips Zoom take-home system provides a middle option, with treatment completed at home according to instructions from a dental professional.
The system typically uses custom-fitted trays and a professional-dispensed peroxide gel. The trays are made to follow the shape of the patient's teeth, helping distribute gel across the intended surfaces and reducing the chance that excess product will sit on the gums. The exact product, concentration, and wear schedule should come from the prescribing dental professional, because oral health, restorations, gum position, and sensitivity history all affect suitability.
What makes the system different
In-office Zoom treatment uses a stronger, closely supervised protocol designed for rapid treatment. A take-home system uses a lower daily dose over a longer period, allowing the patient to control the routine at home. Generic strips and LED kits vary widely in fit and formulation, and they may not provide the same level of customization.
The take-home approach doesn't mean the chemistry is weak or ineffective. It means the system trades intensity for repeated exposure and controlled delivery. That can be useful for people who prefer a slower shade change, want to pause if sensitivity develops, or expect to refresh their smile later with trays that still fit well.
Practical rule: A take-home whitening plan should begin with an assessment, not simply with a product choice.
A dental professional should first check for untreated decay, gum inflammation, cracks, exposed roots, or other problems that could make bleaching uncomfortable. They should also discuss crowns, veneers, fillings, and bonding, because peroxide whitens natural tooth structure, not dental restorations. The result may therefore be uneven if visible restorations already match an older tooth shade.
For a clearer explanation of the active ingredient, see this guide to how carbamide peroxide whitens teeth. The key point is simple: Zoom at home is a professional whitening protocol adapted for home use, not merely a stronger version of a supermarket strip.
The Science Behind the Shade Change
Whitening works by allowing peroxide to move into the tooth and break down colored compounds that contribute to discoloration. Think of stain molecules as dark fragments lodged within a porous material. Peroxide doesn't scrub them away from the surface like an abrasive. Instead, it diffuses into the tooth and chemically changes the molecules so they absorb and reflect light differently.
Carbamide peroxide and hydrogen peroxide
Take-home systems may use carbamide peroxide or hydrogen peroxide. Carbamide peroxide releases hydrogen peroxide gradually, which supports a longer, slower whitening process. Hydrogen peroxide acts more directly, so products using it can be designed for shorter wear periods, depending on the prescribed formulation.
Professional home systems commonly use peroxide concentrations lower than in-office protocols. The American Dental Association's whitening guidance notes that home systems commonly range from 10% to 38% carbamide peroxide and may be worn for about 2 to 10 hours per day over 6 to 28 days. Those figures describe a broad range of home systems, not a universal schedule for every Zoom product.
The relationship is a concentration-time tradeoff. A lower concentration can still produce meaningful whitening, but it generally needs more cumulative contact time. A stronger in-office formula can act quickly under supervision, while a take-home gel releases or remains active over a longer routine.
Why tray fit matters
A well-fitting tray keeps gel close to the enamel and limits movement during wear. If the tray is loose, gel can spread toward the gums. If the patient fills it excessively, the extra gel doesn't create a proportionally better result. It mainly increases the chance of irritation and waste.
The tooth's response also depends on the kind of discoloration. Surface staining may respond more readily than discoloration within the tooth caused by injury, medication, developmental changes, or aging. A dentist can explain whether whitening is likely to create a uniform result before treatment begins.
For practical guidance on the material and diffusion process, review how carbamide peroxide gel works. Whitening is a chemical process guided by gel strength, tray contact, and wear time, not by the visual brightness of a light device.
Expected Results and Clinical Evidence
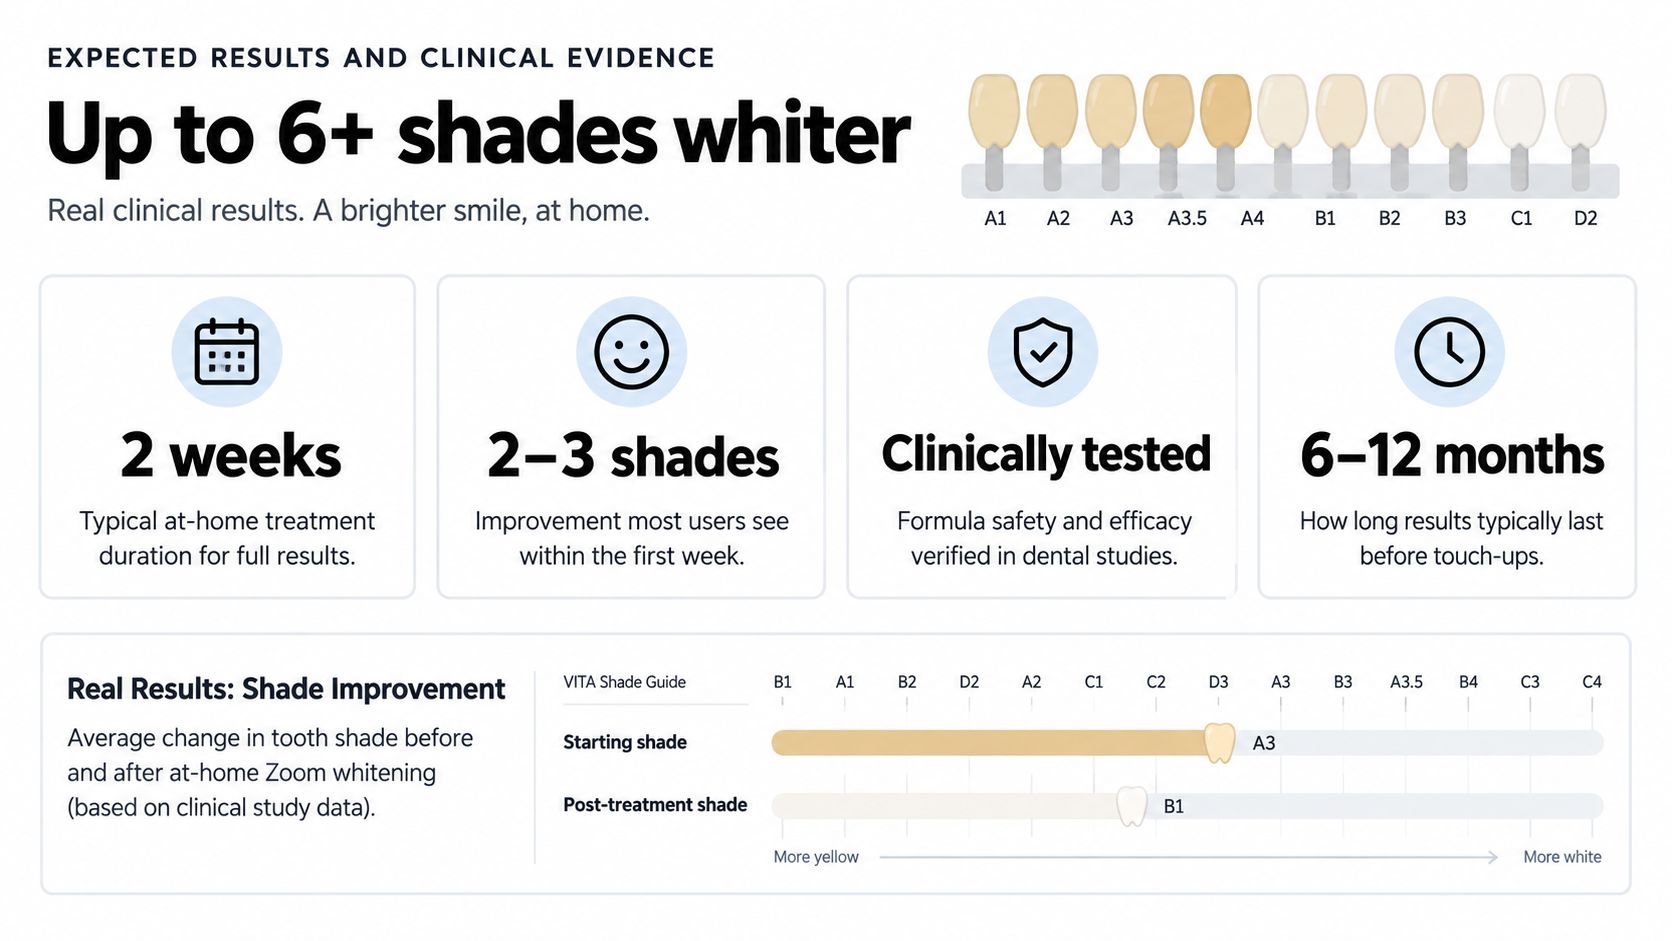
At-home whitening produces a gradual result, so the first few days may show a modest change rather than a dramatic transformation. That progression can be helpful because it gives you time to assess comfort and decide whether the shade is moving in the direction you want.
A Philips take-home clinical evaluation used a randomized, single-blind, parallel-design trial over 14 days. The evaluation found significant whitening, with improvements observed after 3, 9, and 14 days, and described the products as safe, with little to no sensitivity. Participants also rated the systems positively for ease of use and satisfaction, according to the Philips clinical abstract.
That timeline doesn't promise that every person will reach the same shade. Starting color, stain type, enamel characteristics, compliance, and the presence of restorations all affect the visible outcome. It does support a practical expectation: a two-week regimen can produce measurable change, while the final shade may continue to look more even as the teeth rehydrate and the treatment settles.
Sensitivity is part of the decision
Sensitivity and gum irritation are the main practical concerns. In the clinical evaluation above, participants reported little to no sensitivity, but that doesn't mean every patient will have the same experience. People with exposed root surfaces, enamel defects, existing sensitivity, or irritated gums may need a modified plan.
A dentist may recommend shorter wear periods, a lower-concentration product, a gap between sessions, or a desensitizing product. Stopping or adjusting treatment when discomfort develops is safer than trying to force a faster result.
Durability matters more than the first photograph
The strongest result on the final treatment day isn't automatically the most durable result. A whitening plan that a patient can maintain comfortably may provide more practical value than a one-time change followed by a long period without follow-up.
The evidence also supports attention to the maintenance phase. A 2025 PubMed-indexed study found that combining in-office and at-home whitening with prefilled trays produced longer-lasting whitening efficacy than in-office whitening alone, as reported in the PubMed record. This finding doesn't establish one universal maintenance interval, but it does reinforce a useful principle: follow-up care influences how long brightness remains visible.
Comparing At-Home Zoom to Other Options
Choosing a whitening method is easier when you separate the decision into speed, control, comfort, and upkeep. In-office Zoom prioritizes rapid treatment under supervision. A professional take-home system prioritizes a controlled routine that unfolds over time. OTC strips and LED kits prioritize accessibility, but their fit and instructions vary.
| Feature | Zoom At-Home | In-Office Zoom | OTC Strips/Kits |
|---|---|---|---|
| Delivery | Professional gel with custom trays | Professional gel applied in the dental office | Preformed strips or consumer kit trays |
| Pace | Gradual, based on the prescribed schedule | Rapid, completed during a supervised appointment | Varies by product and adherence |
| Tray customization | Custom-fitted trays may improve control | No home tray required during the appointment | Usually standardized rather than individually fitted |
| Convenience | Treatment happens at home, but requires routine | Less home commitment, more chair time | Easy to purchase and use without an appointment |
| Sensitivity management | The dentist can adjust wear time or product | The dentist controls application during treatment | The user must manage discomfort according to product instructions |
| Maintenance | Trays can support later professional touch-ups if appropriate | Follow-up may require another office visit or home plan | Replacement products are usually needed for continued use |
The table shows why no single option suits everyone. Someone with a fixed deadline may value in-office speed. Someone with a history of sensitivity may prefer a slower protocol that can be paused or adjusted. Someone comparing trays should also understand the differences discussed in teeth whitening trays versus Zoom.
The role of light devices
An LED attachment can make a kit look more advanced, but the light isn't the main whitening agent. The peroxide gel performs the chemical work. Evidence reviews found that light activation doesn't measurably improve whitening outcomes for at-home or combined protocols, so a light shouldn't be the deciding factor when comparing products.
Match the method to your routine
A take-home plan requires consistency. You need to load the trays correctly, follow the prescribed wear time, clean them afterward, and respond appropriately if sensitivity appears. In-office treatment reduces the number of home steps, but a later maintenance plan may still be needed if you want to preserve the shade.
The most useful question isn't “Which method is strongest?” Ask instead, “Which method can I use correctly, comfortably, and maintain over time?” That answer often leads to a more satisfying result.
Step-by-Step Usage and Best Practices
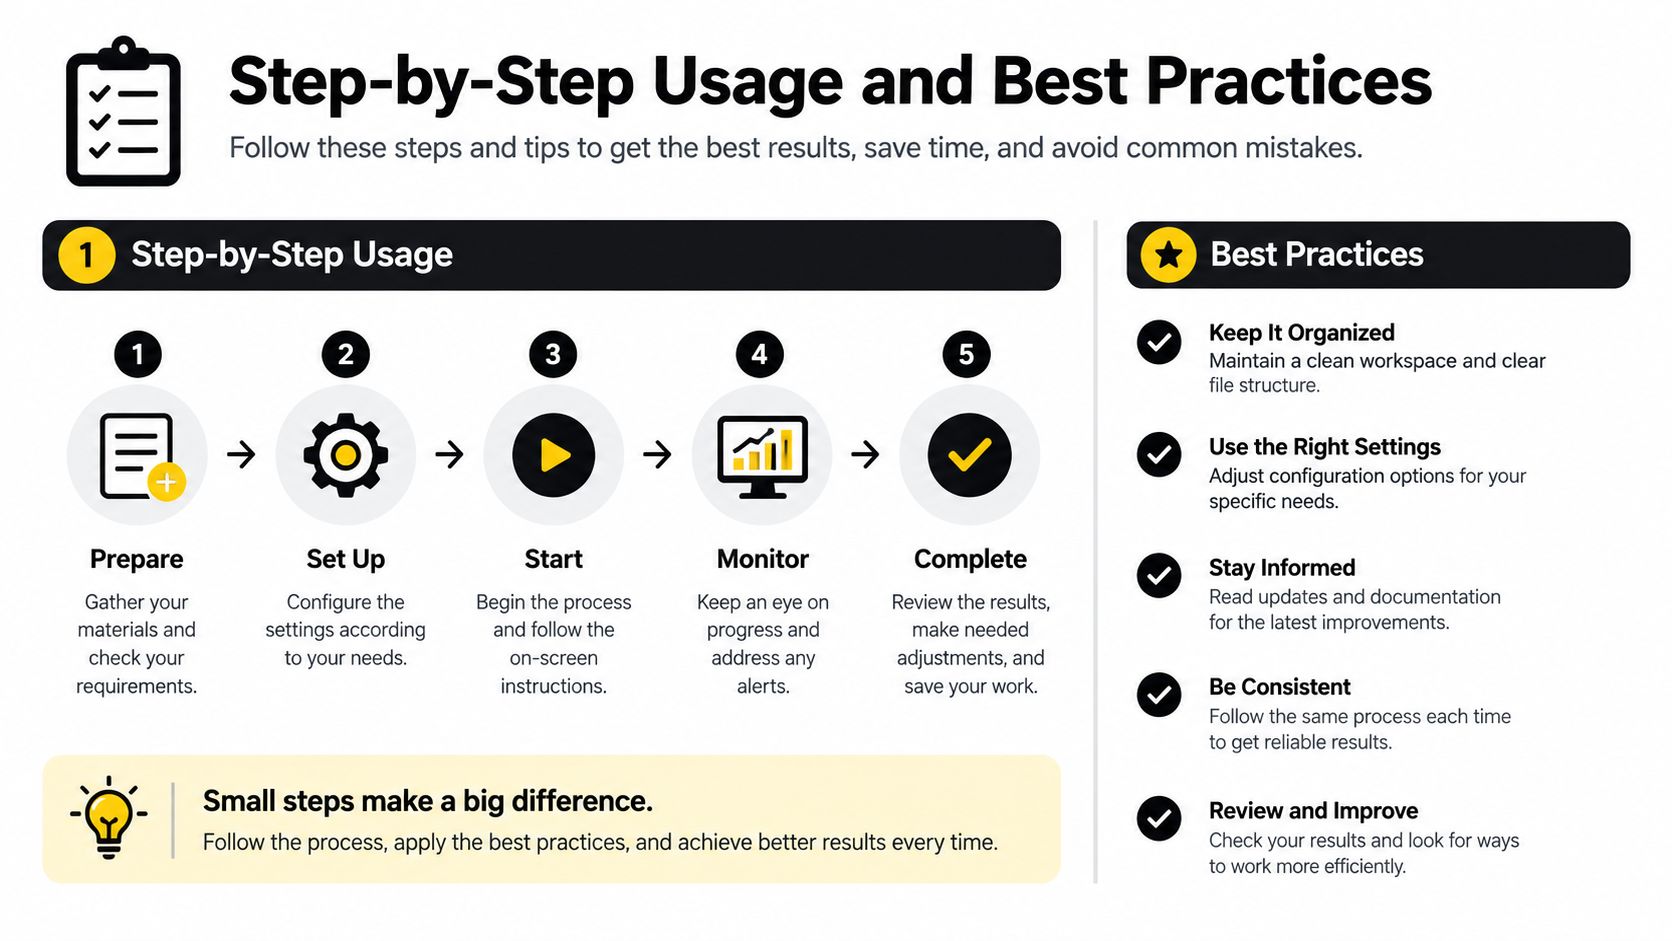
A safe routine starts before the gel touches your teeth. Follow the instructions supplied by your dentist or the specific Zoom product, since wear time differs between formulations. Don't copy another person's schedule or assume that more gel will make treatment faster.
Prepare the trays and teeth
Brush gently and floss before placing the trays, unless your dental professional tells you otherwise. Clean teeth allow closer contact with the gel, while flossing helps remove debris between the teeth. Avoid whitening over active gum inflammation or untreated dental problems until a professional has evaluated them.
Use only the amount of gel recommended for your trays. A small amount placed in the intended area of each tooth is generally more useful than filling the tray. Excess gel can squeeze onto the gums and cause irritation without improving contact with enamel.
Place, wear, and remove
Seat the trays carefully and wipe away visible overflow from the gumline. Keep them in place for the prescribed period. The guide to using carbamide peroxide gel can help explain general handling, but your dentist's directions for your specific product take priority.
After removal, rinse the trays and clean them according to the product instructions. Rinse your mouth as well, and avoid brushing aggressively if your teeth or gums feel tender. Store the trays in their case so they don't warp or collect debris.
Manage discomfort early
Mild, temporary sensitivity can occur. A dentist may suggest a desensitizing toothpaste such as Fluoridex or a remineralizing product such as MI Paste, depending on your needs and medical history. These products don't replace an assessment if pain is sharp, persistent, localized, or worsening.
- Reduce exposure: Ask your dental professional whether shorter wear time or less frequent use is appropriate.
- Protect the gums: Remove excess gel at the edges rather than leaving it against the gumline.
- Pause when necessary: Don't continue through significant discomfort without professional advice.
- Check the fit: A damaged or distorted tray can distribute gel unevenly.
Consistency beats overuse. Completing the prescribed routine with a comfortable fit gives you better control than adding extra gel or extending wear time on your own.
Addressing Safety and Common Misconceptions
The belief that all whitening damages enamel comes from confusing temporary sensitivity with structural injury. Peroxide can move through enamel during bleaching, and some people notice short-lived sensitivity or gum irritation, but evidence reviews describe these as the most common adverse effects and generally mild and transient when products are used appropriately.
That doesn't make every whitening situation risk-free. Higher peroxide concentrations tend to increase sensitivity and irritation, and a patient with untreated decay, cracked teeth, gum disease, or exposed roots may need care before bleaching. The safest plan accounts for the mouth in front of you, rather than treating whitening as a one-size-fits-all cosmetic step.
Myth one, brighter means better
A very bright shade isn't automatically the right target. Natural teeth have variation, and whitening can reveal differences between natural enamel and existing crowns, veneers, fillings, or bonding. A dental professional can help you choose a realistic endpoint and identify restorations that won't change color.
Uneven results can also reflect different stain types or tooth anatomy. If one tooth remains darker, adding more gel may not solve the underlying issue. The tooth may need diagnostic evaluation instead.
Myth two, the LED does the essential work
Evidence reviews of bleaching methods found that light activation doesn't measurably improve whitening outcomes or increase sensitivity risk for at-home or combined protocols, according to this review of bleaching techniques and adverse effects. The gel's peroxide concentration, tray fit, and wear time are more important variables.
That doesn't mean every light-containing product is dangerous. It means the light itself shouldn't create unrealistic expectations or justify ignoring the instructions for the chemical agent. A tray that fits well and a schedule you can follow matter more than a glowing accessory.
The reassuring part: Professional supervision turns whitening into a controlled process, with the option to adjust the gel, fit, or schedule when your teeth or gums need more protection.
Call the dental office if you develop severe pain, persistent gum whitening or soreness, swelling, or a reaction that doesn't settle. Keep the gel away from children, follow storage instructions, and never use a product intended for a different tray or treatment plan without checking first.
Maintaining Your Results Long-Term
Whitening isn't a permanent change in the sense of immunity from future staining. Everyday exposure to pigmented foods and drinks, tobacco, and plaque can gradually alter the appearance of natural enamel. Your oral hygiene routine, saliva, diet, and the type of original discoloration all influence how the shade looks later.
Maintenance should be planned rather than improvised. A dental professional may recommend occasional tray use, a lower-concentration gel, or a review before retreatment. Recent evidence indicates that lower-concentration at-home gels can whiten effectively while producing milder sensitivity, but the right concentration still depends on the patient and the product.
The 2024 retrospective Philips Zoom study followed 111 participants using a combined in-office and take-home protocol. It found that 99.1% of teeth reached the brightest measured endpoint, with 80.2% ending at B1, 18.9% at A1, and 0.9% at A2; 1.8% of patients reported immediate post-treatment sensitivity, as reported by the study record from the Lithuanian University of Health Sciences. The whitening effect remained close to A1/A2 levels after 12 to 15 months, providing a useful durability marker for combined professional and home protocols.
Build a maintenance habit
- Use touch-ups strategically: Follow the interval recommended by your dentist instead of repeating full treatment whenever the smile looks slightly less bright.
- Keep the trays usable: Clean and store them properly, and have the fit checked if they become damaged or uncomfortable.
- Respond to sensitivity: Lower-intensity maintenance may be preferable to aggressive retreatment for people who become sensitive.
- Review dental work: Ask about visible restorations before refreshing the shade, especially if the front teeth include crowns, veneers, or bonding.
- Protect daily cleanliness: Brushing, flossing, and professional examinations help limit plaque-related discoloration and identify problems before another whitening cycle.
Long-term success comes from treating whitening as a maintenance routine, not a single event. If you want to compare professional-grade Zoom gels, sensitivity products, and remineralizing options for a dentist-guided plan, visit DentalHealth.com. Browse the Philips Zoom collection and practical oral-care resources, then confirm the appropriate product and schedule with your dental professional.