
How to Use a Dental Pick Safely: A Complete Guide
Food gets trapped between teeth at the worst times. A popcorn hull wedges under the gumline, a shred of meat catches behind a molar, and suddenly your tongue won't leave the area alone. Many people respond by grabbing whatever is nearby, including a fingernail, a safety pin, or the sharp corner of a takeout fork. That's how small irritation turns into a sore, bleeding gum.
A dental pick can help, but only when you use it with control. The point isn't to dig. The point is to guide debris out and disturb plaque gently without cutting the tissue that seals around your teeth.
That matters even more for people helping someone else with daily care. If you're supporting an older adult or a family member with limited dexterity, oral hygiene often becomes part of a bigger caregiving routine. In that setting, a comprehensive guide to home health aides gives useful context on how hands-on home care tasks fit into everyday support.
Your Guide to At-Home Precision Cleaning
A dental pick is a precision tool, not a scraping weapon. Used properly, it helps remove trapped food and clean hard-to-reach spaces. Used roughly, it can bruise gums, scratch tooth surfaces, and create a problem that didn't exist five minutes earlier.
The safest mindset is simple. Think light contact, small movements, and clear purpose. If you don't know what you're trying to remove, or if the tool isn't sliding in easily, stop and reassess.
Practical rule: If the tool needs force, it's the wrong tool, the wrong angle, or the wrong size.
People often lump several products together under the phrase "dental pick." In daily life, that may mean a floss pick, a soft interdental pick, or a small interdental brush. The technique changes slightly depending on the design, but the same safety principle applies to all of them. Gentle guidance beats aggressive pressure every time.
A good home routine also stays within limits. A pick can remove food and help disrupt fresh plaque between teeth. It can't fix everything. Once buildup hardens into tartar, home tools aren't the answer.
Here is the standard I give patients:
- Use it for access. Reach spots your toothbrush misses.
- Use it for debris. Lift food out carefully instead of jamming it deeper.
- Use it daily if it suits your mouth. Interdental cleaning works best when it's consistent.
- Don't use it to carve at hard deposits. That's a professional cleaning issue.
When to Use a Dental Pick and When to Choose Another Tool
You finish lunch, and one spot between the back teeth keeps catching. You can feel the food there with your tongue, but brushing does nothing. That is the kind of problem a dental pick can solve at home, if the tool fits the space and you use it with a light hand.
A pick is most useful when the job is specific. Removing trapped food. Cleaning around a retainer wire. Reaching a narrow area your toothbrush misses. In each case, the goal is targeted cleaning with control, not scraping.
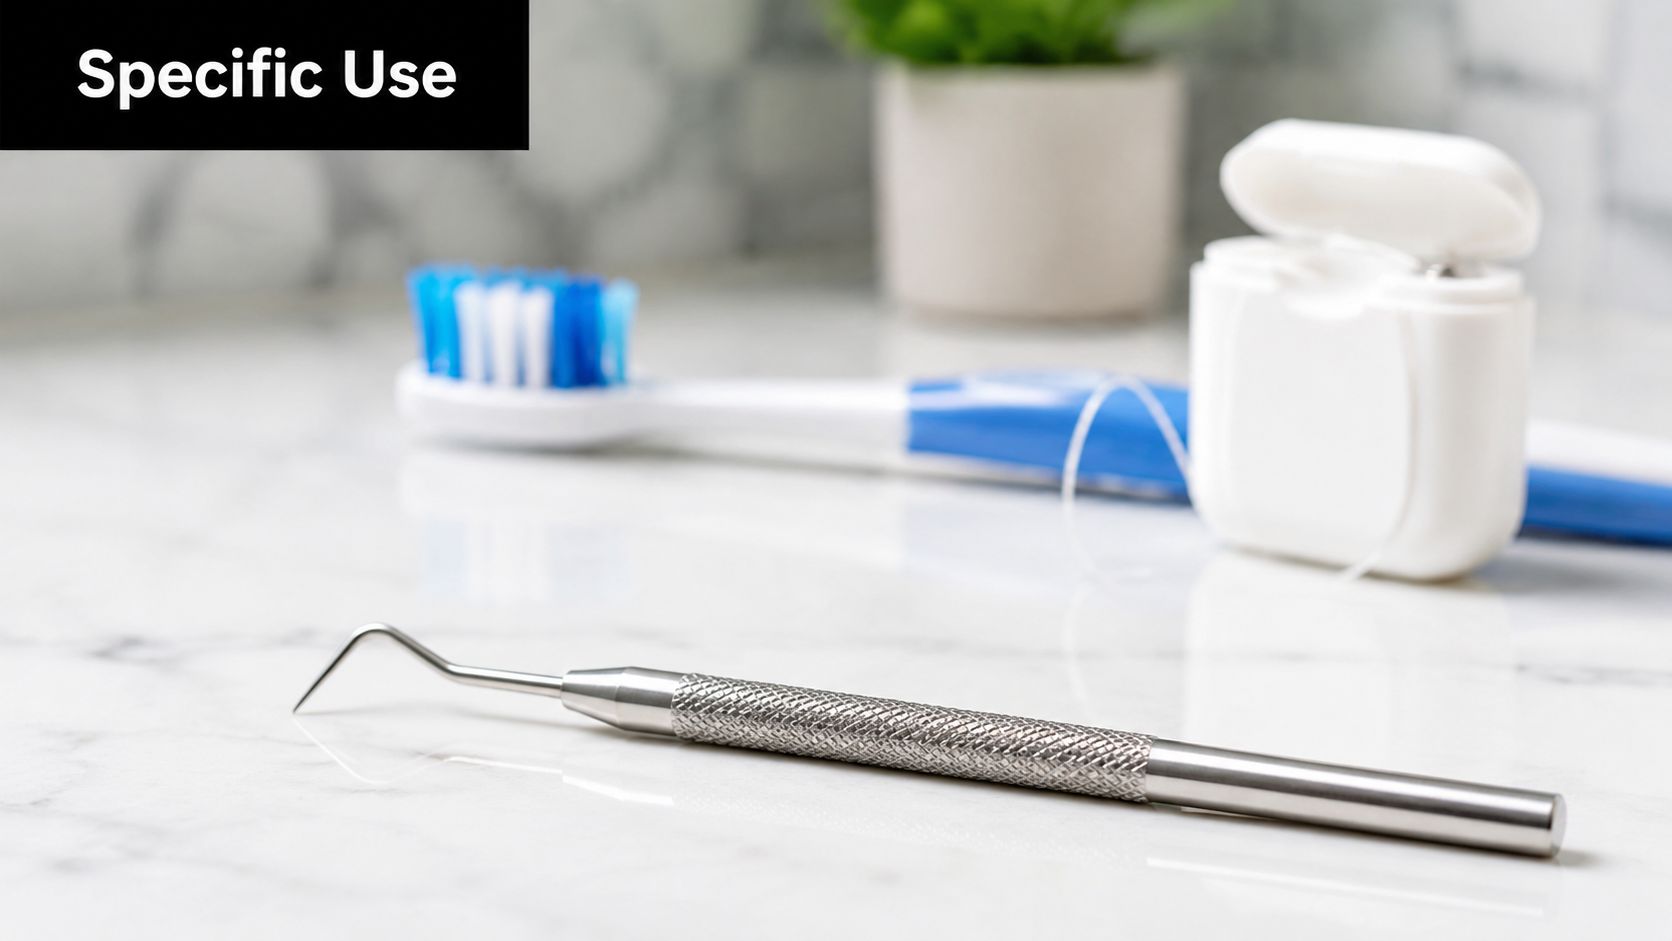
Guidance from SUNSTAR GUM on interdental brush home care notes that these tools are often useful around retainers, braces, and other fixed orthodontic appliances, and that patients may need different sizes for different spaces. That size point matters more than many people realize. If the pick does not enter with light resistance, it is too large, poorly angled, or the wrong tool for that area. Forcing it is how gum tissue gets nicked.
Situations where a pick makes sense
Some situations are a good match for a handled pick or soft interdental cleaner:
- Around orthodontic hardware. Brackets, wires, and bonded retainers create small traps where food collects.
- At one problem contact. A single area that catches food may be easier to reach with a controlled handle than with loose floss.
- After meals away from home. A floss pick is portable and practical for quick debris removal.
- With limited hand dexterity. Many patients can guide a handle more accurately than string wrapped around the fingers.
Water can help in some of these areas too. If you are deciding between picks and a water device for braces, bridges, or tender gums, this guide to water flosser and oral irrigator options gives a useful side-by-side starting point.
When another tool is better
Choose the tool that matches the shape of the space.
String floss is usually better when you need to hug the tooth closely under the gumline and clean both tooth surfaces. An interdental brush is often better for wider spaces, black triangles, exposed root areas, or larger openings around crowns and bridges because the bristles contact more surface area with less poking. A pick works best for access and gentle debris removal in small, specific spots.
Hard, chalky, or firmly attached buildup is a different category. That is not trapped food, and it is not fresh plaque you can disrupt at home. Once deposits harden into tartar, home picks should stay out of the equation. Scraping at it usually irritates the gums before it removes anything useful.
That trade-off is the one patients need to understand. The more aggressively you use a pick, the less effective and less safe it becomes. Gentle, purpose-driven movements clean better because they protect the tissue you are trying to keep healthy.
The Safe and Effective Dental Pick Technique
You are standing at the bathroom mirror with one stubborn piece of food between two back teeth. The urge is to poke at it until it gives way. That is exactly when gum injuries happen.
Safe technique is quiet and controlled. A good pass should feel precise, with the tool contacting the tooth surface more than the gum. If the movement feels forceful, the angle or the tool is wrong.
Prepare your hands and your grip
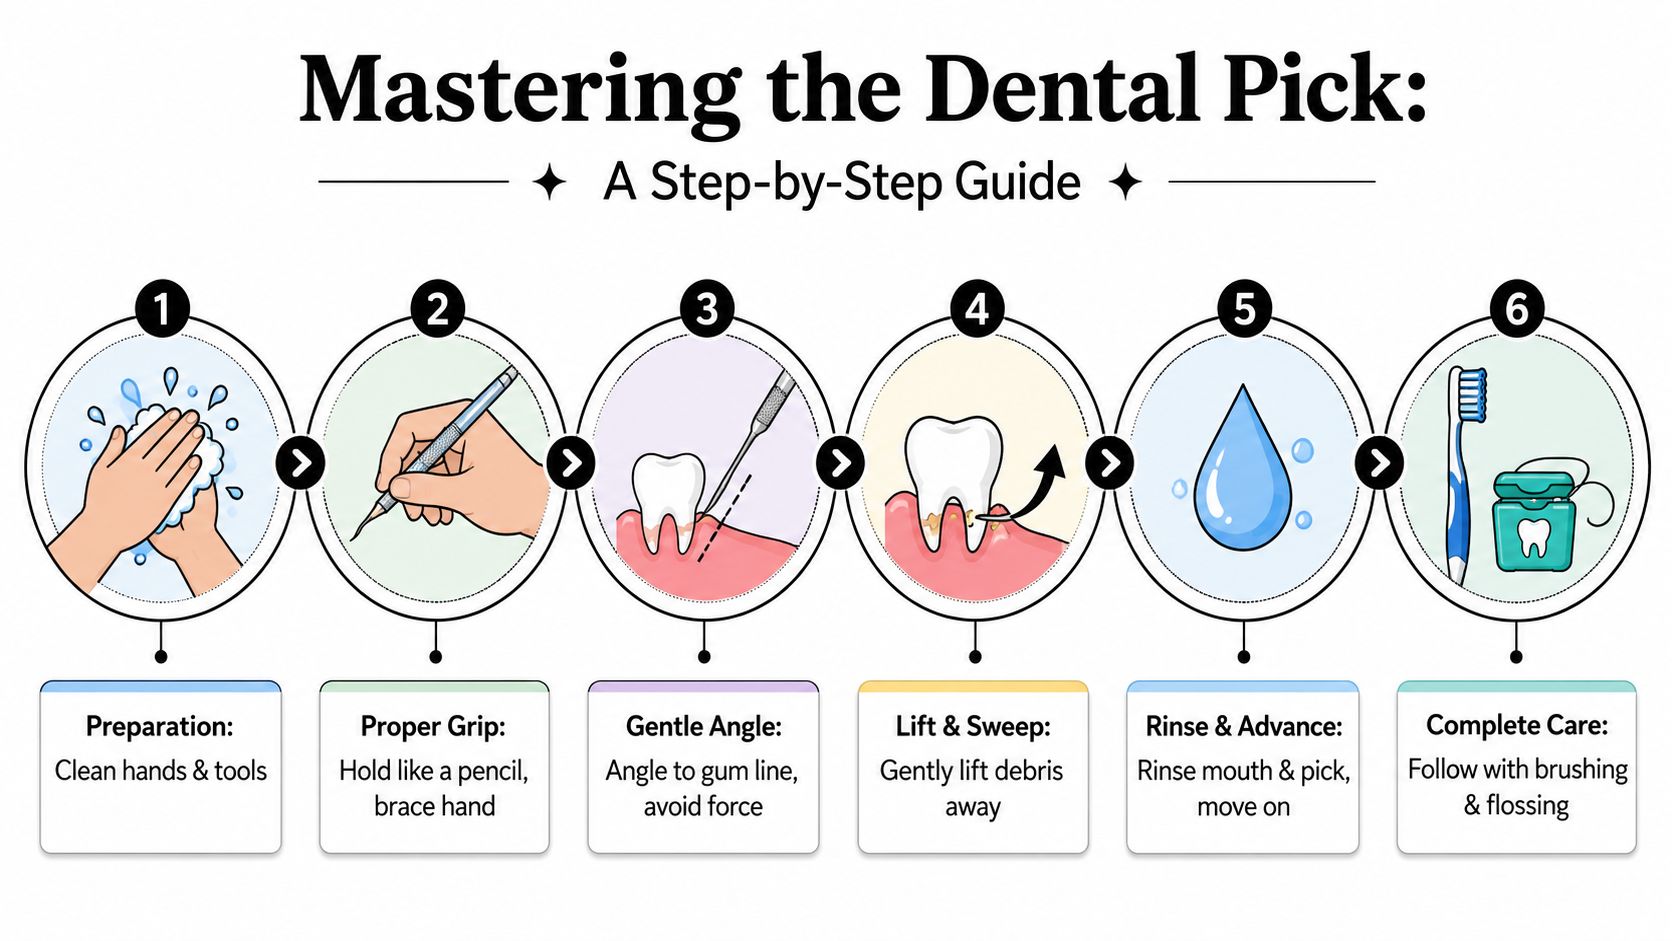
Wash your hands first. If you're using a floss pick or soft interdental pick, start with a clean one. Hold it like a pencil so you can make small movements with your fingers instead of driving from the wrist.
Then brace a finger against a nearby tooth or along the cheek side. I teach patients this because it limits slips. The brace is what keeps a careful cleaning stroke from turning into a stab at the gumline.
A visual walkthrough helps here:
Use the three-step motion
For a floss pick, use the same tissue-safe motion taught for standard floss. Guide it through the contact with a gentle back-and-forth motion, wrap it against one tooth in a C-shape, then slide it up and down the side of that tooth before repeating on the neighboring tooth.
Each part has a purpose.
-
Gentle insertion
Ease the floss through the contact point with a short side-to-side motion. This gets past the tight spot without snapping into the papilla, which is the small triangle of gum between the teeth. -
C-shape adaptation
Curve the floss around one tooth surface. That curve matters because plaque sticks to the side of the tooth, not in a flat line between two teeth. A straight strand often misses the surface you are trying to wipe clean. -
Vertical cleaning stroke
Move the floss up and down along the tooth, including slightly under the gumline, with light pressure. Then clean the adjacent tooth surface before removing the floss.
A good pass feels like a wipe, not a scrape.
Earlier guidance in this article already covers the formal flossing recommendations. The practical takeaway is simple. Gentle adaptation to the tooth works better than pushing harder into the gums. If an area bleeds easily, review these steps for treating bleeding gums at home before you keep working on it.
If you're using a soft interdental pick
A soft interdental pick works differently from floss. You are not wrapping the tooth. You are guiding a flexible tip through the space and letting light contact disrupt soft debris at the entrance and just between the teeth.
Use very light pressure. The pick should pass with mild resistance, not a forced push. If it does not fit comfortably, stop and switch tools rather than trying to create space with pressure.
These guardrails help:
- Angle slightly instead of aiming straight into the gum.
- Use short in-and-out strokes.
- Keep the strokes close to the tooth surface.
- Rinse the tip if debris collects on it.
- Stop if you feel a sharp catch, pinch, or pain.
That last point matters. Pain usually means the tip is pressing tissue, not cleaning tooth.
If you want to watch the hand position and movement pattern in real time, this short video is useful:
Common Mistakes That Damage Your Gums and Teeth
A common home-care scenario goes like this. The pick catches, the gum bleeds, and the next move is to press harder to "finish the job." That is how small irritation turns into avoidable trauma.
The habits that cause trouble
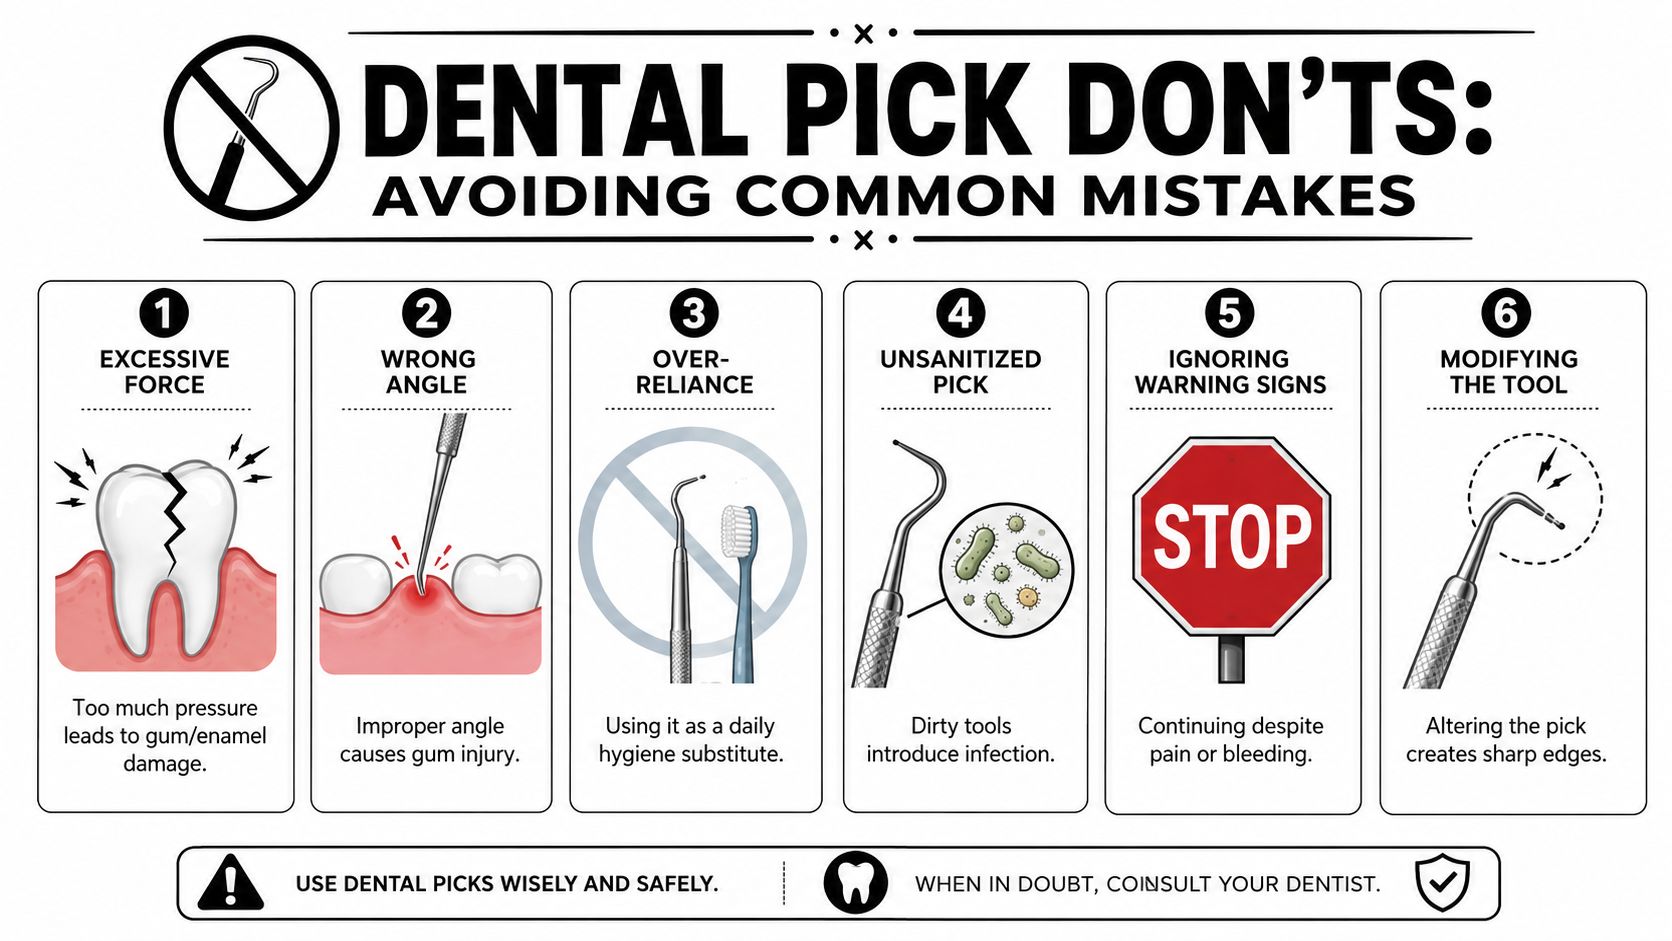
Dental picks work best with control, not force. The goal is to disturb soft debris along the tooth surface without cutting into the gum margin. Once patients understand that purpose, the mistakes are easier to avoid.
Some habits cause problems again and again:
- Driving the tip straight into the gumline. This often causes tenderness, bleeding, and a burning feeling afterward.
- Forcing the tool through a space that is too tight. If the pick does not pass with light pressure, the fit is wrong or a different tool is needed.
- Scraping the tooth as if you are removing tartar. Home picks are for soft plaque and trapped food, not for scaling hardened buildup off enamel.
- Using a pick instead of brushing. Interdental cleaning helps with areas the toothbrush misses, but it does not clean the full tooth surface.
- Continuing after sharp pain or a hard catch. That usually means you are pressing tissue or hitting a rough edge, not cleaning effectively.
One mistake I correct often is "digging" at one sore spot because it feels dirty. Repeatedly attacking the same area usually inflames it more. A better response is to stop, rinse, and come back only if the tool can move smoothly along the tooth without poking the tissue.
Bleeding is another point of confusion. People often treat blood as a sign that the area needs more pressure. In practice, bleeding during picking usually means the tissue is already irritated, and extra force makes healing slower. If it keeps happening, review at-home steps for bleeding gums that reduce irritation safely before you keep working on that spot.
Stop if the tool catches, bends, or feels sharp against tissue. A clean stroke should feel smooth, not jagged.
Tool condition matters, too. Disposable picks dull and fray. Reusable tools can develop rough spots, bent tips, or small defects after drops and repeated washing. If the surface no longer feels smooth, replace it. A worn tip can scratch soft tissue even with otherwise careful technique.
Picks vs Floss vs Interdental Brushes
No single tool wins for every mouth. The right choice depends on contact tightness, dental work, hand control, and whether you need routine plaque removal or quick food removal after meals.
How the tools differ in real use
Floss picks are convenient and easy to handle. That's why many people use them more consistently. The trade-off is that they may not wrap around teeth as completely as string floss, so technique matters more.
String floss gives the best opportunity to adapt the floss into the tooth-hugging shape clinicians want. The drawback is usability. Some people struggle to reach the back teeth or keep tension steady.
Interdental brushes shine where there is actual room for a brush to pass. Around braces, retainers, and larger spaces, they often feel more efficient and less frustrating than trying to force floss where it doesn't belong.
For people who prefer a handled option for better reach, long-handle flosser designs and use cases can be worth considering alongside standard floss picks and interdental brushes. DentalHealth.com also carries professional-grade at-home oral care products, which is relevant if you're trying to build a routine around dentist-recommended brands rather than general drugstore browsing.
Interdental Cleaning Tool Comparison
| Tool | Best For | Pros | Cons |
|---|---|---|---|
| Floss pick | Quick daily use, back teeth, portable cleanup | Easy grip, convenient, simple to carry | Doesn't always curve around the tooth as well as string floss |
| String floss | Tight contacts, detailed cleaning along tooth surfaces | Best control for a proper C-shape, adaptable to many contacts | Harder for some people to use consistently |
| Interdental brush | Braces, retainers, larger spaces, some dental work | Good contact in open spaces, practical around appliances | Wrong size can feel traumatic, won't fit very tight contacts |
A simple selection rule
Choose based on the space, not habit.
If the contact is tight and you need close adaptation to the tooth, use floss. If the area has hardware or a larger opening, use an interdental brush or soft pick. If consistency is your main barrier, a floss pick is often better than skipping interdental cleaning altogether.
The best tool is the one you can use correctly, gently, and every day.
Care, Maintenance, and When to See a Dentist
Tool care is part of oral care. A dirty or damaged pick doesn't become safer because you're using it in a clean mouth.
Keep the tool clean and know its limits
For disposable picks, the simplest rule is to use a fresh one rather than stretching its life. If a pick is bent, frayed, rough, or visibly worn, throw it away. Reusable tools need to stay clean and intact. If you can't verify that a reusable tip is smooth and sanitary, don't put it back in your mouth.
At-home cleaning has a hard limit. If you're seeing firm buildup that won't move, persistent swelling, repeated bleeding, or tenderness that keeps returning in the same area, stop trying to solve it with more pressure.
A dental pick is a maintenance tool. It helps with daily plaque control and food removal. It doesn't replace professional diagnosis, scaling, or treatment.
The safest long-term habit is this. Use gentle technique at home, stay consistent with interdental cleaning, and let your dentist or hygienist handle anything hardened, painful, or inflamed.
If you're building a more professional at-home oral care routine, DentalHealth.com offers dentist-recommended products and practical dental blog content that can help you choose tools for cleaning, sensitivity, whitening, and retainer care.