
Teeth Whitening for Aligners Without Ruining Them
After four weeks of bleaching with 10% carbamide peroxide, about half of patients achieved a 3 to 6 shade improvement, while others gained only 1 to 2 shades or more than 7 shades, according to clinical data summarized in a review of whitening during clear-aligner therapy. That variation is the key lesson behind teeth whitening for aligners. Your aligner can hold gel against enamel, but it can't promise an even result. Gel strength, wear time, tray fit, attachments, and overflow onto your gums decide whether you get a brighter smile or a patchy one with sore tissue. Start with the studied middle ground, not the strongest syringe you can buy.
Gel Strength and Nightly Wear Times
The best-studied schedule places a mid-strength carbamide peroxide gel inside a clean, well-fitting aligner and wears it overnight across a roughly two-week course. That is the protocol to raise with your dentist before any stronger option. Starting on your own skips a required check, because peroxide on a cracked tooth, a leaking filling, or inflamed gums turns a cosmetic plan into a pain problem.
Strength and time work as a pair. A weaker gel worn consistently does measurable work, and a stronger gel never lets you skip the schedule. Wearing aligners with no gel isn't whitening at all. The plastic only holds the agent in place; without a controlled peroxide dose, you're straightening teeth in their current color.
An aligner that comes through whitening intact can still deliver an uneven shade. Attachments, tray fit, and gel overflow decide where the peroxide sits, and those details matter more than the number printed on the syringe.
What the Ferrara Trial Shows About Schedule
The University of Ferrara clinical study of 38 adults in clear-aligner treatment used 3% hydrogen peroxide or 10% or 16% carbamide peroxide for 9 hours per day. Most groups whitened only during days 7 to 14, while one group used 16% carbamide peroxide throughout days 1 to 14. Improvement ranged from 51% of measured tooth sites with 3% hydrogen peroxide to 73% with 16% carbamide peroxide used across the full 14-day period.
Read that gap carefully. The highest result came from the longest controlled course, not from a single long night. Extending exposure across more days gave peroxide more chances to work at a set dose. It doesn't prove that everyone should jump to 16%. The sample was small and used a specific aligner system, so it supports the concept and the schedule effect without settling your personal dose.
| Gel | When it was used | Hours per session | Reported result | Main caution |
|---|---|---|---|---|
| 3% hydrogen peroxide | Days 7 to 14 of a 14-day window | 9 hours | 51% of measured tooth sites improved | Smallest studied effect in the Ferrara trial |
| 10% carbamide peroxide | Across a two-week course | Overnight, matching normal aligner wear | Steady improvement across the course, performing comparably to conventional bleaching trays in reviewed studies | Preferred conservative benchmark; mild transient sensitivity possible |
| 10 to 11% carbamide peroxide | During active aligner therapy | Nightly, as prescribed | Consistent whitening in reviews of aligner use | Individual response varies widely |
| 16% carbamide peroxide, second week only | Days 7 to 14 | 9 hours | More sites improved than 3% hydrogen peroxide, fewer than a full 16% course | Do not lengthen the night to speed the shade |
| 16% carbamide peroxide, full course | Days 1 to 14 | 9 hours | 73% of measured sites improved | Highest site improvement in that trial and a higher sensitivity risk |
| Above 16%, including short daytime gels | Only if a dentist prescribes it | Not the overnight aligner protocol | Not shown to beat 10% just because the percentage is higher | Gel on gums and uneven exposure become more likely |
How to Read the Table Without Overdoing It
Use the 10% row as your conservative home benchmark. It gives you an overnight window that matches normal aligner wear, and it leaves room to pause if sensitivity shows up. Treat the 16% rows as a trade-off, not a shortcut. More sites improved in that trial, but stronger gel also raises the chance that you'll feel it.
Response is individual, so the shade figures are studied ranges, not guarantees. Your starting color, enamel thickness, diet stains, and how well the tray seats all move the result. If you're unsure how long a tray session should last for a given product, the guide to how long to wear teeth bleaching trays helps you match the product type to the clock instead of guessing from a syringe label.
Practical rule: Pick the lowest strength your dentist approves, wear it for the prescribed hours, and finish the full course before you judge it. Changing strength mid-course makes it impossible to know what helped or hurt.
Don't start if you have active decay, cracks, leaking fillings, inflamed gums, unexplained sensitivity, or a tray that doesn't seat fully. A loose tray lets saliva flood in and gel leak out, so you get diluted whitening on the tooth and concentrated irritation on the gum. Fix the fit and the health issues first. Whitening can wait a week. A sore, uneven result can't be undone as easily.
How to Whiten Teeth Inside Your Aligners
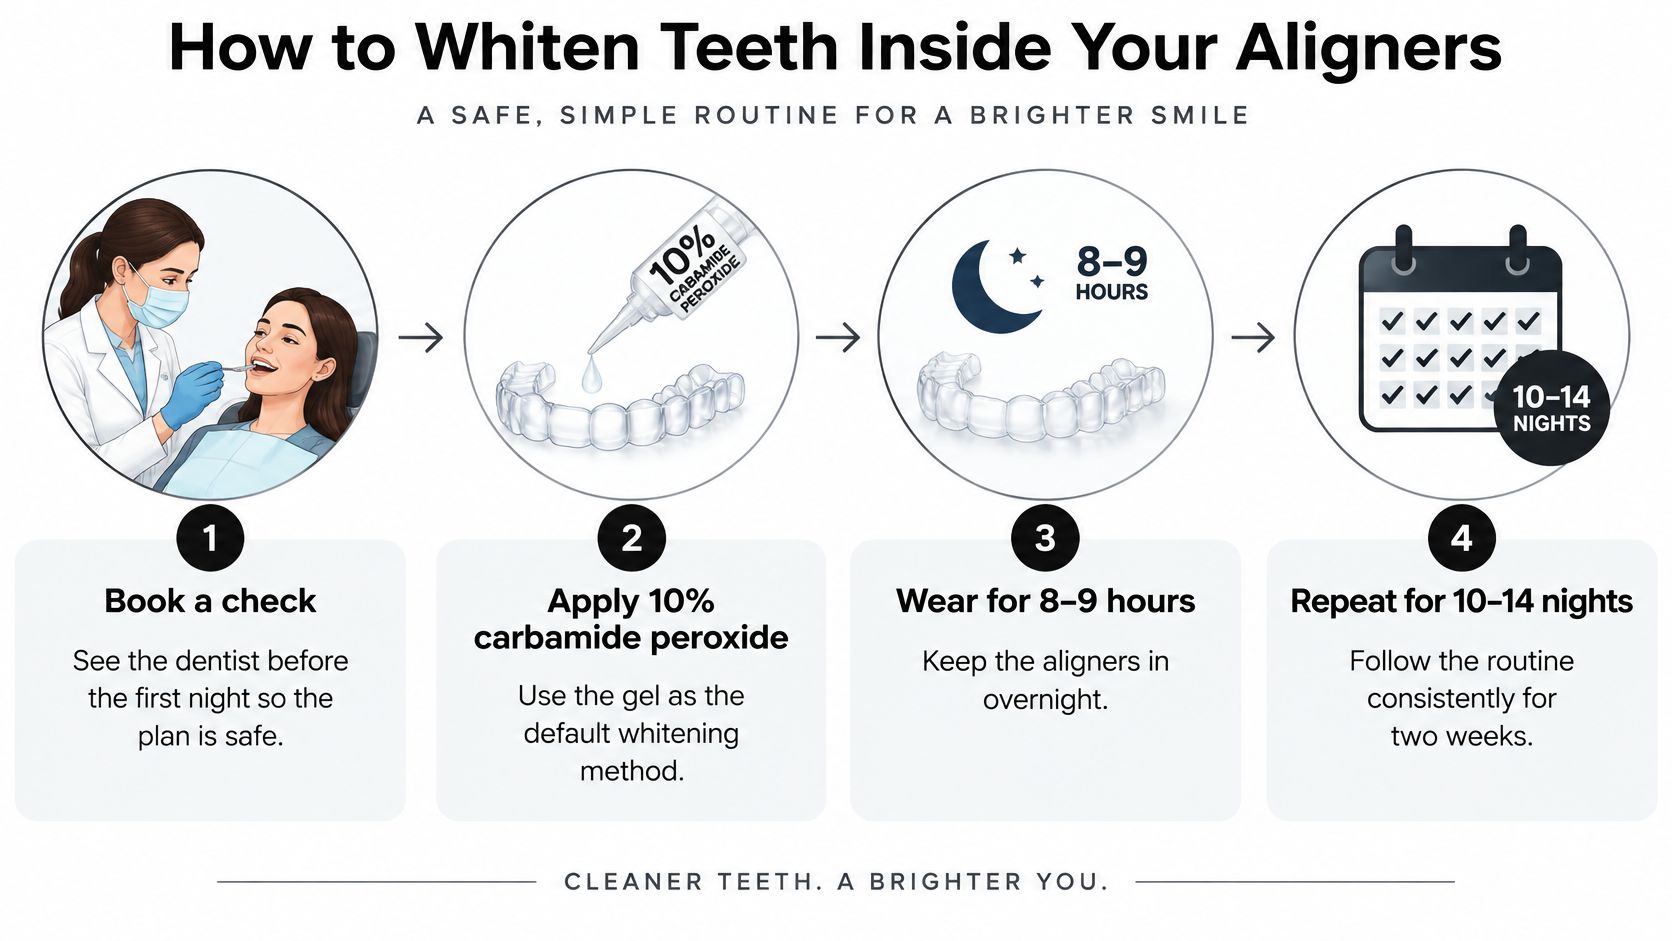
One repeatable routine beats a different approach every night. The protocol described in a clinical review of aligner whitening protocols uses 10% carbamide peroxide inside a clean, well-fitting aligner for approximately 8 to 9 hours nightly over 10 to 14 days. That same source describes an average improvement of about 3.5 Vita Classic shade-guide units after two weeks with Invisalign aligners, and a separate 10-day comparison found no significant whitening difference between Invisalign aligners and conventional bleaching trays.
In plain terms, your aligner can do the tray's job when it fits like one. Your technique decides whether the gel stays where it belongs. Follow these steps in order, and don't improvise the dose when the first mornings look unchanged.
The Nightly Routine Step by Step
- Book a check before the first night. Your dentist looks for caries, cracks, leaking restorations, and gingival inflammation, and confirms your current aligner seats well enough to hold gel. Skipping this step is how people bleach over a cavity and blame the gel for the pain.
- Record a baseline shade. Take a photo in the same bathroom light you'll use later, or note a Vita shade tab with your dentist. Without a baseline, week two becomes a memory test, and memory always expects more change than enamel delivers.
- Brush, floss, then rinse and fully dry the aligner. Plaque blocks gel contact, and saliva or rinse water left inside dilutes the gel before it touches enamel. A dry tray keeps the dose you placed closer to the dose your teeth receive.
- Load a small, manufacturer-directed amount. Put one drop in each tooth compartment, or a thin line along a simple tray, using about half a syringe for the upper tray and half for the lower. Don't pack the compartments or press gel hard onto the teeth, because excess has nowhere to go except onto your gums.
- Seat the aligner and wipe the gumline. Run a clean finger or cotton swab along the edge to remove overflow right away. This ten-second step prevents most of the burning and white patches people report the next morning.
Finishing the Night and the Course
- Wear it for the prescribed 8 to 9 hours, usually overnight. Don't add hours because the color looks flat on day three. Peroxide works across the course, and extra time mostly adds sensitivity risk.
- Remove, rinse, and clean up gently. Rinse your mouth with tepid water, brush gently with a mild toothpaste, then rinse the aligner and let it dry before it goes back in or into its case. Dried gel left in the tray makes the next dose uneven before you even start.
- Repeat nightly and reassess around day 14. Compare against your baseline photo in the same light. Stop once you reach the target shade instead of finishing a leftover syringe out of habit.
Watch one common coverage mistake. If you dot gel only on the six front teeth, your premolars stay behind and the smile looks two-toned when you grin wide. The gel line has to follow every tooth the aligner covers, even the ones you don't see in a close-up selfie. A thin, complete line beats a thick, partial one.
Stop temporarily and get a dental assessment if sensitivity becomes spontaneous or persistent, or if gel keeps contacting inflamed gum tissue. A pause protects the course. Pushing through pain usually ends it.
Remember what gel can't change. It whitens natural enamel, not composite attachments, crowns, veneers, or fillings in the same way. If you have visible bonding on a front tooth, ask your dentist before you start how that tooth will look once its neighbors lighten. That conversation takes two minutes at the check. Fixing a mismatch later costs an appointment and new composite.
Gel Spills Sensitivity and Aligner Damage
Will the gel warp your aligner? That's the first safety question most wearers ask, and it covers only half the test. An in-vitro materials investigation of Invisalign trays and 10% carbamide peroxide found no excessive distortion or degradation of Invisalign material, though the authors noted that clinical trials are still needed to establish real-world feasibility.
So the plastic surviving is nearly settled science at studied strengths. What that result does not cover is everything happening around the plastic: excess gel sitting on your gums, saliva pooling in a gap and diluting the dose, an attachment blocking even exposure. A tray can look fine in your hand and still deliver a sloppy dose in your mouth.
Diagnosing Problems the Morning After
| What you notice | Likely cause | What to do next |
|---|---|---|
| Burning gums or a white patch at the gumline | Too much gel, or gel pushed past the edge | Remove the gel, use a smaller drop or thinner line, and wipe the gumline before the next night |
| Zingers that fade the same day | Normal transient sensitivity, more common with stronger gels or longer wear | Keep the 10% row and do not add hours; pause if it lasts past the day |
| Ache with no hot or cold trigger | Sensitivity beyond the usual mild effect, or gel on already inflamed gums | Stop whitening and get a dental check before another session |
| Aligner looks cloudy, feels softer, or no longer seats | Peroxide plus heat, dried gel, or a tray that was already due to change | Take that aligner out of service and ask the orthodontist before wearing it again |
| Almost no shade change after two full weeks | Saliva flooded the gel, or nights were skipped | Dry and reseat the tray and finish a consistent 10 to 14 nights before considering a stronger gel |
Start with the most common row. A white patch or burn at the gumline almost always means the tray was overloaded, so resist the urge to switch brands first. Shrink the drop, keep it off the edge, and wipe after seating. If the tissue is raw, skip a night and let it settle before you test the smaller dose.
Same-day zingers are the familiar, mild effect, and they happen more often at higher concentrations. Cold water stings, then the feeling fades. That pattern calls for patience, not escalation. An ache with no trigger, or pain that lingers into the next day, is a different signal: stop and call your dentist. Our overview of teeth whitening gel side effects can help you sort ordinary sensitivity from symptoms that need an exam.
Protecting the Plastic Itself
Two habits age aligners fastest during a whitening course. Hot water can distort fit, and gel left to dry in the tray leaves residue that changes the next dose and roughs up your cleaning routine. Rinse with tepid water, clean the tray after wear, and let it dry fully. One more habit to drop: storing an aligner soaking in leftover peroxide on the theory that it keeps working. It whitens nothing from the case, and it exposes the plastic for zero benefit.
Read the symptoms in the right direction. A cloudy or newly loose aligner is a fit problem, so take it out of wear and let your orthodontist judge it, because a tray that doesn't seat can't move teeth or hold gel evenly. Little shade change after two steady weeks points the other way, toward saliva dilution or missed nights. Correct the dry-tray routine and consistency before anyone talks about raising the percentage.
A structurally intact aligner can still be a bad whitening tray. Judge it by fit, seal, and where the gel ends up, not by whether the plastic survived.
Attachments Stains and Uneven Color
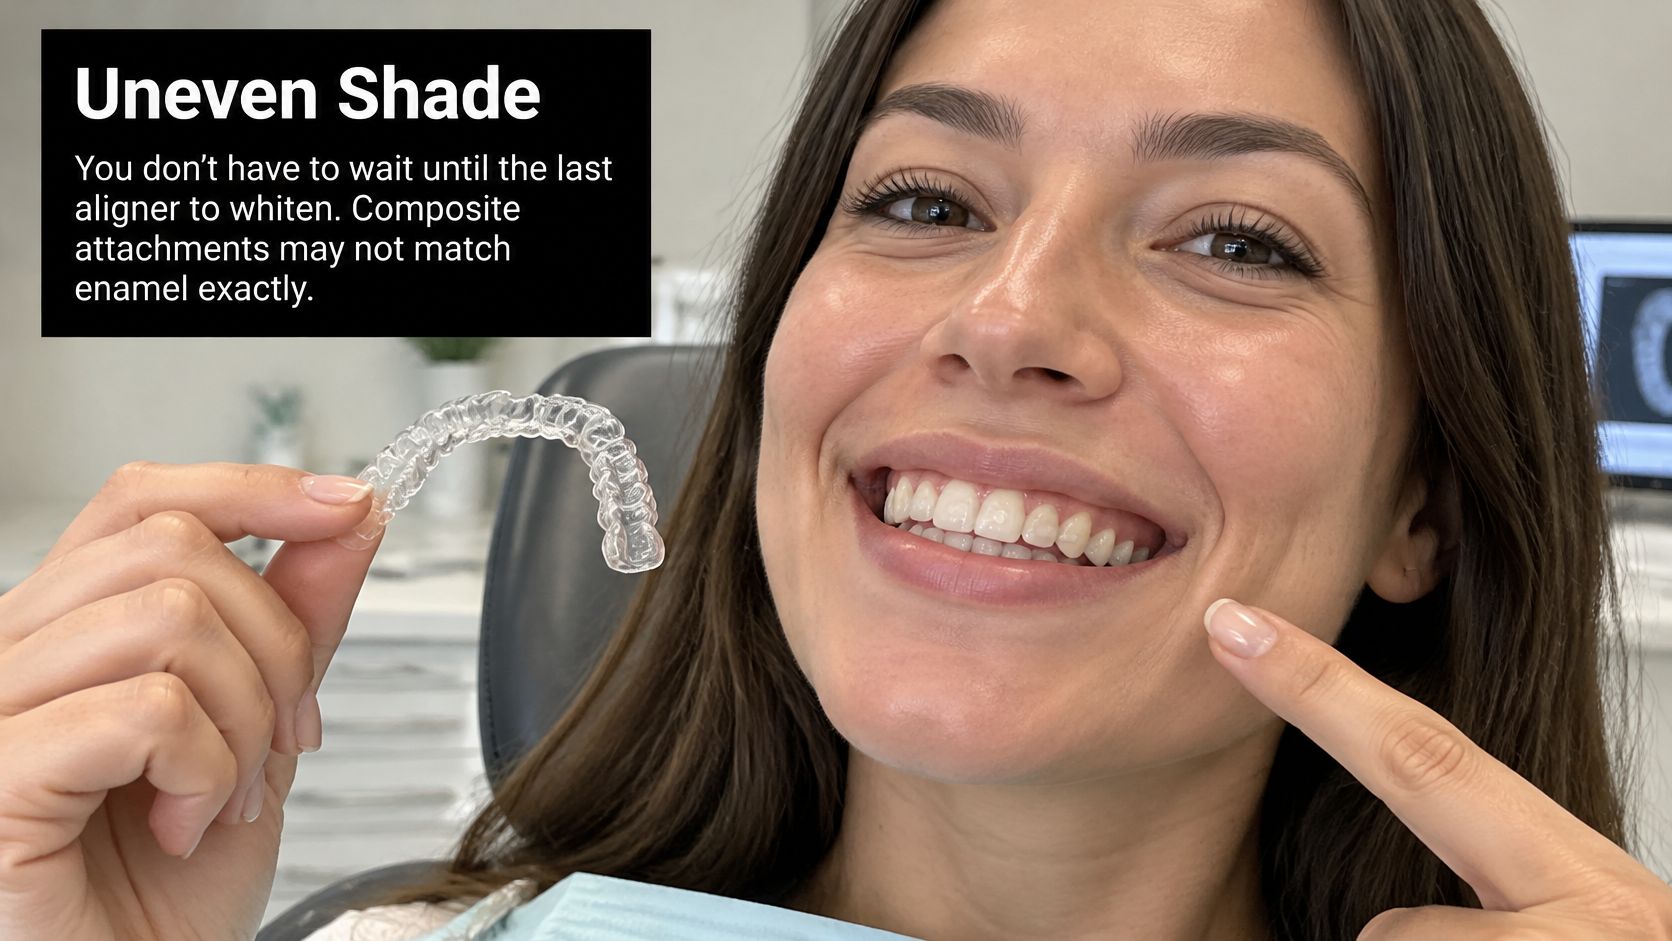
You don't always have to wait until the last aligner to whiten. That blanket rule sounds safe, yet it misses what creates uneven color during treatment. The bigger issue is usually the small composite attachments bonded to your teeth. Those bumps behave differently from the enamel around them, and that difference drives most of the shade problems people notice mid-treatment.
Composite and enamel do not stain or lighten in the same way. Once you understand that, the patchy mirror result stops looking mysterious.
Why Attachments Can Look Darker Than the Tooth
Say you drink coffee every morning with your aligners out, then rinse and put them back in. The aligner shields most enamel for much of the day, while the attachment material picks up pigment more readily. Over weeks, the tooth can look fairly clean while the small bump on it looks tea-stained by comparison. Tea, red wine, and tobacco create the same contrast, just at different speeds.
Bleaching during treatment may lift stain from exposed enamel and reduce overall discoloration. It still won't turn composite into enamel. Your eye may read a halo or a faint square where the attachment sits, because the enamel around it changed and the attachment didn't change in the same way. The mismatch shows up fastest on front teeth, where even a slight tone difference catches light.
Crowns, veneers, and fillings create the same problem on a bigger scale. Front-tooth bonding placed years ago can look yellower once neighboring teeth lighten, and whitening gel won't move its shade either. Any dental work in the smile zone sets a ceiling on how even the result can look.
Expect one more shift at the end. When attachments come off, enamel that sat underneath them may differ from enamel that stayed exposed. Your final color isn't settled until that appointment, which is why some people need a short touch-up after debonding even if they whitened during treatment.
The short video below walks through how attachment placement and daily habits affect what you see in the mirror during treatment.
A Simple Go or Wait Decision
Treat this as a decision about attachment position and existing dental work rather than a fixed rule about timing. Two factors dominate: how visible the attachments are, and how much of your smile is composite or porcelain that peroxide can't change.
- Whitening during treatment is reasonable when your orthodontist confirms healthy gums, a fully seated tray, and a modest peroxide strength, and you accept that attachments won't match perfectly. This suits people with small or less visible attachments who want to control stain buildup as they go.
- Waiting is the smarter plan when large attachments sit on the front teeth, when restorations already dominate your smile, or when heavy diet stain means you'd rather do one even course at the end. Two rushed rounds usually please people less than one planned round after attachments come off.
Ask one direct question at your next review: if I whiten now, which teeth will still look mismatched because of attachments or restorations? A specific answer beats a generic yes or no. You'll know whether you're buying a maintenance step during treatment or a finishing step after it.
Cleaning Aligners and Holding the Shade
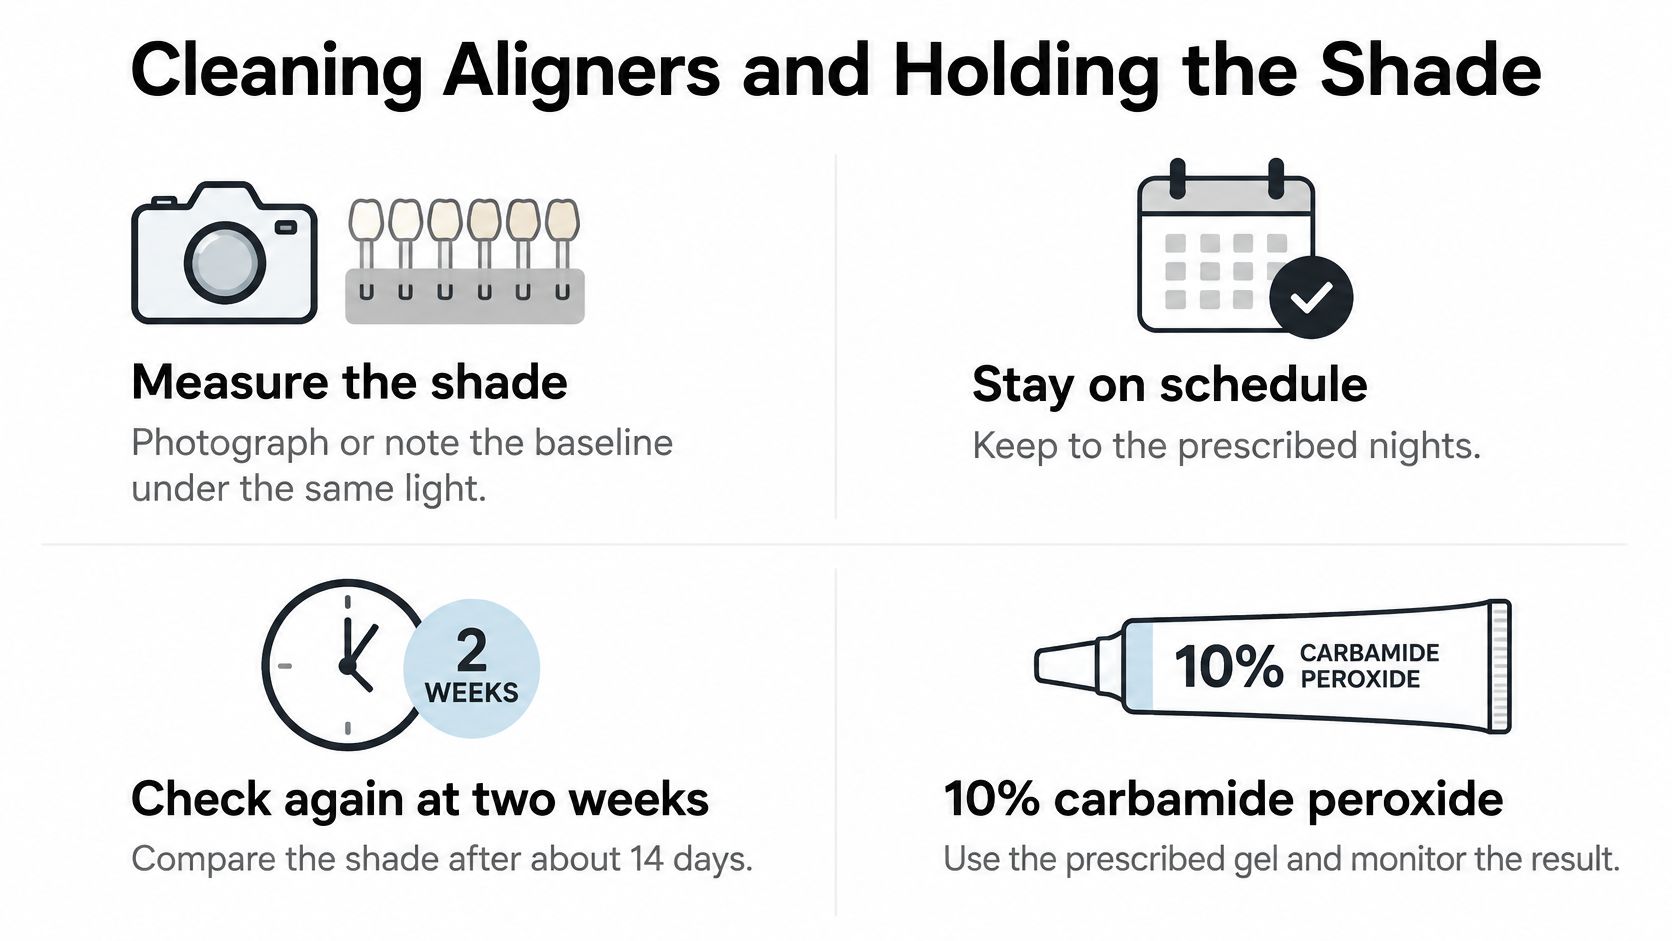
Treat your shade as something to measure, not chase. Photograph or record the baseline under consistent lighting, stay on the prescribed concentration and schedule, then look again at roughly two weeks. A review and clinical summary of aligner whitening outcomes reports that in a 10% carbamide peroxide aligner study, approximately half of patients achieved a 3 to 6 shade improvement after four weeks, while others moved only 1 to 2 shades or more than 7 shades.
That spread should calm you down during a slow first week. A modest early change doesn't mean the gel failed, and it isn't a reason to double the dose. Stop once you reach the target shade. Continuing indefinitely because gel remains in the syringe trades comfort for very little extra brightness.
Keeping the Tray Clean Enough to Work
Saliva dilution, gel overflow, trapped plaque, and inconsistent nightly wear all reduce predictability and raise irritation risk. After every whitening wear, rinse the aligner, brush it gently with a soft brush and a non-abrasive, non-whitening cleanser, and air-dry it. Hot water can warp fit, and abrasive paste scratches plastic so it holds stain and odor more easily.
On ordinary non-whitening days, clean the aligner morning and night. Plaque left in the tray sits under the next gel application and presses against your gumline for hours. For a fuller routine, including what to avoid with heat and scented soaps, follow the steps for how to clean clear aligners and keep them boringly consistent. Boring is good here. Your teeth and the plastic both prefer it.
- Rinse after staining drinks: Coffee, tea, red wine, berries, and tobacco stain enamel while aligners are out, so rinse with water before trays go back in.
- Skip storage in gel: Leftover peroxide in the case doesn't maintain your shade, and it leaves residue you'll have to scrub off later.
- Use sensitivity products as support, not bleach: A sensitivity toothpaste or remineralizing paste between whitening nights can calm zingers, but it won't replace a prescribed whitening course.
Knowing When to Pause the Whole Plan
Postpone whitening until active decay, defective restorations, periodontal inflammation, or unexplained sensitivity has been evaluated. Coordinate the timing with orthodontic reviews, especially when attachments are present or teeth have recently moved. New positions can expose enamel surfaces that weren't facing forward before, and your clinician may want the next tray's fit confirmed before you add gel.
Aligners already limit new stain while they're worn, which helps a short, measured course hold its result. That's why a 10 to 14 night course plus ordinary cleaning usually protects color better than repeating high-strength gels whenever the mirror disappoints you. You're maintaining enamel that's shielded most of the day. Don't turn maintenance into a monthly escalation contest.
Start Only After Your Dentist Clears You
Your next step isn't a purchase. It's a short set of questions for the dentist or orthodontist who knows your trays, attachments, and gum health. Ask whether your current aligner may hold gel, whether front-tooth attachments make waiting wiser, and whether 10% carbamide peroxide for 8 to 9 hours is the right starting point for you.
Those three answers settle most of the risk in teeth whitening for aligners. Tray fit controls overflow. Attachment position controls cosmetic mismatch. Strength controls sensitivity. If any answer is no, you've saved money and avoided learning the same lesson through a sore gumline.
If You Get the Green Light
Begin on the 10% row for 10 to 14 nights. Photograph your shade before night one, load a thin amount, wipe the gumline, and check again at two weeks. Stop at the target shade or the two-week check, whichever comes first. If your clinician steps the plan up instead, follow their hours rather than copying an all-night habit onto a stronger daytime product.
For a prescribed PolaNight 16% tray plan, the trays can be left in for 90 minutes, or put in right before sleep for overnight whitening. Treat that as a clinician-directed step up, not the default aligner night. A product designed for custom trays still needs your aligner approved as the tray. The label on the syringe can't judge your fit.
If the first session stings, the sensible retry is a shorter sitting, not a higher percentage. Let sensitivity settle, confirm you didn't overload the tray, and ask before you resume if the ache had no clear trigger. People who whiten in a retainer after treatment can keep that routine only when the retainer still fits and the gums stay quiet. A loose boil-and-bite tray that rocks isn't a substitute for the aligner or retainer you were given, because rocking creates exactly the saliva gaps and gel leaks you've been trying to avoid.
Matching Products to an Approved Plan
DentalHealth.com, the Lenexa retailer behind this guide, is a practical place to match products to a plan your dentist has already approved. Our whitening lineup includes Opalescence, Zoom, PolaNight, and PolaDay, and we also carry Fluoridex and MI Paste for sensitivity support plus Retainer Brite for aligner and retainer cleaning. Shop by the strength and wear window on your plan, not by the highest percentage on the page.
After any treatment, rinse your mouth with tepid water, brush gently with a mild toothpaste, then rinse the trays and let them dry thoroughly before storing. That closing routine protects both the shade and the plastic. It also sets up the next night properly, with no dried gel waiting to distort your dose.
Chairside test: If you can't name your approved strength, your nightly hours, and your stop date, you're not ready to buy gel yet. Get those three answers first.
Whitening during aligner treatment isn't forbidden, and it isn't automatic. It works best as a supervised, measured course built around a tray that fits, gums that are healthy, and expectations that account for attachments. Clear those conditions, and your aligner can pull double duty without undermining the smile it's straightening.
Once your dentist approves a strength, wear window, and stop date, visit DentalHealth.com to find the tray gels, sensitivity support, and aligner cleaning products that match that plan. You'll find Opalescence, Zoom, PolaNight, and PolaDay alongside Fluoridex, MI Paste, and Retainer Brite, so you can order the exact combination your routine calls for in one place. Bring your approved plan to the cart, not a guess, and start with the conservative course your clinician cleared.