
Teeth Whitening Kit with Hydrogen Peroxide: How It Works
The most popular advice about whitening kits, choose the highest peroxide percentage for the fastest, best result, skips an important detail: the percentage doesn't tell you the whole story. You need to know which peroxide the label names, how the gel is formulated, and how long it's meant to stay against your teeth.
A teeth whitening kit with hydrogen peroxide can be effective, but stronger isn't automatically better. Even products with matching percentages can differ in comfort because of their pH, buffering, desensitizing ingredients, and tray fit. A useful comparison starts with the chemistry, not the biggest number on the package.
Peroxide Strength Compared Across Kit Labels
You're comparing two whitening gels, both labeled 18%. One contains carbamide peroxide; the other contains hydrogen peroxide. They aren't equivalent strengths, and you shouldn't use them on the same schedule.
Carbamide peroxide breaks down into hydrogen peroxide and urea. The concentration guidance accompanying the American Dental Association's whitening overview describes an approximate one-third conversion, so 18% carbamide peroxide provides roughly 6% hydrogen peroxide equivalent.
That conversion is a shopping tool, not a recipe for changing treatment instructions. It helps you compare the amount of hydrogen peroxide available, but it doesn't describe how quickly the gel releases it or how the complete formulation behaves.
Read the ingredient before the percentage
The same concentration guidance describes at-home carbamide peroxide formulations ranging from 10% to 38%, home-use hydrogen peroxide products around 3% to 6%, and office products reaching approximately 35% hydrogen peroxide. The table applies the approximate conversion rule to the carbamide labels; “about” marks rounded equivalents.
Carbamide peroxide label and hydrogen peroxide equivalent
| Label as printed | Hydrogen peroxide equivalent | Where it sits |
|---|---|---|
| 10% carbamide peroxide | About 3.3% | Lowest end of the at-home carbamide range |
| 18% carbamide peroxide | About 6% | Mid-range home kit |
| 22% carbamide peroxide | About 7.3% | Upper home carbamide range |
| 35% carbamide peroxide | About 11.7% | Near the top of the at-home carbamide range |
| 38% carbamide peroxide | About 12.7% | Highest labeled at-home carbamide strength in the cited range |
| 3%-6% hydrogen peroxide | 3%-6% | Typical home-use hydrogen peroxide product |
| About 35% hydrogen peroxide | About 35% | Office professional concentration |
These ranges describe products and protocols, not a recommendation that every home user should choose the upper end. A dentist-directed home treatment and an unsupervised retail purchase are not interchangeable because both happen outside a clinic.
Compare the whole treatment
The ADA overview also describes daily wear ranging from 2 to 10 hours across treatment periods of 6 to 28 days in systematic-review evidence. Those are reported study schedules, not universal directions for a kit you've bought.
Copy the active ingredient, prescribed wear interval, and course length onto a note before comparing products. Include whether the kit needs a custom tray, comes prefilled, or requires a separate mouthpiece.
Shopping rule: Compare active hydrogen peroxide, wear time, tray fit, and total treatment days. Never rank kits by the printed percentage alone.
A higher-strength gel isn't permission to improvise a shorter session, and a lower-strength gel isn't permission to leave it in indefinitely. Each product needs its own exposure instructions.
How Hydrogen Peroxide Whitens and How It Compares to Carbamide Peroxide
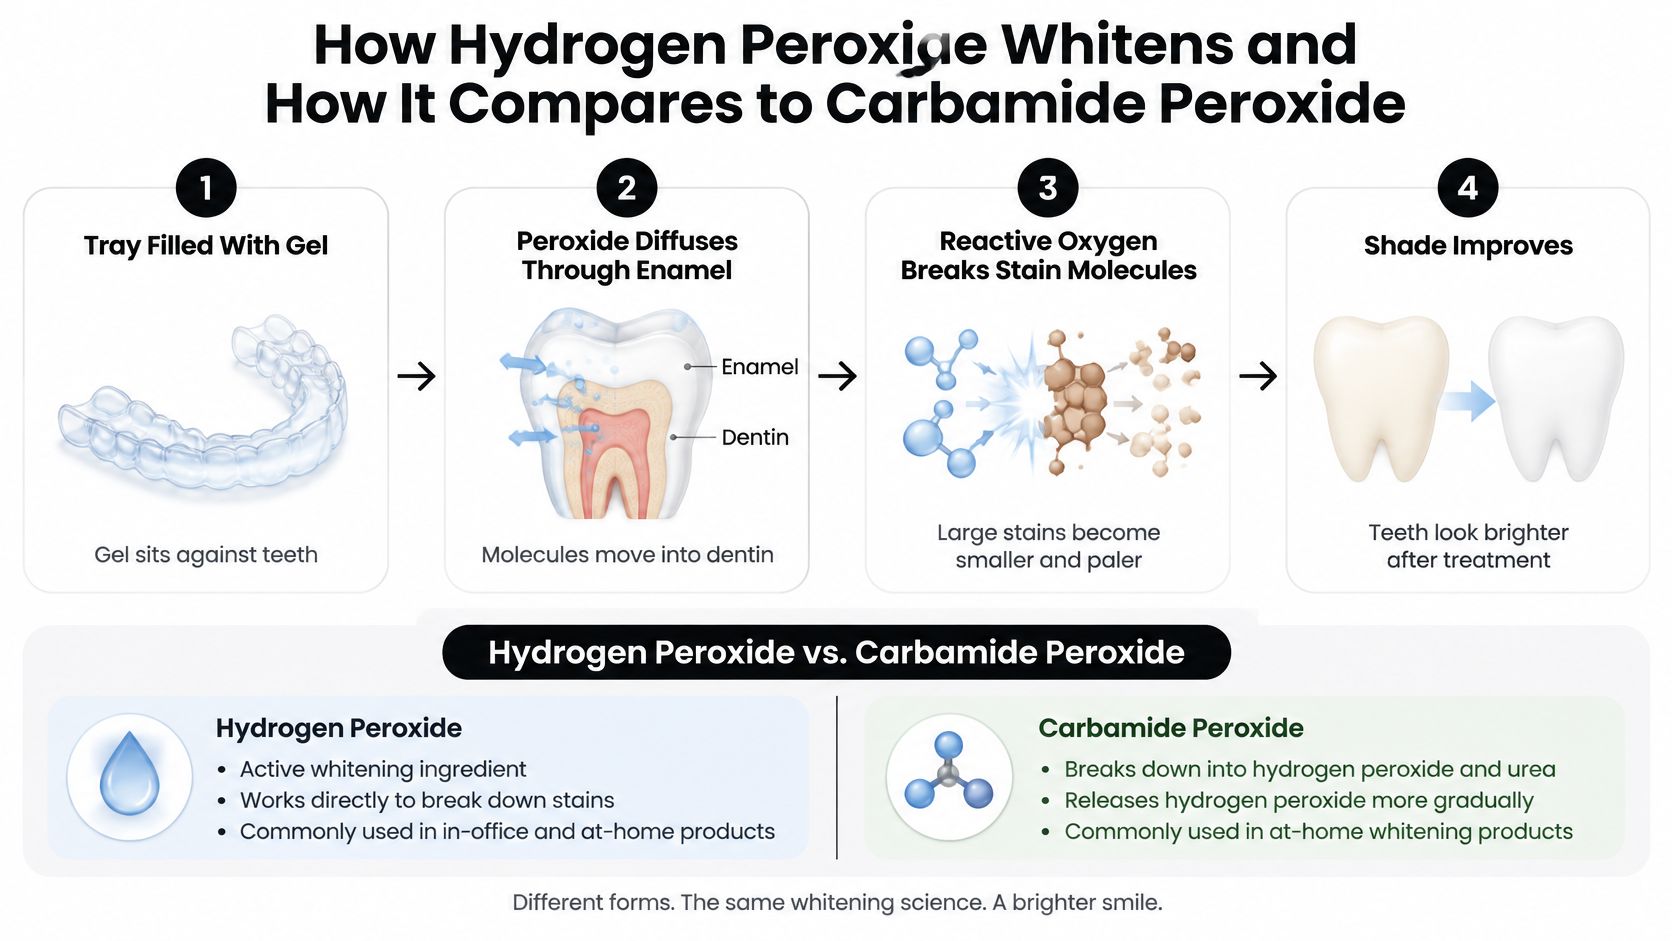
A whitening session starts with gel against the tooth surface, but the bleaching reaction doesn't stop there. Peroxide moves through enamel into dentin, where it reacts with the compounds responsible for discoloration.
The ADA's explanation of peroxide whitening describes an oxidation process: reactive oxygen breaks large, light-absorbing organic molecules into smaller, less-colored compounds. Your teeth look lighter because those compounds absorb light differently, not because the gel paints a white coating over them.
Think of a stained shirt: bleach acts on discoloration within the fabric, and a gentler treatment may work when it has suitable contact time. The analogy ends there, though. Teeth are living structures, so you can't freely trade concentration for time the way you might experiment with laundry.
Fast release versus gradual release
Hydrogen peroxide is already the bleaching agent. Carbamide peroxide must release hydrogen peroxide as it breaks down, making gradual exposure part of its treatment design.
That difference affects convenience. Someone who can manage a brief, carefully timed session may prefer a hydrogen peroxide protocol, while someone comfortable wearing trays longer may find a carbamide peroxide protocol easier to maintain.
Hydrogen peroxide and carbamide peroxide compared
| Criterion | Hydrogen peroxide | Carbamide peroxide |
|---|---|---|
| Speed of action | Acts quickly | Releases hydrogen peroxide gradually, so it needs longer wear |
| Sensitivity risk | Greater risk noted by ADA experts | Still possible, especially with excessive strength or wear |
| Label convention | Stated as hydrogen peroxide percentage | Stated as carbamide peroxide, requiring conversion for comparison |
| Typical home range | The home-use hydrogen peroxide range shown in the label table | The broader at-home carbamide peroxide range shown in the label table |
The range descriptions aren't ceilings for every professionally supplied product. The name of the ingredient alone doesn't establish how comfortable a finished gel will be.
Stronger doesn't guarantee a better endpoint
A 2025 double-blind randomized clinical trial involving 54 participants compared office protocols using 18%, 25%, and 40% hydrogen peroxide and found no statistically significant differences in measured color change between groups. All groups also showed significant color rebound after 6 months.
Those were office treatments, not a head-to-head test of retail home kits. The useful conclusion is narrower: increasing concentration doesn't necessarily produce a proportionately better or more lasting result.
Don't interpret “no significant difference” as proof that every strength works identically in every situation. Delivery method, exposure, starting shade, and the complete protocol still matter.
Which chemistry fits your routine?
- Shorter available sessions: A hydrogen peroxide kit may fit, provided its prescribed schedule and sensitivity profile suit you.
- Comfortable with longer tray wear: Carbamide peroxide offers gradual release, which may make a dentist-directed course easier to accommodate.
- Already reactive teeth: Start with professional guidance and the lowest workable exposure, rather than choosing by speed.
Neither chemistry wins universally. The better choice is the product whose instructions you can follow consistently without trying to push through discomfort or accelerate the course.
Who Should Skip a Kit or Check First
A whitening kit isn't the right first step for an unhealthy or painful tooth. Bleaching changes color; it doesn't repair decay, seal a crack, or treat gum disease.
An examination can also prevent a cosmetic surprise. Natural teeth may lighten while existing dental work stays the same shade.
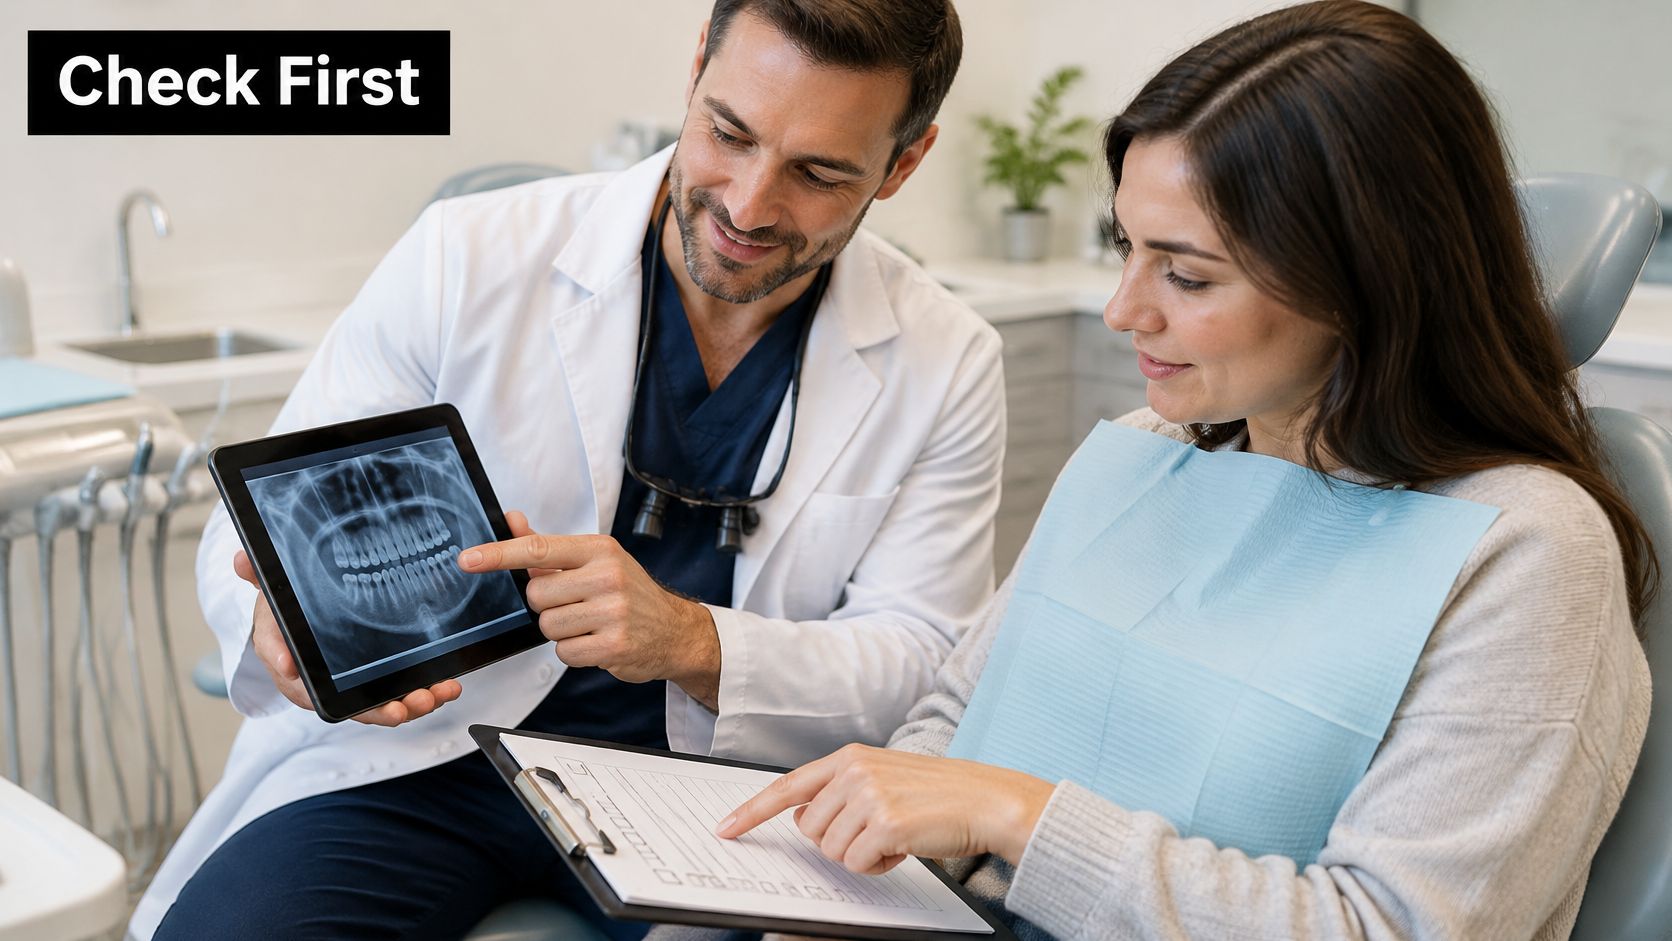
Check your mouth before your shopping cart
Arrange a dental assessment before starting if any of these apply:
- Untreated decay or suspected cracks: Especially if a tooth hurts when biting or reacts sharply to temperature.
- Active gum disease: Bleeding, swollen, or sore gums need assessment before peroxide exposure.
- Exposed dentin or roots: Recession can leave vulnerable areas that need a customized treatment plan.
- Defective dental work: Loose crowns, damaged veneers, or broken fillings should be evaluated first.
- Visible restorations: Crowns, veneers, fillings, and ceramics don't reliably whiten with natural teeth, so plan the desired shade before bleaching.
The European Commission's tooth-whitener safety assessment describes controlled use for products containing more than 0.1% and up to 6% hydrogen peroxide, including an appropriate oral examination and professional involvement at the start of each treatment cycle. This is European safety guidance, not a universal statement of retail rules everywhere.
When extra caution makes sense
Children, teenagers, and people who are pregnant or breastfeeding should speak with a dentist before using a kit rather than treating adult marketing as personal clearance. Don't assume a cosmetic treatment needs no screening just because you can order it online.
Our guide to hydrogen peroxide safety can help you prepare questions about exposure and gum protection.
People with healthy teeth, healthy gums, no active pain, and realistic expectations are better candidates for a home course. Even then, unexplained discoloration, especially a tooth that looks unlike its neighbors, deserves a diagnosis before a stronger gel.
Sensitivity Symptoms, Causes and Fixes
Brief, mild sensitivity and persistent pain aren't the same thing. A temporary tingling sensation can occur during whitening, but sharp, lingering, or localized pain is a reason to stop, not evidence that the gel is working harder.
A 2025 clinical report and evidence discussion describes effective whitening with both 8% carbamide peroxide and 3% hydrogen peroxide, with mild sensitivity and slightly greater sensitivity in the hydrogen peroxide group. It also summarizes separate evidence in which adding 2% sodium fluoride to hydrogen peroxide gel maintained similar whitening while reducing sensitivity scores from 3.2 to 1.7.
These findings support considering formulation and exposure together. They don't mean every fluoride-containing kit will produce the same improvement, or that you should add fluoride to a whitening syringe yourself.
Match the response to the symptom
Use symptoms to decide whether you need a schedule adjustment, a tray correction, or a dental examination. The likely causes below are possibilities, not diagnoses.
Whitening symptoms, likely causes and the change to make
| Symptom | Likely cause | What to change |
|---|---|---|
| Tingling on teeth during or after wear | Peroxide exposure within enamel and dentin | Pause until comfortable; discuss shorter wear and a fluoride or desensitizing product |
| Sharp pain to cold drinks that lasts after treatment | Exposed dentin or existing sensitivity | Pause treatment and book a dental check if it persists |
| Gum whitening or burning | Gel contacting gums or an overfilled tray | Remove the tray, rinse, clear excess gel, and check fit before restarting |
| Pain that continues after stopping | Possible decay, crack, or defective restoration | Stop and see a dentist before any further treatment |
| Mild sensitivity on a hydrogen peroxide gel | Excessive exposure for your tolerance | Discuss alternate-day use or a lower concentration within an approved schedule |
Adjust exposure without improvising treatment
If your teeth settle after pausing, ask whether shorter sessions or alternate-day treatment suit your specific product. Don't compensate for skipped sessions by doubling the gel or extending the next application.
For gum irritation, remove overflow rather than trimming the tray yourself. A mouthpiece that repeatedly presses on the gumline or leaks needs a fit assessment; adding more gel won't fix it.
Our teeth whitening sensitivity relief guide offers practical questions to discuss when planning a more comfortable course. Exposed roots need particular care, so ask a dentist how they should be excluded or protected rather than coating them with gel.
Pain that continues after stopping means a dental visit, not another round of gel.
Avoid restarting while symptoms remain just because an event is approaching. A tolerable treatment schedule is more useful than a fast course you can't complete safely.
How to Choose a Kit That Fits Your Teeth
Two kits can state the same peroxide percentage without having the same risk profile. The rest of the formulation matters, especially the gel's acidity, stability during use, and ingredients intended to manage sensitivity.
A 2025 systematic review of whitening-gel pH found greater sensitivity with acidic gels in two randomized clinical trials, while laboratory studies found more enamel-surface alteration and peroxide diffusion at pH below 7. Clinical evidence remains limited, so this supports asking better formulation questions, not declaring every neutral gel harmless.
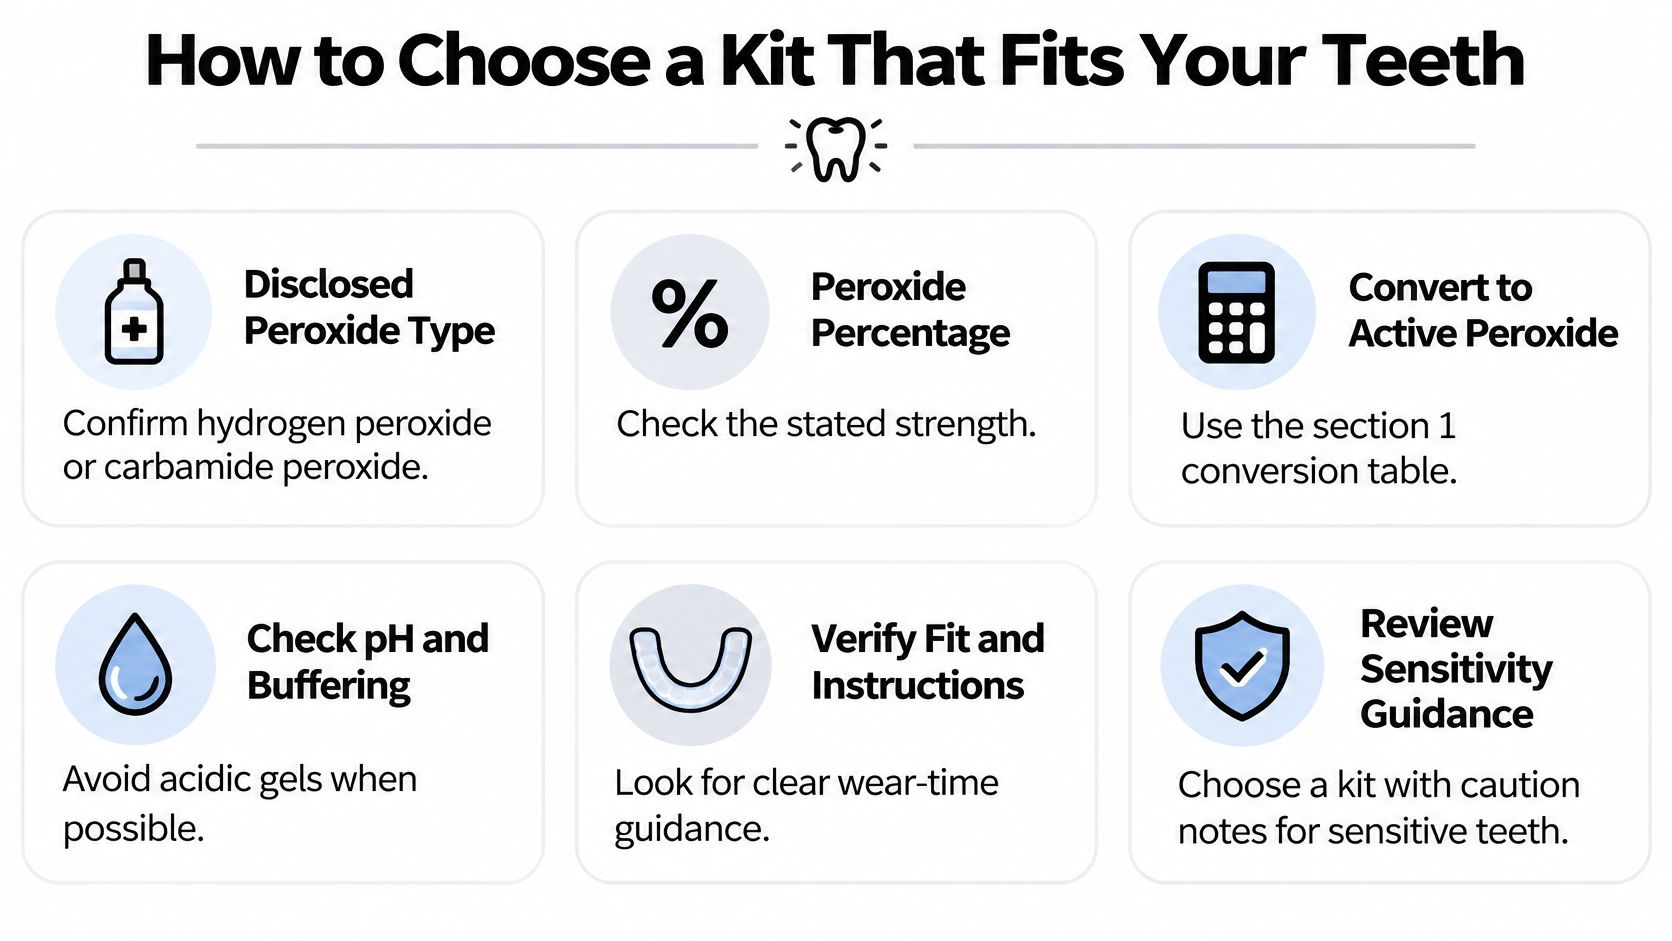
Check what the label actually discloses
Start with a clear peroxide ingredient and percentage. If the packaging names carbamide peroxide, calculate the approximate hydrogen peroxide equivalent before comparing it with a direct hydrogen peroxide gel.
Then check what you can learn about the formula. Buffering means helping the gel resist changes in pH; a neutral starting value and a stable formulation aren't necessarily the same thing.
Formulation features to check on any kit
| Feature | What to look for | Why it matters |
|---|---|---|
| Disclosed peroxide | Peroxide type and percentage stated on the label | Allows a meaningful active-peroxide comparison |
| pH | A disclosed neutral or appropriately formulated nonacidic gel | Acidic formulations have raised sensitivity and enamel-surface concerns |
| Fluoride | Sodium fluoride in a professionally formulated gel | May help manage sensitivity without requiring stronger bleaching |
| Buffering and calcium | Information about buffers, calcium, or hydroxyapatite | Helps evaluate formulation intent; clinical benefits require product-specific evidence |
| Tray fit | A snug tray without gaps or excess gel space | Helps limit overflow onto gums |
| Instructions | Wear time, total days, and gum-contact precautions | Defines the exposure you can control |
Treat missing information as a question
- Undisclosed pH: Don't assume the gel is neutral. Seek formulation information or choose a product with clearer documentation.
- Remineralizing claims: Calcium or hydroxyapatite on an ingredient list isn't proof that the kit prevents enamel changes.
- Sensitivity ingredients: Look for a complete formulated product, not a suggestion to mix separate treatments together.
- Unclear directions: Avoid buying a gel when you can't establish its intended tray, application quantity, or wear schedule.
Our guide to teeth whitening kits recommended by dentists can help you organize a shortlist around these practical criteria.
Buying priority: Clear instructions and suitable tray fit first, formulation next, then concentration and price.
An impressive strength claim can't make up for missing directions. Likewise, “gentle” packaging isn't a substitute for disclosed ingredients and a plan for what to do if discomfort starts.
How to Use a Kit Safely and Decide Whether to Start
A safe routine makes peroxide exposure deliberate and repeatable. Set out the instructions, a timer, a mirror, and the tray before opening the gel so you aren't estimating quantities or searching for the wear interval with the mouthpiece already seated.
Don't combine instructions from different brands or concentrations. Even familiar-looking syringes may belong to different treatment protocols.
Follow a controlled routine
- Confirm your clearance and checklist. Resolve active symptoms and any recommended dental care first. Check that the gel matches the instructions and that the tray is intended for that product.
- Prepare your teeth gently. Brush without scrubbing the gumline, rinse, and gently dry the tooth surfaces if the application directions call for it. Don't begin on gums you've irritated with aggressive brushing or flossing.
- Measure the gel as directed. Use only the manufacturer-specified quantity in the stated tray locations. Don't fill the entire mouthpiece because there's empty space.
- Seat the tray and start a timer. Check in a mirror for gel escaping onto the gums and remove visible excess. Wear the tray for the listed interval, and don't sleep in it unless that exact product's instructions allow overnight use.
- Remove it early if symptoms start. Sharp pain or gum burning means stop, remove the mouthpiece, and rinse. Don't wait for the timer to finish or immediately reapply a smaller amount to test the painful area.
- Clean your mouth and equipment. After treatment, rinse your mouth with tepid water and brush gently with a mild toothpaste. Rinse reusable trays and let them dry thoroughly before storing; discard disposable trays according to their instructions.
- Record the result and your response. Make a dated shade note, ideally with photographs taken under consistent lighting. Record discomfort as well, because a brighter shade isn't the only measure of whether a course suits you.
Plan maintenance instead of continuous bleaching
Some color return is expected, but that doesn't mean you should keep applying gel until your teeth match an edited photograph. Judge changes under similar lighting rather than comparing a bathroom mirror with a bright outdoor selfie.
Repeat a course only when the product's maintenance directions and your dental advice support it. If the instructions don't explain retreatment, get guidance rather than inventing a schedule or stacking different whitening products.
At DentalHealth.com, our product pages list peroxide percentages and detailed descriptions so you can apply the checklist before buying. Read the complete description rather than selecting by the strength in the product name.
Make the start-or-stop decision
Start only when the relevant checks pass: your mouth is healthy, the product is clearly identified, the tray fits, and the treatment instructions are complete. You should also know what symptoms will make you stop and whom you'll contact if they occur.
If an oral-health or fit check fails, book a dental visit first. If product information is missing, resolve it before applying the gel, not after an uncomfortable session.
We offer professional-grade at-home whitening gels and kits, sensitivity-care products, and detailed product descriptions to help you compare options. Visit DentalHealth.com to check peroxide type, review treatment directions, and choose a product that fits your dentist's guidance and your comfort needs.