

The Best Teeth Whitening at Home for a Brighter Smile
When you're looking for the best teeth whitening at home, you'll quickly run into a few heavy hitters. For sheer convenience, it’s hard to beat whitening strips. If you're after more powerful, faster results, LED kits are usually the go-to. And for keeping those pearly whites bright day-to-day, a good whitening toothpaste is your best friend for maintenance.
Your Guide to a Brighter Smile at Home
But getting that truly radiant smile isn't just about grabbing the first box you see at the store. It’s really about understanding what makes these products work, picking the right tool for your specific goals, and knowing how to use it safely. Think of this guide as your personal roadmap, cutting through the hype to help you make a smart choice.
The desire for a whiter smile is bigger than ever. In 2024, the global teeth whitening market hit a value of around USD 8.52 billion, and it's expected to grow to nearly USD 12.77 billion by 2032. Much of that boom comes from products you can use right in your own bathroom. In fact, whitening toothpaste led the charge in 2023, mostly because it's so easy and affordable to use. You can dig into more of these market trends over at Fortune Business Insights.
To give you a quick lay of the land, we’ve put together a simple table comparing the most common at-home methods. This should help you zero in on what might work best for your schedule, budget, and whitening goals.
At-Home Whitening Methods at a Glance
| Method | Best For | Average Cost | Typical Results |
|---|---|---|---|
| Whitening Strips | Simplicity and convenience for moderate staining. | $20 - $50 | 1-3 shades lighter over a few weeks. |
| LED Whitening Kits | Faster, more dramatic results on tougher stains. | $50 - $200 | 4-6 shades lighter, often in 1-2 weeks. |
| Whitening Toothpaste | Daily stain removal and maintenance. | $5 - $15 | Gradual brightening of surface stains over time. |
| Whitening Gels/Trays | Customized fit and potent, even whitening. | $40 - $150 | 3-5 shades lighter, results vary with concentration. |
Each of these options offers a unique trade-off between effectiveness, ease, and price. As we dive deeper, we'll unpack how each one works so you can feel confident in your decision.
Navigating Your Whitening Options
With a whole aisle of products staring back at you, it's easy to get analysis paralysis. Every method strikes a different balance between convenience, cost, and whitening power. To make it simpler, we’ve broken down the common approaches based on what you might be looking for:
- Convenience First: Perfect for anyone with a busy schedule who needs a straightforward, no-fuss solution.
- Maximum Power: For those who want the most noticeable results you can get without a trip to the dentist.
- Daily Upkeep: Ideal for keeping your smile bright and stopping new surface stains from setting in.
- Budget-Friendly: Great options if you're looking for an affordable way to start your whitening journey.
A bright, confident smile can be a huge boost, but getting there safely is what really matters. Understanding your options is the first step toward bringing back your smile’s natural sparkle without any guesswork.
Before you jump in, it’s crucial to have realistic expectations and keep safety top of mind. We'll walk you through everything—from the science behind these products to step-by-step instructions for safe use—to make sure your path to a whiter smile is a successful one.
How At-Home Teeth Whitening Actually Works
So, how does a little gel or a strip make such a big difference to your smile? Let's break it down.
Think about a stubborn coffee stain on a white t-shirt. You can scrub the surface, but the real stain is deep in the fabric. To get it out, you need something that can penetrate those fibers and break the stain apart from the inside. At-home teeth whiteners work in a very similar way.
The best teeth whitening products you can use at home rely on active ingredients like hydrogen peroxide or carbamide peroxide. These are the heavy lifters in the world of teeth whitening. When you follow the directions, they're perfectly safe and are the same ingredients dentists use for professional treatments, just usually in lower, more manageable concentrations for home use.
These ingredients are able to gently work their way into the microscopic pores of your tooth enamel, which is the hard, protective outer layer of your teeth. Once they get inside, they kick off a simple but effective chemical reaction.
The Science of a Brighter Smile
This reaction unleashes tiny, super-reactive oxygen molecules. Picture them as little stain-destroying torpedoes. They travel through the tooth's structure, hunting down the discolored compounds (called chromogens) that have built up over years from things like coffee, tea, red wine, or smoking.
When an oxygen molecule finds a stain molecule, it breaks the chemical bonds that make the stain visible. This process is called oxidation, and it essentially neutralizes the stain, rendering it colorless. The stain doesn't get scrubbed away; it gets chemically dismantled, revealing the naturally whiter tooth shade that was hiding underneath.
The key takeaway is this: whitening agents don't just polish the surface. They get inside the tooth to chemically break down deep-set stains. This is why you can get such dramatic results without physically harming the tooth itself.
This is a world away from what most whitening toothpastes do. Those typically use mild abrasives to buff away extrinsic stains—the fresh, new stains sitting right on the surface of your enamel. Peroxide whiteners are designed to tackle intrinsic stains, the deep-seated discoloration that no amount of brushing is going to remove.
Key Players in the Whitening Process
Knowing the difference between the main active ingredients can help you pick the product that’s right for your lifestyle and sensitivity level.
-
Hydrogen Peroxide: This is the fast-acting one. It gets to work almost immediately, releasing most of its whitening power within about 30-60 minutes. You'll often find it in products that promise quicker results, like certain LED kits and whitening strips.
-
Carbamide Peroxide: This compound is a bit more of a slow-and-steady worker. It breaks down into hydrogen peroxide, but does so over a much longer period—several hours, in fact. A gel with 10% carbamide peroxide is roughly equivalent to a 3.5% hydrogen peroxide gel. Because of its slower, gentler release, it’s a go-to for overnight whitening trays and formulas made for people with sensitive teeth.
At its core, getting a brighter smile at home is a controlled chemical process. Once you understand that you're not just scrubbing but actually breaking down years of stains, it becomes clear why different products work the way they do—and why following the instructions to the letter is so important for getting a great, safe result.
Comparing the Top At-Home Whitening Methods
Stepping into the dental aisle can be overwhelming. You're faced with a wall of products all promising a brighter, whiter smile. To figure out the best approach for you, it helps to understand what you're actually looking at. Each at-home whitening method strikes a different balance between convenience, power, and price.
Let's cut through the noise and break down the big players: whitening strips, gels with trays, LED light kits, and whitening toothpastes. We'll get into how they work, who they're really for, and what kind of results you can honestly expect.
Think of it this way: there are two main paths you can take, depending on the kind of stains you're dealing with.
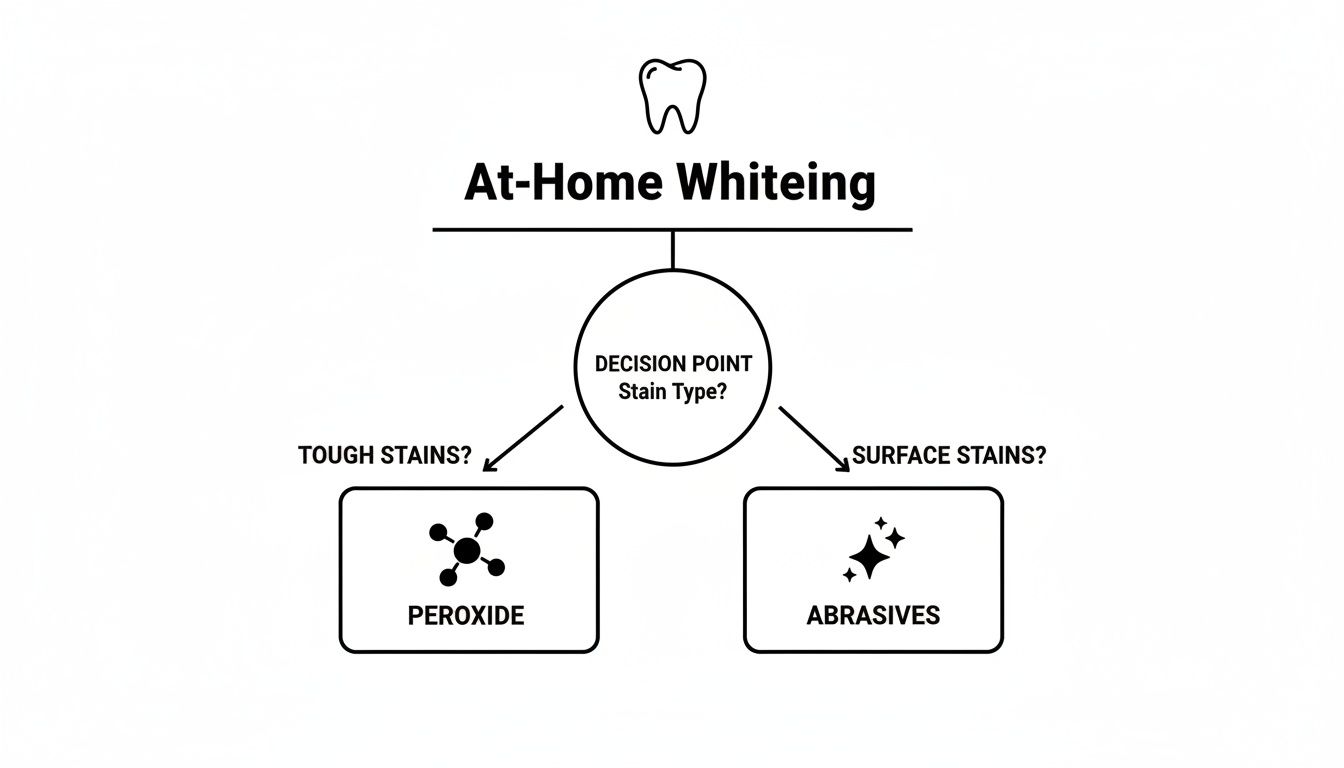
As the chart shows, if you're fighting deep, set-in stains (intrinsic), you'll need something with peroxide. For more recent, surface-level stuff (extrinsic), gentle abrasives can do the trick.
Whitening Strips: The Convenience Kings
Whitening strips are without a doubt the most popular, grab-and-go option out there. They're just thin, flexible plastic strips coated with a whitening gel, usually containing a lower concentration of hydrogen peroxide.
Their main selling point is pure simplicity. You peel the strip, stick it on your teeth, wait about 30 minutes, and you're done. There’s virtually no mess or complicated prep, which makes them a fantastic choice for anyone with a busy schedule or those just dipping their toes into whitening.
- Best For: People with mild to moderate stains who prioritize ease of use over everything else.
- Results Timeline: You'll likely see a difference within a week, with the full effect showing up after the standard 14-day treatment cycle.
- Potential Drawbacks: Strips can struggle to get into the little nooks and crannies between teeth, which can sometimes lead to uneven results. Some people also find their gums get a bit irritated if the gel sits on them for too long.
Gels and Trays: The Customization Champions
If you're looking for more thorough, even coverage, whitening gels that come with trays are a great step up. These kits typically include a syringe of whitening gel (often carbamide peroxide) and mouth trays that you fill up and wear.
The real advantage here is how evenly the gel is applied. The tray hugs your teeth, ensuring the gel makes consistent contact with every single surface for a uniform finish. While the over-the-counter kits use "boil-and-bite" trays for a decent fit, they still offer way better coverage than strips.
These systems are perfect for anyone wanting that comprehensive, dentist-office feel without the professional price tag. The gel itself is usually strong enough to make a real dent in more significant stains over time.
LED Light Kits: The Power Players
LED whitening kits are the heavy hitters of at-home treatments. These systems use a peroxide-based whitening gel in combination with a blue LED light device. The idea is that the light acts as an accelerator, speeding up the chemical reaction of the whitener to break down stains faster and more effectively.
This is your fast track to dramatic results at home. LED kits are especially good at tackling stubborn, deep-set stains that have built up from years of things like coffee, tea, or smoking. They nicely bridge the gap between basic store-bought products and a professional in-office whitening session.
And people are catching on. Searches for 'LED teeth whitening kit' have jumped by 35% in the last year as more people look for powerful, safe solutions. Today's kits, usually in the $20 to $50 range, use gentle, low-peroxide gels with blue light to achieve anywhere from four to eight shades of improvement in just a few weeks.
- Best For: Anyone with tough, intrinsic stains who wants the fastest, most dramatic results they can get from an at-home kit.
- Results Timeline: Many people notice a difference after the very first use, with major whitening accomplished in about 7-10 days.
- Potential Drawbacks: They cost more upfront than strips or simple trays, and the process takes a bit more time and effort for each session. For a deeper dive into getting fast results safely, take a look at our complete guide on how to whiten teeth at home fast.
Whitening Toothpastes: The Daily Maintainers
Finally, let's talk about whitening toothpastes. It's crucial to understand their role: they are all about maintenance and polishing away surface stains, not deep, chemical whitening. Most of them work by using mild abrasives to gently scrub off the daily extrinsic stains from food and drink.
Think of whitening toothpaste as your first line of defense against new stains. It's the perfect tool for keeping your smile bright after you’ve used a more intensive treatment like strips, gels, or an LED kit.
Some of the newer formulas on the market do include very low concentrations of hydrogen peroxide, giving a slight chemical whitening boost with consistent use. They won't transform your smile on their own, but they are fantastic for making the results of your other whitening efforts last much longer.
To help you choose, here's a quick comparison of how these popular at-home whitening products stack up against each other.
Feature Comparison of At-Home Whitening Products
This table breaks down the key features of each product type to give you an at-a-glance view of their effectiveness, ease of use, and overall suitability for different needs.
| Product Type | Effectiveness (1-5) | Ease of Use (1-5) | Best for Sensitivity? | Cost Range |
|---|---|---|---|---|
| Whitening Strips | 3 | 5 | No | $20 - $45 |
| Gels & Trays | 4 | 3 | No | $25 - $60 |
| LED Light Kits | 5 | 3 | No | $40 - $150 |
| Whitening Toothpaste | 2 | 5 | Yes | $5 - $20 |
As you can see, there's a trade-off. For maximum power, LED kits lead the pack, but for daily maintenance and sensitivity, a good whitening toothpaste is a better fit. Consider your specific goals and comfort level to find the right match for your smile.
A Step-by-Step Guide to Whitening Safely
Getting those brilliant, bright results at home is exciting, but doing it safely is easily the most important part of the process. A good whitening plan isn't just about slapping on some gel; it involves smart prep, careful application, and diligent aftercare. Following these steps not only protects your oral health but also makes sure your results are even, impressive, and actually last.
Think of it like painting a room in your house. You'd never just throw a coat of paint on a dusty, unprepared wall and expect a flawless finish. You have to clean the surface, tape the edges, and apply the paint with care. The exact same principle applies to your smile.
Pre-Whitening Preparation
Before you even break the seal on the box, a little bit of prep work can go a long way. This is all about preventing irritation and making sure the product can do its job effectively. Your goal is to create a clean, healthy canvas for the whitening agent to work its magic.
- Brush and Floss Gently: About 30 minutes before you start, gently brush your teeth with a soft-bristled brush and just water—no toothpaste. This clears away any surface plaque that might block the gel. Don't forget to floss to get any debris out from between your teeth, ensuring the whitener can reach every nook and cranny.
- Don't Brush Right Before: Brushing immediately before applying strips or gels can leave your gums feeling a bit raw and more prone to irritation. Giving your mouth that 30-minute buffer lets everything settle down.
- Dry Your Teeth: Just before you put on the product, pat your teeth dry with a clean cloth or tissue. A dry surface helps whitening strips and gels stick much better, which means more consistent, effective results for you.
Applying Your Whitening Product Correctly
This is the part where following the manufacturer’s instructions is completely non-negotiable. The number one cause of sensitivity and gum irritation is leaving whitening agents on for too long. Each product is formulated to work safely within a specific timeframe.
Never assume that leaving a product on longer will get you better or faster results. It will only increase your risk of uncomfortable side effects like sensitivity and gum inflammation.
Whether you're working with strips, gels in a tray, or an LED kit, precision is everything.
- For Whitening Strips: Carefully place the strips to cover the front of your teeth, lining up the top edge with your gum line. Try to fold any extra material behind your teeth. The most important thing is to avoid letting the strip sit directly on your gums.
- For Gels and Trays: Use only the recommended amount of gel. It's so tempting to overfill the tray, but that just causes the gel to ooze out and sit on your gums, which can lead to some serious irritation. A small bead of gel for each tooth impression is usually all you need.
Managing and Preventing Tooth Sensitivity
A little bit of tooth sensitivity is the most common side effect of whitening, but the good news is that it’s almost always temporary and totally manageable. It happens when the whitening agent opens up the microscopic pores in your enamel for a short time, exposing the nerve endings inside.
A few simple strategies can make a world of difference in your comfort.
- Use a Desensitizing Toothpaste: Start brushing with a toothpaste made for sensitive teeth about one to two weeks before you even begin your whitening treatment. Look for ingredients like potassium nitrate or stannous fluoride, and keep using it throughout the process.
- Shorten Your Sessions: If the box says 30 minutes but you start feeling that familiar zing, try cutting back to 15-20 minutes. You can still get fantastic results with shorter, more frequent applications.
- Space Out Your Treatments: Instead of whitening every single day, try switching to every other day. This gives your teeth and gums some much-needed time to recover between sessions, which can dramatically reduce sensitivity. For a deeper dive, you can learn how specialized products can help reduce tooth sensitivity with ingredients like fluoride.
Post-Whitening Aftercare for Lasting Results
So you’ve finished a treatment—congratulations! Now comes the crucial part. For the next 24-48 hours, your teeth are a bit more porous and susceptible to staining. What you do during this window is key to protecting your investment and making that bright smile last.
The rule of thumb is simple: if it can stain a white t-shirt, it can stain your newly whitened teeth.
Foods and Drinks to Avoid:
- Coffee and tea
- Red wine
- Dark sodas and fruit juices
- Berries (blueberries, raspberries, etc.)
- Soy sauce and balsamic vinegar
- Tomato-based sauces and mustard
Try to stick to a "white diet" for a day or two—think chicken, rice, pasta, and potatoes. If you absolutely can't skip your morning coffee, use a straw to help it bypass your teeth. For more tips, check out this comprehensive guide on how to whiten teeth safely at home. This methodical approach ensures your journey to a brighter smile is both a safe and successful one.
How to Choose the Right Whitening Product
Walking down the dental care aisle can feel like a pop quiz you forgot to study for. With dozens of boxes all promising the same brilliant smile, how do you actually pick the right one? The secret isn't in the flashy marketing—it's about knowing what to look for on the label.
First thing's first: play detective and find the active ingredient. You'll almost always see one of two key players: hydrogen peroxide or carbamide peroxide. Hydrogen peroxide is the sprinter; it works fast and is common in things like whitening strips and LED kits. Carbamide peroxide is more of a marathon runner. It releases its whitening power more slowly, which is why you often see it in gels for trays. This slower pace makes it a gentler choice if you're worried about sensitivity.
The concentration of that ingredient is just as critical. A higher percentage doesn't automatically mean a better product. It just means it's stronger, which can dial up the risk for sensitivity. For perspective, a gel with 10% carbamide peroxide is roughly equivalent to a 3.5% hydrogen peroxide solution. For many people, this offers a great balance between getting results and keeping your teeth comfortable.
Decode Labels and Look for Trust Signals
Beyond the active ingredients, a few other clues can point you toward a quality product. One of the most reliable signs to look for is the ADA Seal of Acceptance from the American Dental Association.
The ADA Seal means a product has been independently evaluated by scientific experts for both safety and efficacy. When you see this seal, you can trust that the product does what it claims to do without harming your teeth or gums.
This seal is your shortcut through the noise, especially with so many trendy, unverified products popping up on social media. Established brands usually go through the rigorous testing to earn this seal, while newer, flash-in-the-pan companies often skip it.
It's also helpful to understand just how big the at-home whitening world is. As of 2024, people whitening at home make up a whopping 68.67% of the market share, which adds up to about USD 5.3 billion globally. While online influencers drive a lot of sales, offline retail stores still hold a huge piece of the pie. This popularity gives us tons of options, but it can also make choosing the right one feel impossible.
Match Ingredients to Your Specific Needs
Ultimately, your own dental health should be your guide. What works wonders for your friend might be a disaster for you, especially if you deal with tooth sensitivity.
- For Sensitive Teeth: Keep an eye out for products with added soothing agents like potassium nitrate or fluoride. These ingredients are fantastic for calming down the nerve endings in your teeth, making the whole process a lot more pleasant.
- For Added Enamel Protection: Some whitening formulas include ingredients like amorphous calcium phosphate (ACP). This can help remineralize your enamel, keeping it strong and protected while you whiten.
Before you commit, it’s worth taking a moment to understand all the best teeth whitening options, including professional treatments and at-home kits. Seeing the big picture helps you figure out exactly where at-home products fit in and if they're the right call for you.
Finally, be realistic about your lifestyle. Do you need a quick, no-fuss fix like whitening strips you can wear while checking emails? Or do you have 30 minutes to dedicate to an LED kit for more dramatic results? If you want some expert recommendations, check out our list of the best teeth whitening products available, where we break down the top choices in every category. By matching a product's features to your goals, sensitivity level, and daily routine, you'll be set up for a great whitening experience.
Your Top At-Home Teeth Whitening Questions Answered
When you start looking into whitening your teeth at home, it's totally normal to have a bunch of questions. The number of products out there can be overwhelming, and you want to know you're making the right call. We get it. That's why we've put together answers to the most common questions we hear, so you can feel confident and get the results you're looking for.
Let's clear up those lingering doubts, from how long that new bright smile will actually stick around to whether you can even whiten if your teeth are on the sensitive side.
How Long Do At-Home Teeth Whitening Results Last?
This is the big one, and the honest answer is: it really depends on your lifestyle. For most people using kits like strips or LED systems, you can expect your brighter smile to last anywhere from a few months up to a year. Your daily habits are the single biggest factor here.
Think of it like this: your teeth have pores. Anything you eat or drink that has color can get absorbed into those pores. The main culprits that will fade your results faster are:
- Staining Foods and Drinks: Coffee, tea, red wine, and dark berries are notorious for causing new stains.
- Tobacco Use: Smoking or chewing tobacco will quickly undo all your hard work.
- Poor Oral Hygiene: If you're not brushing and flossing regularly, you're giving new stains a chance to settle in for the long haul.
To keep your smile looking its best, stay on top of your oral hygiene. A good maintenance whitening toothpaste can help polish away surface stains as they appear. Many people also find a quick touch-up treatment every few months is all it takes to maintain that bright, fresh look.
Is At-Home Whitening Safe for Crowns and Veneers?
This is a really important point to understand before you start. Whitening products are designed to work on one thing and one thing only: your natural tooth enamel. They will not change the color of any dental work like crowns, veneers, fillings, or bonding.
Those materials are non-porous. That means the peroxide whitening agent has nowhere to go; it can't get in to break down any color. If you have dental work on your front teeth and you whiten everything else, you're going to end up with a color mismatch. Your natural teeth will get brighter, but your dental work will stay the exact same shade it was before.
Always have a chat with your dentist before starting any whitening if you have dental work on your front teeth. They can walk you through the best options to make sure you get a beautifully even, natural-looking result.
Can I Whiten My Teeth if They Are Sensitive?
Yes, you definitely can! You just need to be a bit more strategic about it. A little tooth sensitivity is the most common side effect of whitening, but it’s almost always temporary and totally manageable if you go about it the right way.
If you know your teeth are sensitive, hunt for products specifically made for you. These will often have a lower concentration of peroxide and sometimes include soothing ingredients like potassium nitrate to help keep the nerves in your teeth calm.
Here are a few tips to make the process more comfortable:
- Start Slow: Don't jump into the maximum application time. Start with shorter sessions than the box recommends and see how you feel.
- Space It Out: Instead of whitening every single day, try every other day. This gives your teeth a little break to recover.
- Use a Desensitizing Toothpaste: Start using a toothpaste for sensitive teeth a week or two before you even begin your whitening treatment.
If you feel any real discomfort, it's best to stop and check in with your dentist. They can help you figure out a plan that works for you.
How Quickly Will I See Whitening Results?
How fast you see a change really comes down to the product you're using and what kind of stains you have.
With the more powerful options, like whitening strips or an LED kit, a lot of people say they notice a subtle difference after just a few uses. The biggest, most obvious changes usually show up after about one to two weeks of consistent, daily use.
Whitening toothpastes are a different story. They work much more slowly because their main job is to scrub away new surface stains. With these, you can expect a gradual brightening over several weeks.
It's all about having realistic expectations. At-home whitening is designed for a gradual improvement of several shades over the full course of the treatment, not an overnight miracle. Patience and consistency are your best friends here.
Ready to find the perfect professional-grade whitening solution delivered right to your door? At DentalHealth.com, we stock the dentist-recommended brands you trust, from high-concentration gels to sensitivity-relief toothpastes. Shop our curated collection and start your journey to a brighter smile today.