
Carbamide Peroxide for Teeth: A Practical Whitening Guide
You're standing in a pharmacy aisle with a whitening kit in one hand and a box covered in chemical names in the other. The label says carbamide peroxide, but it doesn't tell you whether that means faster whitening, more sensitivity, or a safer alternative to hydrogen peroxide.
The useful answer depends on more than the percentage printed on the package. Carbamide peroxide for teeth is a controlled way to deliver peroxide to stain molecules, but concentration, tray fit, wear time, existing dental work, and the condition of your teeth all affect the decision. This guide translates the ingredient into practical choices before you open the box.
What Carbamide Peroxide Actually Is
Carbamide peroxide is a compound made by combining urea with hydrogen peroxide. In a whitening gel, it acts as a more stable carrier that gradually releases hydrogen peroxide after it contacts moisture in your mouth. The urea portion and the peroxide portion don't whiten in the same way, but together they make a gel that can remain active during a longer tray session.
A whitening syringe is therefore more than a single “bleaching chemical.” It contains:
- The peroxide carrier: Carbamide peroxide stores and releases hydrogen peroxide gradually.
- The active whitening agent: Hydrogen peroxide reacts with colored stain compounds.
- The supporting formula: Water, thickeners, flavoring agents, and pH-adjusting ingredients control how the gel spreads, tastes, and behaves.
That slower release is the main difference from a gel based on straight hydrogen peroxide. Hydrogen peroxide is ready to react immediately, while carbamide peroxide breaks down first. The tradeoff is simple: carbamide peroxide often suits tray-based home whitening because it can provide a longer, steadier exposure, while hydrogen peroxide is commonly selected when a shorter application is preferred.
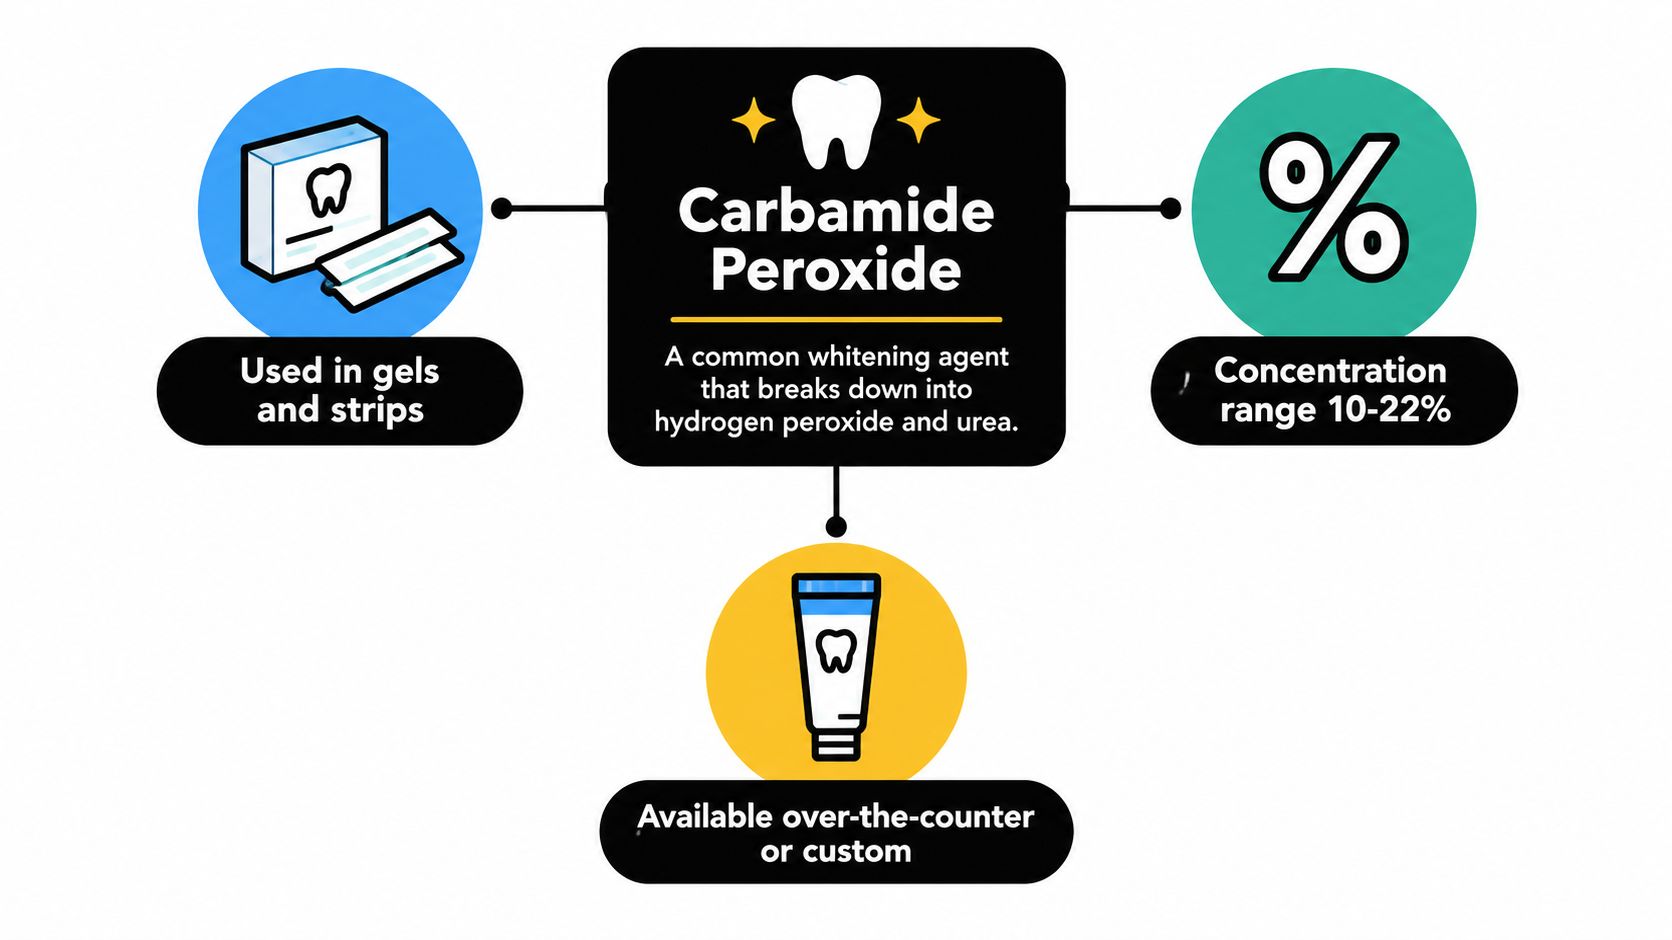
You may find carbamide peroxide in gel syringes, whitening strips, custom-tray systems, and boil-and-bite kits. The format changes how evenly the gel contacts your teeth and how much reaches your gumline. A well-fitted tray can keep the dose where it belongs, while an oversized tray or excessive gel can push material onto the gums.
This ingredient also has an established dental history. The European Commission's summary records FDA approval of carbamide peroxide as an oral antiseptic agent in 1983, followed by the first “Night-Guard Vital Bleaching” technique in 1989, when Haywood and Heymann used 10% carbamide peroxide in a custom tray worn overnight (European Commission summary of home tooth whitening). Those milestones helped move the ingredient from oral care into modern at-home whitening.
How Carbamide Peroxide Whitens Teeth
The chemistry becomes easier to understand if you follow the gel in sequence.
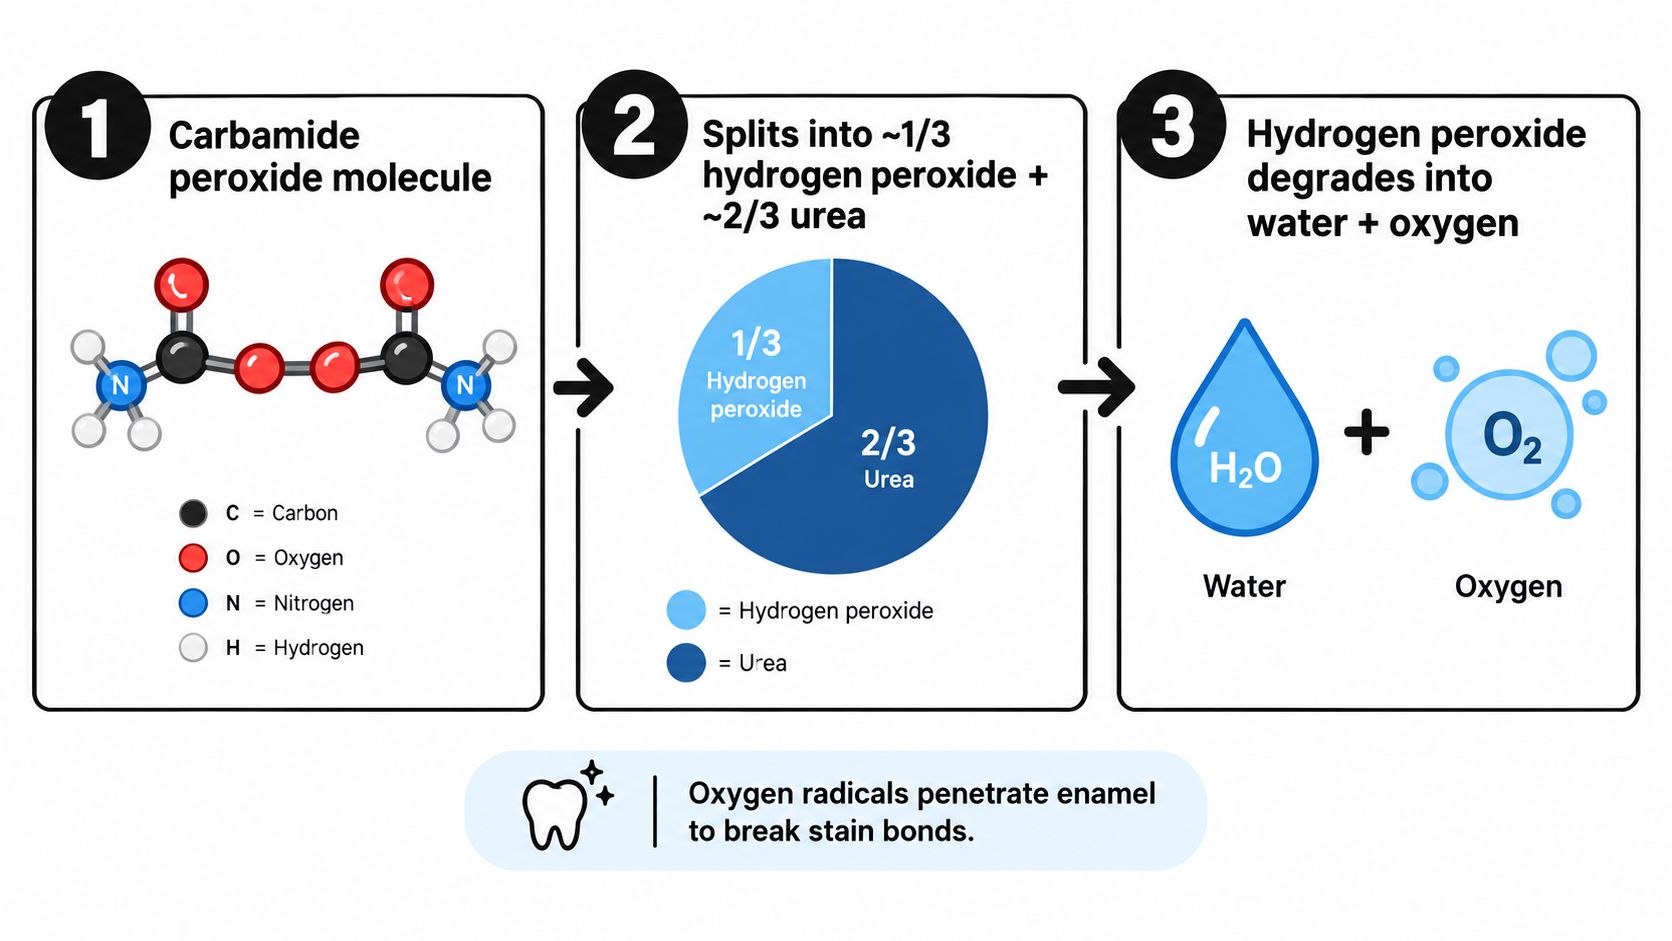
First, moisture begins breaking carbamide peroxide apart. The compound releases approximately one-third hydrogen peroxide and two-thirds urea, according to the formulation description summarized in the supplied research background. Hydrogen peroxide then breaks down into water, oxygen, and reactive oxygen species, including peroxide radicals and perhydroxyl anions.
Those reactive molecules move through microscopic spaces in enamel and dentin. Think of the tooth like a sponge with colored material caught inside it. The whitening agent doesn't scrub the stain away like a brush. Instead, it reaches the colored molecules, called chromophores, and changes the chemical bonds that make them look dark.
As the stain molecules split into smaller fragments, they absorb and scatter light differently. The tooth can then appear lighter even though the whitening gel hasn't removed a layer of enamel.
Surface stains and deeper discoloration
Carbamide peroxide can help with discoloration inside the tooth, including changes associated with aging and some medication-related staining. Surface stains from coffee, tea, tobacco, or dark foods are a different problem. A cleaning or whitening toothpaste with a mild abrasive may remove some of that external buildup, but it won't perform the same chemical job inside enamel and dentin.
Urea also affects the environment around the reaction. It can raise the gel's pH slightly and support a steadier breakdown during normal tray use. That matters because carbamide peroxide is designed to release its active peroxide over time rather than deliver its entire whitening effect at once.
For readers comparing formulas, the difference between carbamide peroxide and hydrogen peroxide is explained in more detail in this guide to hydrogen peroxide whitening gels. The important point is that neither ingredient automatically makes every product appropriate. The concentration and delivery system determine how much peroxide reaches your teeth and gums, and for how long.
Concentrations From 10 to 35 Percent Explained
The number on a carbamide peroxide label describes the weight percentage of carbamide peroxide, not the amount of hydrogen peroxide that reaches the tooth. A commonly used approximation is that 10% carbamide peroxide provides roughly 3.5% hydrogen peroxide, although the exact delivered amount depends on the formula and breakdown conditions.
The percentage should guide your wear time, not encourage you to leave a stronger gel in place longer. A higher concentration can shorten the session, but it may also make sensitivity or gum irritation more likely for some users.
| Concentration | Approx. Hydrogen Peroxide | Typical Wear Time | Best For |
|---|---|---|---|
| 10% carbamide peroxide | About 3.5% | Longer sessions, sometimes 30 minutes to overnight, only when the product directions allow it | First-time users and people prioritizing gradual whitening |
| 16% carbamide peroxide | Lower than the original carbamide peroxide percentage after breakdown | Often shorter than 10%, according to the product instructions | Users seeking a middle-ground regimen |
| 22% carbamide peroxide | Higher peroxide release than 10% or 16% | Usually a shorter session than lower concentrations | Dentist-guided or carefully directed take-home whitening |
| 35% carbamide peroxide | High-strength release | Short sessions under professional direction | Dentist-supervised take-home or professional protocols |
These wear-time ranges are decision categories, not universal prescriptions. One manufacturer may formulate a gel for a different exposure window than another, so the package directions and dental advice take priority over a generic chart.
How to choose your starting point
If you're new to whitening or already notice sensitivity to cold drinks, a lower-strength gel gives you more control over the pace. You can use shorter sessions, take rest days, and judge your response before changing the routine. A middle concentration may suit someone who wants a more efficient schedule but still plans to use trays at home.
High-strength products shouldn't be treated as shortcuts. The goal is not to create the strongest possible chemical exposure. It's to provide enough contact to change stain molecules while keeping the gums and pulp comfortable. The evidence also shows why more isn't automatically better. In a clinical comparison, 10% and 16% carbamide peroxide used once daily for three weeks were equally effective and well tolerated, with most sensitivity described as mild and temporary (clinical trial of 10% and 16% carbamide peroxide).
What the Clinical Evidence Shows
Suppose you are holding two trays, one labelled 10% carbamide peroxide and another 15%. Clinical research can help compare them, but it cannot promise that either will produce the same result for every smile. Starting shade, stain type, gel concentration, contact time, tray fit, and later staining habits all affect the visible change.
A clinical evaluation comparing 10% and 15% carbamide peroxide found effective whitening in both groups. The 15% group showed significantly greater color change at the end of treatment and again two weeks later, while reported tooth-sensitivity incidence was equal between the groups. Another study found that 10% carbamide peroxide produced an average total color change of about 5.20 units (clinical evaluation of carbamide peroxide whitening).
A related evidence summary reports that a meta-analysis of trials conducted from 1989 to 1999 found 73% of bleached patients showed a color change of two units or greater. It also found that 50% needed retreatment to maintain the effect beyond six months (review of carbamide peroxide whitening outcomes). For product decisions, the message is practical: whitening can be visible, yet the result may require maintenance because the original discoloration and later staining do not disappear permanently.
What the concentration comparisons really mean
A six-month study of 16.4% and 18% carbamide peroxide reported about a four-shade improvement in upper anterior teeth after two weeks, with roughly 60% of the whitening benefit remaining at six months (six-month study of higher-concentration carbamide peroxide). A separate comparative review found 37% carbamide peroxide similarly effective to 35% hydrogen peroxide in-office, with less bleaching sensitivity after more than two sessions. Those findings describe tested protocols, not a reason to select a high-strength product without professional guidance (comparative review of carbamide and hydrogen peroxide).
| Concentration | What the evidence helps you judge | Practical decision |
|---|---|---|
| 10% | Effective whitening, with sensitivity usually mild or transient in the cited evidence | A reasonable lower-strength starting point when a slower routine is acceptable |
| 16% | Effective over a three-week regimen, with most sensitivity mild and transient | Consider a controlled daily schedule rather than extending wear time |
| 22% | Effective, but results depend on the product and patient | Follow the stated exposure window closely, especially with sensitive teeth |
| 35% to 37% | High-strength whitening can be effective | Use short, supervised protocols rather than treating concentration as a shortcut |
The evidence base has limits. Many trials follow treatment for relatively short periods, so repeated exposure over the long term remains less certain than the results of a defined course. A dentist should assess unexplained discoloration, restorations, cavities, or pronounced sensitivity before you open the box, since peroxide may not address those problems.
Safety, Enamel, and Sensitivity
The most common fear is that whitening gel will “wear away” enamel. Clinical reviews generally describe carbamide-peroxide whitening as safe and effective when used as directed, with side effects that are usually mild and temporary (clinical review of carbamide peroxide safety). That doesn't mean every product, concentration, or wear schedule carries the same risk.
The distinction between clinical tolerance and laboratory findings matters. Recent research summaries note that higher concentrations and longer exposure can reduce cell viability in laboratory settings, while people in clinical studies may tolerate properly controlled treatment. The difference can depend on formulation, exposure time, and delivery method.
What sensitivity means
Peroxide can move through enamel and dentinal tubules, the microscopic channels within dentin. That temporary movement may stimulate the tooth's nerve and create a sharp response to cold air, water, or sweet foods. A mild sensation that fades after treatment is common, but increasing pain is a reason to stop rather than push through.
Gum irritation usually has a visible cause. If gel leaks over the tray edge, sits against the gumline, or is applied in excessive quantity, the tissue may turn white or feel burned. Removing the excess gel and improving the tray fit can reduce that exposure.
A practical boundary: Whitening should feel controlled. Persistent sharp pain, worsening discomfort, or gum injury isn't a sign that the gel is working better.
Existing restorations require a separate conversation. Crowns, veneers, and composite fillings don't whiten in the same way as natural tooth structure, so treatment can create a color mismatch even when the natural teeth respond well. Laboratory and clinical evidence also leaves open questions about cumulative exposure, microcracks, and particular restoration materials. If visible dental work is part of your smile, have a dentist assess the color plan before whitening.
For a concise explanation of common reactions and what to do when they occur, see this guide to teeth whitening gel side effects.
Using Carbamide Peroxide Safely at Home
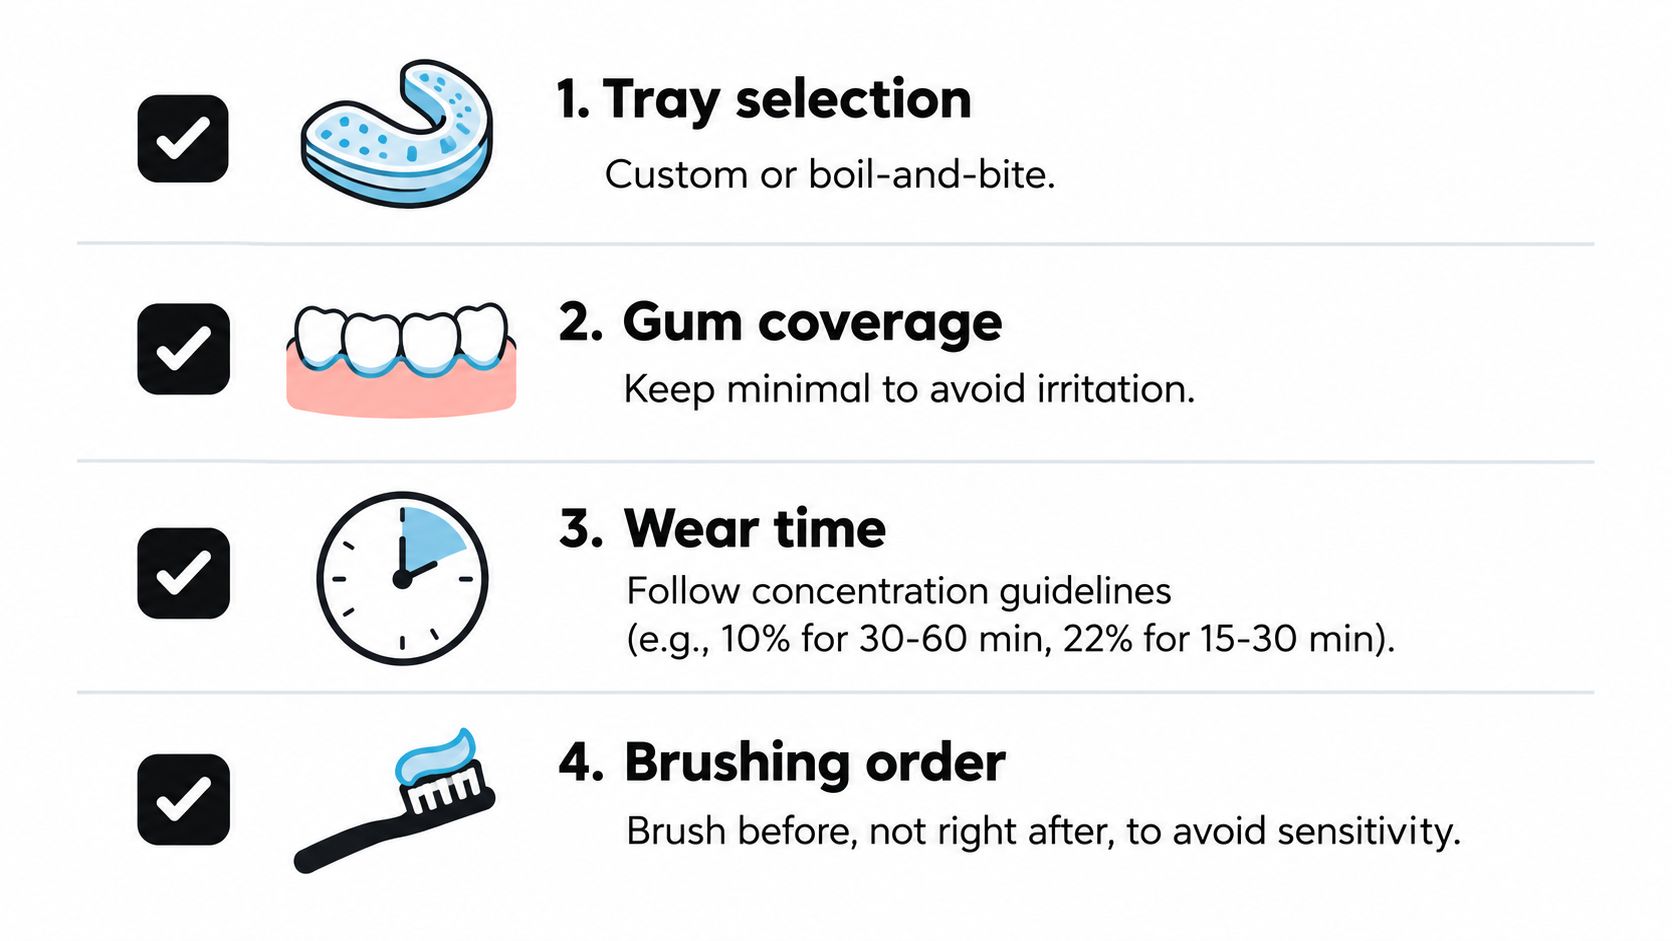
Start with the tray, not the syringe. A custom tray made from a dental impression usually gives more predictable coverage and better control around the gumline than a loose tray. A boil-and-bite tray can work for some users, but inspect the edges before applying gel. If the material repeatedly touches your gums, the fit isn't good enough for a comfortable routine.
A careful home protocol
- Clean the teeth first. Brush gently before treatment to remove plaque and food. Don't scrub aggressively, because irritated gums can react more strongly to peroxide.
- Use a small amount of gel. Place a narrow bead in the tray spaces corresponding to the front surfaces of the teeth. More gel won't necessarily whiten faster, but it can increase leakage.
- Keep the gumline clear. Seat the tray and wipe away visible overflow with a clean finger or cotton swab. Mild contact can irritate tissue, especially when the tray edge presses against it.
- Follow the labeled time. Lower concentrations may be designed for longer exposure, while higher concentrations generally call for shorter sessions. Never extend the session because the teeth don't look different immediately.
- Remove and rinse. Take out the tray, rinse your mouth and the tray, then wait before brushing. Brushing immediately after treatment may add to temporary sensitivity.
- Pause when needed. If sensitivity appears, use shorter sessions or a day-off schedule rather than increasing the amount of gel.
A desensitizing toothpaste containing potassium nitrate or fluoride may help some users manage discomfort. Avoid very cold drinks during the treatment period, and rinse after dark-colored foods and beverages. If you want tray-specific guidance, this resource on safe teeth whitening in Fair Lawn offers another practical checklist for reducing irritation at home.
Stop signs you shouldn't ignore
Stop treatment and contact a dental professional if you develop persistent sharp pain, pronounced gum burning, white patches that don't settle after removing the tray, or whitening that looks unusually uneven. Uneven color can reflect tray coverage, existing restorations, plaque, or changes in enamel, so adding more gel may make the appearance worse.
For help comparing tray designs and fit, review the available teeth whitening trays, then match any product choice to its own instructions rather than relying only on a general concentration chart.
Choosing a Product and When to See a Dentist
A sensible whitening kit should make its dose and instructions easy to understand. Look for a clearly labeled carbamide peroxide percentage, a tray that stays in place without pressing hard into the gums, and directions that state how long to wear it. An ADA Seal of Acceptance or equivalent regulatory clearance can provide an additional product-screening signal, although it doesn't replace an examination of your teeth.
Custom dentist-dispensed trays offer better control over gel placement and gum protection because they're shaped to your mouth. Strips are convenient, but they may not cover every tooth evenly. Boil-and-bite trays sit between those options, with more adaptability than a fixed strip but less precision than a custom tray.
A dental visit should come first if you have
- Visible cavities or cracked teeth: Peroxide may reach sensitive internal areas.
- Gum disease or exposed roots: The gumline may react strongly to the gel.
- Crowns, veneers, or visible fillings: Restorations won't lighten like natural teeth.
- Trauma or medication-related discoloration: Internal stains may need a different plan.
- Pregnancy or breastfeeding: Safety information is limited, so ask your clinician before treatment.
- Age under 16: A dentist should determine whether whitening is appropriate.
A consultation can include shade matching, an examination for decay and gum problems, and a discussion of whether in-office treatment, take-home trays, or a combined plan fits your target. A dentist can also explain whether whitening will expose a mismatch in existing dental work before you spend money on a kit.
Smart Whitening Habits That Last
A manageable routine usually beats an aggressive one. Before buying, verify the concentration, check that the product provides clear wear-time instructions, and choose a tray that limits gel contact with the gums.
Do:
- Use a desensitizing toothpaste: Potassium nitrate or fluoride may help support comfort before and during treatment.
- Follow the clock: Wear the trays only for the directed duration.
- Clean the trays: Rinse them after each use and store them dry.
- Watch staining habits: Use a straw for dark beverages when practical and rinse after coffee, tea, or colored foods.
- Keep dental appointments: Cleanings help remove surface buildup and let a clinician monitor sensitivity, decay, and restorations.
Don't:
- Don't add extra gel: Overflow increases gum exposure without guaranteeing a lighter result.
- Don't chase speed: Longer sessions can increase irritation and sensitivity.
- Don't smoke during active whitening: Tobacco can stain teeth and undermine the appearance you're trying to maintain.
- Don't trust unverified sellers: Unclear storage conditions, missing concentration details, and incomplete instructions make dosing difficult.
- Don't whiten over untreated problems: Pain, bleeding gums, cavities, and exposed roots need attention first.
A touch-up routine may be appropriate after the original treatment, but the timing and concentration should follow the product instructions or dental advice. The clinical evidence shows that some whitening benefit can fade over time, so maintenance is better understood as an occasional plan than a reason to use gel continuously.
If you want gradual control, compare a 10% or 16% carbamide peroxide system. If you want a faster result or have sensitivity, restorations, or unexplained discoloration, schedule a dentist visit before choosing a stronger product.
DentalHealth.com offers professional-grade at-home whitening gels and kits, including carbamide peroxide options, along with sensitivity products and practical guidance for managing treatment. Visit DentalHealth.com to compare clearly labeled whitening products and choose a routine that matches your teeth, tray type, and comfort needs.