

A Guide to Custom Fit Teeth Bleaching Trays for Pro Results
If you're after professional whitening results but without the hefty dental office price tag, custom-fit teeth bleaching trays are hands-down the best at-home solution you'll find. Think of it like getting a suit tailored versus grabbing one off the rack—one is made just for you, ensuring it looks great and feels comfortable.
Your Path to a Brighter Smile at Home
A lot of people want a dramatically whiter smile but feel trapped between two less-than-ideal choices: shelling out a lot of money for in-office treatments or dealing with the frustration of store-bought kits that just don't deliver. Custom-fit bleaching trays are the perfect middle ground, giving you a professional-grade experience that you control.
The concept behind them is simple but incredibly effective. Unlike a one-size-fits-all product that often gives spotty results, a custom tray is created from an exact impression of your teeth. That precision fit is the real secret to its success.
The Power of a Perfect Fit
Imagine trying to paint a masterpiece with a thick, clumsy roller brush. You’d end up with paint on the ceiling and miss half the canvas. That’s pretty much what happens with generic whitening strips and those boil-and-bite trays. They struggle to make consistent contact with every nook and cranny of your smile, especially around curved teeth or crowded areas.
This almost always leads to two big problems:
- Splotchy Whitening: Some parts of your teeth get soaked in gel while others get barely any, leaving you with an uneven, unnatural-looking finish.
- Gum Irritation: Whitening gel easily oozes out of a poorly fitting tray and onto your sensitive gums, causing some real discomfort and irritation.
Custom-fit teeth bleaching trays solve both of these issues by creating a perfect seal around your teeth. This keeps the whitening gel exactly where it needs to be—spread evenly across the enamel—and keeps it off your gums.
Achieving Professional Results on Your Schedule
Because these trays fit so snugly, they allow you to safely use professional-strength whitening gels that you just can't with other methods. The tailored design stops saliva from getting in and diluting the gel, and it prevents the gel from escaping. This means you get the maximum whitening power out of every single treatment.
You can achieve a brilliant, consistently white smile, all from the comfort of your own home. It’s truly the gold standard for anyone who is serious about at-home teeth whitening.
Comparing Your At-Home Whitening Tray Options
When you start looking into whitening your teeth at home, you'll find a few different kinds of trays out there. It’s easy to think they’re all the same, but the tray you choose is just as important as the whitening gel itself.
Think of it this way: a custom fit teeth bleaching tray is like a key cut specifically for your front door—it just works, perfectly. Other trays are more like those generic skeleton keys you see in old movies; they might jiggle the lock open, but it’s never a clean fit.
More and more people are looking for that professional look without the high price tag of an in-office visit, and the market shows it. The global teeth whitening kits market was valued at US$6.21 billion in 2021 and is on track to hit US$9.63 billion by 2028. It’s no surprise, considering professional in-office procedures dropped by almost 44% between 2015 and 2017. People are clearly shifting to effective solutions they can use in their own homes.
Custom-Fit vs. Boil-and-Bite vs. Stock Trays
Let's break down the main players in the at-home whitening game. Each one offers a totally different experience in terms of comfort, precision, and the results you'll actually see in the mirror.
- Custom-Fit Trays: These are the real deal. They're made from a precise mold of your own teeth. This perfect, snug fit is what holds the whitening gel exactly where it needs to be—evenly across every tooth—while keeping it away from your sensitive gums. It’s the gold standard for a reason.
- Boil-and-Bite Trays: This is a step up from the most basic option. You dunk them in hot water to soften the plastic, then bite down to get a semi-custom shape. It's better than nothing, but they're often bulky and just can't mold to the unique contours of your smile, which means you'll get patchy whitening.
- Stock Trays: These are your classic one-size-fits-all trays. They aren't molded to your teeth at all. A poor fit is practically guaranteed, leading to wasted gel, uneven results, and a high chance of gum irritation.
If you're serious about getting professional-grade results from the comfort of your couch, this decision tree makes the choice pretty clear.
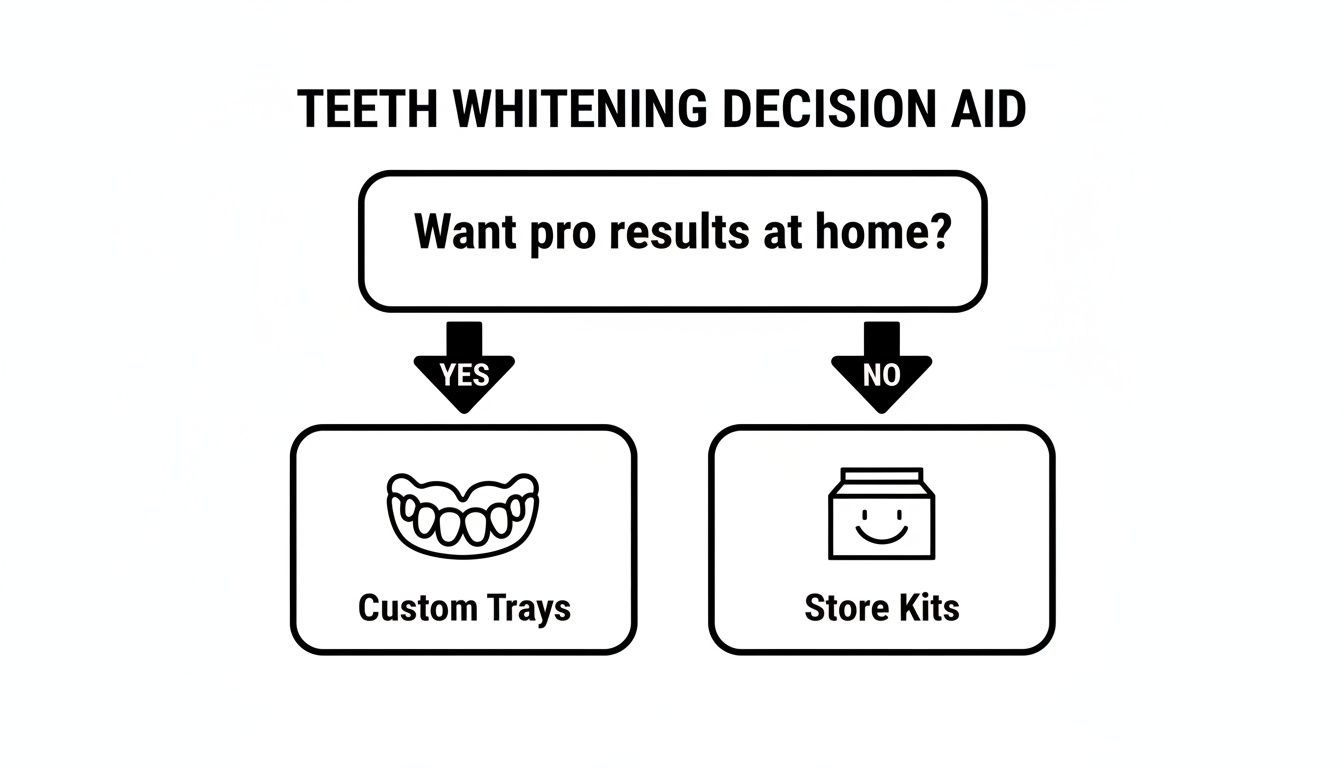
As the guide shows, if you want results you can count on, all roads lead to custom trays.
Why Fit Dictates Your Whitening Success
The success of your entire whitening treatment really comes down to one thing: the fit of the tray. A perfect fit maximizes the contact between the gel and your tooth enamel while keeping that same gel off your gums.
A poorly fitting tray is a recipe for disappointment. Not only will you get patchy, inconsistent whitening, but the leaking gel can cause significant gum sensitivity, making you want to stop the treatment altogether.
This comparison table lays out the key differences you need to know, making it easy to see why fit is so critical.
Whitening Tray Comparison Custom vs Boil-and-Bite vs Stock
| Feature | Custom-Fit Trays | Boil-and-Bite Trays | Stock Trays |
|---|---|---|---|
| Fit Precision | Excellent | Fair | Poor |
| Comfort | High | Medium | Low |
| Whitening Effectiveness | High | Medium-Low | Low |
| Gum Irritation Risk | Very Low | Medium | High |
Ultimately, choosing custom fit teeth bleaching trays isn't just about comfort; it's an investment in getting brilliant, predictable results without the pain and frustration of generic options. For a closer look, you can explore our full range of professional whitening trays.
How Your Custom Fit Bleaching Trays Are Made
The magic behind custom fit teeth bleaching trays lies in how perfectly they are molded to your unique smile. This isn't a clumsy, one-size-fits-all situation like you get with boil-and-bite trays. Instead, your trays are created from an exact blueprint of your dental anatomy, ensuring a snug, glove-like fit that makes all the difference.
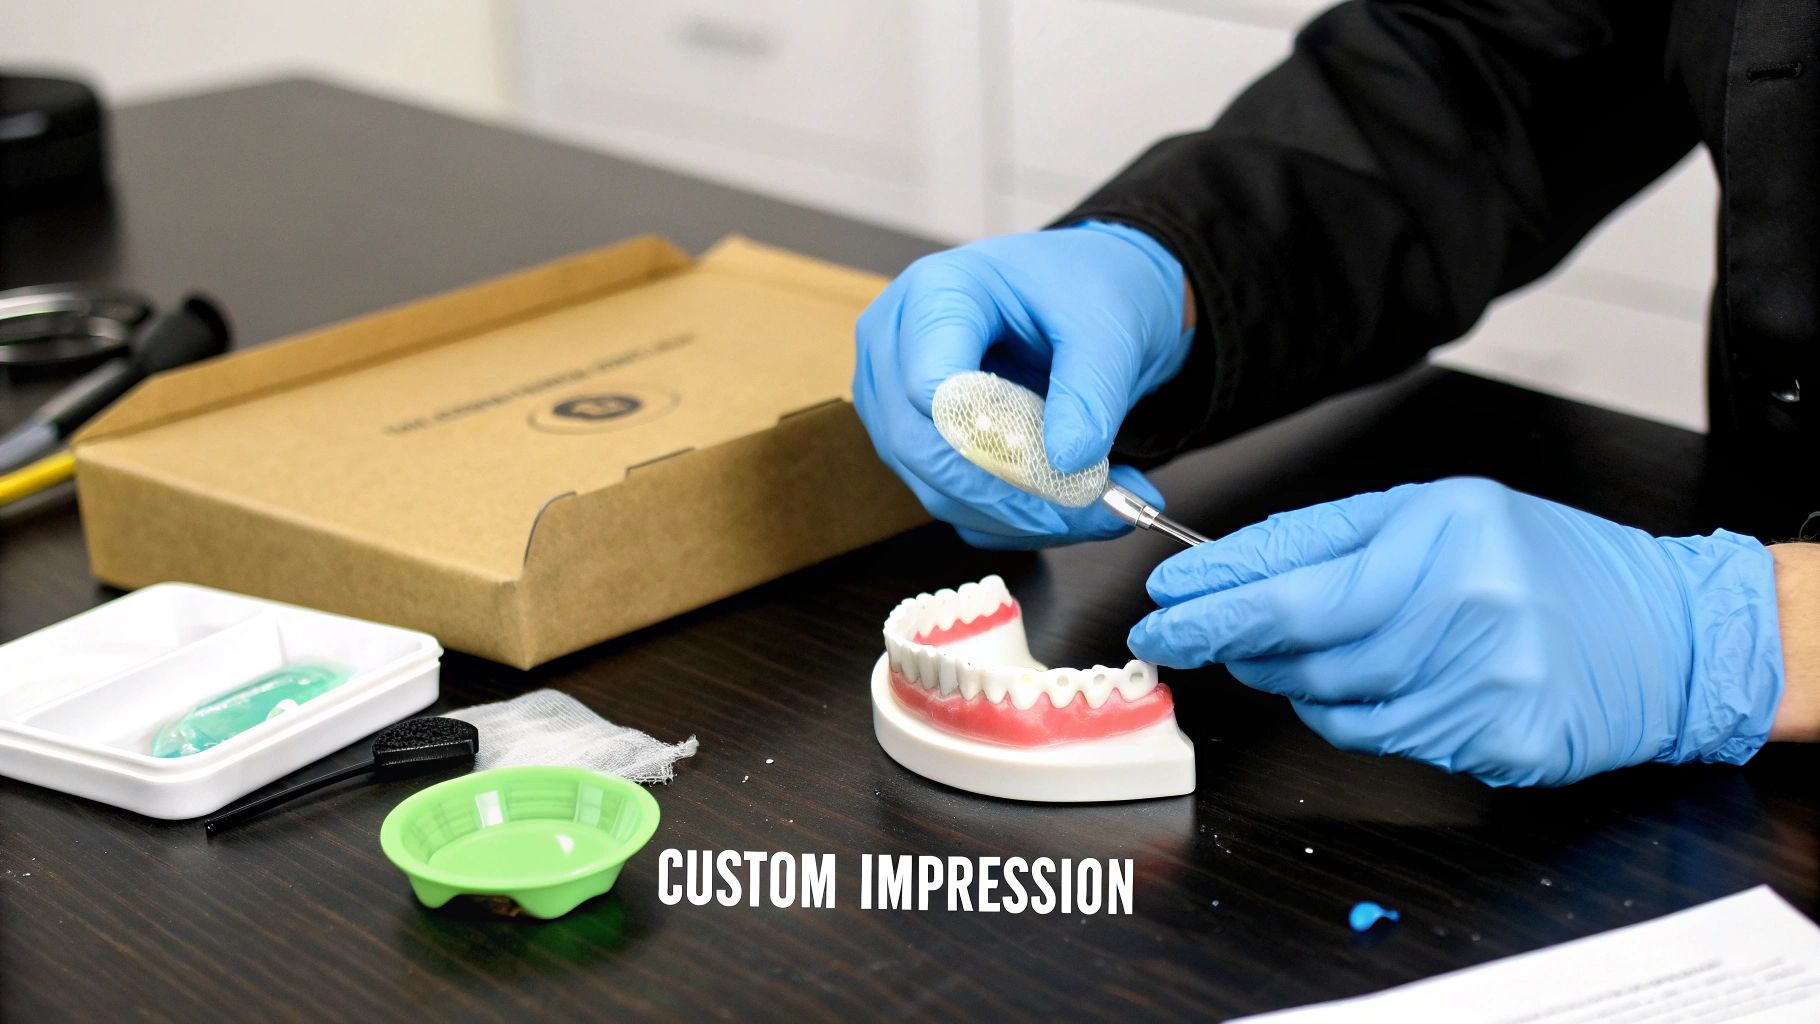
It all kicks off with an at-home impression kit, which puts professional-grade tools right in your hands. Everything you need to capture a precise mold of your upper and lower teeth is in the box, saving you a trip to the dentist.
Taking Your Dental Impressions
Inside the kit, you'll find dental putty, usually in two separate containers. Don't worry, the process is simple and designed for anyone to nail on the first try.
-
Mix the Putty: Just combine the two putties and knead them together until you have one uniform color. This activates the material and starts the clock before it begins to set.
-
Load the Tray: Next, roll the mixed putty into a log shape and press it evenly into the impression tray included in your kit.
-
Take the Impression: Now, carefully bite down into the putty. You'll want to press firmly so every single tooth is fully submerged. Hold that position for a few minutes while the putty hardens, capturing a perfect negative mold of your teeth.
This straightforward procedure creates an incredibly detailed record of every groove and contour of your smile. It's this precision that sets custom trays miles apart from the competition.
The at-home impression process is the critical first step. A clear, deep impression is the foundation for a tray that seals perfectly, keeps gel on your teeth, and protects your gums from irritation.
From Impression to Final Product
Once your impressions are good to go, you just pop them back in the mail using the pre-paid packaging. From there, they head to a dental lab where technicians get to work. First, they use your molds to create a stone cast—a perfect plaster replica of your teeth.
This stone model becomes the master template. A thin, durable, and biocompatible sheet of plastic is heated and then vacuum-formed directly over it. This technique forces the material to adapt flawlessly to every nook and cranny, creating the final custom fit teeth bleaching trays.
After a quick trim and polish to make sure the edges are smooth and comfortable, your personalized trays are shipped right back to your door, ready for you to start whitening.
Choosing the Right Whitening Gel for Your Trays
Think of your custom trays as the perfect delivery system, but it’s the whitening gel that’s the real powerhouse behind your results. Picking the right one is a huge part of the process. It's all about balancing your whitening goals with your comfort level to get that brilliant smile without dealing with unnecessary sensitivity.
The choice really boils down to two main active ingredients: carbamide peroxide and hydrogen peroxide. A good way to think about them is like two different kinds of athletes. Hydrogen peroxide is the sprinter—it works incredibly fast and intensely, but it also tires out quickly. Carbamide peroxide, on the other hand, is the marathon runner, releasing its whitening power slowly and steadily over a much longer period.
Carbamide Peroxide vs Hydrogen Peroxide
The core difference between these two is how they break down chemically. Hydrogen peroxide is a direct, pure whitening agent. It gets to work right away. Carbamide peroxide is a bit different; it first breaks down into hydrogen peroxide and urea. Because of this two-step process, it releases about one-third of its whitening power as hydrogen peroxide, making it a gentler, more sustained choice.
This difference has a big impact on how you'll use the gel:
- Carbamide Peroxide: This is your go-to for longer wear times, and it's fantastic for overnight whitening. Its slow, stable release keeps the initial intensity low, which is a lifesaver for managing tooth sensitivity.
- Hydrogen Peroxide: Perfect if you're looking for shorter, more powerful whitening sessions. If you only have 30-60 minutes a day to spare, this type delivers a faster, more potent burst of whitening action.
The effectiveness of these ingredients is a major reason why professional whitening gels and kits are so popular. The professional teeth whitening market was valued at USD 2.68 billion in 2024, and these products make up a massive 62% of that market. If you're curious about the industry's growth, you can check out some detailed industry insights on Arizton.com.
To make the choice easier, here's a quick comparison to help you decide which gel type fits your lifestyle and sensitivity needs.
Carbamide Peroxide vs Hydrogen Peroxide Gels
| Characteristic | Carbamide Peroxide | Hydrogen Peroxide |
|---|---|---|
| Wear Time | Longer (2-8 hours, often overnight) | Shorter (15-60 minutes per session) |
| Release Speed | Slow, gradual release of whitening agent | Fast, immediate release of whitening agent |
| Sensitivity | Generally gentler, lower risk of sensitivity | Can be more intense, higher risk of sensitivity |
| Best For | People with sensitive teeth, overnight use | Quick results, shorter daily treatments |
| Shelf Life | More stable, longer shelf life | Less stable, shorter shelf life |
Ultimately, both are incredibly effective. Your decision really comes down to whether you prefer a slow-and-steady approach or a quick-and-powerful one.
Understanding Gel Concentrations
Once you've picked between carbamide and hydrogen peroxide, you need to select a concentration, or strength. This is shown as a percentage—the higher the number, the more whitening power you get. Just keep in mind that a higher strength can also increase the chance of temporary tooth sensitivity.
For carbamide peroxide, the common concentrations are:
- 10% - 16%: An excellent starting point, especially for beginners or anyone with a history of tooth sensitivity.
- 22%: This is a very popular mid-range option that hits a great balance between effectiveness and comfort.
- 35% and higher: Reserved for those who want maximum results in less time. These are typically used for shorter daily sessions, not overnight.
The best approach is to start with a lower concentration and see how your teeth react. You can always move to a stronger gel later, but starting too high can lead to discomfort that disrupts your whitening schedule.
The goal is to find that sweet spot where you're getting fantastic results without any nagging sensitivity. Top brands like Opalescence offer a huge variety of formulas and concentrations, which makes finding your perfect match much easier. For a deeper dive into one of the most trusted names in the business, you might want to read our guide to Opalescence gels. By carefully choosing your gel, you're making sure your custom fit teeth bleaching trays deliver the professional results you're looking for.
A Step-by-Step Guide to Using and Caring for Your Trays
Alright, you've got your custom fit teeth bleaching trays and the right whitening gel. Now for the fun part: starting your journey to a seriously brighter smile.
To get those professional-grade results and make your trays last for years, you need a solid routine for both application and care. Think of this as your practical playbook for every step.
First thing's first: always start with clean teeth. Give them a good brush and floss to get rid of any plaque or leftover food. This step is crucial because it lets the whitening gel make direct, even contact with your enamel, which is exactly what you want for the best results.
Your First Whitening Session
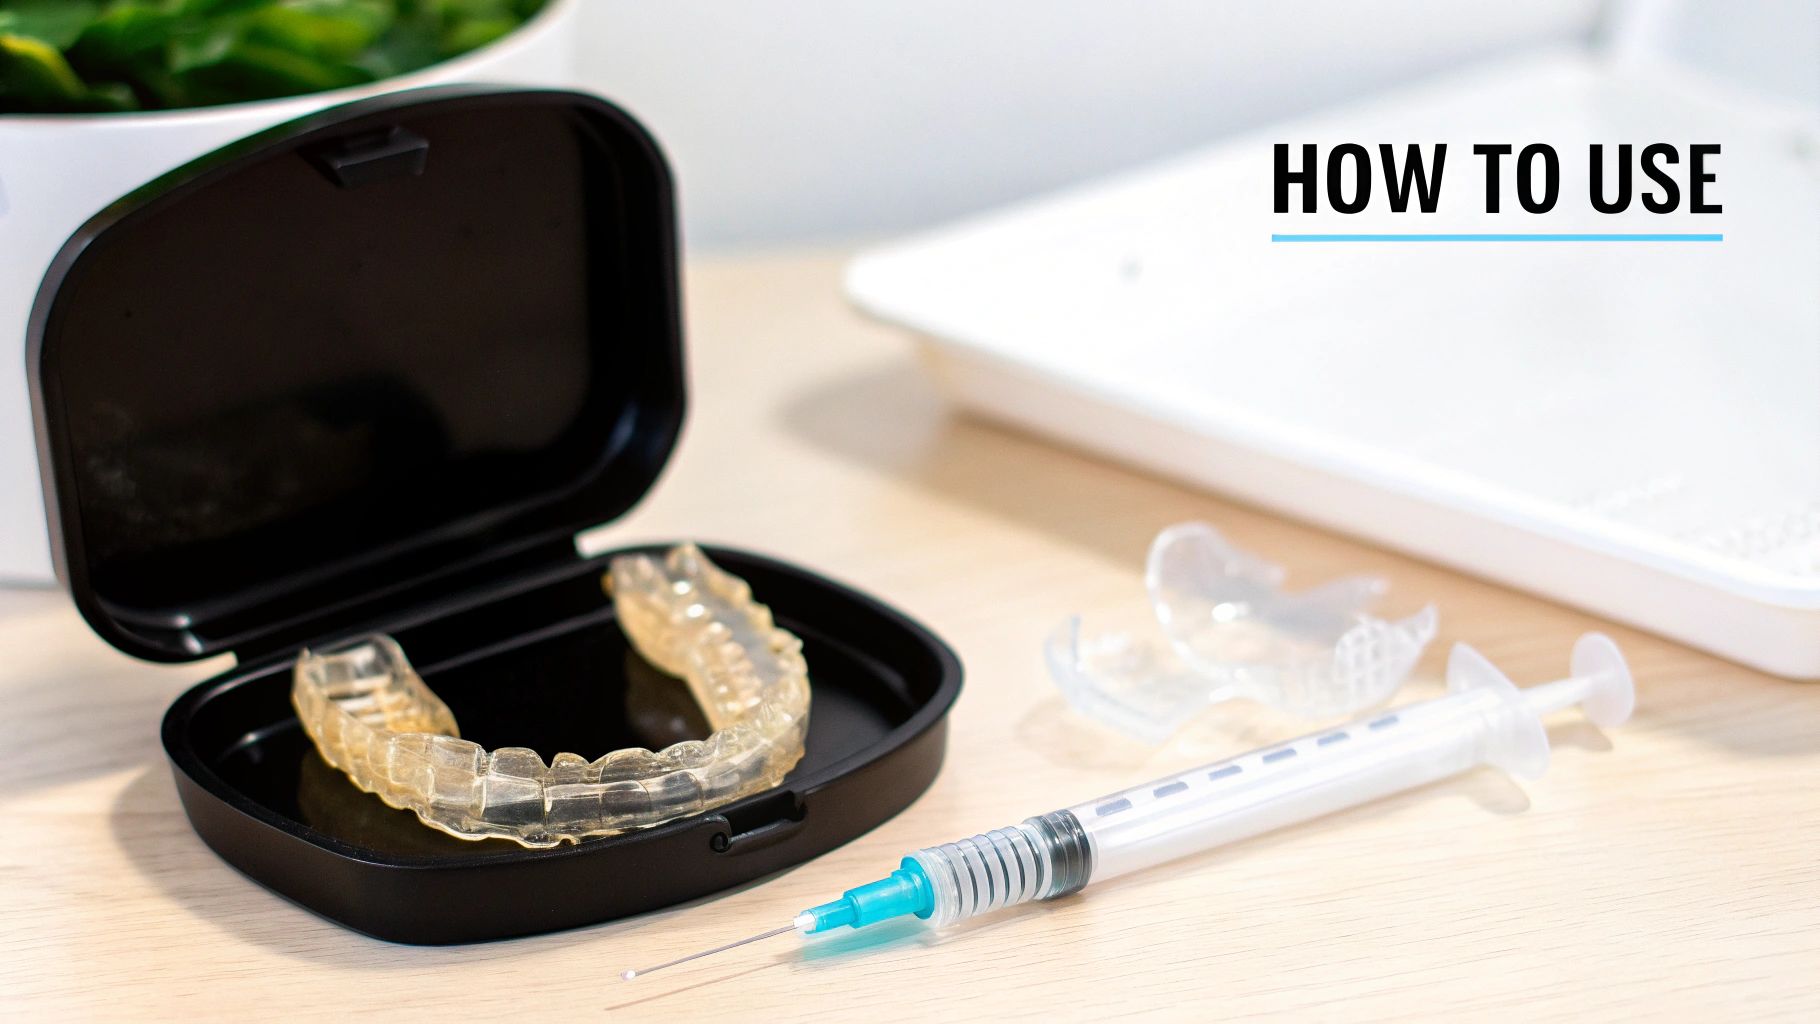
Using your trays for the first time is pretty straightforward. The biggest key is precision, not quantity. When it comes to the whitening gel, a little dab will do you.
- Apply the Gel: Squeeze a tiny dot of whitening gel into the inner, front surface of each tooth compartment in your tray. You only need to put gel in the spots for the teeth people see when you smile.
- Seat the Trays: Gently pop the trays over your teeth. Press down lightly with your fingertips until they feel snug and secure. They shouldn't rock or feel loose at all.
- Clean Up Excess Gel: It’s totally normal for a little bit of gel to ooze out over the top edge. Just grab a soft toothbrush or a cotton swab and gently wipe it off your gums to keep irritation at bay.
- Follow the Clock: Pay close attention to the recommended wear time for your specific gel. This can be as short as 30 minutes for stronger hydrogen peroxide gels or last several hours (even overnight) for gentler carbamide peroxide formulas.
The number one mistake people make is overfilling the trays. Piling on the gel won't get you whiter teeth any faster. It just wastes product and is the quickest way to make your gums sensitive. One small drop per tooth is all it takes.
Keeping Your Custom Trays in Top Shape
Good care is what makes your custom trays last for years, ready for all your future touch-ups. If you neglect them, that perfect fit can get compromised, and they just won't work as well. The cleaning routine is simple—just make sure you do it right after every use.
Here’s all you need to do:
- Cool Water Only: Always rinse your trays under cool tap water. Never, ever use hot water. Heat can warp the plastic, permanently ruining that custom fit you paid for.
- Brush Gently: Grab a soft-bristled toothbrush (keep one just for your trays) and gently scrub away any leftover gel. Don't use abrasive toothpastes; they can scratch up the trays.
- Air Dry Completely: After a good rinse and scrub, let your trays air dry all the way through before putting them away.
- Store Them Safe: Always keep your trays in the protective case they came in. This keeps them from getting lost, crushed, or covered in bathroom germs.
Follow these simple steps, and your custom fit teeth bleaching trays will be your go-to tool for getting—and keeping—that brilliantly white smile you’re after.
Managing Sensitivity and Whitening Safely

Let's talk about one of the most common questions people have about whitening: "Will it make my teeth sensitive?" It's a fair concern. This temporary zing happens because the whitening agent (peroxide) needs to get inside the enamel to work its magic on stains, which can sometimes tickle the tooth's nerve.
While that might sound a little intense, the sensitivity is usually pretty mild and doesn't stick around for long. And the great thing about using custom-fit teeth bleaching trays is that you're in the driver's seat. You have total control over the process, making it incredibly easy to manage any discomfort that pops up. The trick is simply to listen to your teeth and adjust accordingly.
Practical Tips for a Comfortable Experience
If you do start to feel a little sensitivity, don't sweat it. There are a few simple, proven strategies to dial things back without derailing your progress toward a brighter smile.
- Shorten Your Wear Time: If the instructions suggest wearing your trays for an hour, try cutting it down to 30 or 45 minutes. That small change can make a world of difference.
- Take a Day Off: You're not locked into a daily whitening schedule. Giving your teeth a break for a day or two between sessions allows them to recover, and you'll still get to your goal.
- Use a Lower Strength Gel: If you're using a 35% gel, maybe switch to a 22% or even 16% concentration. A gentler formula often delivers the exact same stunning results, just over a slightly longer timeframe.
Think of teeth whitening as a marathon, not a sprint. The goal is to get to the finish line, and prioritizing your comfort is the best way to ensure you stick with it long enough to see the results you want.
When to Pause Your Whitening Journey
Your health and safety always come first. While whitening is a perfectly safe procedure for most people, there are a few situations where it's best to press pause and check in with your dentist before you start.
You should definitely hold off on whitening if you have:
- Untreated cavities
- Gum disease (like gingivitis or periodontitis)
- Cracked teeth or exposed roots
These issues can create a direct path for the whitening gel to reach the sensitive inner parts of your tooth or irritate already inflamed gums, which can be quite painful. It's always a good idea to make sure your mouth is healthy before you begin. For a deeper dive, you can learn more about how to reduce teeth sensitivity after whitening from our other guide.
Answering Your Top Questions About Custom Fit Trays
Jumping into the world of at-home whitening can bring up a few questions, and that's perfectly normal. We've gathered the most common queries we get about our custom fit teeth bleaching trays to give you clear, straightforward answers.
How Long Will My Custom Fit Teeth Bleaching Trays Last?
With just a little care, your custom trays are built to last for several years. We make them from a seriously durable, high-quality material that’s designed for repeated use.
To get the most life out of them, always clean them with cool water and a soft brush, then pop them back in their protective case. The one big rule: avoid hot water at all costs. It can warp the material and completely ruin that perfect custom fit you paid for.
Can I Eat or Drink While Wearing My Whitening Trays?
That’s a definite no. You’ll want to avoid eating or drinking anything besides plain water while your trays are in.
Food can easily damage the trays, and drinks like coffee, tea, or red wine will stain your teeth, actively working against the whitening process. It’s best to always take your trays out before any meal or beverage break.
The demand for professional-level whitening you can do at home is booming. The specialized whitening mouth tray market was valued at $1.1 billion in 2024 and is on track to hit $2.3 billion. This shows just how many people are investing in getting great results on their own schedule. For a deeper dive into the numbers, you can explore more data on this growing market at MarketIntelo.com.
How Quickly Will I See Whitening Results?
Everyone's starting point is a little different, and the gel strength you choose plays a role, but most people start seeing a noticeable difference within just 3 to 5 days of daily use.
For the full, dramatic results you're looking for, it typically takes about one to two weeks of consistent treatment.
Ready to get that professional-grade smile from the comfort of your own home? Take a look at our complete collection of at-home whitening products and custom-fit tray systems over at DentalHealth.com. Your journey to a brighter smile can start today!