

How to Clean Retainers for a Brighter, Healthier Smile
Properly cleaning your retainer is about more than just a quick rinse under the tap. It means getting into a daily habit of gently brushing it with a soft-bristled brush and a mild, clear soap, then giving it a thorough rinse in lukewarm water. This simple routine is your best defense against the buildup of nasty bacteria and plaque, protecting both your oral health and the investment you've made in your smile.
Why Your Retainer Needs More Than Just a Rinse
That amazing feeling of getting your braces off is just the beginning of the next crucial phase: keeping that perfectly straight smile. Your retainer is now the MVP, and taking care of it is just as important as the treatment that got you here. It's so tempting to just swish it under some water and call it a day, but that common shortcut can lead to some pretty unpleasant consequences.
Think about it—your mouth is a complex environment, and your retainer sits in there for hours, soaking it all up. Every time you wear it, it’s collecting saliva, bacteria, and microscopic food particles. When that gunk is left to its own devices, it creates a sticky, invisible film called biofilm.

The Hidden Dangers of a Dirty Retainer
This biofilm is basically a five-star resort for bacteria, leading to a host of problems that go way beyond just looking gross. Skimping on proper cleaning can cause:
- Plaque and Tartar Buildup: Just like on your teeth, plaque can harden into tartar (or calculus) on your retainer. This creates a rough, cloudy, and seriously unhygienic surface that’s tough to remove.
- Persistent Bad Breath: The bacteria partying on your retainer release sulfur compounds, leading to halitosis that no amount of mouthwash can cover up.
- Oral Health Risks: Popping a dirty retainer back into your mouth is like reintroducing an army of germs. This can increase your risk for cavities, gum inflammation, and other oral infections.
- Appliance Damage: Over time, all that buildup can actually weaken the retainer's material, causing it to fit poorly or even crack.
Your retainer is a significant investment in your smile. A consistent cleaning routine is the single most effective way to protect that investment and prevent costly repairs or replacements.
Understanding Your Specific Needs
The global dental retainers market is a multi-billion dollar industry for a reason—more than 4 million people in the U.S. alone wear retainers after their orthodontic treatment.
Whether you have a clear plastic Essix retainer or a traditional Hawley with its acrylic plate and metal wires, each type has its own nooks and crannies that trap bacteria differently. This means your cleaning approach needs to be tailored to your specific retainer. For instance, the techniques for how to remove plaque from retainers can vary slightly depending on the material.
The American Dental Association is clear on this: neglecting the daily cleaning of your retainer can significantly raise your risk of oral infections. It's a small task with a huge impact on your long-term health.
Building Your Daily Retainer Cleaning Habit
Let's be honest: consistency is everything when it comes to taking care of your retainer. Just like brushing your teeth, cleaning your retainer has to become a non-negotiable part of your day. The goal is to build a simple habit that takes just a few minutes but pays off big time for your oral health and protects that orthodontic investment you made.
The absolute best time to clean your retainer is the moment you take it out of your mouth, whether that's first thing in the morning or right before you eat. Why? Because the saliva and biofilm are still soft and incredibly easy to remove. If you let it sit out and dry, that film hardens into a stubborn, cloudy layer of plaque that’s much tougher to deal with.
A quick rinse under lukewarm water is the perfect way to start. It washes away any loose particles before you get down to the real cleaning.
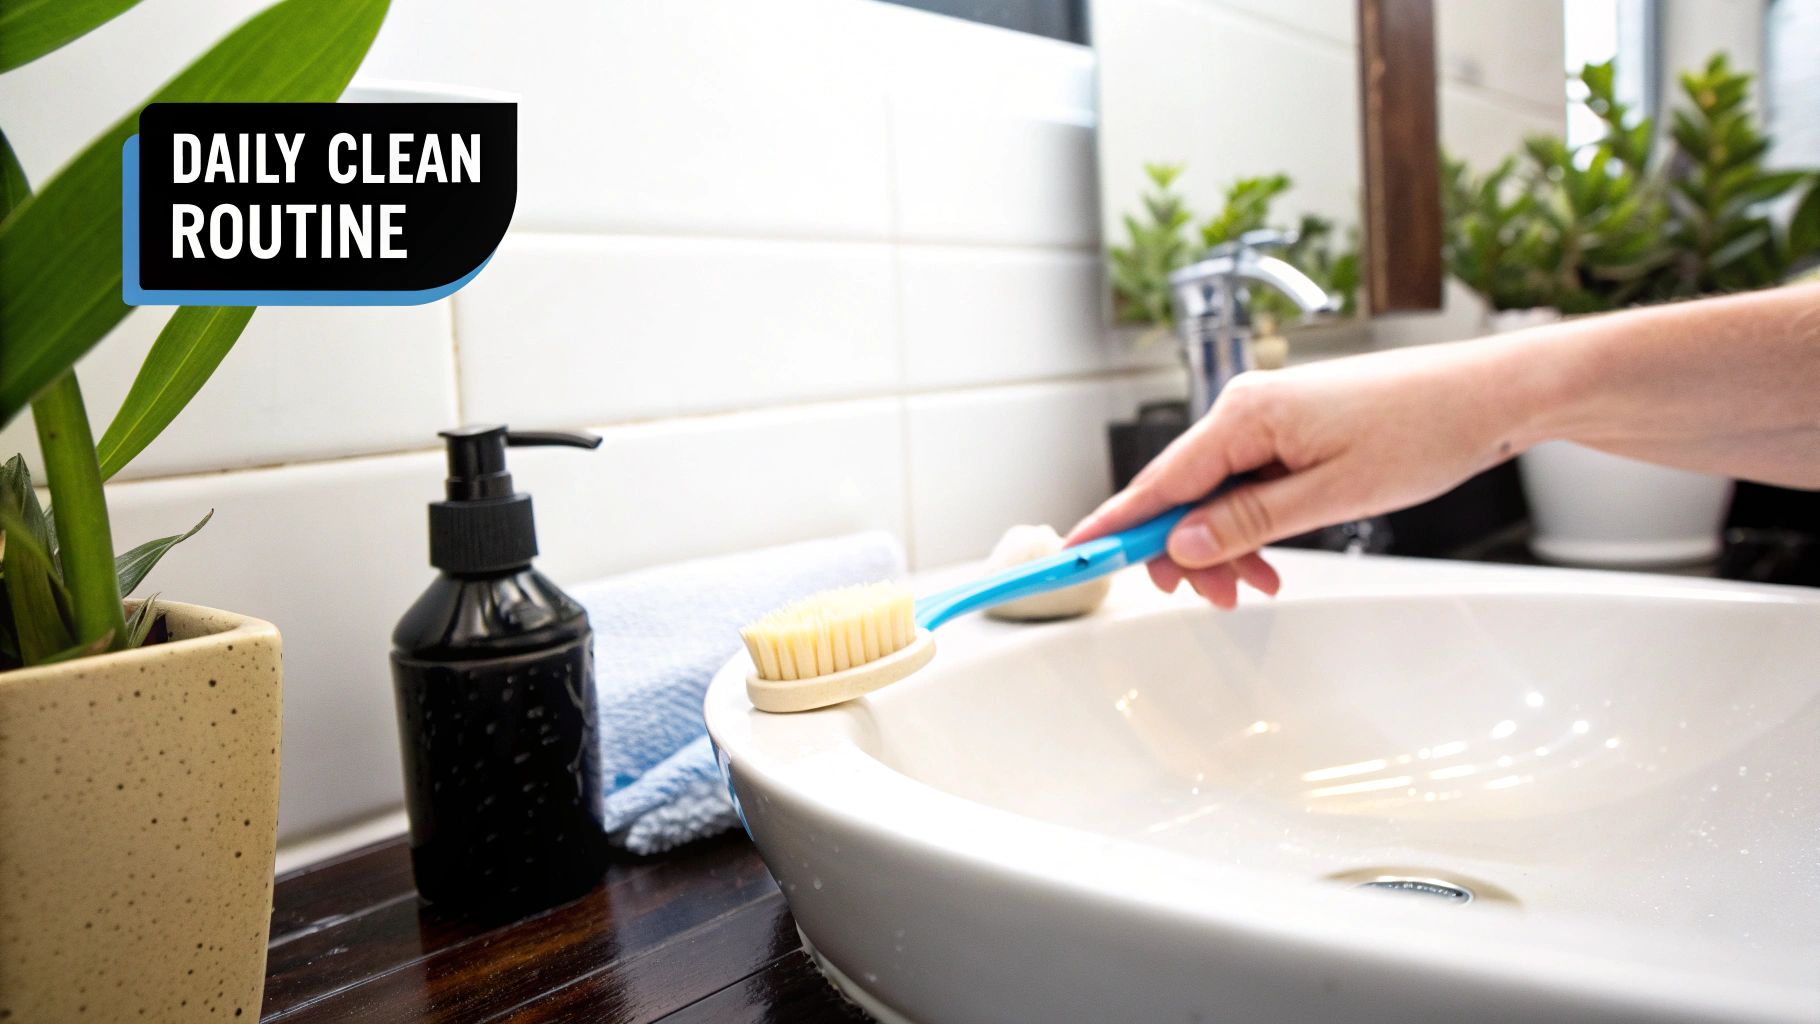
The Gentle Brushing Method
After that initial rinse, the most important thing you can do is give your retainer a gentle brushing. But it's critical to use the right tools for the job, or you could end up doing more harm than good.
- The Right Brush: Always, always use a separate, soft-bristled toothbrush. Never use the same one you brush your teeth with. A dedicated brush prevents you from transferring bacteria and old toothpaste back onto your clean retainer.
- The Right Cleaner: Whatever you do, avoid regular toothpaste. Its abrasive ingredients are great for tough tooth enamel, but they’ll create microscopic scratches all over the softer plastic or acrylic of your retainer. These tiny scratches are the perfect hiding spots for bacteria, ironically making your retainer harder to keep clean.
Instead, a small amount of mild, clear, unscented liquid soap or a specialized retainer cleanser works perfectly. Brush every single surface—inside and out—and really focus on the nooks and crannies where buildup loves to hide. After about a minute of brushing, rinse it thoroughly under lukewarm water until every trace of the cleaner is gone. If you're wondering about the specifics of how often to do this, you can learn more about how often you should clean your retainer in our other guide.
Remember, the key is gentle but thorough scrubbing. You're not trying to scour the appliance, but to dislodge the soft biofilm before it has a chance to harden into plaque and tartar.
If you struggle with remembering, you're not alone. Sometimes a little digital nudge can make all the difference. Exploring the best habit tracking apps can give you the tools you need to lock in this routine for the long haul.
Comparing Your Daily Retainer Cleaning Options
So, what should you actually use to clean your retainer every day? It doesn't have to be complicated. The best choice is simply the one you'll stick with.
To help you decide, here’s a quick look at some common daily cleaning agents for removable retainers, highlighting their effectiveness, safety, and suitability for different materials.
| Cleaning Agent | Best For | Pros | Cons |
|---|---|---|---|
| Mild Liquid Soap | Budget-conscious users seeking a simple, effective solution for daily hygiene. | Inexpensive, readily available, and effective at removing biofilm and bacteria without harsh chemicals. | Must be rinsed very thoroughly to avoid a soapy aftertaste; some scented soaps can linger. |
| Retainer Brite | Users wanting a convenient, specialized cleaning tablet designed for all retainer types. | Kills 99% of odor-causing bacteria, removes stains, and leaves retainers tasting fresh. | Higher cost per use compared to soap; requires a 15-minute soak time. |
| White Vinegar (Diluted) | A natural, DIY deep-clean option for tackling mineral buildup (tartar). | Excellent at dissolving calculus; all-natural and chemical-free. | Strong smell and taste require extensive rinsing; not ideal for daily use due to its acidity. |
Ultimately, whether you choose a simple soap or a specialized tablet, the most important factor is consistency. A simple clean done daily is far better than a deep clean done sporadically.
Deep Cleaning Methods for a True Refresh
Even if you're a rockstar with your daily cleaning routine, your retainer is going to need a more serious deep clean every so often. Think of it as a spa day for your appliance—a chance to get rid of that stubborn, microscopic gunk that a quick daily brush just can't handle. This is what restores that crystal-clear, fresh-from-the-ortho look and makes sure your retainer is truly hygienic.
Giving your retainer this deeper clean once or twice a week is a fantastic way to head off long-term discoloration and tartar buildup. Two of the best ways to do this are with effervescent cleaning tablets or by using an ultrasonic cleaner. Both are designed to blast away grime from every nook and cranny.
The Power of Effervescent Cleaning Tablets
You've probably seen these fizzing tablets. Their magic lies in a simple but powerful chemical reaction. Brands like Retainer Brite are formulated specifically to deep clean orthodontic appliances without being harsh or causing damage. When you drop a tablet into water, it kicks off a fizzing action, creating thousands of tiny, powerful bubbles.
These bubbles get to work immediately to:
- Lift Away Stains: The fizzing action gently pries away surface stains from things like coffee or tea that can make clear plastic retainers look cloudy and yellowed over time.
- Neutralize Odors: The active ingredients target and eliminate up to 99% of the bacteria that cause those funky smells, getting rid of the source instead of just covering it up.
- Dissolve Plaque: The formula helps break down the sticky biofilm and plaque that has started to harden, making it much easier to brush away any residue afterward.
Using them is a breeze. Just pop your retainer into a cup of lukewarm water with a tablet and let it soak for about 15 minutes. That satisfying fizz is how you know it's working. After the soak, a light brush and a good rinse are all it takes. For a full breakdown of the different brands out there, check out our retainer cleaner reviews.
Upgrade Your Clean with an Ultrasonic Cleaner
If you're looking for the absolute best, top-tier deep clean, nothing beats an ultrasonic cleaner. These little countertop devices bring professional-level cleaning right into your home. Instead of relying on chemicals, they use high-frequency sound waves—often up to 40,000 Hz—to create microscopic vibrations in the water.
These vibrations produce millions of minuscule bubbles that implode when they hit your retainer. This process, known as cavitation, literally blasts away plaque, tartar, and bacteria from every single surface, including the tiniest cracks and corners your brush could never hope to reach.
An ultrasonic cleaner provides a level of sanitation that you just can't get with manual cleaning. It’s like a pressure washer for your retainer, guaranteeing a truly deep, comprehensive clean.
The market for ultrasonic retainer cleaners is expanding fast, which shows a real shift in how seriously people are taking their at-home orthodontic care. When you consider that a dirty retainer can host millions of bacteria per square inch in just 24 hours, these devices offer a powerful defense against the kind of buildup that can increase your risk for issues like gingivitis. You can read more about this growing market and its impact on oral hygiene for more insights.
Using one couldn't be simpler. Fill the basin with water, drop in a cleaning tablet for an extra boost if you want, place your retainer inside, and turn it on. In just a few minutes, it will come out looking visibly cleaner and feeling incredibly fresh.
Custom Cleaning Guides for Every Retainer Type
Not all retainers are created equal, so your cleaning routine shouldn't be a one-size-fits-all deal. Honestly, using the wrong method for your specific retainer is a fast track to damage, warping, or just plain ineffective cleaning. Knowing how to clean retainers properly means tailoring your technique to the material, whether it's a clear plastic Essix, a classic acrylic Hawley, or a bonded wire.
This targeted approach is about more than just getting it clean—it's about preserving its shape, clarity, and function for the long haul. Let's break down the best practices for the three main types you'll encounter.
Caring for Clear Plastic Retainers (Essix or Vivera)
Clear plastic retainers, like the popular Essix or Vivera brands, are fantastic because they're nearly invisible. The downside? Their material is super sensitive to heat and harsh chemicals, which means you have to be careful to prevent them from getting cloudy or warped.
The number one rule here is to avoid hot water at all costs. I can't stress this enough. Even water that feels just comfortably warm to your hands can be hot enough to permanently distort the plastic, completely ruining its custom fit. Stick to lukewarm or cool water for every single rinse and soak.
For your daily clean, a soft-bristled toothbrush and a tiny drop of clear, unscented liquid soap are your best friends. Gently brush every surface to scrub away the daily gunk and biofilm. Be sure to skip any colored soaps or mouthwashes that contain alcohol—these can stain or dry out the plastic over time, making it brittle and prone to cracking.
Keeping Hawley Retainers in Top Shape
Hawley retainers are the classic workhorses of the ortho world, made of a tough acrylic plate molded to the roof of your mouth and a sturdy metal wire that fits across your front teeth. This combo of materials means you need a two-part cleaning strategy.
- The Acrylic Plate: This part can be a magnet for plaque and tartar. Use a soft brush and a non-abrasive cleaner to scrub the plate, paying extra attention to the textured side that rests against your palate where buildup loves to hide.
- The Metal Wire: The wire and its clasps can also get pretty grimy. Just be gentle when you're brushing around these metal parts to avoid accidentally bending them out of shape.
A weekly deep soak with an effervescent cleaning tablet works wonders for Hawley retainers. The fizzing action is great for lifting stubborn particles out of the little nooks and crannies where the wire meets the acrylic.
This simple diagram shows an effective deep-cleaning process that's great for both clear and Hawley retainers.
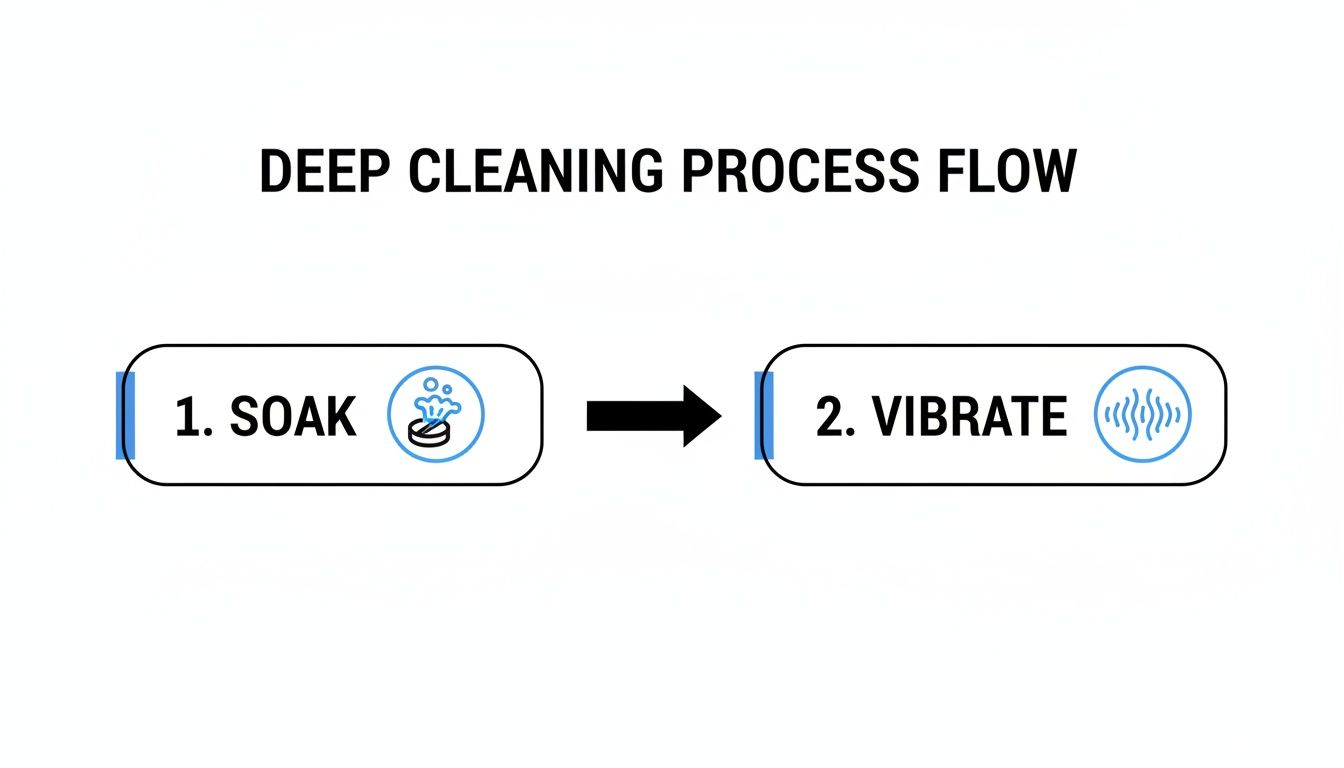
As you can see, combining a good soak with high-frequency vibrations offers a much deeper clean than you can get with manual brushing alone.
Managing Bonded or Permanent Retainers
A bonded retainer—that thin wire permanently glued to the back of your teeth—presents its own unique challenge because you can't take it out. The whole game here is preventing plaque and tartar from building up around the wire and creating problems for your teeth and gums.
Think of a bonded retainer like having braces again. Diligent flossing isn't just a suggestion; it's absolutely essential for preventing gum disease and cavities around that wire.
Standard flossing isn't going to cut it, so you'll need to grab a few specialized tools. A floss threader, which is a small, flexible loop, is perfect for guiding dental floss underneath the wire. You could also try interdental brushes (they look like tiny pipe cleaners) or a water flosser, which can be incredibly effective at blasting away food and plaque from between the teeth and around the wire. Make this a non-negotiable part of your daily routine.
Common Retainer Cleaning Mistakes and How to Avoid Them
Protecting your investment in a straight smile often comes down to knowing what not to do. It’s easy to fall into a few common traps that can quickly damage, warp, or just plain ruin your retainer. That means costly replacements and potentially setting your orthodontic progress back.
Knowing how to clean your retainer is just as much about sidestepping these pitfalls as it is about the cleaning itself. Many of these slip-ups, like using a dab of toothpaste or a quick rinse under hot water, seem harmless at first. But the plastics and acrylics your retainer is made from are far more delicate than your tooth enamel and don't react well to harsh treatment.
The Big Don'ts of Retainer Care
Let's walk through the most frequent mistakes we see people make and, more importantly, how to steer clear of them.
-
Using Boiling or Hot Water: This is the absolute cardinal sin of retainer care. High temperatures will cause plastic or acrylic to warp, completely changing its custom-molded shape. Once it's misshapen, it won't fit, making it useless. Always use cool or lukewarm water for every single rinse and soak. No exceptions.
-
Scrubbing with Toothpaste: While it’s perfect for your teeth, your daily toothpaste is way too abrasive for your retainer. The gritty particles will etch countless microscopic scratches into the surface. These scratches are perfect hiding spots for bacteria and plaque, which leads to that dreaded yellowing and bad odors. Your best bet is a soft-bristled brush and a bit of clear, non-abrasive liquid soap.
-
Soaking in Harsh Mouthwash: A lot of popular mouthwashes contain alcohol, which is terrible for the acrylic on Hawley retainers. It dries the material out, making it brittle and prone to cracking. On top of that, the bright dyes in many formulas can stain clear plastic retainers over time. If you want to give your retainer a deep-cleaning soak, stick with a specialized effervescent tablet made for the job.
Using the wrong cleaning methods has a real impact. Research shows that tartar can build up on a retainer much faster than on properly brushed teeth. Using a professional cleaning tablet can achieve a 99% germ kill rate, something you just won't get with unproven DIY soaks. You can find more insights on the effectiveness of dental care products to see why using the right tools matters.
Don't Forget About the Case!
One of the most overlooked parts of keeping your retainer clean has nothing to do with the appliance itself—it's the case.
Forgetting to clean your retainer case is like putting clean dishes back into a dirty cabinet. You're just reintroducing bacteria to your freshly cleaned retainer every time you store it.
Make cleaning your case part of the routine. A few times a week, wash it out with some soap and warm water, then let it air dry completely before snapping it shut. A damp, sealed case is a five-star resort for bacteria and mold. This simple step is a critical piece of the hygiene puzzle.
Your Retainer Cleaning Questions Answered
After going through the daily and deep-cleaning routines, you probably still have a few questions rattling around. That's totally normal. This is where we tackle the most common things people ask about cleaning their retainers, giving you clear, straightforward answers to help you solve any issues that pop up.
Can I Use Vinegar or Baking Soda to Clean My Retainer?
I get this question all the time. People are always looking for DIY cleaning solutions because, let's face it, they're cheap and you already have them in your kitchen. A 50/50 mix of white vinegar and lukewarm water can actually be pretty effective. If you let your retainer soak for about 20 minutes, the vinegar’s acidity does a decent job of breaking down that stubborn white tartar (also known as calculus) buildup.
But here's the catch: it’s not something you want to do every day. Over time, that same acidity can be harsh on your retainer's materials. Plus, the strong taste and smell are a real pain to rinse off completely.
Baking soda is another popular one. It’s a mild abrasive, so it can help with surface stains, but that's also its downside. It can create tiny micro-scratches on plastic retainers, which ironically gives bacteria even more places to hide. So, while these home remedies can work in a pinch, you're generally much better off sticking with specialized cleaning tablets for regular deep cleans. They’re safer and just plain work better.
How Often Should I Deep Clean My Retainer?
Daily brushing is the bare minimum, the thing you absolutely can't skip. But it's the deep clean that keeps your retainer from getting funky and cloudy over the long haul.
- For most people: A deep clean once a week is the sweet spot. This is usually enough to stop any serious tartar or stains from taking hold.
- If you see buildup: If you start noticing a cloudy film or white spots that don't brush off, bump up your deep cleaning to twice a week.
Think of it like this: a consistent deep cleaning schedule is your best defense against the yellowing, bad smells, and stubborn plaque that daily brushing sometimes leaves behind. It's preventative maintenance for your smile.
What Should I Do About a Smelly or Stained Retainer?
A retainer that smells bad or has turned yellow is a clear sign that bacteria and biofilm have set up camp. Your first move should be a thorough deep clean. Grab an effervescent cleaning tablet or use an ultrasonic cleaner—this will knock out the odor-causing bacteria and help lift off a lot of the surface stains.
If the stains are still there after a good soak, you're probably dealing with hardened tartar, which is next to impossible to remove safely at home. If that's the case, it's time to bring your retainer to your orthodontist. They have the tools to give it a professional-grade cleaning.
Finally, don't forget about storage. This is a big one. Always, and I mean always, store your retainer in a clean, dry case that has ventilation holes. A sealed, damp case is basically a petri dish for bacteria and mold, which is a major source of bad smells. Never just leave it sitting out on the counter or, the worst sin of all, wrap it in a napkin.