
How to Use Home Whitening Kit Safely and Get Results
You've bought a home whitening kit, filled the tray, and then paused because you're unsure whether the gel should touch your gums, how long to wear it, or whether the sharp twinge in your teeth is normal. Those details matter more than adding extra gel or choosing the strongest product.
Used correctly, a home whitening kit can improve stains on natural teeth while keeping treatment manageable. It won't change every type of discoloration, and discomfort isn't a sign that the treatment is working better. The safest approach is controlled peroxide contact, a well-seated tray, and a schedule you can tolerate.
Introduction to At Home Whitening and What to Expect
You may notice coffee staining near the gumline, an old bonding repair on a front tooth, and crowns that already differ from nearby teeth. A home whitening kit can brighten some of the natural tooth surface, but it cannot make every visible tooth the same shade.
Home kits mainly address extrinsic stains, the surface discoloration linked to coffee, tea, wine, and similar drinks. Peroxide does not change the color of crowns, veneers, or bonding, and it generally cannot remove deep intrinsic stains within the tooth. This distinction is explained in what at-home whitening kits can and cannot change.
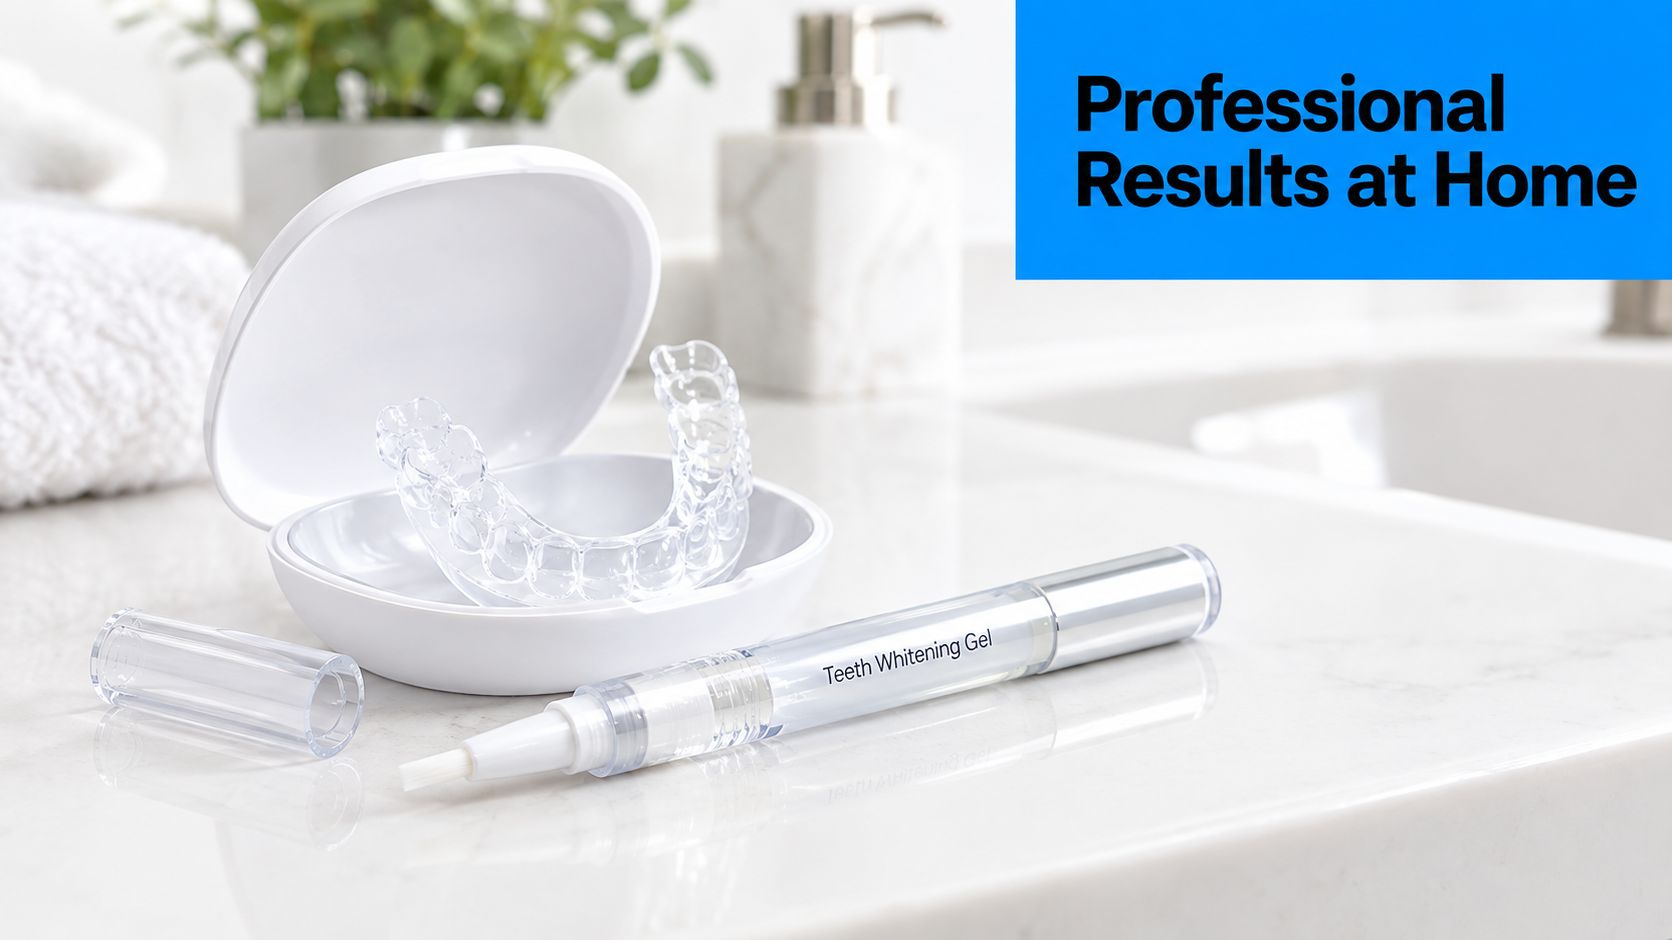
Tray whitening has a clinical history. In 1989, Haywood and Heymann introduced nightguard vital bleaching with 10% carbamide peroxide in custom-fitted trays. Their method became a model for many home tray systems, as described in this history of nightguard vital bleaching. It allowed patients to follow a whitening regimen at home rather than receive every application in a dental office.
The same principle still applies: peroxide gel must remain in controlled contact with the natural tooth surface. A light included with a kit does not change the fact that the gel and the treatment schedule determine much of the result. A practical guide to whitening teeth at home offers further context on comparing home approaches. Follow the instructions supplied with your specific product.
Set a realistic treatment goal
Plan for gradual brightening within the recommended treatment window. Wearing the tray longer or adding extra gel can increase irritation without producing a proportionally better result.
Mild sensitivity is common during the first few days and usually settles shortly after treatment ends. It should remain manageable, rather than becoming sharp, persistent, or severe. Stop and seek dental advice if discomfort suggests an untreated problem rather than ordinary whitening sensitivity.
Aim for a brighter, more even shade among your natural teeth. Existing restorations and deep internal discoloration will remain, so a dental examination before whitening is sensible when either makes up a prominent part of your smile.
Preparing Your Teeth and Kit for Safe Whitening
Preparation takes only a short time, but it prevents many problems blamed on the gel itself. Start with a clean mouth, healthy gum tissue, and a tray you can seat without forcing.
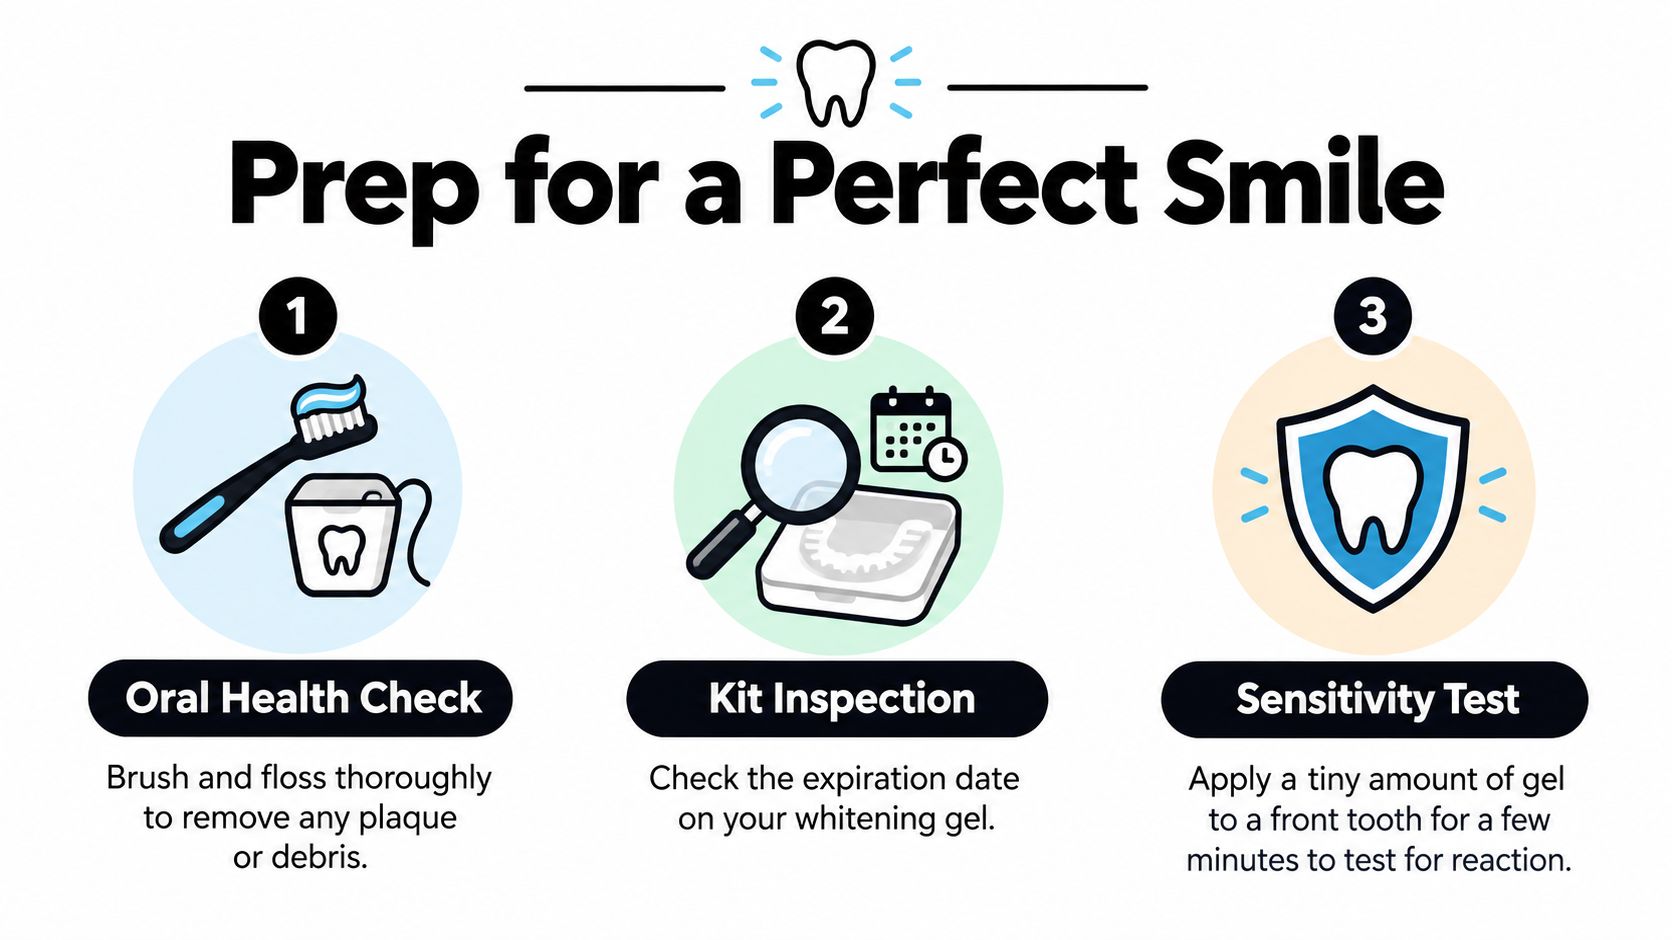
Complete an oral health check
Brush and floss gently to remove plaque and debris. Avoid whitening over active gum irritation, obvious decay, cracks, or areas that already react sharply to cold. Whitening gel can make an existing dental problem more uncomfortable, and it won't treat the cause.
Drying the teeth before application also matters. Saliva can dilute gel and make it harder to keep the product positioned on the intended tooth surfaces. Don't scrub aggressively to achieve dryness. A gentle brush, flossing, and a brief pat with a clean tissue are enough.
Use this pre-treatment checklist:
- Check your gums: They should not be actively bleeding, ulcerated, or visibly inflamed.
- Review your restorations: Crowns, veneers, and bonding won't lighten with peroxide.
- Inspect the tray: Look for rough edges, tears, distortion, or a fit that pushes gel onto the gums.
- Check the gel: Confirm the expiry date and follow the storage directions on the packaging.
- Review the schedule: Identify the exact wear time and frequency supplied by the manufacturer.
- Plan for comfort: Keep a sensitivity toothpaste or dentist-recommended desensitizing product available.
Choose controlled strength over maximum strength
A stronger peroxide formula may whiten faster, but increasing strength isn't automatically a better decision for home use. In some markets, consumer products are capped at 6% hydrogen peroxide, equivalent to 18% carbamide peroxide, after earlier DIY products reached as high as 16% hydrogen peroxide, or 44% carbamide peroxide. The consumer guidance on whitening treatment concentrations illustrates why concentration limits exist.
If you've had sensitivity before, select a product and schedule that match your history rather than chasing the highest available percentage. Don't combine products or improvise wear times. The manufacturer's instructions are based on the gel formulation, tray design, and intended exposure, so changing one of those variables changes the treatment.
How to Apply Your Home Whitening Kit Correctly
The most common application mistake is using too much gel. More product doesn't create a more complete whitening effect. It creates more overflow, and overflow is what frequently irritates the gumline.
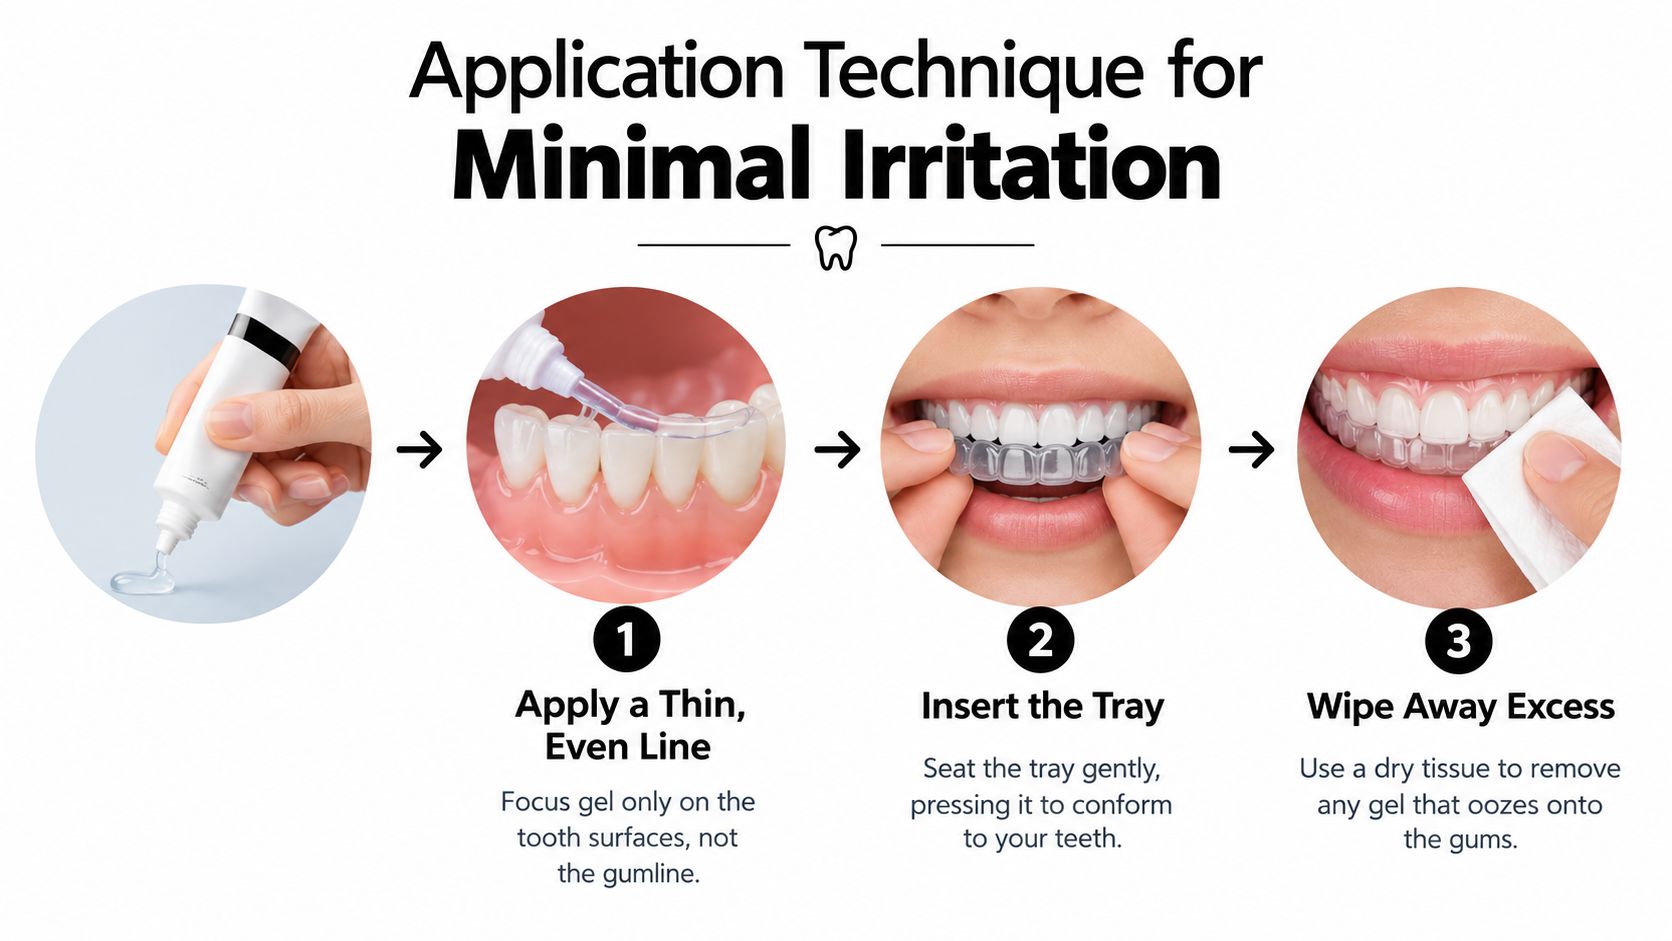
Begin with clean, gently dried teeth. Place a rice-grain-sized amount of gel in each tooth compartment, concentrating it where the front surface of the tooth will sit. You don't need to fill the compartment or draw a thick line along the entire tray.
Seat the tray without forcing it
Place the tray over the teeth and press it gently into position. A good tray should sit fully without rocking, pinching, or pushing a large amount of gel onto the gingiva. If the tray is uneven, stop and inspect it rather than biting down hard to force it into place.
Wipe away any gel that oozes onto the gums with a dry tissue or cotton swab. Peroxide belongs on the tooth surfaces, not pooled against soft tissue. A review of home bleaching technique confirms the importance of correct gel placement, tray seating, and excess removal.
Practical rule: If you can see a continuous ridge of gel sitting on your gums, you've used too much or the tray doesn't fit correctly.
Keep the tray in place only for the wear time stated by the manufacturer. Prolonged contact isn't a reliable shortcut. Whitening depends on peroxide exposure over time, but excessive exposure raises the chance of sensitivity and gum irritation. Don't sleep in a tray unless the instructions specifically prescribe overnight use.
Light activation is another area where expectations often exceed evidence. The clinical review linked above found no proven benefit from light activation for whitening amount, persistence, or sensitivity reduction. If your kit includes a light, use it only as directed, but don't compensate for an ill-fitting tray or too little gel contact by extending the light session.
Finish each session cleanly
Remove the tray carefully and rinse your mouth with water. Clean the tray according to the product instructions, using a soft brush if permitted, and let it dry before storage. Don't use hot water unless the manufacturer says it's safe, because heat can distort some tray materials.
If saliva has diluted the gel or it has pooled in one area, note what happened before the next session. You may need less gel, a more careful seating technique, or professional advice about the tray fit. For additional product-specific guidance, see these teeth whitening gel kit instructions.
Managing Sensitivity and Keeping Gums Comfortable
A first-time user may notice a sharp zing from cold water after a few sessions. That brief response can be normal. Pain that is severe, lingers, or keeps worsening calls for a pause rather than greater persistence.
Mild-to-moderate sensitivity is common with whitening and may begin during treatment or shortly afterward. Research on home bleaching reports varying rates, and sensitivity generally settles after treatment ends. A clinical review found that at-home and in-office bleaching did not differ significantly in overall sensitivity. The review of sensitivity and mitigation strategies describes this discomfort as temporary, often resolving within days and sometimes taking about a week.
Recognize the usual pattern
Whitening sensitivity usually feels like a short, sharp response to cold drinks, cool air, or sweet foods. It can affect several teeth or focus on one area. The sensation should ease between triggers instead of becoming constant.
Use a comfort plan as soon as symptoms appear:
- Use desensitizing toothpaste: Potassium-nitrate toothpaste may reduce the response when used according to its directions.
- Support remineralization: Fluoride or calcium-based gels may help when they suit your oral health needs.
- Shorten exposure: Reduce wear time only within the kit's permitted instructions. Do not compensate with extra gel.
- Space sessions: Leave more time between applications while sensitivity settles.
- Avoid triggers: Limit very cold drinks during treatment if they provoke discomfort.
A short break will not remove your progress. Continuing through significant pain can make whitening harder to tolerate without producing a proportionally brighter result.
Know when to stop
Remove the tray and pause treatment if you develop intense pain, sensitivity that remains instead of easing, or gums that turn white, peel, or feel raw. Excess gel and tray overflow commonly irritate soft tissue. Persistent symptoms need a dental assessment because decay, recession, a cracked tooth, or another condition may be responsible.
Mild sensitivity means the routine needs adjustment. Persistent pain needs investigation.
A desensitizing gel for teeth may be suitable as part of a comfort plan, provided its directions match your needs and oral health. A dentist or hygienist can help distinguish expected temporary sensitivity from a problem that whitening cannot resolve. They can also explain why crowns, veneers, bonding, and intrinsic stains will not change color with peroxide, which helps prevent disappointment when natural teeth whiten but a restoration does not.
Common Pitfalls That Reduce Results or Cause Irritation
The strongest kit isn't necessarily the most effective kit for you. Evidence summarized in a clinical review indicates that higher peroxide concentrations can whiten faster without creating a meaningful long-term color advantage over lower-concentration at-home systems when they're used properly. Overuse tends to increase irritation rather than improve the final shade.
The same principle applies to wear time. Leaving a tray in longer, adding extra applications, or filling every compartment with gel may make your gums uncomfortable while wasting product. A well-fitting tray and consistent schedule usually matter more than aggressive dosing.
What home whitening can realistically change
Surface stains from coffee, tea, and wine are sensible targets. Crowns, veneers, bonding, and deep intrinsic discoloration are not. If a front crown looks darker than the natural teeth, whitening the natural teeth may make the mismatch more noticeable rather than correcting the crown.
Lights also deserve a cautious interpretation. They may make a kit look more advanced, but the evidence does not establish that light activation improves the amount or persistence of whitening. The active variables remain peroxide contact, tray fit, and adherence to instructions.
| Practice | Helps Results | Increases Irritation |
|---|---|---|
| Use a small amount of gel in each compartment | Keeps peroxide on tooth surfaces and limits waste | Filling the tray can push gel onto gums |
| Seat the tray fully and check the gumline | Promotes more even contact | Forcing a distorted tray can create pressure and overflow |
| Follow the stated wear schedule | Provides controlled exposure | Extending sessions adds exposure without a reliable long-term benefit |
| Use a sensitivity plan when needed | Helps you continue comfortably | Ignoring pain can turn a temporary issue into a reason to stop |
| Judge the result on natural teeth | Sets a realistic target | Expecting restorations or intrinsic stains to lighten creates disappointment |
Correct uneven results before adding product
Uneven whitening may come from uneven tray contact, different stain types, or restorations that cannot respond. It isn't automatically proof that you need more gel. Inspect the tray, confirm that each tooth compartment is loaded sparingly, and ask a dental professional for advice if one tooth remains markedly darker or painful.
Maintaining Your Results and Next Steps for a Brighter Smile
Once you've completed the recommended course, assess the result under ordinary lighting rather than trying to force a further change immediately. Look at the natural teeth separately from crowns, veneers, and bonding. A shade difference involving a restoration may require restorative or cosmetic planning, not repeated bleaching.
Maintain your result with consistent oral hygiene and sensible stain control. Keep brushing and flossing, clean removable trays properly, and avoid exposing freshly treated teeth to strongly staining foods and drinks when they trigger noticeable discoloration. Don't begin another course just because the shade hasn't reached an unrealistic target.
If sensitivity returns, use the same conservative measures: potassium-nitrate toothpaste, fluoride or calcium-based remineralizing care, shorter exposure, and more space between sessions. The evidence indicates that bleaching-related sensitivity is usually temporary, often settling within days to about a week, but persistent pain, gum sloughing, or a single tooth that remains painful warrants a dental check.
For future purchases, compare the gel concentration, tray design, wear instructions, and availability of sensitivity support rather than choosing by the presence of a light or the promise of speed. DentalHealth.com carries professional-grade home whitening gels and kits, along with sensitivity toothpastes and remineralizing products, so you can build a routine around both whitening and comfort.
DentalHealth.com offers tray-based whitening kits, gels, sensitivity care, and remineralizing products from brands such as Opalescence, Zoom, PolaNight, PolaDay, and MI Paste. Visit DentalHealth.com to compare products, review usage guidance, and choose a kit that fits your teeth, tray needs, and sensitivity plan.