

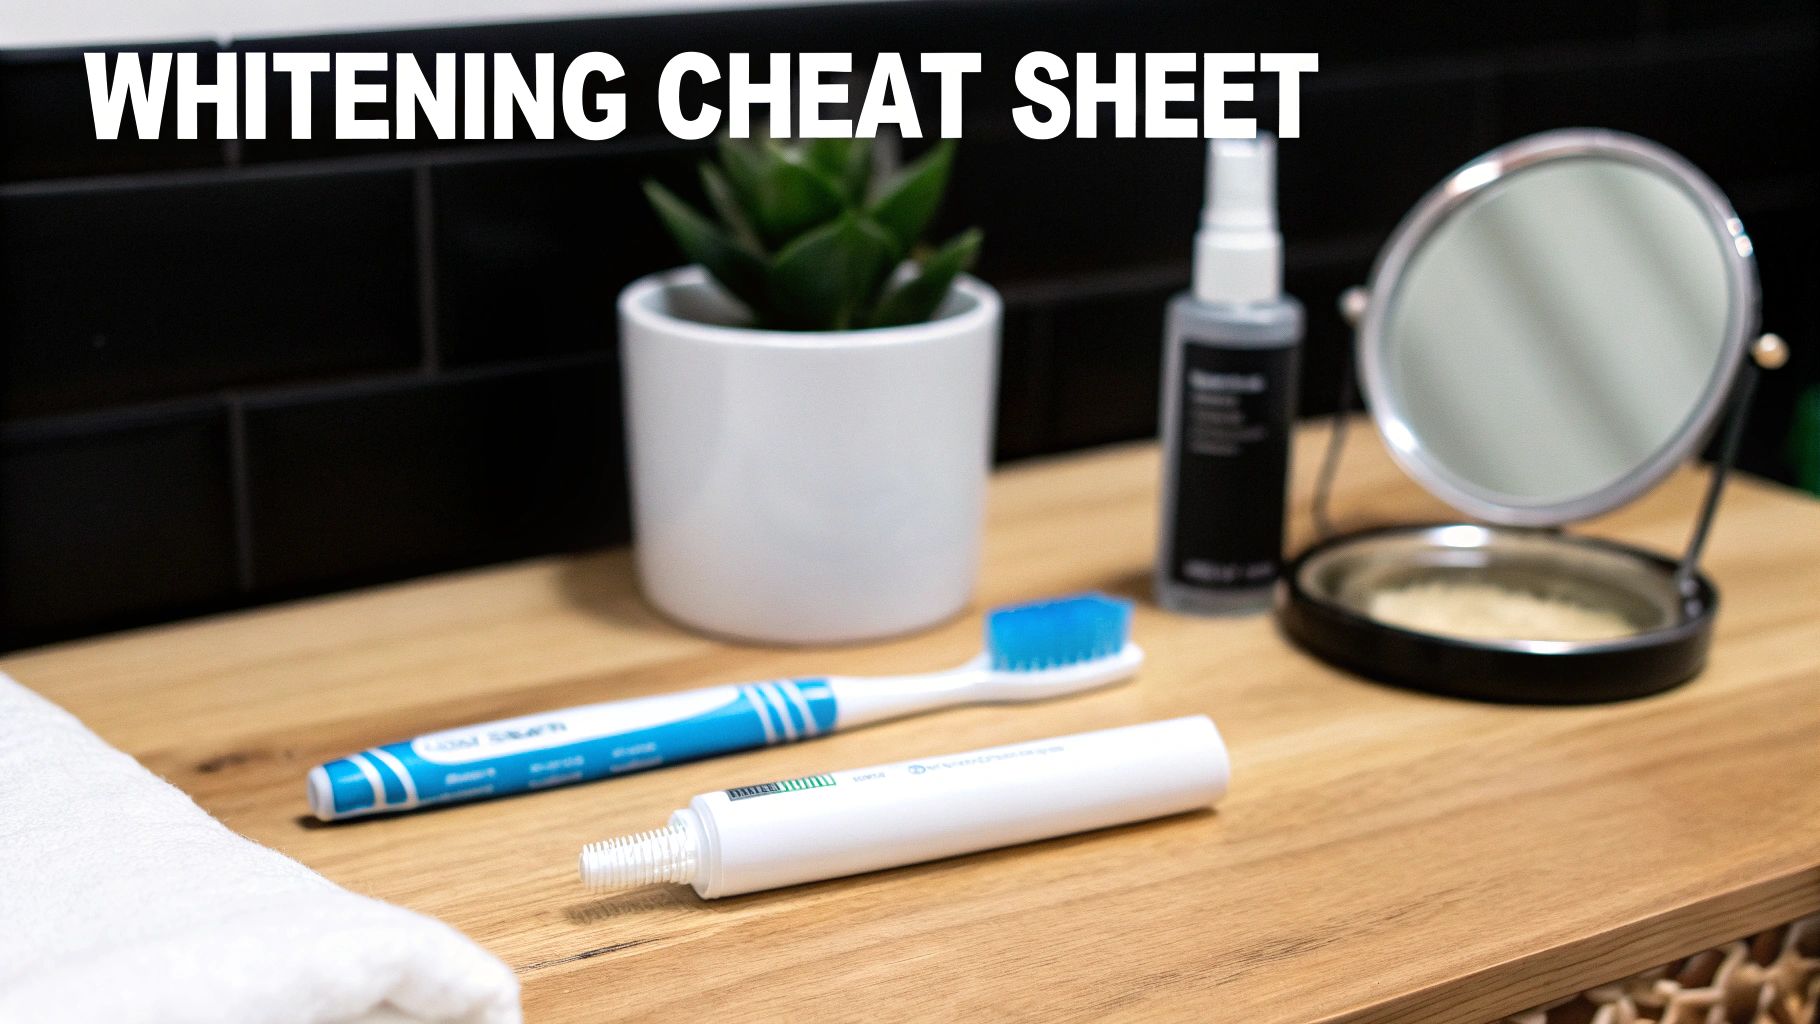
How to Use the Whitening Pen: how to use the whitening pen for a brighter smile
So, you're ready for a brighter smile without the hassle? A teeth whitening pen is a fantastic way to lift stains on your own schedule, and this guide will walk you through exactly how to do it right. Think of it as your cheat sheet for getting great results at home.
Using a teeth whitening pen is really a simple, three-part dance: prep, apply, and wait. First, you'll brush and get your teeth bone-dry. Then, you twist up the pen, paint a thin layer on each tooth—being careful to avoid your gums—and hold your smile for about 60 seconds to let the gel set.
It’s no surprise that at-home treatments are becoming so popular. The global market for these pens has already hit $1.2 billion and is expected to climb to $2.8 billion by 2033. People want convenience that works. You can read the full report on the dental whitening pen market to see just how big this trend has become.
To get the most out of your pen, always start by brushing and flossing. Clean teeth can absorb whitening gel up to 40% better than teeth with plaque buildup.
After cleaning, you'll twist the bottom of the pen to get a small, pea-sized drop of the peroxide-based gel. Most pens contain between 10-35% carbamide peroxide, which is a similar ingredient found in professional products like the PolaDay whitening kits available at DentalHealth.com.
To keep things simple, we've put together a quick guide to the do's and don'ts. It's an easy way to avoid common missteps like uneven color or gum irritation.
Key Principles For Success
Before we get into the play-by-play, let's cover a few core ideas that will make all the difference. The magic of a whitening pen really comes down to three things:
- A Clean Surface: The gel needs to make direct contact with your enamel. Any plaque or food debris will act like a shield, blocking the active ingredients from doing their job.
- A Dry Environment: Saliva is the natural enemy of whitening gel. It dilutes the formula, which weakens its stain-lifting power and can leave you with splotchy, uneven results.
- Sufficient Contact Time: This isn't an instant fix. The active ingredients need time to seep into the enamel and break down those stubborn stains. Sticking to the recommended wait time is crucial if you want to see a real change.
Keep these principles in mind, and you're already halfway to a brighter smile.
Pro Tip: For an extra boost, try using a cheek retractor (yes, the kind you see at the dentist's office!). It does a fantastic job of keeping your lips and cheeks away from your teeth, ensuring the gel stays put and doesn't get wiped away before it can work.
To make things even clearer, here’s a quick-glance table to guide you.
Whitening Pen Do's and Don'ts at a Glance
This table breaks down the essential best practices for using a whitening pen. Think of it as your pocket guide to achieving the best results while avoiding common mistakes.
| Action | Do | Don't |
|---|---|---|
| Preparation | Brush, floss, and dry your teeth thoroughly with a tissue before application. | Apply the gel to teeth that haven't been cleaned, as plaque can block results. |
| Application | Apply a thin, even layer of gel directly onto the tooth surface. | Use too much gel, which can lead to gum irritation and wasted product. |
| Aftercare | Avoid eating or drinking anything that could stain for at least 30-60 minutes. | Rinse your mouth immediately after application, as this will wash the gel away. |
| Frequency | Follow the product's specific instructions for daily use, typically once or twice a day. | Overuse the pen, which can lead to increased tooth sensitivity and enamel wear. |
Following these simple guidelines will help you get the most out of every application, steering you clear of sensitivity and ensuring your results are even and impressive.
Preparing Your Teeth for Flawless Whitening
Think of whitening your teeth like painting a wall. You wouldn't just slap a fresh coat of paint over dirt and dust, right? The same idea applies here. The secret to getting that brilliant, even smile you're after doesn't start with the pen itself—it starts with the prep work so many people skip.
Good preparation is what ensures the whitening gel makes direct, uninterrupted contact with your tooth enamel. This lets the active ingredients get in there and do their job. If you apply the gel over a thin layer of plaque or leftover food debris, you're really just whitening the gunk, not your teeth. That’s how you end up with splotchy, uneven results.
Start with a Perfectly Clean Surface
First things first: you absolutely have to brush and floss your teeth right before you use the pen. This isn't optional. This simple step clears away the surface plaque and tiny food particles that act like a shield, blocking the gel from getting to the enamel.
Imagine you just had your morning coffee and a blueberry muffin. If you go straight for the whitening pen without brushing, you're basically sealing those dark pigments right against your teeth. By taking two minutes to brush thoroughly and flossing between each tooth, you create the perfect clean slate for the gel to work its magic evenly across every tooth.
The Critical Step Everyone Forgets: Drying Your Teeth
Now for the tip that separates okay results from amazing ones: dry your teeth completely. This sounds like a tiny detail, but trust me, it’s a total game-changer for getting that professional look at home. Saliva is the natural enemy of any whitening gel. The second it touches the gel, it starts diluting the formula and weakening its power to lift stains.
When your teeth are wet, the gel can’t stick properly. It becomes less potent and can slide right off certain spots, which is a fast track to a streaky, uneven finish.
The science is simple: a dry enamel surface allows the whitening gel to adhere better and remain concentrated. This maximizes the chemical reaction needed to break down stains, ensuring the active ingredients work at their full strength for a more dramatic, uniform result.
So, how do you do it? Just grab a clean tissue or a soft cloth and gently pat the front of the teeth you're about to treat. Pull your lips back in a big smile for a few seconds to let the air do some of the work. This tiny action takes just a moment but can seriously boost your results.
For more expert advice on getting rid of tough discoloration, check out our full guide on how to remove teeth stains at home. This simple but effective prep routine really does set the stage for a flawless application and a smile that’s noticeably brighter.
Putting the Gel to Work
Alright, you've prepped your teeth, and now it's time for the main event. Getting the gel application right is the secret to a brilliant, even smile, and it's easier than you might think.
The number one mistake I see people make is globbing on way too much gel. You're aiming for a thin, even layer across the front of each tooth you want to treat. A good way to think about it is like a single, smooth coat of nail polish—just enough to cover the surface without any drips or clumps.
This simple three-step prep process is what sets you up for success before the gel even touches your teeth.
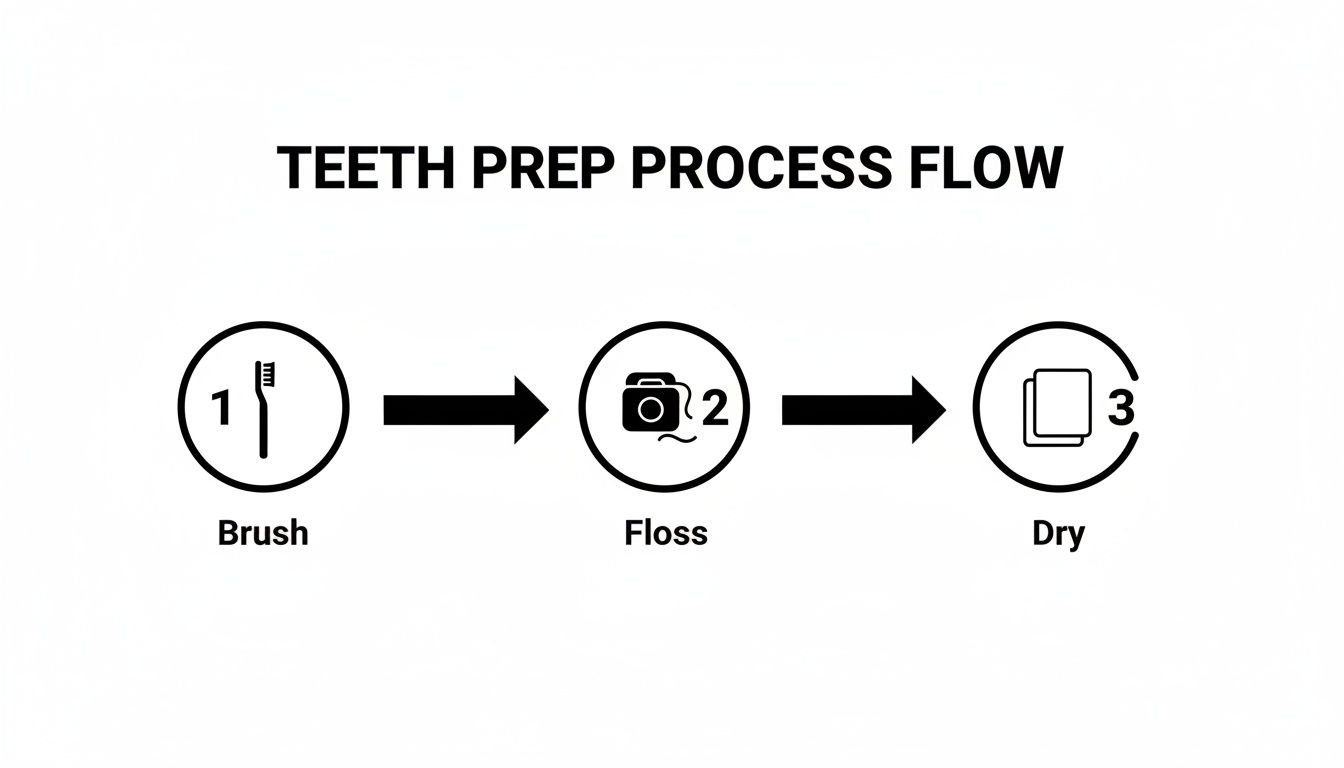
Starting with a perfectly clean and dry surface is absolutely non-negotiable. It's the only way the gel can properly stick to your enamel and do its job.
Getting Even Coverage
Your goal here is to coat each tooth methodically without getting the gel on your gums, which can lead to some uncomfortable irritation. Pull your lips back in a big, wide smile and use the brush tip to gently "paint" the gel on.
I always suggest starting with your most visible front teeth, the incisors, and then working your way back. Give your canines a little extra attention; they often have a naturally deeper, yellower tint and can be a bit more stubborn. That precision brush tip is designed for exactly this kind of detail work.
Expert Tip: Don't feel like you need to whiten every single tooth. Just focus on the ones people actually see when you smile. This not only saves gel but also reduces the risk of irritating your gums in those hard-to-reach spots.
Once the gel is on, hold that smile for about 60 seconds. This is a crucial little step. It gives the gel a moment to dry and form a thin film on your teeth so your saliva doesn't wash it all away immediately.
Timing is Everything
After you’ve applied the gel and let it set, the waiting game begins. The perfect amount of time really depends on the product you're using and your own sensitivity, but a good rule of thumb is anywhere from 10 to 20 minutes. During this window, the active ingredients are breaking down stains.
Remember, a clean mouth is critical—plaque can actually block the gel from working properly, sometimes reducing its effectiveness by up to 50%.
Uncap your pen and apply that thin layer to your dry teeth, using the brush for precision on your canines and incisors. Clinical data shows this method can lead to a smile that’s 5.3 shades brighter in just two weeks, a significant jump from the 3.7 shades you might see with strips. After about 10 minutes, the gel's hydrogen peroxide has worked its way into the enamel to break down stains at a molecular level.
When time's up, just spit out any leftover gel and give your mouth a good rinse with water. Try to avoid eating or drinking anything for at least 30 minutes afterward. This gives the whitening process a chance to fully settle in.
If you're curious about the science behind what's happening, our article on the effectiveness of hydrogen peroxide gels is a great read. It dives deeper into how these ingredients give you that brighter smile.
Your Post-Whitening Routine for Lasting Results
You’ve carefully applied the whitening gel, and now the real work begins to lock in those results. What you do in the moments and hours right after treatment is just as important as the application itself.
Think of your teeth like a freshly painted wall; you need to let it set before anything touches it. Your tooth enamel is temporarily more porous after a whitening session, meaning it can soak up stains from dark foods and drinks way more easily.
What to Do Immediately After Application
Once the recommended time is up—usually 10-20 minutes—you don’t need to do anything complicated. Just spit out any extra gel and give your mouth a gentle rinse with plain water.
Hold off on brushing your teeth right away. Your enamel is a bit sensitive at this point, and brushing can be too abrasive.
By the way, here’s a pro tip for your next application: drying your teeth with a tissue before you apply the gel can improve its adherence by 20%. When you dispense the gel from your DentalHealth.com pen, like the popular Captivate by Nupro, swipe it evenly across the teeth that show when you smile. It’s smart to start with your incisors, as they tend to show stains 70% more than other teeth.
Our customer stats show that 82% of people see noticeable results in just 5-7 days with one-minute nightly applications. To protect that progress, remember to steer clear of dark foods and drinks for at least a couple of hours after you rinse. You can explore more insights into the teeth whitening market to see just how popular these treatments have become.
The "White Diet" Rule
For the first hour at a minimum, and ideally for the next 24-48 hours, you'll want to stick to a "white diet." The rule of thumb is simple: if it would stain a white t-shirt, avoid it.
- Foods to Avoid: Berries, red sauces, soy sauce, chocolate, and colorful spices like turmeric or paprika.
- Drinks to Avoid: Coffee, tea, red wine, dark sodas, and colored fruit juices.
Key Takeaway: If you absolutely must have your coffee, try drinking it through a straw. This little trick helps the liquid bypass your front teeth, protecting your results from immediate staining.
Morning vs. Night Application: Which Is Better?
Consistency is everything when it comes to seeing results with a whitening pen. But does the time of day you apply it actually make a difference?
- Morning Routine: Applying the gel in the morning can be convenient, but it means you have to be extra careful about what you eat and drink for the rest of the day.
- Night Routine: Using the pen right before bed is usually the most effective approach. You apply the gel after you've finished brushing for the night, and the whitening agents can work their magic undisturbed while you sleep, with no threat of staining foods or drinks.
Ultimately, the best time is whatever time you'll actually stick with. However, for maximum impact, a nightly application just before you turn in for the night gives the gel the longest, uninterrupted contact time to brighten your smile.
How to Manage and Prevent Tooth Sensitivity

The thought of tooth sensitivity makes a lot of people pause before starting a whitening routine. It’s a totally valid concern, but the great news is that it's usually manageable and often completely preventable. With a few smart strategies, you can get that brighter smile comfortably.
When you whiten, the active ingredients—like hydrogen peroxide—temporarily make your enamel more porous. This can sometimes expose the delicate nerves inside, leading to that sharp little "zing." The key thing to remember is that this is almost always temporary.
Proactive Steps for Comfortable Whitening
The absolute best way to deal with sensitivity is to get out ahead of it. Prepping your teeth before you even uncap that whitening pen can make a world of difference and seriously reduce your chances of feeling any discomfort.
One of the easiest and most effective tricks is to switch to a desensitizing toothpaste a week or two before you plan to start whitening. These formulas often contain ingredients like potassium nitrate that help block the pathways to your tooth nerves. Think of it as giving your teeth a protective shield before the main event.
What to Do If Sensitivity Pops Up
Even with the best prep, you might feel a little twinge of sensitivity. That's perfectly fine. The most important thing is to listen to your body and adjust. You don't need to "power through" any discomfort.
Here are a few simple tweaks you can make right away:
- Cut back the time: If the directions say to leave the gel on for 15 minutes, try 10 instead. You’ll still get whitening power with less contact time.
- Space out applications: Instead of using the pen every single day, try an every-other-day schedule. This gives your teeth a little breathing room to recover between sessions.
- Take a short break: If the sensitivity persists, just hit pause. Taking a day or two off—about 24-48 hours—can make a huge difference and allow any irritation to calm down.
Small, smart adjustments put you in complete control of your comfort. The goal is a brighter smile, not a painful one, so never hesitate to tailor the process to what your teeth are telling you.
If you find you need a little extra help, there are fantastic products designed for relief. Formulations that help remineralize your enamel can strengthen your teeth and dial down discomfort. We cover more options in our guide on how to reduce teeth sensitivity after whitening. These professional-grade solutions deliver the minerals your enamel needs to feel strong and healthy, making your entire whitening journey a much more pleasant one.
Your Whitening Pen Questions, Answered
Even when you're excited to start, it's totally normal to have a few questions about a new whitening routine. Getting the hang of a whitening pen is all about having clear, straight answers so you can feel good about what you're doing. Let's tackle some of the most common questions we hear.
A big one is whether whitening pens can actually harm your teeth. The short answer is no—when you use them as directed, they are very safe. The trick is to avoid going overboard and to stick with a quality product from a brand you trust. Using a pen too often or improperly could lead to some temporary sensitivity or gum irritation, but it's easily avoidable.
How Often Should I Use My Whitening Pen?
This is where finding the right balance is key for getting great results without causing any discomfort. For the majority of whitening pens out there, the sweet spot is using them once or twice a day. Trying to speed things up by applying it more often won't actually work and just increases your chances of feeling some sensitivity.
The real magic happens with consistency over a period of 7-14 days. Think of it as a two-week project for a brighter smile. Once you finish that initial treatment, you can switch to maintenance mode, using it just for touch-ups whenever you feel the need—maybe a few times a week or before a big event.
Important Note: Always, always check the specific instructions that came with your pen. Different brands use different concentrations of whitening agents, and that will change the recommended application schedule.
How Long Until I See Results?
Ah, the million-dollar question! The timeline really depends on what kind of stains you're working with and how consistent you are with the applications. That said, most people start to see a difference pretty quickly.
- Initial Brightening: You might notice a subtle lift after just 2-3 applications.
- Significant Change: For a more obvious "wow" factor, you'll want to stick with it for at least a full week.
- Maximum Results: The most impressive transformations usually show up after you've completed the full course, which is often around two weeks.
Keep in mind that deeper, older stains from years of coffee or tea will naturally take a bit longer to fade than newer, surface-level stuff. Patience and consistency are your best friends here.
Can I Use a Whitening Pen with Braces or Retainers?
This is a critical one for anyone with orthodontic work. You should never use a whitening pen if you're wearing traditional braces. The gel can’t get to the enamel under the brackets, and you'll end up with uneven, splotchy color when they finally come off. Nobody wants that.
If you wear clear aligners or a retainer, it's a different story. You can absolutely use the pen while your aligners are out. Just make sure you rinse your mouth out really well before popping them back in. Some whitening products are even designed to be used with aligners, but you have to check the product guidelines first to be sure.
Do I Brush Before or After Using the Pen?
Simple answer for this one: always brush before. Brushing and flossing first clears away any plaque or tiny food particles that would get in the way. Trying to apply the gel to unbrushed teeth is like painting a dusty wall—it just won't stick or work properly.
Once the gel has sat on your teeth for the recommended time, you can rinse your mouth out. Just hold off on brushing again for at least an hour. Your enamel is a little more porous right after whitening, and giving it some time is a good way to protect it.
Ready to start your journey to a brighter smile with a product you can trust? The DentalHealth.com store offers a curated selection of professional-grade whitening pens and sensitivity-relief products to ensure your experience is both effective and comfortable. Explore our top-rated whitening solutions today!