
Teeth Whitening Gel with Hydrogen Peroxide: How It Works
If a tube says 22%, is it stronger than one that says 9.5%? Not necessarily, and that gap between the number on the label and the strength your teeth get is where most shoppers go wrong. A teeth whitening gel with hydrogen peroxide should be judged after you convert every label to the same scale, then weigh wear time, tray fit and your own sensitivity history.
Hydrogen Peroxide Gel Strengths at a Glance
Most home-use gels you'll meet contain about 3 to 6 percent hydrogen peroxide. That's your default starting band. In-office systems a dentist applies can reach about 35 percent, which is a different setting with supervision, gum protection and short, timed sessions.
A percentage describes how much peroxide is in the gel. It doesn't predict the shade you'll see in the mirror. The same strength behaves differently if you wear it longer, if your tray leaks onto your gums, or if your stain sits deeper in the tooth.
| Strength | Typical setting | Typical wear pattern | Main trade-off |
|---|---|---|---|
| 3-6% hydrogen peroxide | Home-use gels and trays | Follow the manufacturer schedule | Lower sensitivity risk, slower colour change |
| About 9.5% hydrogen peroxide | Stronger professional-grade at-home gel | Set by the label | Faster change, higher sensitivity potential |
| About 35% hydrogen peroxide | In-office whitening | Supervised sessions by a dentist | Greatest whitening effect, most sensitivity and gum irritation risk |
How to Read the Rows
The first row suits most first-time users because it trades speed for comfort. You may need more sessions, but you're less likely to stop early because cold water suddenly hurts.
The middle row exists, and it tempts people who want a quicker result at home. Its wear time is set by the label, not by you. Extending it doesn't turn a careful product into a better one, it just raises your exposure.
The last row belongs in a dental chair. A dentist can isolate your gums, control timing and stop if you react. That protection is part of the treatment, not an optional extra.
Two Checks Before You Buy
- Active ingredient: Is it hydrogen peroxide or carbamide peroxide? You can't compare their percentages directly.
- Wear-time directions: Can you follow that schedule on workdays, not just weekends?
Practical rule: Start at the lowest strength that fits your schedule, and move up only if a full first course leaves visible stain and no lasting sensitivity.
Compare your label against the table before you pay. If you can't place it in a row, you don't yet know what you're buying.
How Hydrogen Peroxide Whitens Teeth and Why Carbamide Differs
Think of stain molecules sitting in enamel and dentin like dye in fabric. Peroxide acts like bleach for that fabric. It doesn't scrub the colour off the surface, it breaks the bonds that make the molecules look yellow or brown.
The American Dental Association whitening guidance explains that hydrogen peroxide diffuses through enamel into dentin, where it oxidatively breaks down chromogenic organic molecules responsible for yellow-brown discoloration. Concentration and exposure time jointly determine peroxide dose, so a stronger gel worn briefly and a weaker gel worn longer aren't judged by percentage alone.
Why Carbamide Labels Look Bigger
Carbamide peroxide breaks down into hydrogen peroxide and urea, releasing peroxide more gradually. Because only part of it becomes hydrogen peroxide, its label percentage is always higher for a similar effect. Comparing 22% carbamide peroxide with 9.5% hydrogen peroxide without converting is like comparing temperatures in Fahrenheit and Celsius by number alone.
| Carbamide peroxide | Approximate hydrogen peroxide | Where it is common |
|---|---|---|
| 10% carbamide peroxide | About 3.5% hydrogen peroxide | Lower-strength at-home trays |
| 16% carbamide peroxide | About 5.5% hydrogen peroxide | Mid-strength at-home trays |
| 22% carbamide peroxide | About 7.5% hydrogen peroxide | Higher-strength at-home trays |
| 35% carbamide peroxide | About 12% hydrogen peroxide | High-strength at-home or supervised use |
These conversions are approximate, but they're close enough to stop a costly mistake. A 22% carbamide product, for example, sits near 7.5% on the hydrogen peroxide scale, above the usual 3 to 6 percent home band but well below an in-office gel.
If you want the chemistry in more detail before you choose, read this plain explanation of carbamide peroxide versus hydrogen peroxide, then come back to your own label.
Do two things every time. Check the active ingredient first. Then convert it to its hydrogen peroxide equivalent before you compare it with any strength table. That single step prevents most label confusion.
Balancing Concentration, Wear Time and Sensitivity
The most common myth is simple. A higher percentage always means whiter teeth. It doesn't, at least not in proportion to the extra discomfort you may get.
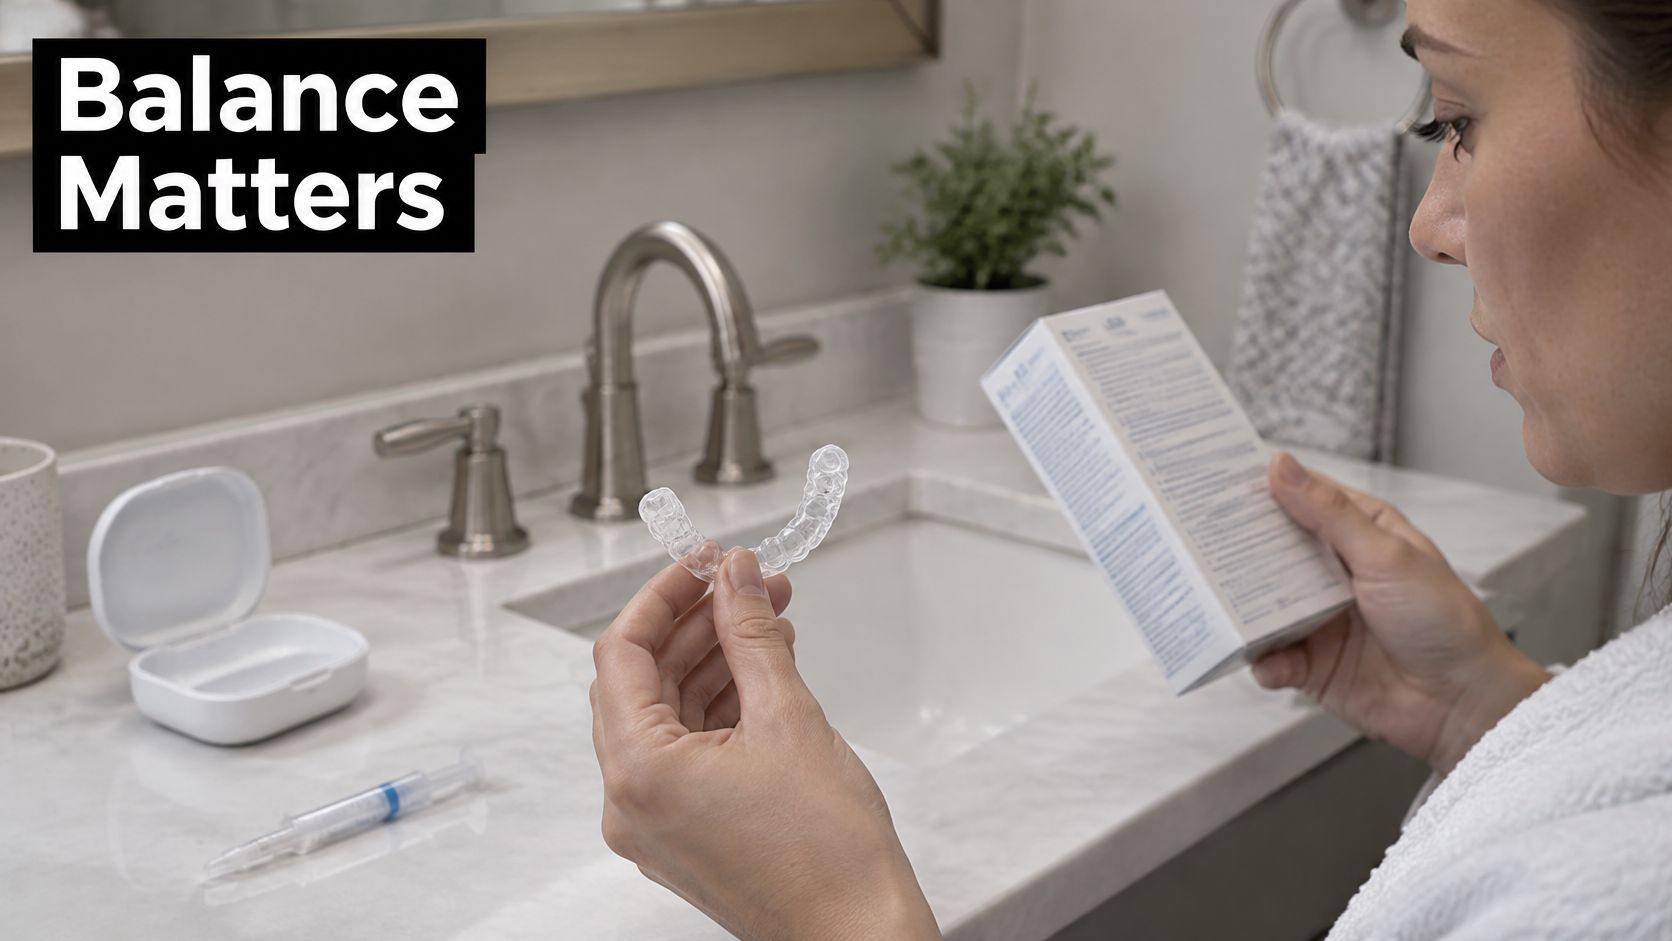
This photo shows the moment that matters before gel touches a tooth, reading the directions while holding the tray.
ADA News guidance on whitening options summarizes a randomized study comparing 6% and 35% hydrogen-peroxide gels, where the 6% protocol achieved whitening comparable to the higher-concentration groups while producing lower sensitivity. The 35% groups showed greater whitening efficacy overall but significantly more sensitivity.
A 2025 randomized, triple-blind split-mouth trial summarized on PubMed followed 22 adults using a 3% hydrogen-peroxide gel and an 8% carbamide-peroxide gel for two weeks, and both produced clinically acceptable whitening. The hydrogen peroxide side changed colour slightly more, while carbamide peroxide caused statistically lower sensitivity and less enamel alteration.
Duration adds another wrinkle. A randomized trial in an NIH-indexed systematic review published by Springer compared 6% and 37.5% hydrogen-peroxide gels and found the 37.5% formulation showed significantly better colour stability after one year. Stronger professional treatment may hold longer, but it still carries more sensitivity risk.
The Three Levers You Actually Control
- Concentration: Sets how fast oxidation happens and how much peroxide moves toward the pulp.
- Wear time: Longer contact raises total dose even at a lower percentage.
- Tray fit: A well-fitting tray keeps gel on teeth and off gingiva.
Watch this short walkthrough before your first session, then check your own tray fit against it.
Say you have mild sensitivity and a visible tea stain. A sensible start is a lower strength for the shorter label wear time, then a check after two weeks in the same light. If colour has moved and sensitivity settled, you've found an effective exposure without paying for speed you didn't need.
Which effective exposure gives you acceptable whitening with the least avoidable irritation? That's the question to answer, not which percentage is biggest.
Stop and seek dental advice if pain persists, your soft tissue whitens or burns, or sensitivity doesn't resolve after treatment.
How to Use a Hydrogen Peroxide Gel Step by Step
Good technique protects your gums more than willpower does. Follow the sequence in order, and don't improvise the timing.
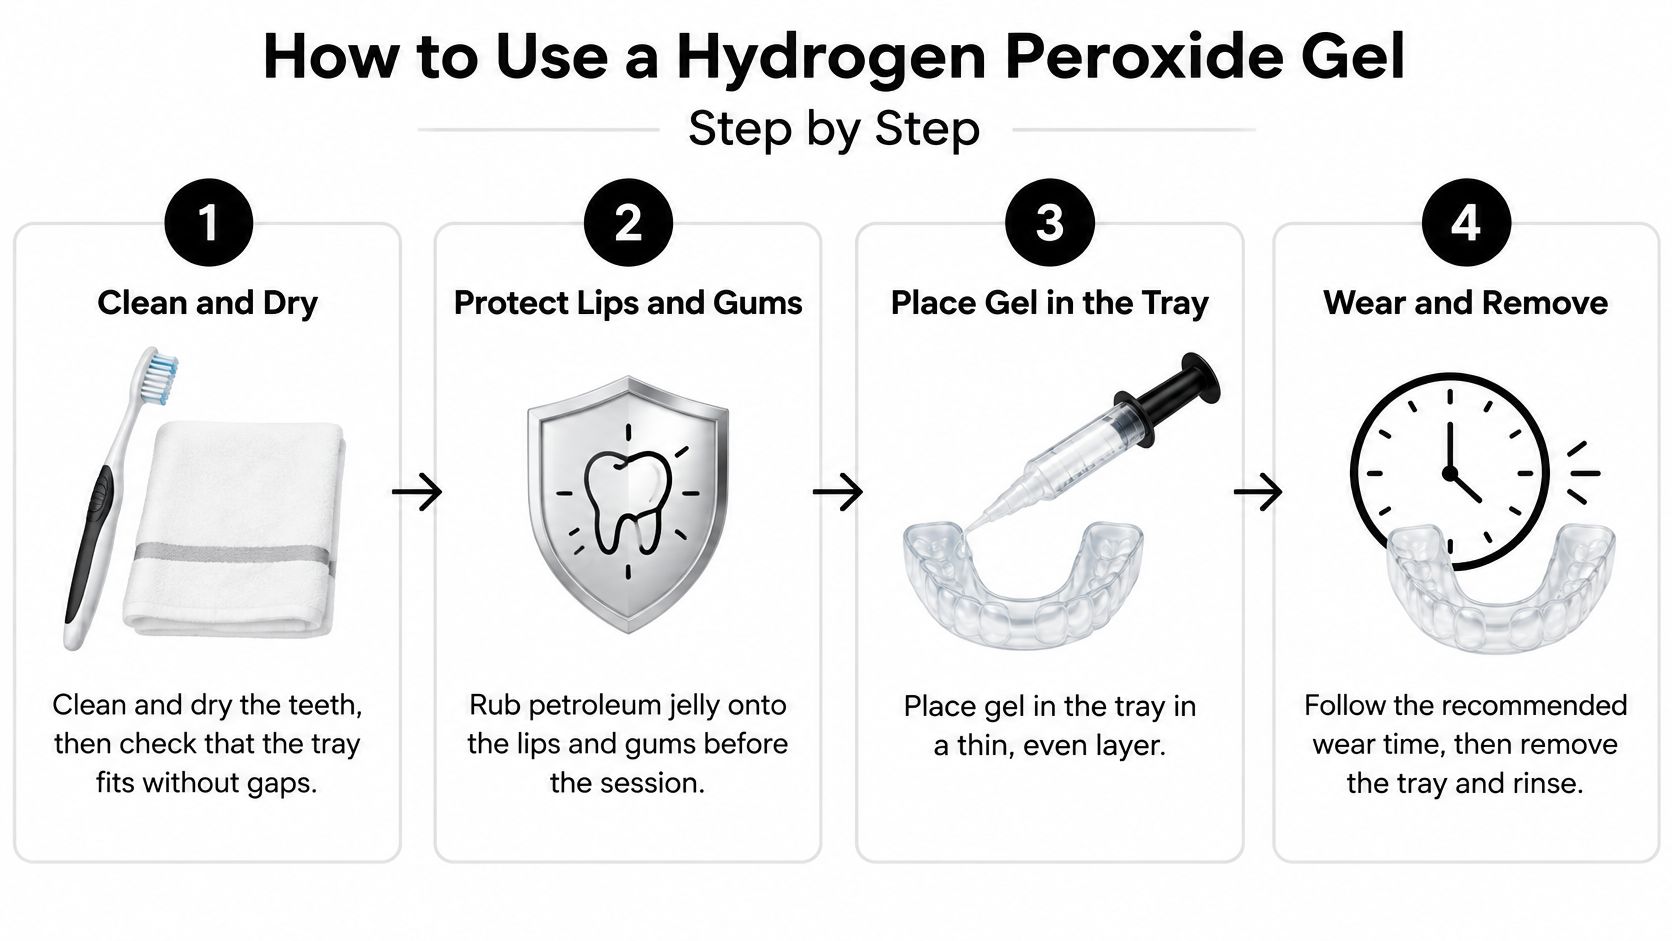
The Routine
- Clean, dry and check the fit: Brush, floss, then dry your teeth so gel contacts enamel instead of sliding on saliva. Seat the empty tray first and look for gaps, lifting edges or a rim that digs into your gum. If it doesn't sit flush empty, it won't sit flush loaded.
- Protect lips and gums: Rub petroleum jelly onto your lips and gums before the session, as directed before each Lumibrite 22 bleaching session. This creates a simple barrier where stray gel is most likely to land. Skipping it is the easiest slip to fix.
- Place a thin amount of gel: With compartmented trays, put a drop of gel into each tooth compartment. With simpler trays, run a line of gel along the entire tray. Use half the syringe for the upper tray and half for the lower, so one arch doesn't get a double dose.
- Don't overload or press hard: Overloading trays with gel or pushing gel firmly into teeth isn't necessary and may irritate gums. Extra gel has nowhere to go except outward onto soft tissue. A thin, even layer is the goal.
- Seat, wipe and time it: Put the tray in, then wipe away any gel that reaches your gums with a clean finger or soft brush. Wear it only for the time the label specifies. Wearing a two-hour tray overnight because you fell asleep on the couch is still an overdose of exposure.
- Remove, rinse and brush gently: Take the tray out, rinse your mouth and the tray, and brush gently. Check your gums in the mirror. Note any spot that burned, because that tells you where gel escaped.
What a Good Session Looks Like
You shouldn't feel burning. Mild tingling can happen, but it shouldn't build into a sharp zing that makes you pull the tray out early. Your tray sits flush, your gums stay mostly clear, and you can finish the full timed session calmly.
If you have to keep reseating the tray or wiping gel every few minutes, stop and fix the cause. Use less gel next time, check the fit again, or ask a dentist about a better tray. Repeating a messy session exactly the same way won't whiten faster, it'll just irritate the same spot again.
Sensitivity, Gum Irritation and Enamel Concerns
Many readers arrive with one fear first. Does peroxide cause oral cancer? The American Dental Association whitening page cites a 2022 systematic review concluding that hydrogen-peroxide-containing tooth-whitening products do not appear to have carcinogenic effects on oral mucosa.
The documented problems are more ordinary. The principal adverse effects are temporary tooth sensitivity and gingival irritation, and risk generally increases with stronger formulations, longer exposure, poor tray fit or individual susceptibility. Typical sensitivity feels like a short, sharp response to cold air or cold drinks, then it fades.
Gum irritation is typically transient and resolving soon after treatment. You might see a sore or pale patch where gel sat on the tissue. That spot is useful information. It usually points to overfilling or a tray edge that let gel escape.
What About Enamel
Laboratory enamel changes at high concentrations aren't the same as permanent harm in every patient. A lab dish doesn't have saliva, normal spacing between sessions or a dentist controlling exposure. Still, repeated or poorly controlled use shouldn't be treated as risk-free, especially if you keep extending wear time.
For broader context on that balance, see this discussion of hydrogen peroxide safety before you decide a stronger gel is harmless or dangerous.
A Pause and Check Plan
- Pause, don't push through: Skip a session when sensitivity is still present from the last one.
- Follow the schedule: Return to the prescribed wear time instead of compensating with a longer session.
- Book an evaluation: Get checked for persistent pain, a crack, a cavity, recession or one tooth that hurts far more than the others.
A dentist may suggest a desensitising or fluoride-based product as support during a course. Treat that as help, not a guarantee. If sensitivity keeps returning at the same strength, the strength or schedule needs to change.
Who Should Check With a Dentist First
Whitening works on natural tooth structure. It won't change the colour of crowns, fillings, veneers or bonding. If a front tooth has a visible filling matched to your current shade, whitening the teeth around it can leave that filling looking suddenly darker.
| Condition | Gel guidance | Next step |
|---|---|---|
| Existing tooth sensitivity | Choose a lower strength and shorter wear time | Ask a dentist for a desensitising plan first |
| Untreated cavity or cracked tooth | Do not use peroxide until treated | Dental exam and treatment first |
| Gum disease or exposed root surfaces | Avoid high strength; gel on gums increases irritation | Dental evaluation before whitening |
| Crowns, fillings or veneers | Whitening will not change their colour | Plan a colour match with a dentist |
Why These Conditions Change the Decision
A cavity or crack gives peroxide a path to vulnerable inner tissue that sound enamel would slow down. That can turn mild tingling into real pain in one tooth. Treating the defect first removes a problem whitening can't fix.
Exposed roots don't have the same enamel cover as the crown of the tooth, so they often react more to cold and to peroxide. Gum disease adds inflamed tissue that stray gel can irritate further. Neither condition automatically rules whitening out forever, but both change the strength and supervision you need.
A dentist can also check whether your discoloration is the type peroxide can lighten and plan the order of treatment. Sometimes the right sequence is whiten first, let the shade settle, then replace a visible filling to match. Doing it backwards wastes money.
If any row in the table applies to you, book the exam before you buy a gel.
Choose Your Gel and Confirm It Fits Your Teeth
Use a short decision sequence and write down your answers. Guessing in the shop aisle is how people end up with a strength they can't tolerate.
Four Steps in Order
- Confirm the active ingredient: If it's carbamide peroxide, convert the percentage to its hydrogen peroxide equivalent first.
- Match strength to sensitivity and wear time: Use the label schedule you'd follow, not a longer one you hope will be faster.
- Check the dentist list: If a condition applies, book the exam before buying.
- Start lowest and effective: Move up only after a completed course, visible remaining stain and no lasting sensitivity.
Say you have no dental conditions and you're comparing a 22 percent carbamide peroxide tray gel with a 6 percent hydrogen peroxide gel. The carbamide product converts to about 7.5 percent hydrogen peroxide, so it's the stronger option despite the different chemistry. If you have any sensitivity history, start with the 6 percent gel.
For a product such as PolaNight 10, first try a two-hour treatment, and if there are no adverse reactions, try the overnight treatment the next time you whiten. That test-first pattern is the model to copy. Our single product example here is PolaDay 9.5, which contains 9.5% hydrogen peroxide, and it belongs in the stronger at-home row rather than the starter row.
When you're ready to compare what is sold for home trays, browse the options for buying teeth whitening gel online with your converted strength already noted.
Your first-session check is concrete. The tray seats without gaps, your gums stay clear of gel, and any sensitivity settles within a day. If it doesn't, pause and reassess instead of repeating the session.
Do one thing today. Pick one strength, confirm the dentist checklist, and run the first session exactly as the label directs.
At DentalHealth.com we stock professional-grade at-home whitening gels, sensitivity toothpastes and remineralizing products from brands dentists recommend, with clear product details to help you match strength and wear time to your teeth. Visit DentalHealth.com to compare your converted label strength against the gels available and choose a starting option you can use exactly as directed.