

Teeth Whitening Trays Custom Fit: teeth whitening trays custom fit tips
Think about the difference between a generic, one-size-fits-all raincoat and a custom-tailored jacket. One gets the job done, sort of, while the other fits you perfectly. That’s the exact idea behind custom-fit teeth whitening trays. They’re personalized dental appliances, molded from an exact impression of your teeth, designed to give you professional-level whitening results right at home.
How Custom Fit Teeth Whitening Trays Work
To really get why these trays are so effective, you have to think of them as the perfect delivery system for whitening gel. Their power comes down to one simple but critical feature that flimsy alternatives just can't match: a perfect seal. This precision is the secret to getting both incredible results and keeping the process safe.
The whole process is a smart blend of dental science and personalization. Each tray is a clear, flexible plastic replica of your dental arch, made to hug every single curve and crevice of your smile. That bespoke fit is what makes professional-level whitening possible.
The Science of the Perfect Seal
The real magic starts when you add a professional-grade whitening gel—usually one with carbamide peroxide or hydrogen peroxide—into the trays. When you slip the tray over your teeth, it creates a self-contained little environment. This is crucial for two big reasons:
- Maximizing Gel Contact: The snug fit keeps the whitening gel in consistent, uniform contact with the entire surface of every tooth. This is how you avoid the splotchy, uneven whitening that’s so common with strips, which often miss the curved edges and in-between spaces.
- Preventing Saliva Contamination: Your saliva is the natural enemy of whitening gel. It dilutes the active ingredients almost instantly, making them far less effective. A custom tray acts as a barrier, keeping saliva out so the gel stays potent and active against stains for the whole treatment.
This controlled application lets the peroxide get into the tooth enamel and break down the discolored molecules that cause stains, gradually lifting away years of coffee, tea, or smoking stains.
Protecting Your Gums and Reducing Sensitivity
Another massive advantage of a custom fit is gum protection. Those over-the-counter "boil-and-bite" trays are often bulky and imprecise. It's really easy for whitening gel to ooze out and get all over your sensitive gum tissue, which is a leading cause of irritation, burning, and general discomfort.
A custom-fit tray is designed to end exactly at your gumline. This careful design ensures the powerful whitening agents stay on your teeth—where they belong—and off your gums, making for a much more comfortable and safe experience.
This targeted approach doesn't just prevent irritation; it also helps manage tooth sensitivity. By controlling exactly where the gel goes and keeping it off exposed root surfaces near the gums, you seriously minimize the risk of those sensitivity flare-ups. You can check out a wide variety of these professional-grade teeth whitening trays on DentalHealth.com to see how they’re designed for both punch and comfort.
Ultimately, this precise fit is why dentists consider custom trays the gold standard for getting significant whitening results outside of their office.
Comparing Whitening Methods
When you decide to brighten your smile, walking down the dental aisle can be overwhelming. You're faced with a shelf full of options, but they are far from being created equal. Picking the right whitening method is a lot like choosing the right tool for a job—your results depend entirely on the quality and design of what you use.
Let's break down how custom-fit teeth whitening trays stack up against the other common players: boil-and-bite trays, whitening strips, and those powerful in-office treatments. Each one strikes a different balance between effectiveness, comfort, safety, and cost, making the choice a personal one based on your goals and budget.
The Problem with One-Size-Fits-All Solutions
Boil-and-bite trays are a popular drugstore attempt at a custom fit. The idea seems simple enough: you heat the plastic tray in hot water, then bite down to create a rough mold of your teeth. In reality, the fit is often sloppy and imprecise. This leads to a host of problems, from whitening gel leaking onto your gums and causing irritation to patchy, inconsistent results because the gel doesn't make even contact with every tooth.
Whitening strips present a similar challenge. While they’re incredibly easy to use, these thin plastic strips are designed for a generic, perfectly straight set of teeth. They struggle to adhere properly to crowded or crooked teeth and almost always fail to reach the curved surfaces between teeth. This leaves behind noticeable yellowing in all the nooks and crannies that a custom tray would cover perfectly.
This flowchart really simplifies the decision between a perfect fit and a generic one.
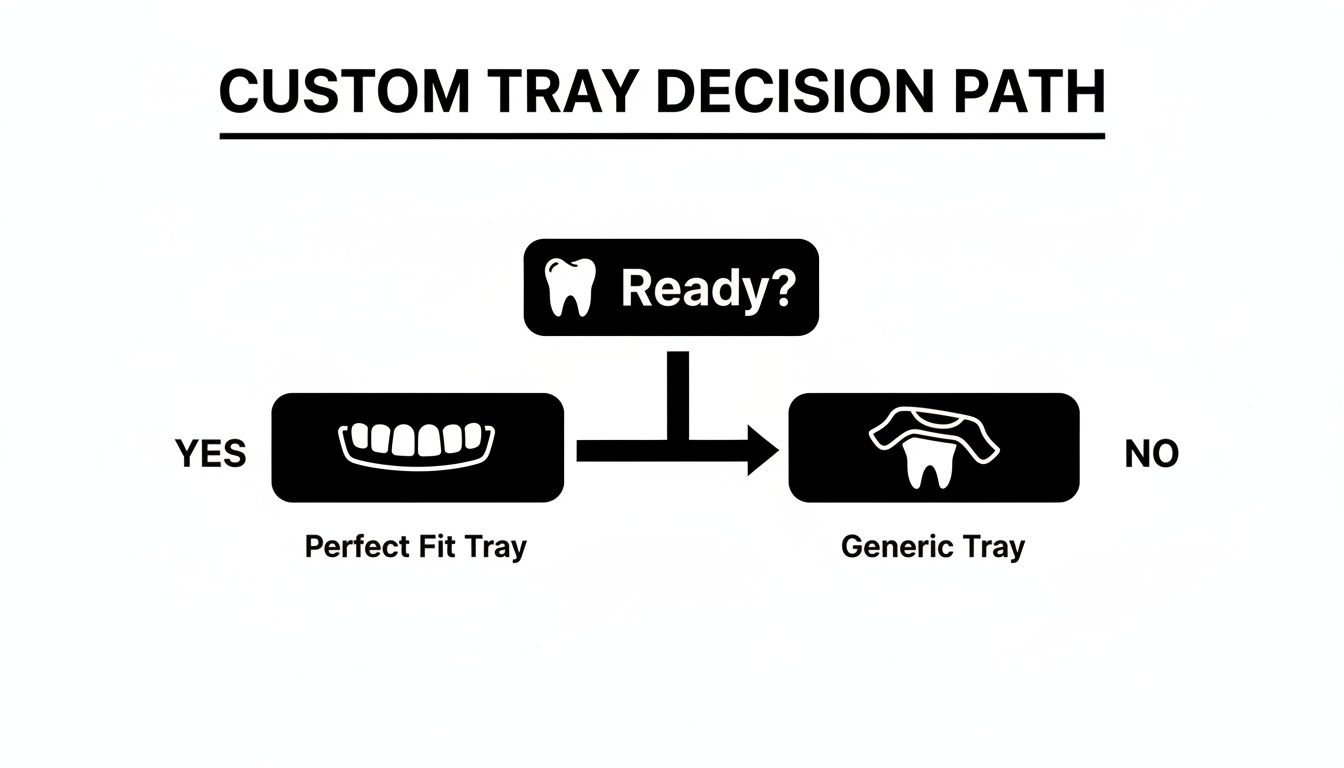
As you can see, the path to a truly precise application starts by choosing a tray that is made just for you. It’s the only way to sidestep the pitfalls of generic alternatives.
In-Office Treatments Versus At-Home Precision
On the other end of the spectrum, you have professional in-office whitening. This is, without a doubt, the fastest way to get dramatic results, often in a single one-hour visit. Dentists use high-concentration bleaching agents, sometimes activated with a special light, to achieve a significantly brighter smile almost immediately.
But that speed and power come at a premium. These treatments often cost hundreds of dollars per session. While custom trays provide an amazing at-home solution, you can also explore professional teeth whitening options at your dentist's office for the most intense results. Custom trays were designed to bridge this gap, giving you professional-level results over a couple of weeks for a fraction of the cost.
Custom-fit trays deliver the best of both worlds: the powerful, effective results you expect from a dentist, combined with the convenience and affordability of an at-home treatment. They are the ideal middle ground for a brilliant, long-lasting smile.
In a market like the U.S., where the teeth whitening industry is projected to hit USD 2.62 billion by 2032, custom trays fill a crucial need. They sit perfectly between costly professional sessions and less effective drugstore kits. And for those with sensitivity—a common complaint affecting 57% of people who whiten—trays allow for the use of lower-strength or desensitizing gels, making the whole process much more comfortable.
A Side-by-Side Look at Your Options
To make the choice crystal clear, let's put these methods head-to-head on the factors that matter most. The table below breaks down how each one performs, from the quality of the fit to the final cost.
Teeth Whitening Method Comparison
Here’s a quick overview of how the most popular whitening methods compare, helping you see where custom trays really shine.
| Feature | Custom-Fit Trays | Boil-and-Bite Trays | Whitening Strips | In-Office Treatment |
|---|---|---|---|---|
| Effectiveness | High (professional-grade gel, even coverage) | Low to Medium (uneven coverage, gel dilution) | Medium (misses crevices and curved areas) | Very High (immediate, dramatic results) |
| Comfort & Fit | Excellent (perfectly molded to your teeth) | Poor (bulky, loose, and often uncomfortable) | Fair (can slip, may not cover all teeth) | N/A (Administered by a professional) |
| Gum Safety | Excellent (ends at gumline, prevents leakage) | Poor (high risk of gel irritating gums) | Fair (gel can easily contact gums) | Excellent (gums are protected by dentist) |
| Cost | Moderate (initial investment, cheap refills) | Low (very affordable for a single use kit) | Low (inexpensive and widely available) | High (most expensive option per treatment) |
| Convenience | High (use at home on your schedule) | High (available at most drugstores) | Very High (easy to apply anywhere) | Low (requires a dental appointment) |
When you lay it all out, the evidence is pretty clear. For anyone seeking serious, lasting results without the high cost of in-office procedures, custom-fit teeth whitening trays are the superior choice. They offer a safe, comfortable, and highly effective path to the brighter smile you've been wanting.
How to Get Your Custom Fit Trays
So, you’re ready for a set of teeth whitening trays custom fit to your unique smile. Great choice! You basically have two paths to get them: the traditional route through your dentist's office or the modern, convenient option of a mail-order impression kit.
Both roads lead to the same destination—a perfect, lab-made tray—but the journey is a little different. Your choice really boils down to whether you prefer the hands-on guidance of a professional or the ease of doing the first step yourself at home.
The Traditional Dentist Office Method
Going to your dentist is the classic way to get custom trays made. The biggest advantage here is having an expert guiding the process from start to finish. This ensures everything is done with maximum precision, and it also gives your dentist a chance to check for any underlying oral health issues before you start whitening.
Here’s what that process usually looks like:
- The Initial Consultation: First, your dentist will take a look at your teeth and gums to make sure you're a good candidate for whitening. This is a really important step to catch any cavities or gum problems that should be fixed first.
- Taking the Impressions: A dental assistant or hygienist will take exact impressions of your upper and lower teeth using a soft, putty-like material. It’s a quick process, usually taking only 10-15 minutes, and it creates a perfect mold of your teeth.
- Off to the Lab: These impressions are then sent out to a specialized dental lab. There, skilled technicians use your molds to craft the trays from a durable, flexible plastic material that will hug your teeth perfectly.
- The Fitting Appointment: Once the trays are ready (typically in about a week), you'll pop back into the office for a final fitting. Your dentist will make sure they fit snugly and comfortably, trimming them or making small adjustments if needed.
When you go this route, your dentist can walk you through all their professional teeth whitening services to find the best fit for your goals.
The At-Home Impression Kit Alternative
For anyone who loves convenience, at-home impression kits are a fantastic modern solution. They deliver the exact same lab-quality trays but cut out the multiple dental visits. These kits come with everything you need to take your own impressions right from your kitchen table.
This method puts you in the driver's seat for the first step before the pros in the lab take over to finish the job.
Key Insight: At-home kits have really opened up access to professional-grade dental products. They use the same impression putty and send the molds to the same fabrication labs that dentists do, so the final product is identical in quality.
Here’s how to nail the process using an at-home kit:
- Get Your Materials Ready: In your kit, you'll find impression trays and two different colored putties (a base and a catalyst). Before you begin, wash your hands and give your teeth a good brushing.
- Mix the Putty: Grab one of each color of putty and start mixing them together. You need to be quick—squish and knead them for about 30 seconds until the color is completely uniform. If you see any streaks, keep mixing!
- Make the Impression: Roll the mixed putty into a log shape and place it evenly inside one of the impression trays. Immediately put the tray over your teeth, pushing firmly up for the top row or down for the bottom. Make sure your teeth are centered right in the middle of the putty.
- Hold Still and Remove: Now for the hard part: hold that tray perfectly still for a few minutes (your instructions will give you the exact time). Once the putty has firmed up, pull the tray straight down (or up) to get it off. Try not to wiggle it from side to side.
- Mail It Back: Pop your finished impressions into the prepaid mailer that came with the kit and drop it in the mail. In a week or two, your perfectly crafted teeth whitening trays custom fit just for you will show up right at your doorstep.
Using Your Whitening Trays for the Best Results
Getting your custom-fit trays is a huge first step, but how you use them is what really brings out that brilliant, whiter smile. Think of it like being handed the keys to a high-performance car; you still need to know how to drive it to get where you want to go. This guide will walk you through exactly how to run a perfect at-home whitening session, every single time.
Following the right procedure is about more than just getting results. It's how you ensure even, consistent whitening, protect your gums from getting irritated, and make your whitening gel last as long as possible. Let’s break it down into simple, easy-to-follow steps.
Prepping for Your Whitening Session
Before you even think about opening that whitening gel, a little prep work can make a huge difference. A clean slate ensures the whitening agent works directly on your enamel, giving you more consistent and noticeable results.
First, give your teeth a good brush and floss. This clears away any plaque or food debris that could get in the way and block the gel from making full contact. After you're done, rinse with water, but skip the mouthwash for now—some of its ingredients can interfere with the whitening process.
Lastly, make sure both your hands and your whitening trays are clean and totally dry. It’s a simple step, but it keeps bacteria from getting trapped against your teeth and gums while you whiten.
Applying the Gel and Seating the Trays
This is where precision really counts. The single most common mistake people make is overfilling the trays. Not only does this waste expensive gel, but it’s the number one cause of gum irritation. When it comes to whitening gel, less is always more.
Here’s your step-by-step guide to getting it just right:
- Dispense the Gel Carefully: Squeeze a very small dot of whitening gel inside the front-facing part of each tooth impression in your tray. You only need to apply it to the teeth that show when you smile.
- Use the Right Amount: A tiny drop—about the size of a pinhead—is all you need for each tooth. The gel will spread out and cover the entire tooth surface on its own once the tray is in place.
- Seat the Tray Firmly: Gently place the tray over your teeth and press it into place with your fingers. It should feel snug and secure, without any wiggle room.
- Wipe Away Excess Gel: It's totally normal for a little bit of gel to squeeze out onto your gums. Just use a soft toothbrush, a cotton swab, or even your finger to carefully wipe away any extra gel from your gumline.
Pro Tip: Whitening gel only works on your natural teeth. It won't change the color of crowns, fillings, or veneers. There's no need to put gel in those spots in your tray, which helps you save gel for where it actually makes a difference.
Always follow your dentist's instructions for how long to wear your trays. Gels come in different strengths, and wearing them for too long is a fast track to sensitivity. If you're new to whitening, it's a good idea to start with shorter sessions just to see how your teeth react.
Top-tier brands give you options. For instance, Opalescence, a bestseller on DentalHealth.com, offers gels with up to 35% carbamide peroxide. This allows you to get results on par with in-office light-activated treatments for a fraction of the cost—usually around $200-$300 for a full kit compared to $500+ at a clinic. In fact, studies show 92% user satisfaction with custom tray systems, and a whopping 75% of users report no sensitivity when they also use a remineralizing paste. You can learn more about the growing teeth whitening market at fortunebusinessinsights.com.
While you're whitening, try to steer clear of things that can re-stain your teeth, like coffee, tea, red wine, and tobacco. This will help protect your progress. For more specific product advice, check out our guide on how to use Opalescence whitening gel. Once you master these simple steps, your journey with teeth whitening trays custom fit will be both successful and comfortable.
How to Manage and Prevent Teeth Sensitivity
If you’re worried about sensitivity, you're not alone. It’s easily the most common concern people have when they start thinking about whitening, but the good news is that it’s usually temporary and totally manageable. The first step to preventing it is just understanding why it happens in the first place.
That brief "zing" you might feel happens because the active ingredient in the gel—peroxide—temporarily makes your tooth enamel a bit more porous. This lets the gel get down to the inner dentin layer where the nerves live, causing that fleeting discomfort. Think of it like opening tiny windows on your teeth; they close again pretty quickly, but while they're open, the nerves are more exposed to the elements.
The key thing to remember is that this is not a permanent change. With the right approach, you can make sure your experience with teeth whitening trays custom fit is as comfortable as it is effective.
Proactive Steps Before You Whiten
One of the smartest things you can do is prepare your teeth before you even apply that first drop of gel. A little prep work can make a massive difference in your comfort level through the whole process.
About a week before you plan to start, switch to a desensitizing toothpaste that contains potassium nitrate or stannous fluoride. These ingredients work by either calming the tooth's nerve directly or by blocking the microscopic pathways in your dentin that lead to the nerve.
Key Takeaway: Using a desensitizing toothpaste is like building a protective shield for your teeth. When you start early, you give those active ingredients time to build up and create a strong defense against sensitivity before the whitening even begins.
Smart Whitening Habits to Minimize Discomfort
Once you start using your trays, how you whiten is just as important as the prep work. If you start to feel some sensitivity, don't just grit your teeth and push through it. Listening to your body is key for a pain-free experience.
Instead, try these proven strategies to keep any discomfort under control:
- Take a Day Off: You don't have to whiten every single day to get great results. Taking a 24-hour break between sessions gives your teeth plenty of time to recover and rehydrate, which can dramatically reduce sensitivity.
- Shorten Your Wear Time: If the instructions suggest wearing your trays for an hour, try cutting back to 30 minutes. You'd be surprised how effective shorter exposure times can be, often with far less irritation.
- Opt for a Lower-Concentration Gel: Whitening gels come in different strengths. If a high-concentration formula is causing issues, switching to a lower percentage of carbamide or hydrogen peroxide will be much gentler while still lifting stains.
- Use a Post-Treatment Gel: Many whitening kits come with a remineralizing or desensitizing gel that you can pop into your trays right after a session. These products often contain fluoride and potassium nitrate to help soothe nerves and replenish minerals in your enamel.
By actively managing your whitening routine, you stay in complete control of your comfort. For a deeper dive, you can learn more about how to reduce teeth sensitivity after whitening in our detailed guide. These simple tweaks can help you get the bright smile you want without any of the dreaded discomfort.
Maintaining Your New Brighter Smile
You did it—you put in the time and finally have that brilliant shade of white you were hoping for. Congratulations! Now, let's talk about how to make sure that beautiful smile lasts. Your initial investment in teeth whitening trays custom fit to your mouth is the hard part, but keeping those results just takes a few smart habits.
Think of your newly whitened teeth like a fresh white shirt. It's a whole lot easier to prevent a stain from setting in than it is to get one out later. A little bit of maintenance can turn a one-time treatment into a long-term source of confidence.
Protecting Your Investment From Stains
Everyday life is full of things that can stain and dull your smile. The main culprits are intensely colored foods and drinks, which have compounds called chromogens that just love to cling to tooth enamel and cause discoloration.
The good news is you don’t have to give up everything you love. Just be a little more mindful.
- Enjoy Smartly: When you’re having coffee, dark tea, or red wine, try using a straw. It’s a simple trick that keeps most of the staining liquid away from the front of your teeth.
- Rinse Immediately: Right after you finish a staining food or drink, swish your mouth out with water. This helps wash away those pesky compounds before they have a chance to stick around.
- Avoid Tobacco: This one’s a biggie. All forms of tobacco are notorious for causing deep yellow and brown stains that are incredibly tough to remove. Quitting is the best thing you can do for both your health and the brightness of your smile.
The Power of Regular Touch-Ups
Even if you’re super careful, a little bit of fading over time is completely normal. This is where your custom trays really shine as a long-term whitening partner. Unlike single-use treatments, you have your trays ready for quick and easy touch-ups whenever your smile needs a little refresh.
The real value of custom trays is their reusability. The initial kit is the main investment; after that, you only need to purchase affordable gel refills to maintain your results for years.
A simple touch-up schedule keeps your smile consistently bright without having to go through a full whitening cycle again. Lots of people find that just wearing their trays for a night or two every few months is enough to wipe away new surface stains and bring back that fresh, just-whitened glow. Using a good whitening toothpaste daily also helps manage surface stains in between touch-ups.
This sustainable approach is why custom trays are so popular and effective. They are a cornerstone of the professional teeth whitening market, which was valued at USD 2.69 billion, with whitening gels and kits holding a massive 62% market share. That popularity comes from their proven ability to lighten teeth by 6-8 shades in just 7-14 days—an effectiveness that makes people stick with their personalized solution. You can explore more data on the professional teeth whitening market at researchandmarkets.com.
Frequently Asked Questions
When you're looking into teeth whitening, it’s natural for a bunch of questions to pop into your head. Let's walk through some of the most common ones about custom-fit whitening trays to give you the clear, straightforward answers you need.
How Long Will My Custom Trays Last?
Think of your custom trays as a long-term investment. They're made from a seriously durable plastic and, with a little bit of care, are designed to last for several years. This is one of their biggest perks compared to single-use strips or flimsy boil-and-bite options.
To get the most mileage out of them, just rinse them with cool water after you're done, give them a gentle scrub with a soft toothbrush, and pop them back in their case. Just be sure to avoid hot water—it can warp the plastic and mess up that perfect fit you paid for.
Will the Gel Whiten My Crowns or Veneers?
This is a really important point: whitening gel only works on natural tooth enamel. It won't have any effect on the color of dental work.
That includes things like:
- Crowns
- Veneers
- Fillings
- Bridges
Why? The peroxide gel is designed to lift organic stains from the tiny pores in your natural teeth. Dental restorations, on the other hand, are made from non-porous materials like porcelain or composite resin, so the gel just can't penetrate them. If you have any of this work done on your front teeth, it’s a good idea to chat with your dentist before starting a whitening routine.
How Quickly Will I See a Difference?
Everyone's starting point is different, but most people begin to notice a real change within just a few days of using their trays consistently. It's a gradual process, but it's happening.
You'll typically see the most dramatic, final results after about two weeks of following the daily schedule. This slow-and-steady approach is what gives you that even, natural-looking brightness, avoiding the "too-white" shock of some intense, one-off treatments.
Is It Safe to Wear the Trays Overnight?
Whether you can wear your trays to bed all comes down to the strength of the whitening gel. Gels with a lower concentration of carbamide peroxide are often made specifically for overnight use, releasing their whitening power slowly over several hours.
Higher-strength gels, however, are meant for much shorter sessions—usually somewhere between 30 minutes and a couple of hours. Trying to wear a powerful gel overnight is a surefire way to end up with sensitive teeth. The golden rule is to always follow the specific instructions that come with your gel. That’s the best way to make sure your treatment is both safe and effective.
Ready to get that professional-level bright smile right from your own couch? At DentalHealth.com, we stock a huge selection of professional-grade whitening kits and gel refills from the brands that dentists know and trust.
Shop Custom Fit Teeth Whitening Trays and Gels at DentalHealth.com