
Zoom Whitening Results and What You Can Expect
You've just had Zoom whitening, checked your smile in the treatment-room mirror, and taken a photo because your teeth look strikingly bright. A few days later, they seem softer in color. That change can be unsettling, but it doesn't automatically mean the whitening failed. The immediate appearance and the shade that settles after treatment aren't always the same.
Zoom whitening can make natural teeth look substantially brighter, but the result depends on your starting shade, the kind of discoloration you have, the treatment protocol, and how you maintain your teeth. Clinical findings can help set expectations, but they can't promise an exact shade for every person.
What Realistic Zoom Whitening Results Look Like
Think of Maya, who looks at her teeth right after an in-office appointment and sees a dramatic change. She takes a selfie, then compares it with a photo a week later. Her teeth still look lighter than before treatment, but the fresh, almost glowing appearance has settled. The first photo captured an immediate result, not necessarily the shade she'll see day to day.
That distinction matters when you're looking up Zoom whitening results or comparing before-and-after pictures. Whitening lifts discoloration from natural teeth. It doesn't repaint each tooth a uniform new color. Imagine a painted surface with layers of old color: removing some of the discoloration can reveal a brighter appearance, but the underlying material, its thickness, and its original tone still affect what shows through.
A result has more than one meaning
“Whiter” can refer to different things. You may notice a visible change in the mirror, a clinician may record an objective shade-guide improvement, or an instrument may measure a change in tooth color. Those observations are related, but they aren't interchangeable. A particular shade-guide movement doesn't guarantee that your teeth will look like a photo you've seen online.
The most relevant clinical evidence here concerns professionally administered, in-office Zoom protocols. If you're considering professional-grade take-home whitening gel, don't assume your result will match an in-office study. Home routines differ in how the gel is applied and used, and the result may develop on a different schedule.
A useful expectation: Look for a meaningful improvement in your own natural teeth, not a guaranteed shade number or a perfectly uniform white.
Your mouth's starting point is part of the outcome. Two people can receive similar treatment and still finish with different-looking smiles because their teeth don't have the same natural color, stain pattern, or enamel characteristics. A responsible expectation accounts for those differences and leaves room for the shade to settle after treatment.
Clinical Evidence Behind Typical Shade Improvement
A clinical comparison gives one reference point for professional Zoom whitening. In the report, 32 patients moved from an average Vita Classical shade of D3 before treatment to A1 afterward, with an average reduction of 7.8 shade-guide units. The same report described observed whitening as generally ranging from 6 to 9 shades (Philips Zoom clinical comparison). These are study results, not a promised shade change for every patient.
A separate evaluation compared a specific WhiteSpeed protocol using 6% hydrogen peroxide, with or without LED acceleration. The reported immediate mean reduction was 6.9 shade-guide units with acceleration and 5.3 without it (WhiteSpeed clinical evaluation). Because the peroxide regimen was the same, the comparison helps isolate the role of the light in that protocol. It does not establish that any Zoom-labeled treatment will produce the same result.
What the measurements can and can't tell you
A shade guide works like a set of paint chips: it sorts tooth colors into named or numbered steps. Researchers may also measure color with an instrument and report the difference as ΔE. These are separate methods, so a shade-guide unit cannot be converted directly into a ΔE value.
| Study context | Reported result | Important context |
|---|---|---|
| Philips Zoom clinical comparison | Average change from D3 to A1, reported as 7.8 shade-guide units | Results reflect the protocol studied, not a universal outcome. |
| WhiteSpeed evaluation with 6% hydrogen peroxide | Immediate mean reduction of 6.9 units with LED acceleration and 5.3 without | The comparison concerns a specific in-office regimen. |
A shade-guide shift can help describe change, but it does not capture every detail of how a smile looks. Starting color, stain type, enamel characteristics, treatment method, and measurement technique all affect the result. The evidence supports the possibility of a noticeable multi-shade improvement for suitable candidates, while leaving room for individual outcomes to differ.
How Your Shade Changes Over Time
A same-day photo may show your teeth at their brightest, while the smile you see a week later looks a little less dramatic. That shift can be part of the normal settling process: whitening can dehydrate teeth temporarily, making them appear brighter until they rehydrate.
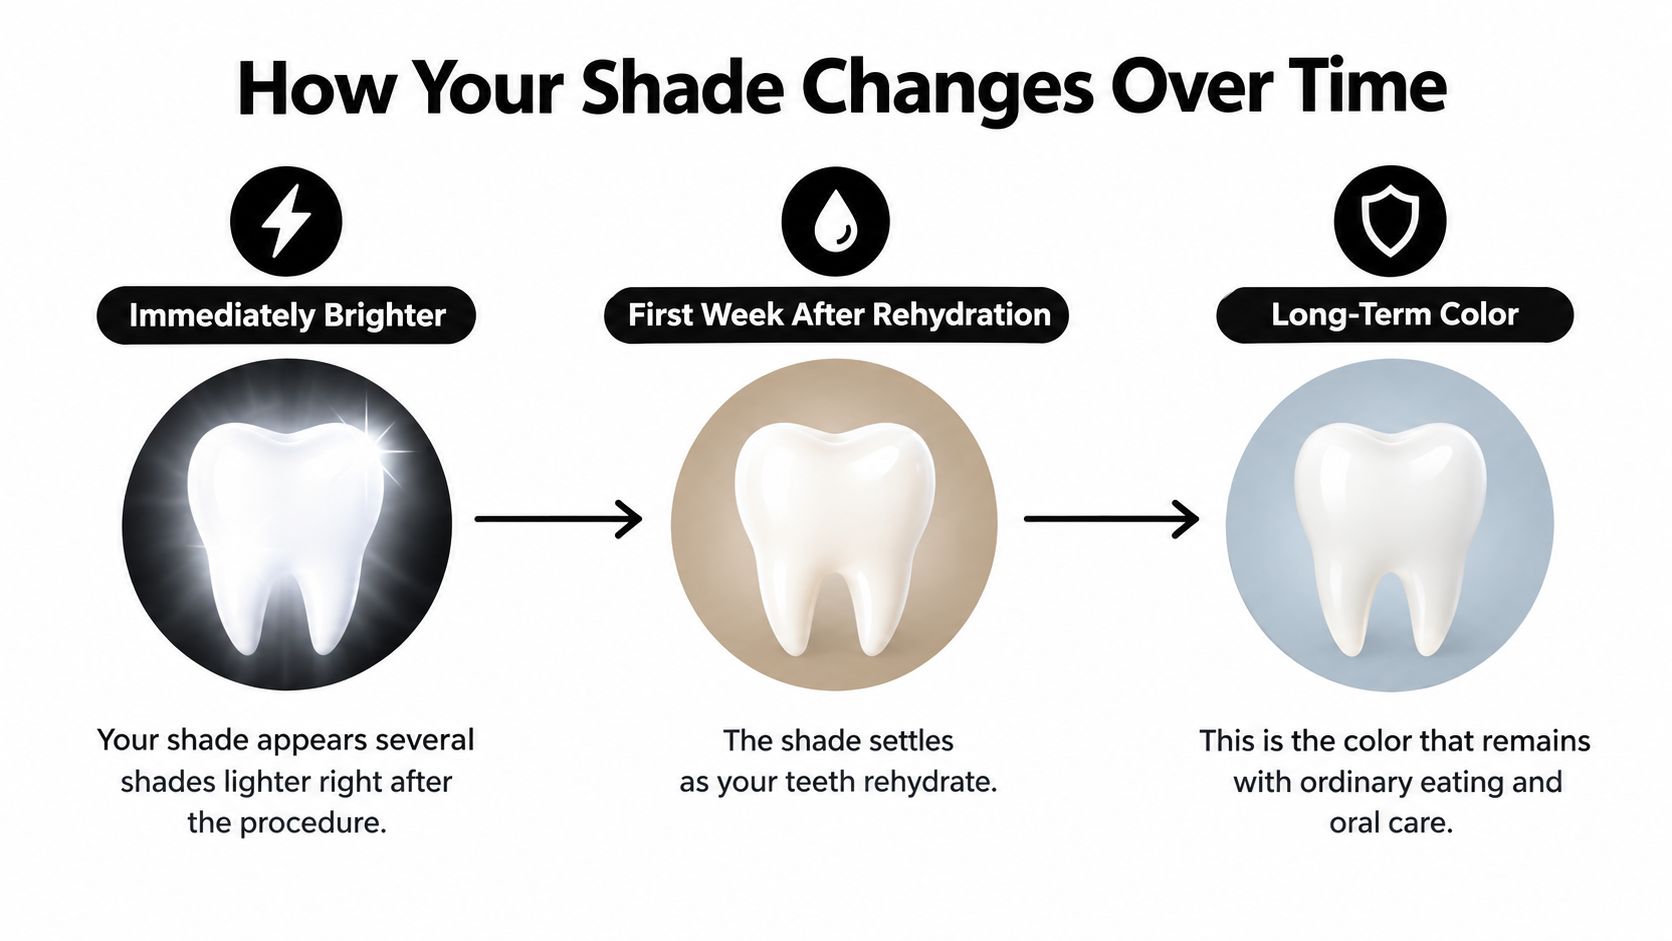
Three points to compare
Immediately after treatment: Teeth may look exceptionally bright. A same-day photo captures both the bleaching effect and any temporary brightness from dehydration, so it may not represent the settled shade.
After the first week: In a randomized trial of a 6% hydrogen peroxide regimen, the mean reduction in the LED-accelerated group changed from 6.9 shade-guide units immediately after treatment to 4.4 by day seven. The comparison group changed from 5.3 to 3.6 units. Both groups remained lighter than their starting shades, despite some early rebound (WhiteSpeed trial results).
A separate clinical evaluation, cited earlier in this article, reported day-seven least-squares mean reductions of 4.92 units with LED acceleration and 4.19 without it. These are results from specific study protocols, not a forecast for every patient.
After the color settles: Compare your smile with a baseline photo taken in similar lighting and from a similar angle. Filters, shadows, and bathroom bulbs can change how tooth color appears. Checking your shade 7 to 14 days after treatment gives a more useful comparison than relying on a fresh, post-treatment image.
For a longer-term perspective, read about how long teeth whitening results last. A settled everyday smile is a better measure of your result than its brightest moment.
Factors That Change Your Whitening Outcome
Two people can begin with teeth that look similarly yellow and still finish with different results. The reason is that the visible starting color doesn't reveal everything about what's underneath it or how each tooth will respond.
Your teeth and your staining are individual
A starting shade gives a reference point, but it isn't the only influence. Enamel characteristics affect how color appears, while the type and depth of discoloration affect how much whitening may be visible. A surface stain and discoloration within the tooth can look similar in a photo but respond differently to bleaching.
Natural teeth can also vary from one another. One tooth may have a deeper tone, or a smile may have uneven coloration before treatment. Even when whitening lightens the teeth, that original variation may remain visible. Following the intended application schedule matters too; changing the routine on your own doesn't make the outcome more predictable.
Restorations and deeper discoloration need a different expectation
Crowns, veneers, fillings, and other restorations don't bleach like natural teeth. If a restoration begins at a different shade, whitening nearby teeth can make the contrast more noticeable. A dentist can help you consider that before treatment, particularly if a restoration is prominent when you smile.
Discoloration associated with trauma, tetracycline staining, or fluorosis may also respond differently from surface staining. Whitening may have limited value or create an uneven-looking result, so it's sensible to ask a dental professional whether bleaching suits the cause of the color change.
If you're comparing professional-grade take-home products, check the active ingredient, how the product is intended to be used, how well the tray fits, and whether the routine is appropriate for your teeth. A stronger product isn't automatically a better match.
Before you choose a routine: Consider what caused the discoloration, whether you have restorations, and whether you can follow the intended schedule comfortably.
Realistic expectations start with your own mouth, not another person's before-and-after image.
Why the Zoom Light Is Not the Whole Story
A bright lamp is easy to notice, so it's tempting to assume that the light is the main reason whitening works. But the lamp alone doesn't explain the result. The bleaching gel and its peroxide regimen are central to how the treatment is delivered, while research on light activation has found different results under different protocols.
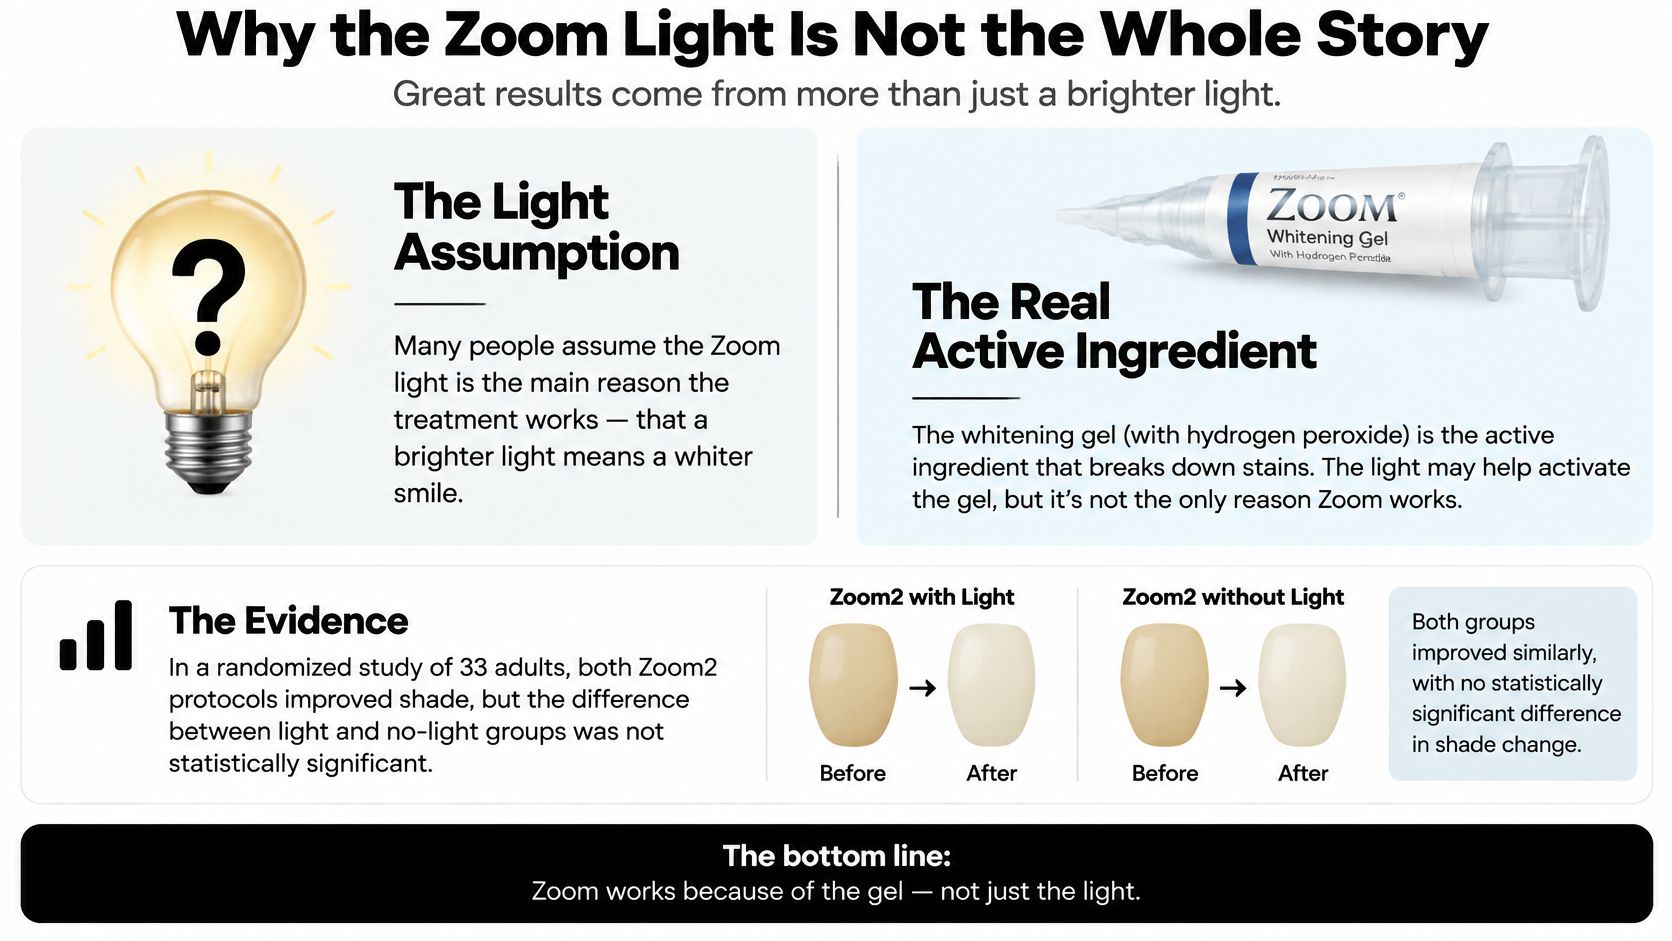
A randomized clinical study of 33 adults found significant shade improvement after Zoom2 treatment both with and without light activation. However, the difference between the two protocols was not statistically significant. The study also reported transient sensitivity in 39.4% of participants and no detected shade relapse at its three-month follow-up (randomized Zoom2 clinical study).
That doesn't mean light activation never makes a difference. The WhiteSpeed evaluation described earlier found greater measured improvement with LED acceleration under its particular protocol. Together, these findings show why a single sweeping claim doesn't fit every study: a lamp-associated advantage appeared in one comparison, while another trial found no statistically significant difference between its light and no-light groups.
Before-and-after photos can add another layer of confusion. They may show genuine bleaching alongside temporary dehydration, lighting differences, and changes in camera angle. A striking same-day image can't, by itself, tell you how much of the appearance will remain after the teeth rehydrate.
If you're comparing in-office care with take-home whitening, focus on the treatment details and your own needs:
- Peroxide protocol: Ask what active ingredient and regimen are being used.
- Exposure and fit: Consider how the product is meant to be applied and whether a take-home tray fits appropriately.
- Sensitivity: Discuss your history and what to do if discomfort occurs.
- Maintenance: Ask how you'll preserve the result without extending treatment beyond directions.
Treat the light as one part of a particular protocol, not an automatic guarantee of a whiter or longer-lasting smile.
Managing Sensitivity and Keeping Results White
Sensitivity is a real part of the whitening decision, and stronger gel isn't automatically better. A clinical comparison reported tooth sensitivity in 44% of participants using 6% hydrogen peroxide and 74% using 35%, with lower intensity in the lower-concentration group. The American Dental Association identifies temporary sensitivity and gum inflammation as common adverse effects of vital-tooth whitening (clinical discussion of whitening sensitivity).
Make comfort part of the plan
Ask a dental professional for advice before whitening if you already have dentin hypersensitivity, exposed roots, enamel cracks, untreated decay, gum recession, or a tray that feels too large or loose. These conditions can affect comfort and make it harder to keep gel where it belongs.
Use whitening products only as directed. Don't extend wear time or repeat applications because the first result seems too subtle. If you're considering maintenance products, a sensitivity-focused toothpaste, a remineralizing paste, or a whitening gel may be options to discuss with a dental professional. The right choice depends on your teeth and the routine you're following.
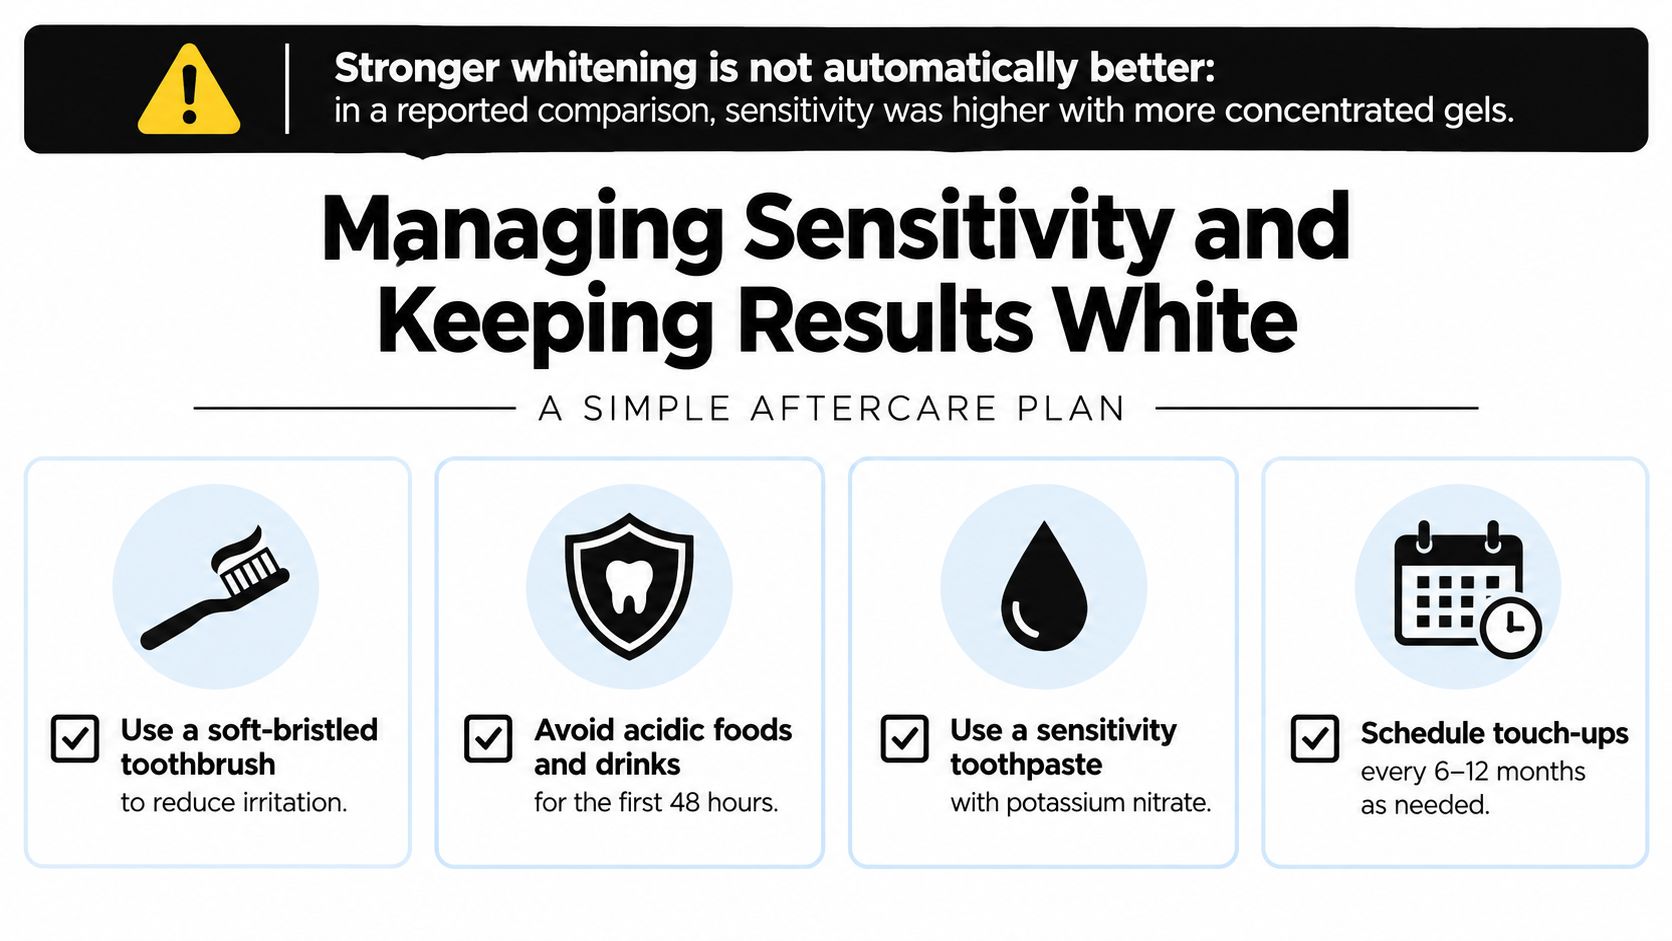
If you're looking for practical steps after treatment, see this guide to Zoom whitening aftercare. Persistent pain or gum burning isn't something to push through. Stop whitening and contact a dentist if discomfort persists, if you notice a burn, or if sensitivity doesn't resolve as expected.
For maintenance, keep routine oral care consistent and be aware that staining habits can affect how your teeth look over time. A sensitivity toothpaste or remineralizing product may fit into a care plan, but it doesn't make it safe to exceed a whitening product's directions. Compare your shade under similar conditions before deciding that you need another treatment. Repeatedly whitening to recapture a temporary, extra-bright appearance isn't the same as maintaining a comfortable result.
Set Your Personal Whitening Expectations
Before choosing a treatment, take a moment to define what you want and what could affect the outcome. A quick baseline record can make later comparisons more useful: note your current shade in consistent lighting, identify visible restorations or uneven discoloration, and consider whether you've had sensitivity or gum concerns.
Ask yourself whether you're prioritizing a faster in-office change or a gradual take-home routine. Then use this checklist to set a practical goal:
- Meaningful improvement: You want natural teeth to look lighter, without expecting a guaranteed shade.
- Natural variation: You understand that teeth may not whiten evenly and restorations won't match automatically.
- Comfort: You're prepared for possible temporary sensitivity and will follow the product directions.
- Maintenance: You're willing to keep up oral care and assess the result after it has settled.
- Professional advice: You'll ask a dentist about persistent pain, exposed roots, cracks, decay, or complex staining.
A shade guide can help you describe your starting point and track a change, but it can't promise a particular finish. If you're comparing color descriptions, this whitening shade guide can help you think about shades without treating one label as a guaranteed outcome.
Judge your smile after it has rehydrated and returned to ordinary routines, not only by its brightest post-treatment moment. Choose a product or professional protocol that fits your teeth, and stop to seek dental advice if pain persists or your gums burn.
DentalHealth.com offers professional-grade at-home whitening gels and kits, along with sensitivity and remineralizing oral-care products. Visit DentalHealth.com to compare options for maintaining your whitening routine and find practical guidance for choosing products.