

The Best Way to Clean Retainers for a Healthier Smile
The best approach to cleaning your retainers is pretty straightforward: a quick, gentle brushing every day and a deeper soak once a week. For clear plastic types, lukewarm water and a soft brush are your best friends. If you have a Hawley retainer, mild soap and a soft brush will do the trick. And for those with a permanent bonded retainer, a floss threader is non-negotiable. Sticking to this simple routine is the key to preventing gross buildup, odors, and damage, making sure your orthodontic investment goes the distance.
Why Your Retainer Cleaning Routine Is So Important
That retainer you pop in every night? It's a total magnet for bacteria, plaque, and tartar. If you let its upkeep slide, you're looking at more than just bad breath—you could be setting yourself up for oral health problems like gum inflammation or even new cavities.
Think of your retainer as an extension of your teeth. Whatever gunk collects on its surface gets pressed right up against your enamel and gums for hours on end. That's a surefire way to put your hard-won orthodontic results at risk.
The best defense is a simple daily cleaning habit. This isn’t just about keeping your retainer looking nice; it’s a crucial health practice. The warm, moist environment of your retainer is the perfect breeding ground for bacteria, which quickly form a sticky film called plaque. If you don't clean it off, that plaque hardens into tartar (or calculus), which is a whole lot tougher to remove and can cause some real damage.
The Consequences of Neglect
Letting your retainer cleaning slide can lead to a few nasty outcomes that go way beyond just having a dirty appliance. Knowing the risks is often all the motivation you need to stay on track.
- Bacterial Buildup: Your mouth is home to millions of bacteria. When they set up camp on your retainer and multiply, they can contribute to infections, seriously bad breath (halitosis), and tooth decay.
- Appliance Damage: The acids produced by plaque and tartar can slowly eat away at the acrylic and plastic your retainer is made from. This can cause it to warp, crack, or lose its custom fit, making it useless and forcing you to pay for a costly replacement.
- Staining and Odors: Bacteria don't just cause plaque; they also release smelly compounds that lead to persistent odors. Clear retainers are especially notorious for turning yellow from plaque or from drinking things like coffee and tea while wearing them.
A Growing Awareness of Retainer Hygiene
Thankfully, proper retainer maintenance is no longer just an afterthought in orthodontic care. People are catching on, and that growing awareness has fueled some serious growth in the market for specialized cleaning products.
The retainer cleaner market was valued at $1.2 billion and is projected to nearly double to $2.5 billion by 2033. This boom shows that more and more people understand just how critical retainer care is for long-term oral health.
Your retainer is a medical device designed to be in your body for long periods. Just like any surgical instrument, it needs a high standard of cleanliness to be safe and do its job correctly.
To really get why any device used inside the body requires such strict cleaning standards, you can check out this in-depth guide on medical device sterilization validation.
And if you're looking for a practical cleaning schedule to follow, you'll find our guide on how often you should clean your retainers super helpful: https://dentalhealth.com/blogs/news/how-often-clean-retainers. At the end of the day, a clean retainer is the foundation for protecting both your smile and your health.
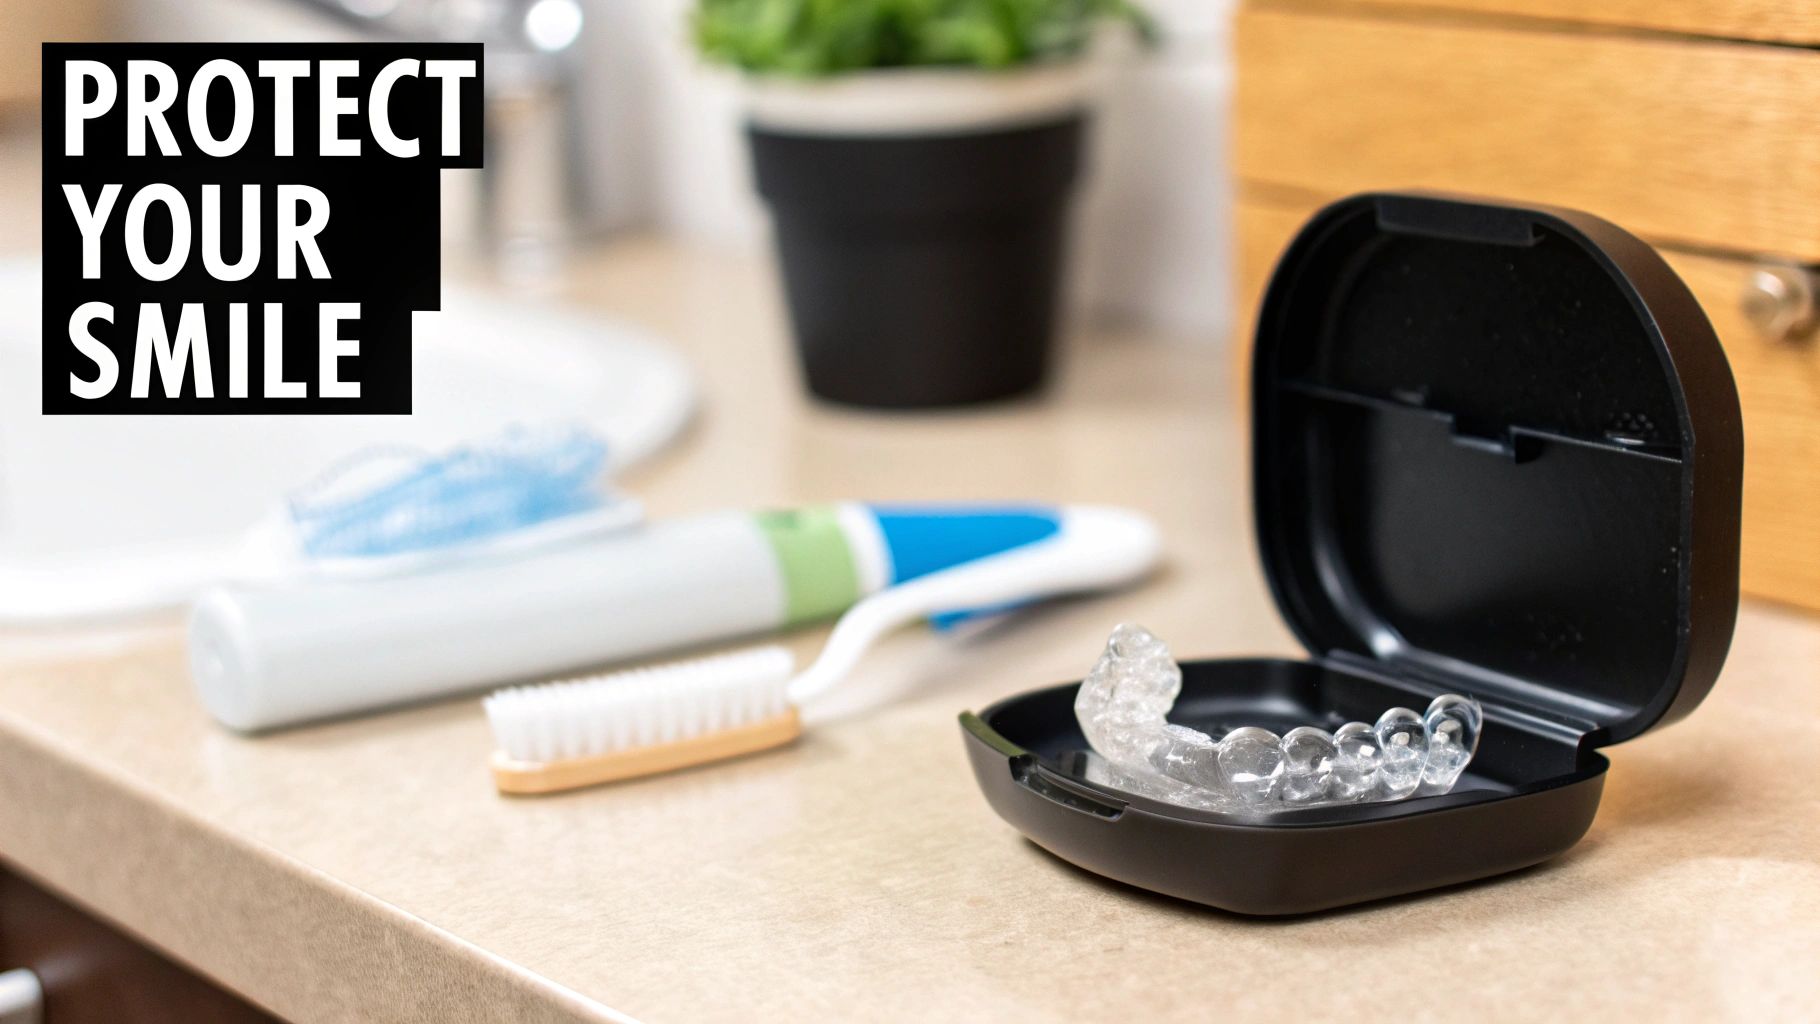
How to Properly Clean Removable Retainers
Whether you have the clear Essix style or the classic Hawley with its wire and acrylic plate, your removable retainer needs consistent care. Think of it this way: your retainer spends hours in your mouth, a warm, moist environment where bacteria love to grow. Without a solid cleaning routine, that buildup can lead to bad smells, ugly stains, and potential health issues.
Let's break down the ideal cleaning playbook to protect your oral health and your orthodontic investment.
Daily Cleaning for Essix Clear Plastic Retainers
Essix retainers are fantastic for their nearly invisible appearance, but their thermoplastic material is sensitive. The right technique is crucial to prevent them from getting cloudy, smelly, or warped.
The best time to clean your retainer is the moment you take it out in the morning. This prevents saliva and plaque from drying on the surface, which makes it a nightmare to clean later on.
-
Rinse It Right Away: As soon as you pop it out, rinse your retainer under lukewarm water. Never, ever use hot water—it can permanently warp the plastic and ruin that perfect custom fit.
-
Brush Gently: Grab a separate, soft-bristled toothbrush (not the one you use for your teeth) and a bit of mild, clear dish soap or a dedicated retainer foam. Gently brush every surface, inside and out. Pay extra attention to the deep crevices where your molars sit, as that's a prime spot for gunk to hide. Stay away from toothpaste; its abrasive ingredients will create tiny scratches on the plastic that attract more bacteria and give it a cloudy look over time.
-
Rinse It Again: After a gentle scrub, rinse the retainer thoroughly under more lukewarm water. You want to wash away every bit of soap residue.
-
Let It Air Dry: Before putting it away, let your retainer air dry completely on a clean surface. Sticking a wet retainer into a sealed case is like creating a petri dish for bacteria.
Daily Care for Hawley Wire Retainers
Hawley retainers are the workhorses of the orthodontic world, built with a sturdy acrylic plate and metal wire. While they’re more durable than the clear plastic kind, they still have plenty of nooks and crannies where plaque can accumulate.
The daily routine for a Hawley is pretty similar to an Essix, just with a little extra focus on the hardware.
-
Rinse and Brush: Just like with a clear retainer, rinse your Hawley with lukewarm water immediately after taking it out. Use a soft brush and mild dish soap to gently scrub the acrylic plate and the entire length of the metal wire.
-
Focus on the Details: Make sure you carefully brush where the wire meets the acrylic. This is a common trouble spot for plaque to build up and harden into tartar, which can really irritate your gums.
-
Final Rinse and Dry: Give it one last, thorough rinse to get all the soap off, then let it air dry before putting it back in its case.
For more tips on making this a seamless part of your day, check out our complete guide on how to care for retainers.
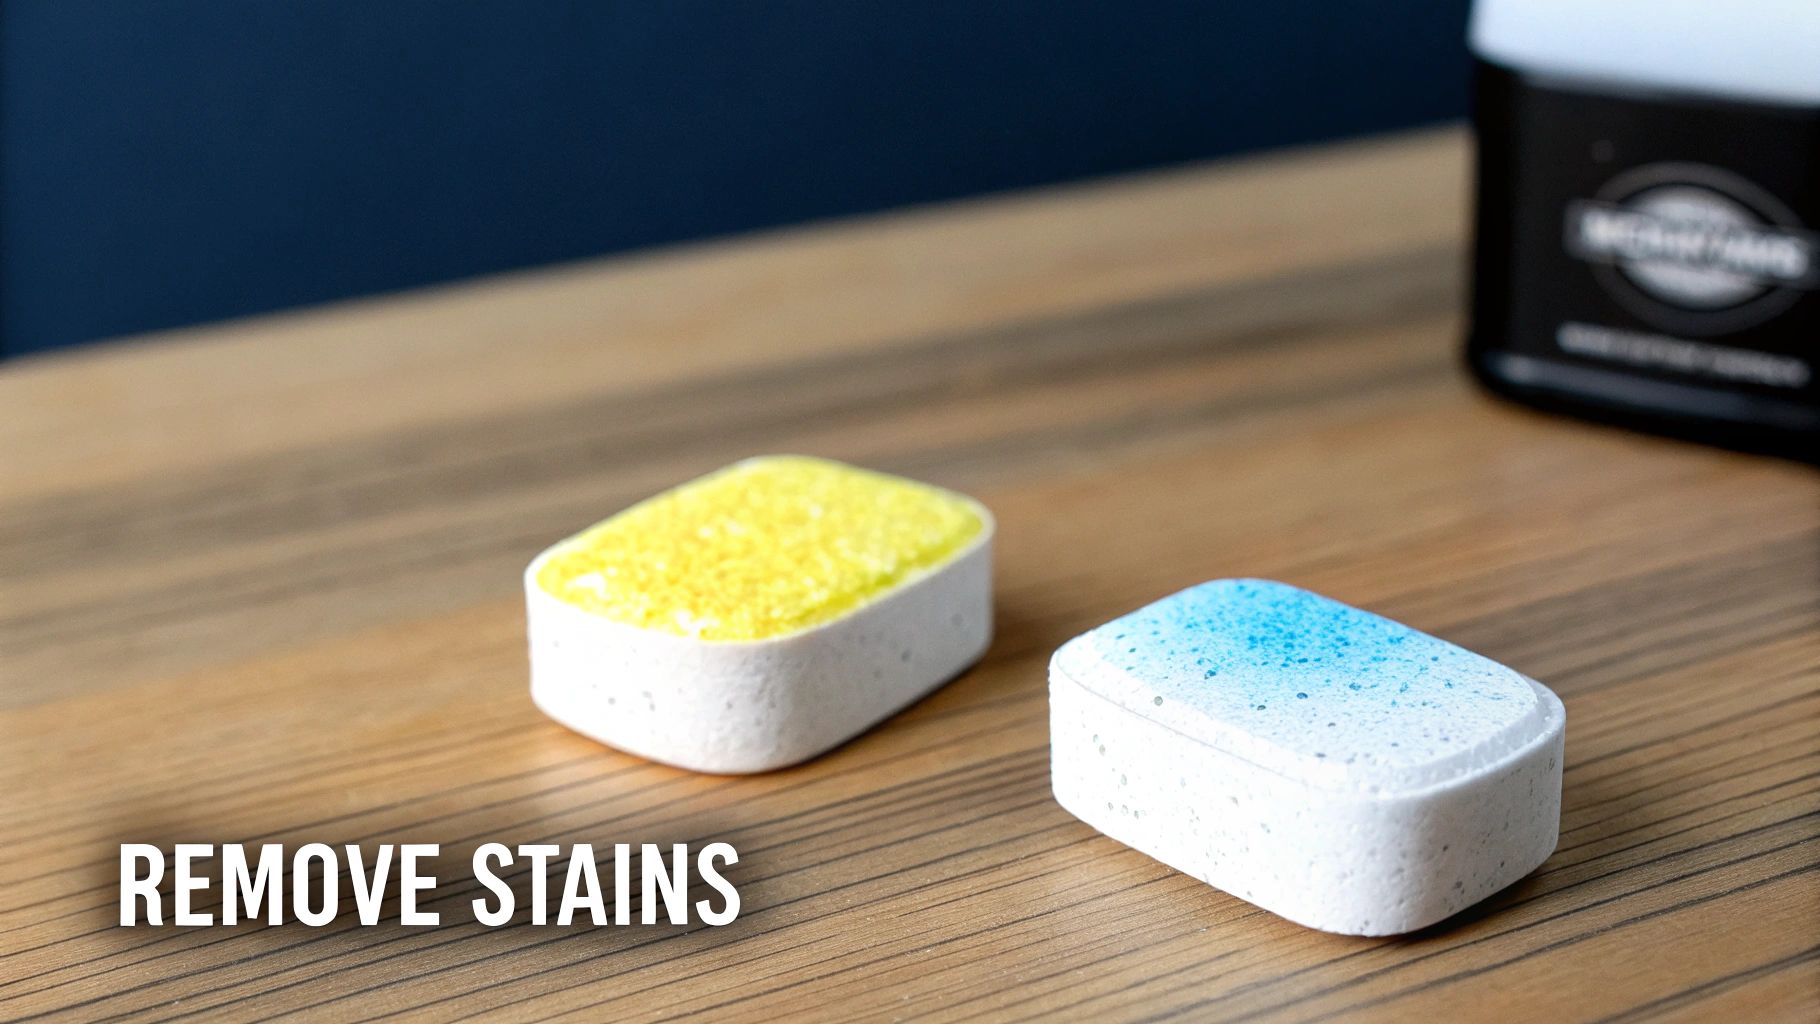
Your Weekly Deep Cleaning Ritual
Daily brushing is non-negotiable for getting rid of fresh plaque, but a weekly deep clean is what really tackles stubborn bacteria and prevents long-term buildup and odors. This is where you bring in the heavy hitters.
Think of daily cleaning as wiping your kitchen counters after cooking. The weekly deep clean is the full scrub-down that keeps everything truly sanitary. You need both.
One of the easiest and most effective ways to deep clean is by using an effervescent cleaning tablet. Products like Retainer Brite are specifically designed to clean oral appliances without causing any damage.
Here's how to work a deep clean into your weekly schedule:
-
Drop and Dissolve: Fill a glass or small bowl with lukewarm water and pop in one cleaning tablet. You'll see it start to fizz, creating an active cleaning solution.
-
Soak Your Retainer: Submerge your retainer completely in the solution. Most tablets recommend a soak time of about 15-20 minutes. That's plenty of time for the fizzing action to lift away plaque, kill odor-causing bacteria, and fight off yellowing.
-
Rinse and Store: Once the time is up, pull the retainer out and give it a good rinse under running water to wash off any leftover solution. Let it dry, and you're good to go.
This simple weekly soak catches what daily brushing might miss and keeps your retainer smelling fresh and looking clear. It's a small step that makes a massive difference.
Mastering the Maintenance of a Fixed Retainer
That little wire permanently bonded behind your teeth—the fixed retainer—comes with its own unique set of cleaning challenges. You can't just pop it out for a soak like a Hawley or Essix retainer. Because it's a permanent fixture, it's a prime spot for plaque and tartar to set up camp, which can lead to cavities and gum issues right where your teeth are most vulnerable.
But don't worry, keeping it spotless is completely manageable once you have the right tools and technique. It just means adding a couple of extra steps to your daily brushing and flossing routine. If you neglect this crucial area, you could quickly undermine all the hard work that went into your orthodontic treatment.
This visual guide breaks down the core principles for cleaning any retainer, emphasizing the essential daily actions of rinsing and brushing that are critical for both removable and fixed types.

While the soaking step is for removable retainers, that rinse-and-brush mentality is exactly what you need to keep your fixed retainer in great shape.
Essential Tools for a Fixed Retainer
A standard toothbrush just isn't going to cut it here. To get a truly effective clean around that bonded wire, you'll need to add a few specialized tools to your bathroom counter. Think of them as the precision instruments you need to protect your smile.
-
Floss Threader: This simple gadget is a total game-changer. It's usually a small loop of flexible plastic that works like the eye of a needle, helping you guide a piece of floss underneath your fixed wire without any fuss.
-
Interproximal Brush: Sometimes called a "proxy brush," this tiny brush is designed specifically for tight spaces. It’s perfect for scrubbing between your teeth and all around the little pads of bonding material holding your wire in place.
-
Water Flosser: While it's not a direct replacement for traditional flossing, a water flosser is an amazing sidekick. It uses a targeted stream of water to blast away food bits and plaque from those tricky spots that are tough to reach.
Having these tools on hand turns what seems like a daunting task into a simple, straightforward part of your day.
Your Daily Cleaning Technique
Figuring out the best way to clean a fixed retainer takes a little practice, but it'll quickly become second nature. The goal is to be thorough but gentle, making sure you clean every tooth surface, the wire itself, and the all-important gumline.
First up, grab your floss threader. Pull about 18 inches of your favorite floss and thread a few inches through the loop. Carefully guide the stiff end of the threader under your bonded wire, pulling the floss all the way through.
Once the floss is in position, gently move it up and down along the side of each tooth. Be sure to curve it into a "C" shape to really hug the tooth's surface and dip just slightly below the gumline. Pull the floss out and repeat this for every single tooth connected by the retainer.
Next, it's the interproximal brush's turn. Use it to gently scrub the areas where the wire is bonded to your teeth and all along the wire itself. This little brush is great at dislodging any stubborn plaque your floss may have left behind.
Finally, you can finish up with a water flosser. Aim the stream of water directly at the wire and along your gumline to flush out any remaining debris. This last rinse leaves the area feeling exceptionally clean and is fantastic for preventing gum inflammation. It's a small extra step that makes a huge difference in your long-term gum health.
Comparing Commercial Cleaners And DIY Remedies
When it’s time to clean your retainer, you’re faced with a choice. Do you grab a dedicated, scientifically formulated cleaner, or can something from your kitchen pantry get the job done? It’s a classic debate: the specially made product versus the at-home DIY remedy.
The answer really matters, not just for keeping your retainer fresh, but for protecting the appliance you paid good money for.
On one hand, you have commercial retainer cleaners. These are usually tablets or foams made specifically for oral appliances. Their biggest selling point is a balanced, non-corrosive formula designed to kill germs and get rid of plaque without damaging the delicate materials your retainer is made from.
Then you have the DIY crew. Popular homebrew solutions often involve white vinegar, baking soda, or hydrogen peroxide. People love them because they're cheap and feel "natural," but they come with some serious hidden risks that can cause long-term damage.
The Hidden Dangers of DIY Retainer Cleaning
Using a household product to clean your retainer might feel like a clever life hack, but it can easily backfire. These substances simply weren't designed for oral appliances and can cause slow, irreversible harm.
Here’s a look at what can go wrong:
-
Vinegar: That high acidity is great for dissolving mineral buildup like tartar. Unfortunately, it's also strong enough to corrode the metal wires and solder joints on a Hawley retainer over time, which can weaken the whole appliance.
-
Baking Soda: While it's a fantastic cleaner, baking soda is abrasive. If you use it to scrub a clear plastic retainer, you're essentially creating thousands of microscopic scratches on the surface. This not only makes it look cloudy but gives bacteria countless new places to hide.
-
Hydrogen Peroxide: If you don't dilute it properly or use a concentration that's too high, hydrogen peroxide can discolor the pink acrylic part of a Hawley retainer. It can also potentially weaken the plastic itself over time.
The real problem with DIY methods is the lack of a balanced, controlled formula. A product made for wiping down a countertop just doesn’t have the same safety profile as one engineered for a medical device that sits in your mouth for hours every day.
Why Commercial Cleaners Are The Safer Bet
Specialized retainer cleaners give you peace of mind because they're made with one specific job in mind. They deliver a reliable, powerful clean without the guesswork or the risk of accidentally ruining your retainer.
These formulas are proven to eliminate up to 99.9% of odor-causing bacteria, dissolve stubborn plaque, and lift away stains—all without using harsh chemicals that could degrade the appliance. This targeted approach is the best way to ensure your retainer stays hygienic, crystal-clear, and fits just right.
For a closer look at what separates the good from the great, check out our in-depth retainer cleaner reviews to compare the top-rated options available.
Retainer Cleaner Comparison Commercial vs DIY Methods
When choosing between a commercial product and a home remedy, it helps to see a direct comparison. This table breaks down the key differences in effectiveness, safety, cost, and convenience.
| Cleaning Method | Effectiveness | Safety for Retainers | Convenience | Recommendation |
|---|---|---|---|---|
| Commercial Cleaners | High. Kills up to 99.9% of bacteria. Removes plaque and stains. | Excellent. Formulated to be non-corrosive and non-abrasive for all retainer types. | Very high. Simple drop-in-and-soak tablets or easy-to-use foams. | Highly Recommended. The safest and most effective option for long-term retainer health and durability. |
| Vinegar Solution | Moderate. Good for mineral buildup (tartar) but less effective on bacteria. | Poor. Acidity can corrode metal parts and may degrade some plastics over time. | Moderate. Requires mixing and has a strong odor that can linger. | Not Recommended. The risk of damage to Hawley retainers is too high. |
| Baking Soda Paste | Moderate. Can remove surface stains but is less effective against bacteria. | Poor. Its abrasive nature can scratch clear plastic retainers, making them cloudy. | Low. Abrasive scrubbing can be harsh and may not clean all crevices. | Not Recommended. Creates micro-scratches that harbor more bacteria. |
| Hydrogen Peroxide | Moderate. Kills some bacteria but must be heavily diluted. | Fair. Can discolor acrylic and potentially weaken plastic if the concentration is too high. | Moderate. Requires careful dilution to avoid damage. | Use with Caution. Only if heavily diluted, and commercial options are not available. |
Ultimately, while whipping up a DIY solution is tempting, the potential for causing permanent damage makes it a risky gamble. Sticking with a dedicated commercial cleaner is the smartest and most effective strategy for taking care of your retainer for years to come.
Solving Common Retainer Cleaning Problems
Even if you're diligent with your daily cleaning, you might still run into a few frustrating issues. Maybe it's those stubborn white spots that won't scrub off, or a yellowish tint that makes your clear retainer look anything but. Don't worry—these problems are incredibly common, and more importantly, they're completely fixable.
Figuring out what’s causing the issue is the first real step to getting your retainer back to its crystal-clear, fresh-smelling state. Let's walk through how to diagnose and solve the most frequent retainer headaches for good.
Tackling Stubborn White Spots
Ever noticed hard, chalky white spots clinging to the surface of your retainer? That’s not just dried spit. It’s calculus—the same stuff that forms on your teeth when plaque hardens and mineralizes. It loves to build up in areas where saliva pools, and it can be a real pain to remove with just a brush.
This buildup creates a rough, gritty surface that actually attracts more bacteria, making your retainer a pretty gross place for your mouth. If you’re seeing this, your simple daily brushing routine just isn't cutting it anymore.
-
Bring in a Specialized Soak: Effervescent cleaning tablets, like the ever-popular Retainer Brite, are designed with ingredients that specifically break down and dissolve these tough mineral deposits. A weekly soak for just 15-20 minutes can make a huge difference in dissolving existing calculus and stopping new spots from forming.
-
Go Ultrasonic: For really tough cases, nothing beats an ultrasonic cleaner. It uses high-frequency sound waves to create microscopic bubbles that blast away grime and calculus from every last nook and cranny. It's a fantastic little investment for keeping your retainer pristine long-term.
Getting Rid of Yellow Stains and Discoloration
Clear plastic retainers are notorious for picking up a yellowish, cloudy tinge over time. It's usually caused by a perfect storm of factors—pigmented foods and drinks, combined with inconsistent cleaning that lets a film of plaque settle in.
Honestly, preventing stains is way easier than removing them. The trick is to be mindful of what your retainer is exposed to and to clean it right after you take it out.
The golden rule for preventing yellowing is simple: never eat or drink anything other than plain water while wearing your retainer. Coffee, tea, soda, and red wine are the absolute worst offenders for staining clear plastic.
If you’ve already got some light staining, a good deep clean can often bring back some of its original clarity. Using cleaning tablets regularly helps lift those surface stains before they get a chance to become permanent.
Eliminating Persistent Bad Odors
A funky-smelling retainer is a dead giveaway that bacteria are having a party. When you don't clean your appliance thoroughly, bacteria feast on the trapped food particles and saliva, releasing some seriously unpleasant odors. Tossing a wet retainer into its sealed case is like rolling out the welcome mat for these smelly microbes.
The solution isn't to try and mask the smell with mouthwash, which can actually damage the plastic. You have to get to the root of the problem and eliminate the bacteria.
A strict daily and weekly cleaning schedule is your best defense. Daily brushing gets rid of the fresh plaque, while a weekly deep-soak kills the stubborn bacteria that your brush might miss. And here’s a pro tip: always let your retainer air dry completely before putting it in its case. A dry environment is a terrible place for bacteria to grow.
Your Top Retainer Cleaning Questions Answered
Even with a solid daily routine, questions always seem to pop up. You might find yourself wondering if you’re using the right products, or if one tiny mistake could end up damaging that pricey retainer. This section is all about clearing up that confusion.
Think of it as the final polish on your retainer care knowledge. Let’s get into the most common questions we hear so you can feel completely confident you're doing things right.
Can I Use Toothpaste on My Retainer?
This is probably the number one question we get, and the answer is a hard no. It seems to make sense—if it cleans your teeth, it should clean your retainer, right? Unfortunately, most toothpastes have abrasive ingredients designed to scrub tough enamel. These little particles will create microscopic scratches all over your retainer’s surface.
Those scratches cause a couple of big problems:
- They’ll make a clear plastic retainer look cloudy and dull pretty quickly.
- They create thousands of new hiding spots for bacteria and plaque, which ironically makes your retainer dirtier and harder to clean over time.
Instead, always reach for a soft-bristled brush and something non-abrasive, like a gentle dish soap or a dedicated retainer cleaning foam.
Is an Ultrasonic Cleaner Worth the Investment?
If you're serious about keeping your retainer in pristine condition, an ultrasonic cleaner can be a game-changer. These little devices use high-frequency sound waves to create tons of microscopic bubbles in water, a process called cavitation. Those bubbles implode, creating a gentle but powerful scrubbing action that blasts away plaque and tartar from every nook and cranny—places your brush just can’t reach.
Think of an ultrasonic cleaner as a professional-grade deep clean you can do right on your bathroom counter. It’s hands-down the best way to deal with stubborn buildup and keep your retainer looking brand new.
It’s not just a niche gadget, either. The market for ultrasonic retainer cleaners hit $280 million in North America alone, and it's projected to grow by 8.10% annually through 2032. That tells you a lot about how many people are seeing the value in professional-level care at home. You can find more details on this trend over at htfmarketinsights.com.
How Should I Clean My Retainer While Traveling?
Going on a trip doesn't mean you get a vacation from your retainer routine. The secret is simply to pack a small, dedicated kit so you’re always prepared.
Your travel kit should have a few key items:
- A hard retainer case. This is non-negotiable for keeping it safe from getting lost or crushed in your bag.
- A travel-sized soft toothbrush. Make sure it’s used only for your retainer.
- A small bottle of mild soap or a few retainer cleaning tablets. Tablets are perfect for a deep soak in a hotel room cup.
And please, never, ever wrap your retainer in a napkin! It’s the fastest route to accidentally tossing it in the trash. Sticking to your routine on the road is the best way to clean your retainer and stop gunk from building up.
What if My Retainer Still Smells After Cleaning?
If you’re cleaning your retainer but it still has a funky smell, that’s a sure sign that bacteria are still hanging around. It usually boils down to one of two things: you're not letting it dry completely before storing it, or your daily scrub isn't quite getting all the plaque off.
The fix is pretty straightforward. First, get serious about your weekly deep clean with a fizzing tablet to kill off any stubborn microbes. Second—and this is critical—always let your retainer air dry completely on a clean towel before popping it back in its case. Bacteria love moisture, so a dry environment is your best defense against bad odors.
At DentalHealth.com, we stock professional-grade products like Retainer Brite to make your cleaning routine simple and effective. Keep your smile protected by exploring our full range of oral appliance care solutions at https://dentalhealth.com.