

How to Use Whitening Pen: A Simple Guide for a Brighter Smile
Using a whitening pen couldn't be simpler, but there's a right way to do it. First, you'll want to brush and dry your teeth really well. Then, just twist the pen to get the gel flowing. From there, you just paint a thin, even layer right onto the teeth you can see when you smile, making sure to avoid your gums. Let it dry for the recommended time, and you're good to go—just hold off on eating or drinking for a bit.
Your Quick Guide to Using a Teeth Whitening Pen
Teeth whitening pens are a fantastic, convenient way to get a brighter smile without leaving your house. But the real secret to getting those great results comes down to your technique. It’s not just about slapping the gel on; it's a repeatable process that ensures the whitening agent gets maximum contact with your enamel.
The whole routine really breaks down into four key stages: getting your teeth ready, applying the gel, waiting for it to work, and the final aftercare.
Think of your teeth like a painter’s canvas. You need a clean, dry surface for the whitening agent—usually carbamide or hydrogen peroxide—to do its job effectively. Any leftover plaque or even just saliva can act as a barrier, which is a one-way ticket to splotchy, uneven results. This is exactly why that prep stage is so important.
The Core Process
From start to finish, the process is pretty straightforward. You kick things off by brushing, flossing, and then getting your teeth completely dry. Next comes the application, where you paint on a thin layer of gel from the pen.
After that, it's just a waiting game. You'll need to keep your lips pulled back away from your teeth so the gel can set properly. Finally, you just follow the product's aftercare instructions, which almost always means avoiding coffee, tea, or red wine for a little while.
Key Takeaway: The single most common mistake people make is applying the gel to wet teeth. Saliva instantly dilutes the peroxide, which dramatically weakens its whitening power and almost always leads to disappointing results. Always, always pat your teeth dry with a tissue right before you start.
To make things even easier to follow, I've put together a quick summary table. Think of it as your cheat sheet for getting the application right every time.
Whitening Pen Application At a Glance
Here’s a quick rundown of the essential steps for using your teeth whitening pen, from prep all the way through to aftercare.
| Stage | Action Required | Key Tip |
|---|---|---|
| Prep | Brush, floss, and dry teeth completely. | Use a clean tissue to pat each tooth dry. This really helps the gel stick properly. |
| Apply | Twist the pen and paint a thin gel layer on visible teeth. | A big, wide smile is your best friend here—it keeps your lips and gums from smudging the wet gel. |
| Wait | Allow the gel to dry for the time specified in the instructions. | Try not to talk, eat, or drink during this time. Just let the gel do its thing. |
| Aftercare | Avoid staining foods/drinks for at least an hour. | If the instructions say to rinse, wait a while before doing so. Don't rinse immediately after the time is up. |
Following this simple process will help you get the most out of your whitening pen and avoid the common pitfalls that can lead to a less-than-perfect smile.
Preparing Your Teeth for Maximum Whitening
Jumping straight into applying a whitening pen without any prep work is one of the most common reasons people get disappointing results. Think of your teeth as a canvas; you wouldn't paint on a dirty or wet surface and expect a masterpiece, right? The same logic applies here—proper preparation is non-negotiable if you want that brilliant, even smile.
This initial phase is all about making sure the whitening gel makes direct, uninterrupted contact with your tooth enamel. If you skip these steps, you're essentially applying a great product on top of barriers that block its effectiveness. That leads to splotchy outcomes and wasted effort.
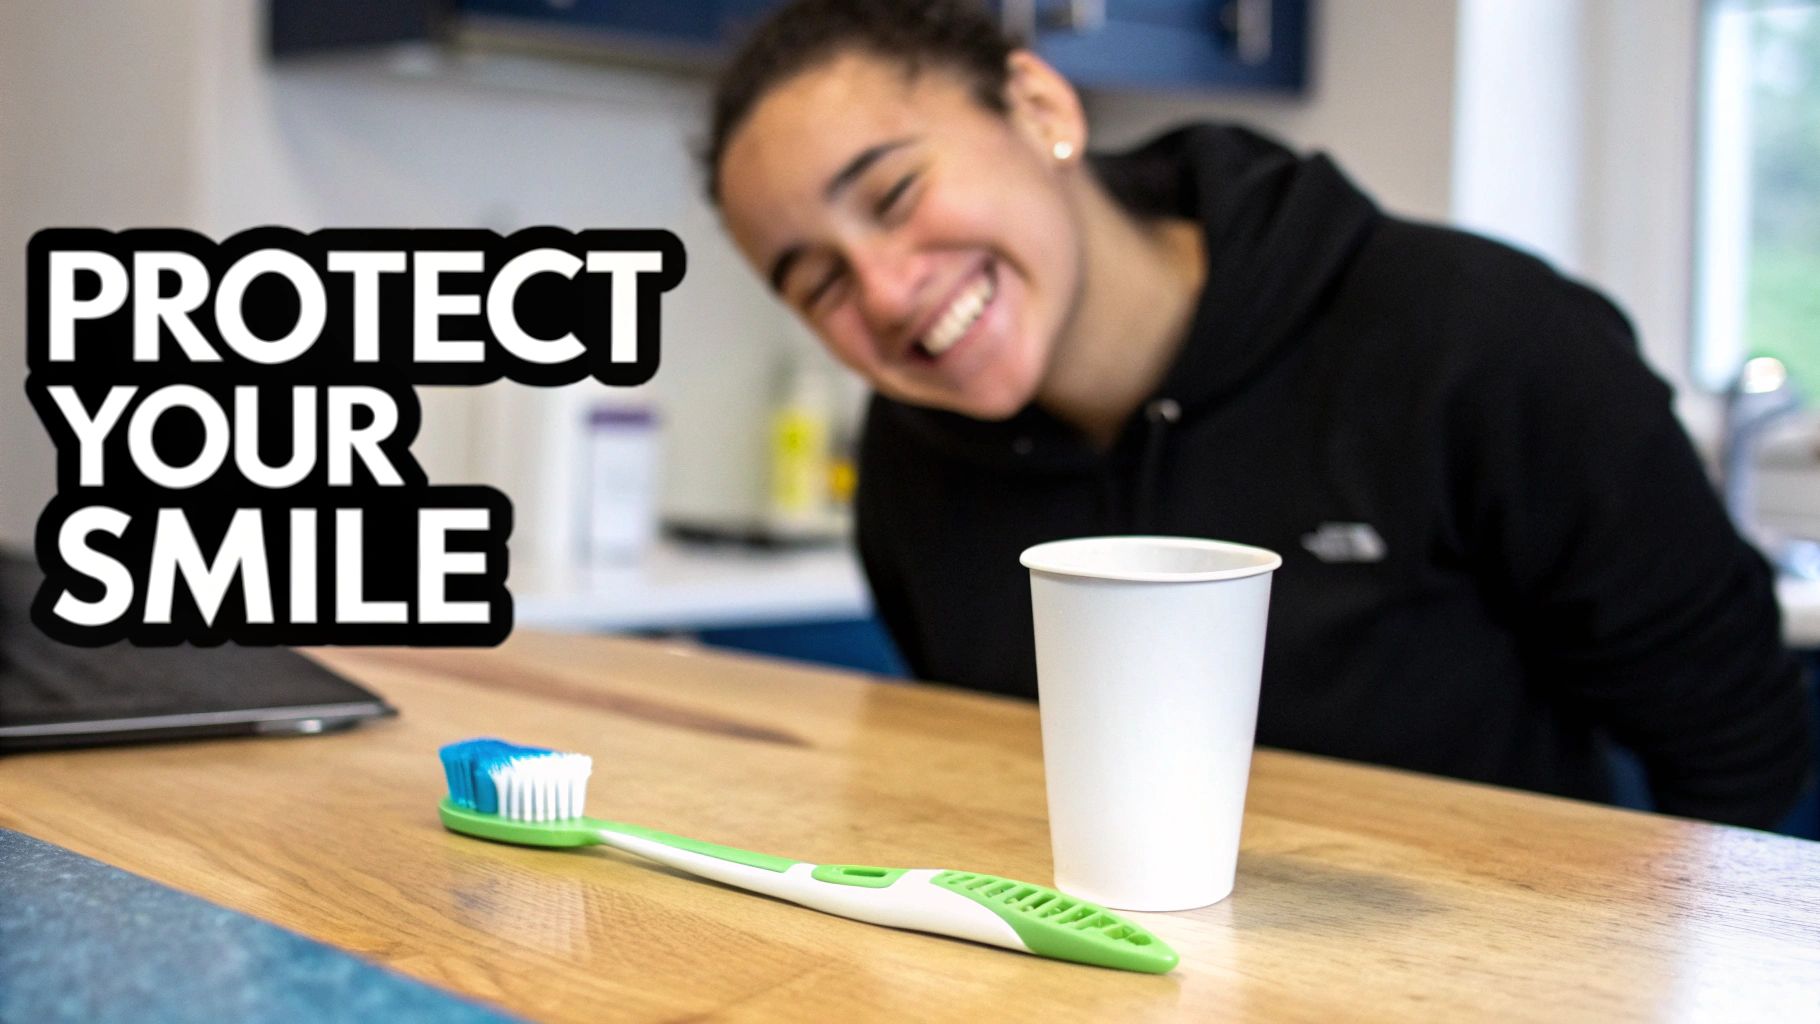
Start with a Completely Clean Slate
First thing's first: brush and floss thoroughly. This isn't just about fresh breath; it's about physically removing that invisible film of plaque and any food particles stuck to the surface of and between your teeth.
Plaque acts like a tiny shield, preventing the whitening agents—usually hydrogen or carbamide peroxide—from actually penetrating the enamel. Flossing is just as crucial because it clears out the gunk from the tight spaces between your teeth. This allows the gel to reach those often-overlooked areas, giving you a much more uniform finish.
To really nail this step, just follow this simple routine:
- Brush for a full two minutes, making sure to focus on the front surfaces of the teeth you're about to whiten.
- Floss carefully between each tooth to clear away any hidden debris.
- Rinse with plain water to wash away anything you've just dislodged.
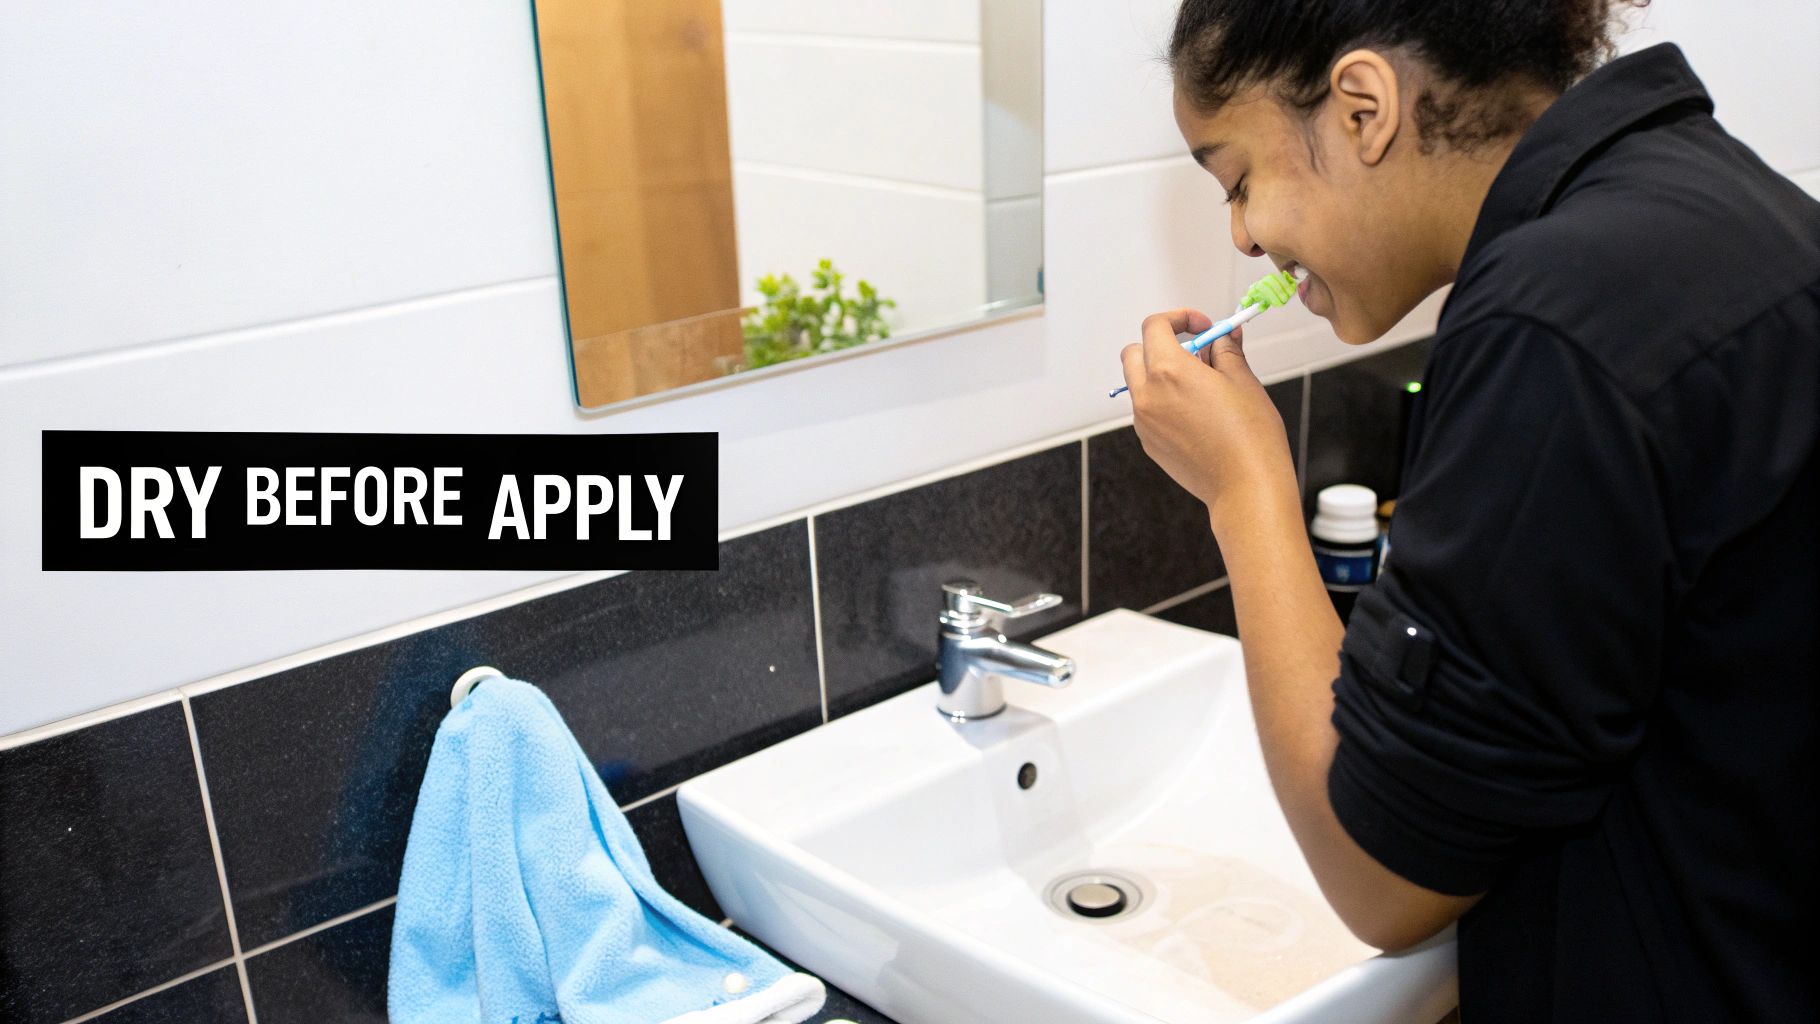
The Critical Step Everyone Skips
Once your teeth are sparkling clean, the next step is arguably the most critical—and the one most people overlook. You have to dry your teeth completely. Saliva is the natural enemy of teeth whitening gel. When the gel mixes with moisture, its active ingredients get diluted, which seriously weakens their whitening power.
This dilution is a huge reason for uneven or barely noticeable results. But taking just a few extra seconds to make sure each tooth is dry can make a world of difference.
Here's a simple but effective trick: use a clean, soft cloth or a paper towel to gently pat each tooth dry. Stand in front of a mirror and give a big, wide smile to pull your lips away from your teeth, then carefully blot the surface of each one. This creates the perfect dry environment for the gel to stick properly and work at full strength.
For those who want to go the extra mile in enamel care, you could also think about products that strengthen your teeth. For instance, after your whitening routine is done, you might be interested in learning about remineralizing agents like those found in MI Paste, which can help keep your teeth healthy in the long run.
By creating a clean and dry foundation, you're setting yourself up for a successful application. This prep work ensures every bit of the whitening gel is used to its maximum potential, paving the way for a brighter, more consistent smile.
Mastering the Application for Flawless Coverage
Alright, your teeth are prepped and ready—now for the main event. This is where your technique really makes or breaks your results. The goal here is pretty simple: get a thin, even coat of gel onto the front of your teeth without getting it all over your gums.
Think of it like painting a model. You need a steady hand and a clear view. Good lighting is absolutely non-negotiable, so get right in front of your bathroom mirror and make sure you can see everything clearly. This one small step is your best defense against missing spots or getting gel where it doesn't belong.
Dispensing and Applying the Gel
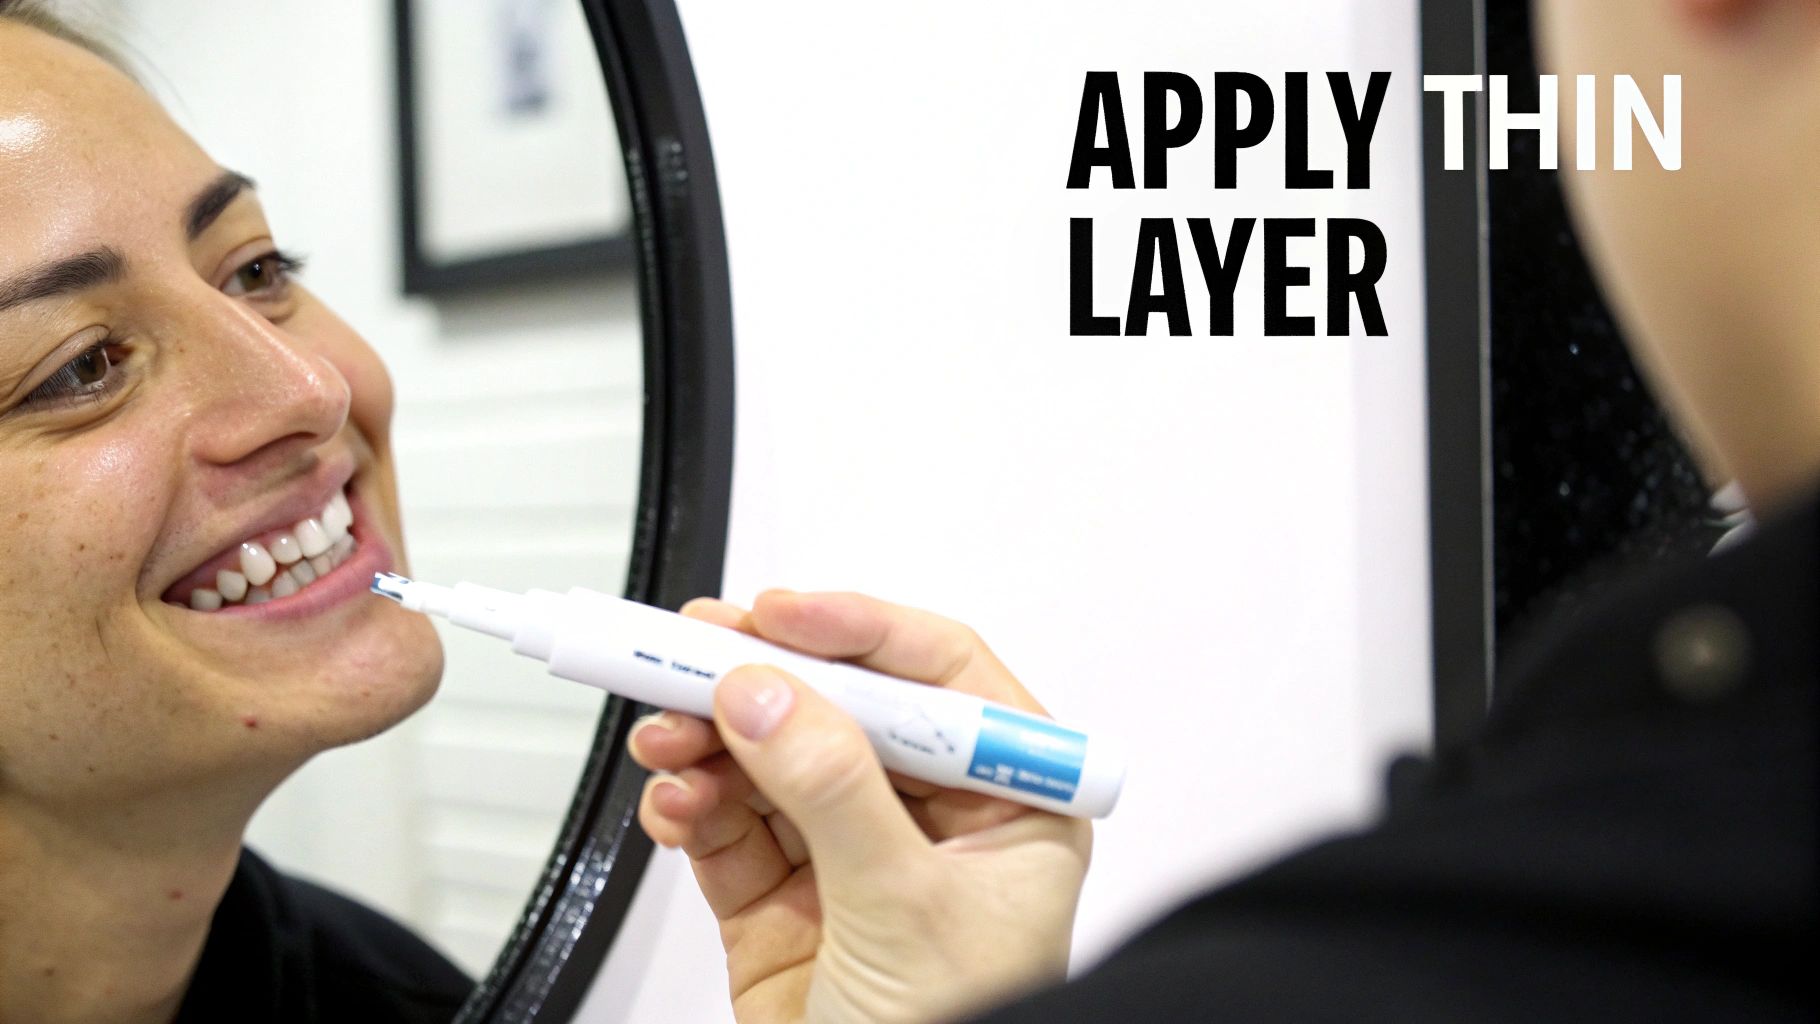
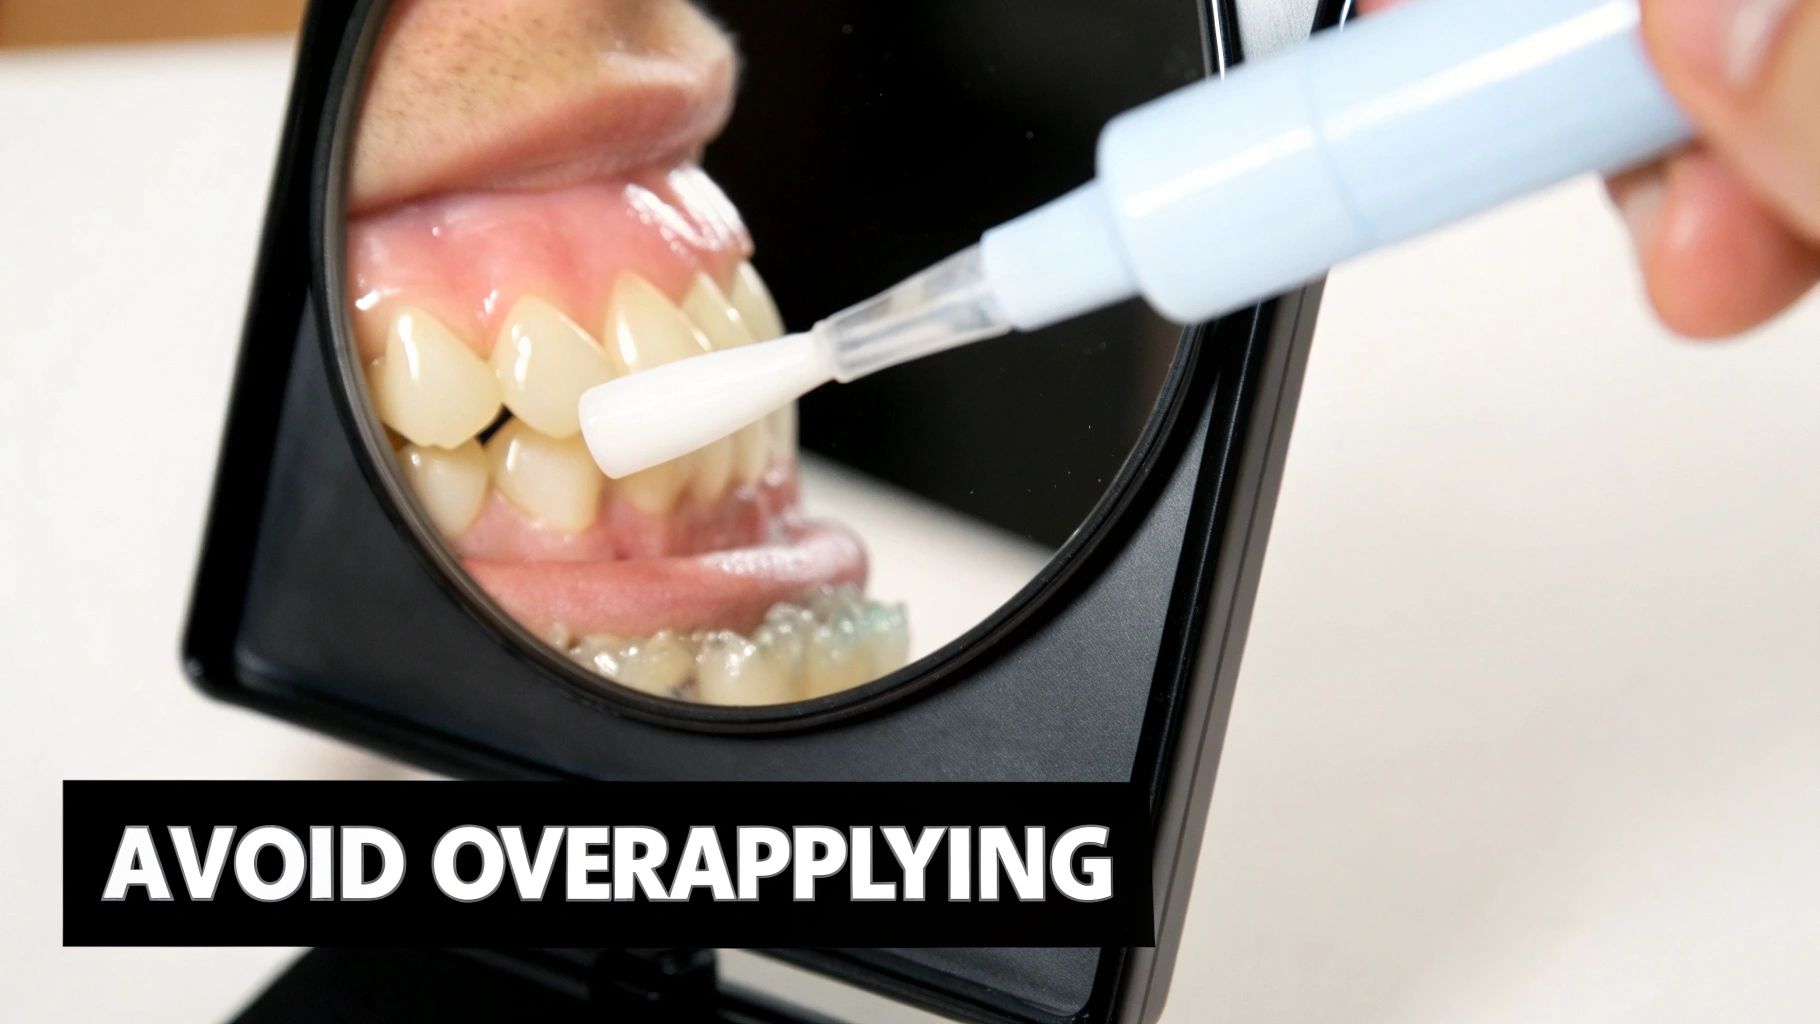
First things first, you have to get the hang of the pen itself. Most have a simple twist-up base. You'll want to twist it just enough to see a tiny bead of gel appear on the brush tip. Seriously, a little goes a long way. A common rookie mistake is to over-saturate the brush, which just wastes product and makes a mess on your gums.
Once the gel is on the brush, pull your lips back into a big, wide smile. I know it feels silly, but this is crucial for keeping your lips and cheeks from smudging the gel right after you apply it.
Now, start painting. Use light, even strokes to brush a very thin layer onto the front surface of each tooth you want to whiten. Don't scrub it in; just glide it on. You only need to focus on the teeth people actually see when you smile, which for most of us is the front eight to ten on both the top and bottom.
Key Application Techniques
To really nail this every time, keep these pointers in mind. They’re what separate a splotchy, amateur job from pro-level results.
- Thin Layers Are Better: Piling on a thick coat won't whiten your teeth faster. It just increases the risk of sensitivity. A thin, consistent layer is far more effective.
- Avoid Your Gums: The whitening agents are for tooth enamel, not your gums. Be precise and paint right up to the gum line, but not over it. If you slip, just wipe it off with a cotton swab right away.
- Work Methodically: Pick a side and work your way across. Do the top row, then the bottom (or vice-versa). This systematic approach ensures you don't accidentally skip a tooth.
A dental survey found that 68% of users saw noticeable results in just seven days with twice-daily use. But to get the most from a market expected to hit USD 2,350.78 million by 2032, you have to get the technique right. Give each tooth about 30 seconds of attention to ensure an even coat. You can check out the latest market trends to see just how popular these pens are becoming.
After the gel is on, the waiting game begins. You’ll need to hold that big smile for about 30-60 seconds. This gives the gel a chance to dry and form a thin film on your teeth so your saliva doesn't wash it all away.
Once that initial minute is up, you can relax your mouth. The total treatment time varies by brand but is usually somewhere between 10 and 30 minutes. During this window, do your best to avoid eating, drinking, or talking too much. You want to give the peroxide an uninterrupted chance to work its magic. Getting this focused application right is your ticket to a uniform, brilliantly white smile.
Protecting Your Results and Maintaining Your Smile
You've successfully used your whitening pen—that’s a fantastic start. But the real secret to keeping that bright smile isn't just the application; it's what you do right after.
Think of your enamel as being extra receptive immediately after a treatment. The whitening gel works by opening up microscopic pores in your teeth to lift stains out. For a short time, those pores stay open, making your teeth more susceptible to picking up new stains from the foods and drinks you consume.
The Golden Hour Rules
What you do immediately after applying the gel is critical. Because your enamel is so porous, it's like a dry sponge, ready to soak up any dark pigments it comes across.
This is why it’s smart to avoid certain foods and drinks that are notorious for staining. This isn't a permanent ban, of course. Just give your teeth a break for at least one to two hours after your treatment to protect your investment.
Here are the main culprits to steer clear of for a little while:
- Dark Beverages: Coffee, black tea, red wine, and colas are the big ones.
- Colorful Sauces: Think tomato sauce, soy sauce, and curry.
- Pigmented Fruits: Berries—especially blueberries and blackberries—can easily stain.
A good rule of thumb is: if it can stain a white shirt, it can stain your teeth right now. Your safest bet is to stick with water and light-colored foods.
Building a Sustainable Whitening Routine
Knowing how often to use your pen is the key to getting the shade you want without causing unnecessary sensitivity. This really depends on whether you're starting from scratch or just doing a touch-up.
For an initial whitening cycle, most brands will suggest using the pen once or twice a day for 7 to 14 consecutive days. This consistent use is what builds momentum and lifts those deeper, set-in stains.
Once you’re happy with the results, you can switch over to maintenance mode. This is way less frequent. A quick touch-up once or twice a week—or maybe after you have a glass of red wine—is usually all it takes to keep new stains from settling in.
Your long-term strategy isn’t just about whitening. It's about total oral health. Using products that support enamel strength is a really smart move. If you deal with sensitivity, a desensitizing toothpaste can make the whole process much more comfortable. Remineralizing pastes can also help replenish essential minerals, keeping your enamel strong and resilient.
This proactive approach does more than just make your results last longer. For a deeper dive, check out our guide on how to maintain white teeth. When you pair your whitening efforts with a solid oral hygiene routine, you’re not just getting a whiter smile—you’re getting a healthier one, too.
Common Mistakes to Avoid With Your Whitening Pen
 Even with the best intentions, it's surprisingly easy to make small mistakes that can undermine your whitening efforts. A whitening pen is a precise tool, but a few common slip-ups can lead to gum irritation, wasted product, and results that just don't wow you.
The good news? These errors are incredibly simple to fix once you know what to look for. By avoiding these missteps, you can make every application as effective and safe as possible, getting you that much closer to the brilliant smile you're after.
Over-Applying the Whitening Gel
More isn't always better, especially with whitening gel. It feels intuitive to slather on a thick layer for faster results, but that’s one of the quickest ways to wind up with irritated gums. It's a classic rookie mistake.
When excess gel oozes where it doesn’t belong, the active peroxide can cause temporary sensitivity or even a mild chemical burn on your gums, leaving behind white spots and discomfort. Beyond the irritation, you're literally just washing money down the drain. A thin, even layer is all you need for the peroxide to do its job.
To get it right, just remember this:
- Twist precisely: Only click the pen enough to see a tiny bead of gel emerge at the tip.
- Paint, don't glob: Gently brush on a sheer coat, almost like you're applying a single layer of nail polish.
- Clean up spills: If some gel does get on your gums, just wipe it off immediately with a cotton swab or tissue.
Skipping the Drying Step
This is probably the single most common mistake people make. Trying to put whitening gel on wet teeth is like painting a wet canvas—the formula just won't stick where you want it. Your own saliva is the natural enemy of teeth whitening agents.
Any moisture instantly dilutes the peroxide, significantly weakening its stain-lifting power before it even gets a chance to work. This simple error can turn a potent formula into an ineffective one, leading to patchy results and the frustrating feeling that the product isn't working at all.
Master the technique: After using a sensitivity toothpaste, dry teeth with a tissue—moisture dilutes gel by 30%. Dispense precisely; over-application wastes 20% of the product. For best outcomes, use nightly for 10 days, then maintain weekly—85% of users retain their results. Discover more insights about these teeth whitening market trends.
Using Your Pen Inconsistently
Finally, inconsistency will absolutely sabotage your progress. Using a pen sporadically—a few days here, a week off there—prevents the whitening agents from ever building momentum. Think about it: you're trying to lift stains that have set in over years. It’s a gradual process that requires consistent, repeated applications.
Sticking to the recommended routine, usually once or twice a day for one to two weeks, is non-negotiable for breaking down deep-seated discoloration. Think of it as a short-term sprint for a long-term reward. Once you finish that initial cycle, you can switch to a simple maintenance schedule, but that first push is what really delivers the results.
How to Manage and Prevent Tooth Sensitivity
Let's talk about one of the biggest concerns people have with teeth whitening: sensitivity. That little "zing" you might feel can definitely be uncomfortable. The good news is that it’s almost always temporary and completely manageable.
The first step to dealing with it is understanding why it happens. The whitening gel's active ingredients, like hydrogen or carbamide peroxide, work by gently opening up the microscopic pores, or tubules, in your enamel to lift away stains. This process can temporarily leave the nerve endings inside your teeth a bit more exposed, making them reactive to hot, cold, or even pressure.
Proactive Steps for a Pain-Free Experience
Honestly, the best way to handle sensitivity is to get ahead of it before it even starts. Your first line of defense is picking the right product. If you already know you have sensitive teeth, make a point to look for a whitening pen formulated with a lower concentration of peroxide. It might take a little longer to see dramatic results, but a gentler formula makes for a much more comfortable experience.
Another incredibly simple but effective trick is to adjust how often you use the pen. Instead of applying it every single day, try switching to every other day. Giving your teeth and gums that little bit of recovery time between treatments can make a world of difference in preventing irritation.
Expert Tip: Try not to kick off your whitening routine on the same day as a professional dental cleaning. That combination can be a bit much for your teeth. Give them a day or two to settle down before you start applying the whitening gel.
Soothing Your Smile During Treatment
What if you do start to feel some sensitivity creeping in? Don't panic. There are several things you can do right away to calm everything down so you can get back to your whitening journey.
Here are a few practical solutions that really work:
- Take a Break: If your teeth start talking to you, listen. Simply pause your whitening routine for a day or two. Often, that's all it takes for the sensitivity to fade away.
- Use a Desensitizing Toothpaste: For a week before you start whitening and during the treatment period, switch to a toothpaste made for sensitive teeth. Look for ingredients like potassium nitrate or stannous fluoride.
- Avoid Temperature Extremes: Right after you apply the gel, your teeth are at their most vulnerable. It’s a good time to skip the ice-cold water or that piping hot coffee. Stick with lukewarm or room-temperature food and drinks for a little while.
Strengthening your enamel is also a fantastic long-term strategy for keeping sensitivity at bay. For a much deeper dive into protecting your teeth, you can check out our complete guide on how to reduce teeth sensitivity after whitening. By taking a few of these simple precautions, you can get that brighter smile you want without any of the discomfort.
Got Questions About Your Whitening Pen? We've Got Answers.
Even after you've nailed down the application process, a few questions might still pop up. That's totally normal. Let's walk through some of the most common things people ask, so you can feel completely confident about getting that brighter smile.
How Often Should I Use My Whitening Pen?
One of the biggest questions is about timing and frequency. The best way to think about it is in two separate stages: the initial whitening push and the long-term maintenance.
For that first whitening cycle, most brands recommend applying the gel once or twice a day for a solid 7 to 14 days. This is the heavy-lifting phase where the consistent application works to lift those deeper, more stubborn stains. Once you've completed that, you switch over to maintenance mode. A simple touch-up just once or twice a week is usually all you need to keep your smile looking its best.
Can I Use a Whitening Pen with Dental Work?
This is a huge one, especially for anyone with braces, retainers, or aligners. The short answer is: it depends on what you have.
If you're rocking traditional metal or ceramic braces, you’ll need to hold off on using a whitening pen on those teeth. The gel simply can't get to the enamel hidden under the brackets, and if you whiten around them, you'll end up with uneven, splotchy spots when they finally come off.
For those with removable gear like aligners or retainers, you have more flexibility.
- Removable Retainers: Always, always take them out before you apply the whitening gel. Go through the full treatment time, rinse your mouth if the directions say to, and only then should you pop your retainer back in.
- Clear Aligners (like Invisalign): Some whitening gels are actually formulated to be used inside your aligner trays, turning your treatment time into whitening time. But this isn't a universal rule, so you absolutely must check the product’s instructions first before you try it.
What Kind of Results Can I Realistically Expect?
Okay, let's talk results. When will you actually see a difference? The honest answer is that it varies from person to person. It really depends on where you're starting from, what kind of stains you have (coffee is different from general yellowing), and the specific strength of the whitening gel you're using.
Some people get a little boost in brightness after just a couple of applications. But for a really noticeable shift in shade, you'll typically see a difference after about one week of consistent, daily use. To get the absolute best results possible, you'll want to finish the full recommended cycle, which can be up to 14 days.
Don't forget that your daily habits make a big impact, too. If you’re a big fan of coffee, red wine, or tea, your results might take a little longer to show up. You may also need more frequent touch-ups to keep stains at bay. Patience and consistency are truly your best friends on the path to a brilliant smile.
Ready to achieve a brighter, more confident smile with professional-grade products? DentalHealth.com offers a curated selection of dentist-recommended whitening pens and other oral care essentials. Find the perfect solution for your smile at https://dentalhealth.com and enjoy fast, free shipping on all USA orders.