

How to Whiten Teeth Safely at Home: Quick Tips
Before you even think about whitening, you need to lay the right groundwork. This is non-negotiable for getting the safe, effective results you're after. Think of it as a pre-flight check for your smile—it's the roadmap to a successful and comfortable experience.
Your Pre-Whitening Safety Checklist

Before you unbox a single whitening product, your first and most important step is to see your dentist. I can't stress this enough; it's a critical safety measure. Whitening gels can cause some serious pain if they get into areas with untreated dental issues.
A quick check-up is designed to spot potential roadblocks before they become painful problems.
- Undiagnosed Cavities: Applying bleaching agents over tooth decay is a recipe for a world of hurt. The gel can seep into the sensitive, inner layers of the tooth and cause sharp, intense pain.
- Gum Inflammation or Gingivitis: If your gums are already irritated, that powerful whitening gel will only make things worse. This can lead to significant discomfort and even damage your gum tissue.
- Cracked or Leaking Fillings: Any weak points in your dental work create an express lane for whitening agents to get deep inside the tooth, right where the nerve lives.
What About Existing Dental Work?
One of the biggest surprises people run into with at-home whitening is finding out their dental work doesn't change color. Whitening agents are only designed to work on natural tooth enamel.
This means any crowns, veneers, bonding, or fillings on your front teeth simply will not whiten. If you proceed, you could easily end up with a mismatched smile where your natural teeth are shades brighter than your dental work. Your dentist can help you plan around this to make sure your final result is beautifully uniform.
The focus on safety has completely reshaped the whitening industry. An incredible 35.22 million Americans are using these products, fueling a global market valued between USD 7.3-8.5 billion. This demand has pushed companies to innovate, leading to gentler options like carbamide peroxide gels, which have helped slash sensitivity complaints by 35% since 2020. You can learn more about this shift toward safer options over at bajarsdental.com.
Key Takeaway: A pre-whitening dental visit isn't just a suggestion—it's essential. It’s the only way to be sure your teeth and gums are healthy enough for treatment and to avoid the disappointment of an uneven result.
Understanding Your Whitening Agent
Once your dentist gives you the all-clear, it's time to get familiar with what's actually in the whitening gel. Most professional-grade kits use one of two active ingredients: hydrogen peroxide or carbamide peroxide. They both break down stains, but they go about it in very different ways.
Choosing Your Whitening Agent Carbamide vs Hydrogen Peroxide
Choosing the right whitening agent for your needs is a crucial step. This quick comparison table breaks down the key differences between Carbamide Peroxide and Hydrogen Peroxide, focusing on speed, sensitivity, and typical wear time.
| Feature | Carbamide Peroxide | Hydrogen Peroxide |
|---|---|---|
| Speed of Action | Slower, gradual release. Releases 50% of its power in the first 2 hours and can work for up to 6 hours. | Fast-acting. Releases most of its whitening power within 30-60 minutes. |
| Sensitivity | Generally gentler on teeth and gums due to its slower breakdown. A better choice for sensitive users. | Can be more likely to cause sensitivity due to its rapid, intense action. |
| Wear Time | Ideal for longer wear times, including overnight treatments. | Best suited for shorter, more intensive sessions (e.g., 30-minute treatments). |
| Best For | People with sensitive teeth, those who prefer overnight whitening, or anyone looking for a more gradual result. | Individuals looking for quick results who don't typically experience tooth sensitivity. |
The main takeaway here is that Carbamide Peroxide is often the go-to for at-home kits because its slower, more stable action is much gentler on teeth, reducing the risk of that dreaded sensitivity "zing." Knowing the difference is fundamental to picking a product that fits your lifestyle and comfort level.
Selecting The Right At-Home Whitening Kit
Once you've got the green light from your dentist, it's time for the fun part: picking out your whitening tools. The at-home market isn't just basic drugstore strips anymore; it's packed with powerful, professional-grade options that can deliver some seriously impressive results. The trick is knowing how to find a kit that actually fits your needs, your lifestyle, and what you're trying to achieve.
When you're browsing at-home whitening kits, you're really looking at three main things: the whitening trays, the strength of the gel, and any bonus tech like LED lights. Each piece of that puzzle is vital to your final result. Making the right choice here is probably the most important part of whitening your teeth safely and getting the look you want from the comfort of your couch.
Decoding Gel Concentrations
That little percentage on the whitening gel syringe? It’s not just a random number. It tells you exactly how strong the gel is and, more importantly, how you’re supposed to use it. Most gels you'll find fall somewhere between a gentle 10% carbamide peroxide and a much more potent 35% concentration.
I like to compare it to picking a workout. A lower concentration is your steady, long-distance run—it's gentle, sustainable, and perfect if you're new to this or have sensitive teeth. A higher concentration is like a HIIT session—it's fast, intense, and designed to get you quick results for a big event.
Here's how that works in the real world:
- If You Have Sensitive Teeth: Start low and go slow. A 10-16% carbamide peroxide gel is your safest bet. These formulas release peroxide slowly, so they're often designed for longer wear times—some you can even wear overnight without issue.
- If You Need Fast Results: Got a wedding or a reunion coming up? If your teeth aren't usually sensitive, a 22-35% carbamide peroxide gel can create a dramatic shift in a short amount of time. You'll wear these for much shorter sessions, typically just 15-60 minutes.
Pro Tip: Don't fall into the trap of thinking a higher percentage is always better. Using a gel that's too strong for your teeth can cause some major-league sensitivity and gum irritation, forcing you to stop altogether. It's always smarter to start with a lower strength and see how you feel.
Choosing Your Whitening Trays
The tray—the thing that holds the gel against your teeth—is just as important as the gel itself. A poorly fitting tray is a recipe for disaster. It lets the gel ooze out onto your gums, which can cause irritation, and it won't give you that nice, even coverage you need for a consistent result.
For quality at-home kits, you've really got two main options.
Custom-Fitted Trays From Your Dentist
These are, without a doubt, the gold standard. Your dentist makes a mold of your teeth to create trays that hug every single contour of your smile. That perfect, snug fit keeps the gel exactly where it needs to be and, just as importantly, away from your gums.
Thermoforming Trays
You might know these as "boil-and-bite" trays, and they are a fantastic, budget-friendly alternative. You just heat the tray in warm water, pop it in your mouth, and bite down to create a custom-ish impression. While they're not quite as precise as the ones from your dentist, a well-made thermoforming tray is worlds better than any generic, one-size-fits-all option.
The Role Of LED Light Technology
Lots of modern whitening kits come with a blue LED light device. The idea is that the light helps to kickstart the chemical reaction in the whitening gel, which can speed up the whole process. This kind of innovation is a big reason the professional whitening market has exploded.
In fact, professional gels and kits currently make up 62% of the USD 2.69 billion professional market. That whole sector is expected to jump to USD 3.74 billion by 2030, and a huge part of that growth is thanks to advancements like LED-activated hydrogen peroxide that can slash treatment times by up to 60%. You can dive deeper into these trends over at Dentistry Today.
By thinking through the gel strength, tray type, and technology, you can put together a whitening plan that feels truly personalized. This thoughtful approach is the key to getting that bright smile you're after without sacrificing safety or comfort. And if you'd like a little help narrowing down the choices, you can check out our guide to the best teeth whitening products for some dentist-approved recommendations.
Mastering The Application For Flawless Results
Having the right whitening kit is only half the battle. Your application technique is what truly makes the difference between so-so results and a stunning, even, brilliant smile. This is where we get into the nitty-gritty of getting professional-level outcomes right at home, focusing on how to do it safely and sidestep common issues like gum irritation.
First things first: always start with a clean slate. Brush and floss thoroughly right before you plan to whiten. This clears away any plaque or food particles, ensuring the gel makes direct, even contact with your enamel. It’s a simple step, but it’s crucial for the best possible outcome.
This visual guide breaks down the key components of a typical at-home whitening system, helping you see how the trays, gels, and optional lights work together.
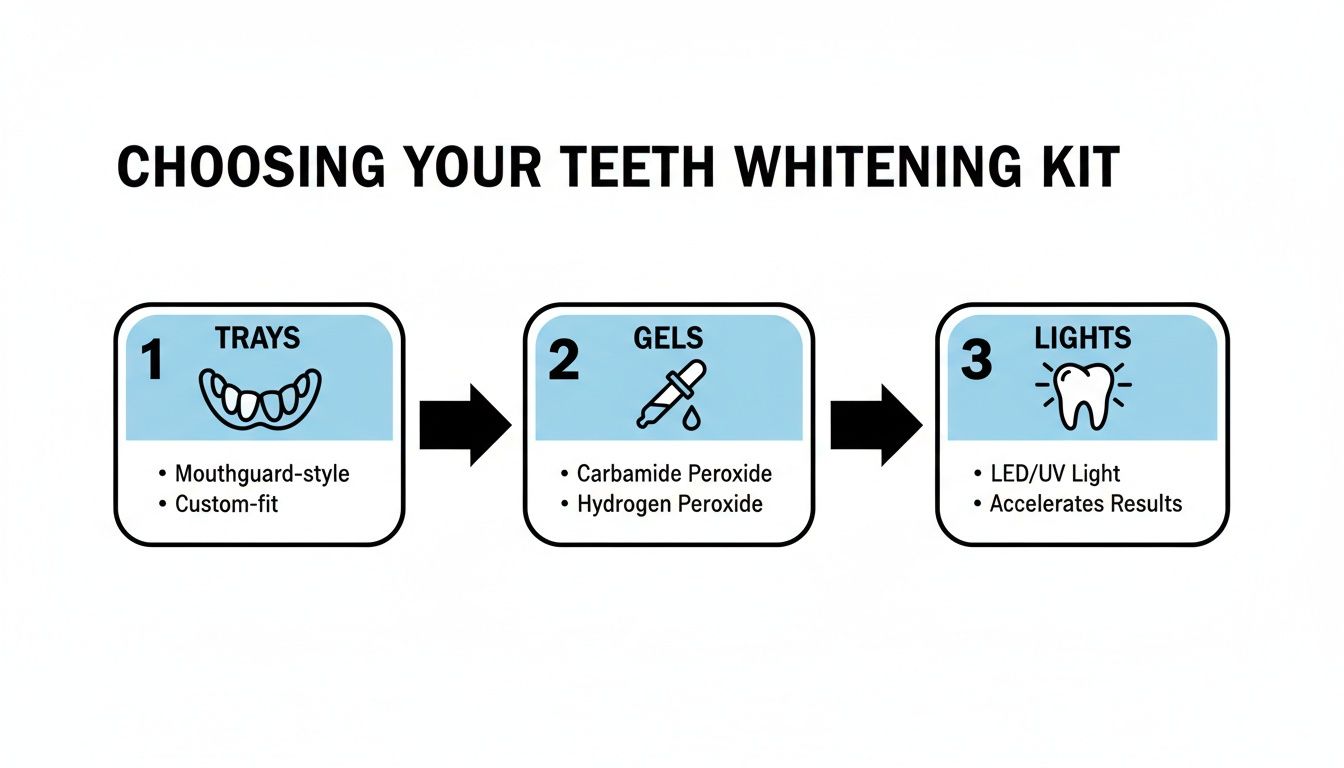
As you can see, every element—from how well the tray fits to the strength of the gel—plays a specific role in getting you a bright smile safely and effectively.
The Most Common Application Mistake
If there's one mistake people make over and over again, it's using way too much gel. I get it; it seems logical that more gel would mean faster, better whitening. But the exact opposite is true.
Overfilling your trays is the number one cause of sensitivity and gum irritation. All that excess gel has nowhere to go but out, oozing onto your delicate gum tissue. Your teeth only need a very thin, consistent layer to work their magic. Anything more is just wasted product that creates unnecessary risk.
Perfecting The Teardrop Placement Method
To nail the application every time, you’ll want to use what’s known as the "teardrop" or "dot" method. This technique gives you just enough gel for full coverage without the messy, uncomfortable overflow.
Here’s exactly how to do it:
- Dry Your Trays: First, make sure the inside of your trays is completely dry. This helps the gel stay put.
- Dispense Small Dots: Squeeze a single, small teardrop-sized dot of gel onto the inner front surface of each tooth impression in the tray.
- Focus on the Smile Line: You only need to apply gel where it will touch the front of your teeth—the ones people actually see when you smile. Don’t waste gel on the backs of your teeth.
When done right, this method uses only about 0.25 to 0.5 mL of gel per tray. That means a single syringe should easily last you for several applications.
A simple rule to live by: A little gel goes a long way. The goal is to have just enough to cover the tooth surface when the tray is seated, not so much that it spills onto your gums. If you see gel oozing out, you’ve used too much.
Proper Tray Seating And Timing
With your trays carefully loaded, it's time for placement. Seat the tray firmly but gently over your teeth. You can press lightly with your fingers to help adapt the tray snugly against your teeth.
If a little gel does happen to squeeze out onto your gums (it happens!), immediately wipe it away with a cotton swab, a tissue, or even your finger. Don't let it sit there.
Now for the most important part: timing. This is absolutely critical. Never, ever assume that leaving the gel on longer will fast-track your results. All it will do is increase your risk of sensitivity and irritation.
- High-Concentration Gels (22% and up): These are powerful and designed for short-wear sessions. Follow the instructions to the letter, which is often somewhere between 15 to 60 minutes.
- Low-Concentration Gels (10-16%): These are formulated for longer wear, sometimes for a few hours or even overnight. But you must always confirm the manufacturer's recommendation first.
Do yourself a favor and set a timer on your phone. It’s too easy to get distracted and forget. Going over the recommended time is the fastest way to trigger discomfort.
Post-Treatment Cleanup And Care
Once your time is up, the cleanup is straightforward but important.
- Take out the trays and immediately rinse your mouth with lukewarm water.
- Gently brush your teeth to get rid of any leftover gel.
- Clean your whitening trays really well with a toothbrush and cool water. Using hot water is a big no-no, as it can warp and ruin thermoforming trays.
- Pop your clean, dry trays back into their protective case to keep them safe and hygienic for your next session.
By mastering this application process, you take complete control over your whitening journey, ensuring every session is not just effective, but also perfectly comfortable and safe.
How To Manage And Prevent Tooth Sensitivity
That sharp, sudden "zing" is the number one reason people give up on whitening. But what if I told you that sensitivity usually isn't a sign of damage? More often than not, it's just a temporary—and totally manageable—side effect.
When whitening gels get to work, they temporarily open up the microscopic tubules in your enamel. This can cause a brief period of dehydration in the tooth's inner layer (the dentin), which is what triggers that sensitive feeling. The good news is this is almost always a short-term thing, and with the right strategy, you can often prevent it entirely.
Start With A Desensitizing Toothpaste
One of the smartest things you can do is get ahead of the game. Start using a desensitizing toothpaste one to two weeks before you even open your whitening kit. Look for active ingredients like potassium nitrate or stannous fluoride on the label.
These ingredients work in one of two ways: they either calm the tooth's nerve directly or they block those tiny tubules, creating a shield against sensitivity. This simple, proactive step makes a world of difference. Keep using it throughout your whitening treatment for the best results.
The demand for comfortable, at-home whitening solutions has driven the global market to an incredible USD 8.93 billion. And it makes sense—while older, harsher bleaches can cause sensitivity in over 80% of users, modern professional-grade carbamide peroxide gels can cut that risk by as much as 50% when used correctly. You can see more on this trend over at Fortune Business Insights.
Adjust Your Whitening Schedule
Your whitening routine should work for you, not the other way around. If you start to feel any twinges of discomfort, the first thing to do is adjust your schedule. This gives your teeth the time they need to rehydrate and recover between sessions, which often solves the problem completely.
Try one of these simple tweaks:
- Switch to Every Other Day: Instead of daily applications, give your teeth a 24-hour break. This is often all it takes to keep sensitivity from starting.
- Shorten Your Wear Time: If the instructions say 60 minutes, try cutting back to 30 or 45. You'll still see fantastic results, just a bit more gradually and much more comfortably.
- Take a Longer Break: If the sensitivity is more noticeable, don't hesitate to take a two or three-day break. You can always pick up right where you left off once your teeth feel normal again.
Expert Tip: Never try to "push through the pain." Sensitivity is your body’s way of telling you to ease up. Listening to that signal is the key to completing your treatment successfully and without any discomfort.
Use Adjunctive Products For Immediate Relief
Sometimes, especially right after a treatment, you might want a little extra support. This is where specialized adjunctive products come into play. They’re designed to give you fast-acting relief while also helping to strengthen your enamel.
Here are two great options to have on hand:
- Remineralizing Pastes: Products like MI Paste are packed with bio-available calcium and phosphate—the literal building blocks of your enamel. Applying a small dab to your teeth after whitening helps replenish minerals and calm sensitivity.
- Fluoride Rinses: Using a standard over-the-counter fluoride rinse after you’ve cleaned out your trays can help fortify your enamel, making it more resilient.
Think of these as the "cool-down" part of your whitening workout. They soothe, protect, and strengthen your teeth. If you want to dive deeper, check out our complete guide on how to reduce teeth sensitivity after whitening.
Choose a Lower Concentration Gel
If you've already tried adjusting your schedule and are still feeling sensitive, the solution might be as simple as using a lower-strength gel. A 10% or 16% carbamide peroxide formula is designed to be much gentler on teeth while still delivering excellent results.
Sure, it might take a few more applications to reach your ideal shade, but the trade-off for a completely comfortable and pain-free experience is absolutely worth it. Safe, successful whitening is a marathon, not a sprint. By mixing these proactive and reactive strategies, you can take full control of your comfort and get that bright, confident smile without the wince.
Maintaining Your Bright Smile For The Long Haul

So, you’ve hit your goal shade and your smile is looking incredible. That’s fantastic! Now for the most important part—making that beautiful result stick around for as long as possible. The habits you build from this point forward will directly determine how long you get to enjoy that brighter, more confident smile.
Think of your newly whitened teeth like a freshly painted wall. For a little while, they are far more susceptible to picking up new stains. This happens because the whitening process makes your enamel temporarily more porous, so it’s crucial to be extra vigilant right after you finish your treatment.
The Critical First 48 Hours
The two days immediately following your whitening cycle are the most pivotal for long-term success. During this window, your teeth are like sponges, ready to absorb pigments from foods and drinks. This can undo your hard work in a flash. The best strategy here is what's often called the "white diet."
It’s simpler than it sounds: just avoid anything that would stain a white t-shirt. The usual suspects include:
- Dark Beverages: Coffee, tea, red wine, colas, and colorful fruit juices are definite no-gos.
- Staining Foods: Think berries, beets, tomato sauce, soy sauce, and even dark chocolate.
- Highly Pigmented Spices: Turmeric, curry powder, and paprika can instantly stain your porous enamel.
While it might feel a bit restrictive, sticking to this plan for just 48 hours is the final, essential step of the whitening process. It gives your enamel time to remineralize and creates a barrier against future stains.
Building Sustainable Habits For Lasting Whiteness
Once you're past that initial 48-hour window, you can start bringing your favorite foods and drinks back into the rotation—but with a few smart adjustments. The goal isn’t to give up coffee or pasta forever; it's about minimizing their contact with your front teeth to keep your smile looking its best.
Small, consistent habits truly make the biggest difference. For instance, using a straw when you drink iced coffee, tea, or soda is an incredibly simple but effective trick. It lets the liquid bypass your front teeth, dramatically cutting down their exposure to staining agents.
Another great habit to get into is rinsing your mouth with plain water right after you eat or drink something dark. A quick swish is all it takes to wash away the staining compounds before they have a chance to settle in. You don’t need mouthwash every time; water works perfectly.
Key Insight: Long-term whitening success isn't about being perfect; it's about being consistent. Integrating small, protective habits into your daily routine is far more effective than trying to avoid every single staining food forever.
Planning Smart Touch-Up Sessions
Even with the best maintenance plan, your teeth will naturally start to pick up new stains over time. This is completely normal and expected. The trick to keeping your smile consistently bright is to plan for occasional touch-up sessions, rather than waiting until you’re unhappy with the shade again.
A touch-up is not a full-blown whitening treatment. It’s a much shorter, targeted effort to lift fresh surface stains that have accumulated. For most people, a quick touch-up every 4-6 months is all it takes to maintain that ideal brightness.
This usually just means one or two applications of your whitening gel, not the full week-long (or more) regimen you started with. This proactive approach is not only more efficient but also minimizes the risk of sensitivity that can come with over-whitening. For a deeper dive into what to expect, our article on how long teeth whitening lasts offers more detailed timelines.
By staying on top of your maintenance and being strategic with touch-ups, you can ensure your investment in a brighter smile pays off for a long, long time.
Common Questions About Whitening Teeth Safely
When you start looking into at-home teeth whitening, a few questions always seem to pop up. Even if you have a solid plan, you might wonder how long your brighter smile will actually last or what will happen to the fillings or crowns you already have. Let's walk through some of the most common questions I hear, so you can feel completely confident.
Getting clear, straightforward answers helps you set realistic expectations and make the safest choices for your unique smile. It’s all about making sure your journey to whiter teeth is smooth and successful.
How Long Do At-Home Whitening Results Actually Last?
This is probably the number one question, and the honest answer is: it depends. The lifespan of your whitening results can be anywhere from six months to a couple of years, but it's almost entirely down to your daily habits.
Think of your freshly whitened teeth like a clean white shirt. If you constantly expose it to things that stain, the color is going to change back much faster.
The biggest culprits that shorten the life of your results are:
- Dark beverages like your daily coffee, black tea, or that glass of red wine.
- Staining foods, especially things like berries, tomato sauce, and soy sauce.
- Tobacco use, which is one of the fastest ways to bring back yellow or brown stains.
To keep your smile bright for as long as possible, you have to be proactive. Little things, like using a straw for dark drinks, make a huge difference. Planning a quick touch-up session every four to six months is also a great way to maintain your ideal shade without starting from square one.
Key Takeaway: Your lifestyle habits are the single biggest factor in how long your whitening results last. A little maintenance goes a long way and is much easier than doing the whole process over again every year.
Can I Whiten Teeth With Crowns, Veneers, or Fillings?
This is a critical point that can save you from a lot of disappointment. The short answer is no. Whitening gels are designed to work only on natural tooth enamel. The peroxide agents in them are fantastic at breaking down stains within your enamel, but they have zero effect on porcelain, resin, or other dental materials.
This means any crowns, veneers, bonding, or fillings will stay the exact same color while your natural teeth around them get whiter. This can create a mismatched, two-tone look that actually draws more attention to your dental work—probably not the result you're hoping for.
If you have restorations on your front teeth, it’s a really good idea to chat with your dentist before starting any whitening. They can help you map out a plan. Often, the best approach is to whiten your natural teeth to your desired shade first, and then have your dentist replace the old restorations to match.
Are High-Concentration Gels Safe to Use At Home?
They absolutely can be safe, but only if you use them exactly as directed. These stronger formulas, often containing 22% carbamide peroxide or more, are made for quick, powerful sessions—sometimes as short as 15 to 30 minutes. The biggest risk here isn’t the gel itself; it’s user error.
Leaving a high-strength gel on for longer than recommended is the quickest route to major tooth sensitivity and gum irritation. That active peroxide can dehydrate the tooth’s inner layers if it’s left on too long, leading to some pretty serious discomfort.
My advice is always to start low and go slow. If you're new to whitening or you already know your teeth are on the sensitive side, beginning with a lower concentration (10-16% carbamide peroxide) is a much smarter move. You can still get fantastic results, just more gradually and without the painful side effects. Safety should always come first.
Ready to find the perfect, professional-grade whitening solution for your smile? At DentalHealth.com, we stock a wide range of dentist-recommended brands like Opalescence, PolaNight, and Zoom, with options for every sensitivity level and goal. Shop our complete collection of at-home teeth whitening kits and gels today!