
Whitening Kit Gel Guide: Types, Strength and Safe Use
You're standing in front of a bathroom mirror, or scrolling late at night, comparing two syringes that look almost identical except for the numbers on the front. One says 10%, the other says 35%, and both promise a brighter smile. It's tempting to pick the bigger number and hope for the best.
That number won't tell you what you need on its own. Whitening kit gel comes in two main peroxide families, those families don't convert one to one, and the right choice also depends on your trays, your sensitivity, and whether you have crowns or fillings that won't change color at all. Once you can read the label properly, the decision gets much simpler and much safer.
Whitening Kit Gel Types and Concentrations at a Glance
Whitening kit gel is based on carbamide peroxide or hydrogen peroxide, and the concentration sets both how intense the bleaching feels and how long you wear the tray. That's the whole starting point. Strength and time work as a pair, so you can't judge a gel by percentage alone without asking how long it's meant to stay on your teeth.
A weaker bag left in the cup longer can end up in a similar place to a stronger bag pulled out quickly, much like steeping tea. With whitening, lower concentrations are commonly used for longer wear, while higher concentrations are generally used for shorter sessions.
The Lookup Table
Use this table to find the row that matches your stain level, your schedule, and whether you're whitening at home or under supervision. There are no brand names here on purpose, because the peroxide type and strength matter more than the logo.
| Gel Type | Strength | Typical Wear Time | Best For |
|---|---|---|---|
| Carbamide peroxide, entry level | 10% | 2 to 10 hours daily for 6 to 28 days | First-time whitening, mild stains |
| Carbamide peroxide, mid range | 15% to 22% | Shorter daily sessions or overnight wear | Moderate staining, faster visible change |
| Carbamide peroxide, high strength | 30% to 38% | Short supervised sessions | Stubborn stains under dentist guidance |
| Hydrogen peroxide, home use | 3% to 6% | Short daily sessions | Light maintenance whitening |
| Hydrogen peroxide, in-office | Up to 35% | Single supervised appointment | Fast results with professional oversight |
The American Dental Association whitening guidance reports that peroxide concentrations in at-home systems typically range from 10% to 38% carbamide peroxide. A systematic review cited there found daily treatment periods ranging from 2 to 10 hours, continued for 6 to 28 days. That pattern tells you something important: kits rely on repeated exposure over days, not one heroic application.
Why Carbamide Peroxide Suits Trays
Carbamide peroxide gradually breaks down into hydrogen peroxide and urea. Because that breakdown is slow, the bleaching effect releases over time instead of arriving all at once. That's why it suits extended wear in tray based systems, including overnight use when the label allows it.
Hydrogen peroxide works more directly. Home products sit at the lower end in the table, while the highest strength row belongs in a dental office, where a professional controls where the gel goes, protects your gums, and watches the timing. Stronger doesn't mean you should use it unsupervised at your sink.
Practical rule: Match the row to your goal first, then check sensitivity and tray fit. A schedule you can repeat calmly for the full course beats a stronger gel you quit on day three.
Before you buy, find your row. Mild yellowing and no deadline points toward entry level. Stubborn staining and a short timeline may point higher, but only with supervision and a plan you can follow.
Reading Peroxide Percentages Without Getting Misled
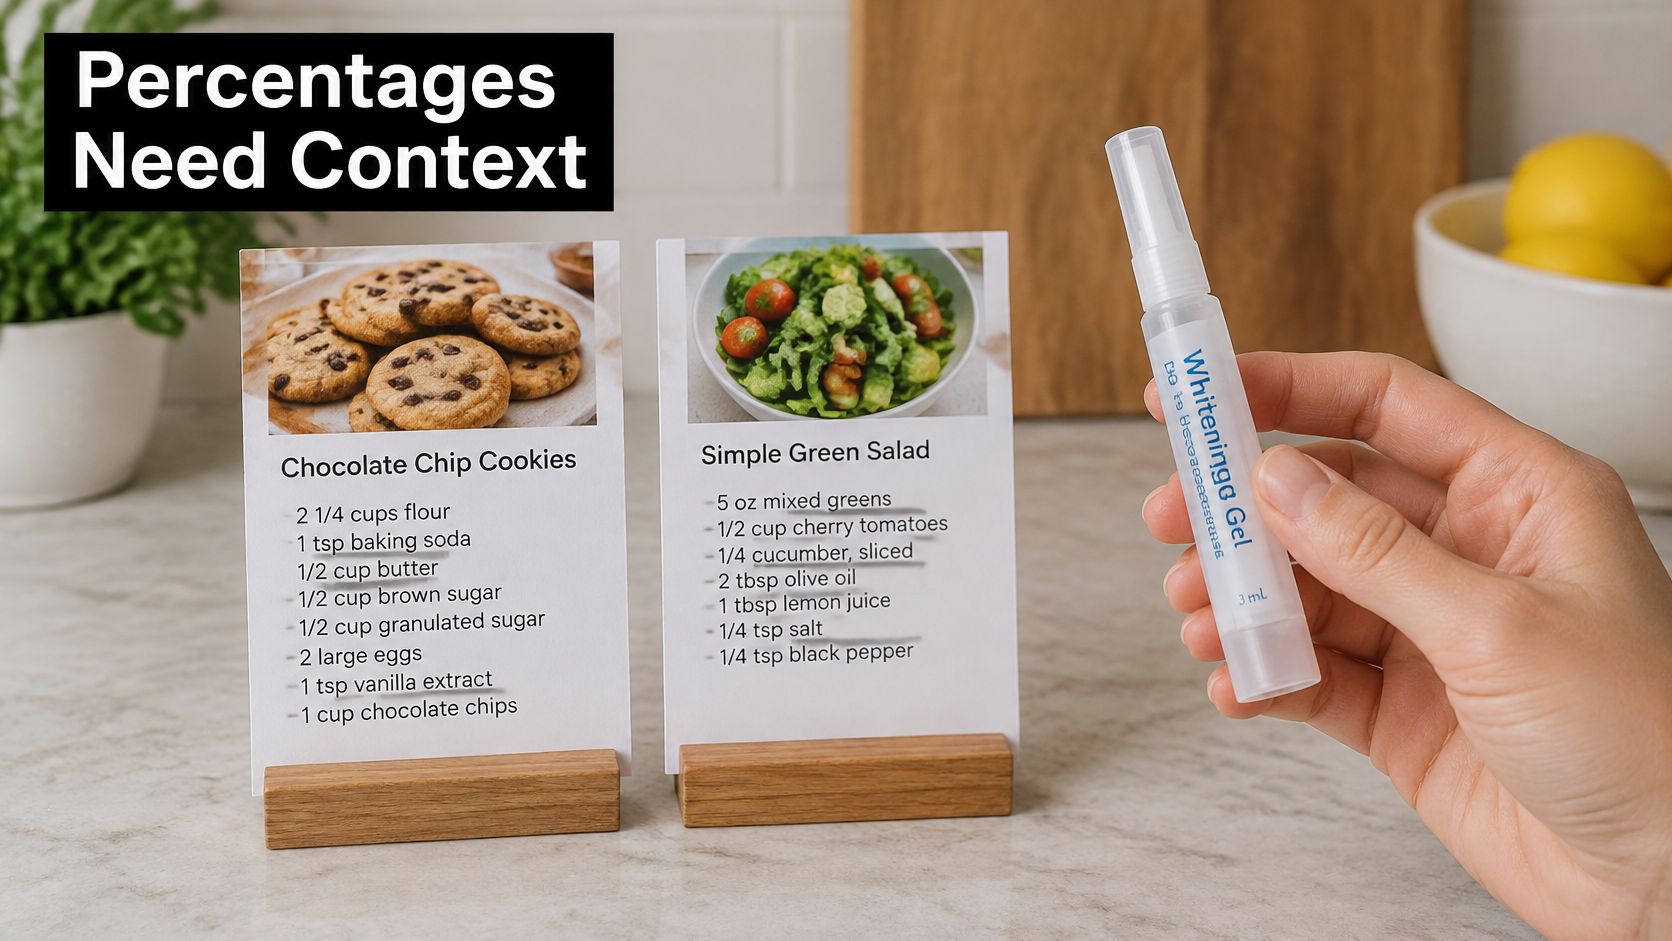
Comparing whitening percentages without converting the peroxide type is like comparing two recipes when one lists cups and the other lists grams. The numbers look comparable, but they're not measuring the same thing in the same way. You need the conversion before you can judge which one is stronger.
The image below captures that everyday confusion, a whitening product sitting next to recipe cards, each using its own units.
The One Third Rule
A 10% carbamide peroxide gel is not the same strength as 10% hydrogen peroxide, because carbamide peroxide releases hydrogen peroxide slowly as it breaks down. Only part of that listed percentage becomes hydrogen peroxide.
A 2024 systematic review of professional tooth whitening evidence reported that one study found 10% carbamide peroxide more effective than 6% hydrogen peroxide for at-home bleaching. The Australian Dental Association explains the commonly used equivalence that approximately one-third of carbamide-peroxide concentration corresponds to hydrogen-peroxide concentration, so 18% carbamide peroxide is roughly equivalent to 6% hydrogen peroxide. The same guidance describes home-use products with hydrogen-peroxide concentrations as low as 3% to 6%, compared with some in-office products reaching 35%.
That review finding is useful precisely because it breaks the simple score idea. If percentages were direct scores, the comparison would be tidy. Formulation, release rate, wear time, and supervision change the result, which is why a slower release gel worn in a tray can perform differently from a faster gel worn briefly.
A Simple Label Check
Before you compare two products, do three quick things:
- Name the peroxide: Write down whether the label says carbamide peroxide or hydrogen peroxide, not just the number.
- Convert carbamide peroxide: Divide by roughly three to estimate the hydrogen peroxide equivalent. For background on the ingredient itself, see this explanation of what carbamide peroxide is and how it works.
- Read the wear time: Treat percentage plus minutes or hours as the dose. A lower number worn longer isn't automatically weaker in practice.
Treat the percentage as a dose, not a score. A bigger dose can mean faster change, but it can also mean more sensitivity and more gum irritation if the tray overflows or you extend sessions on your own. Convert first, compare second, and let the schedule on the label set the session length.
Choosing the Right Gel and Your First Session
Three factors decide your starting point: how strong the stains are, how much time you have, and whether your teeth are sensitive or restored. If you skip the third factor, you can pick a gel that's technically strong enough but wrong for your mouth.
The checklist below turns those three factors into a quick first pass before you look at specific products.
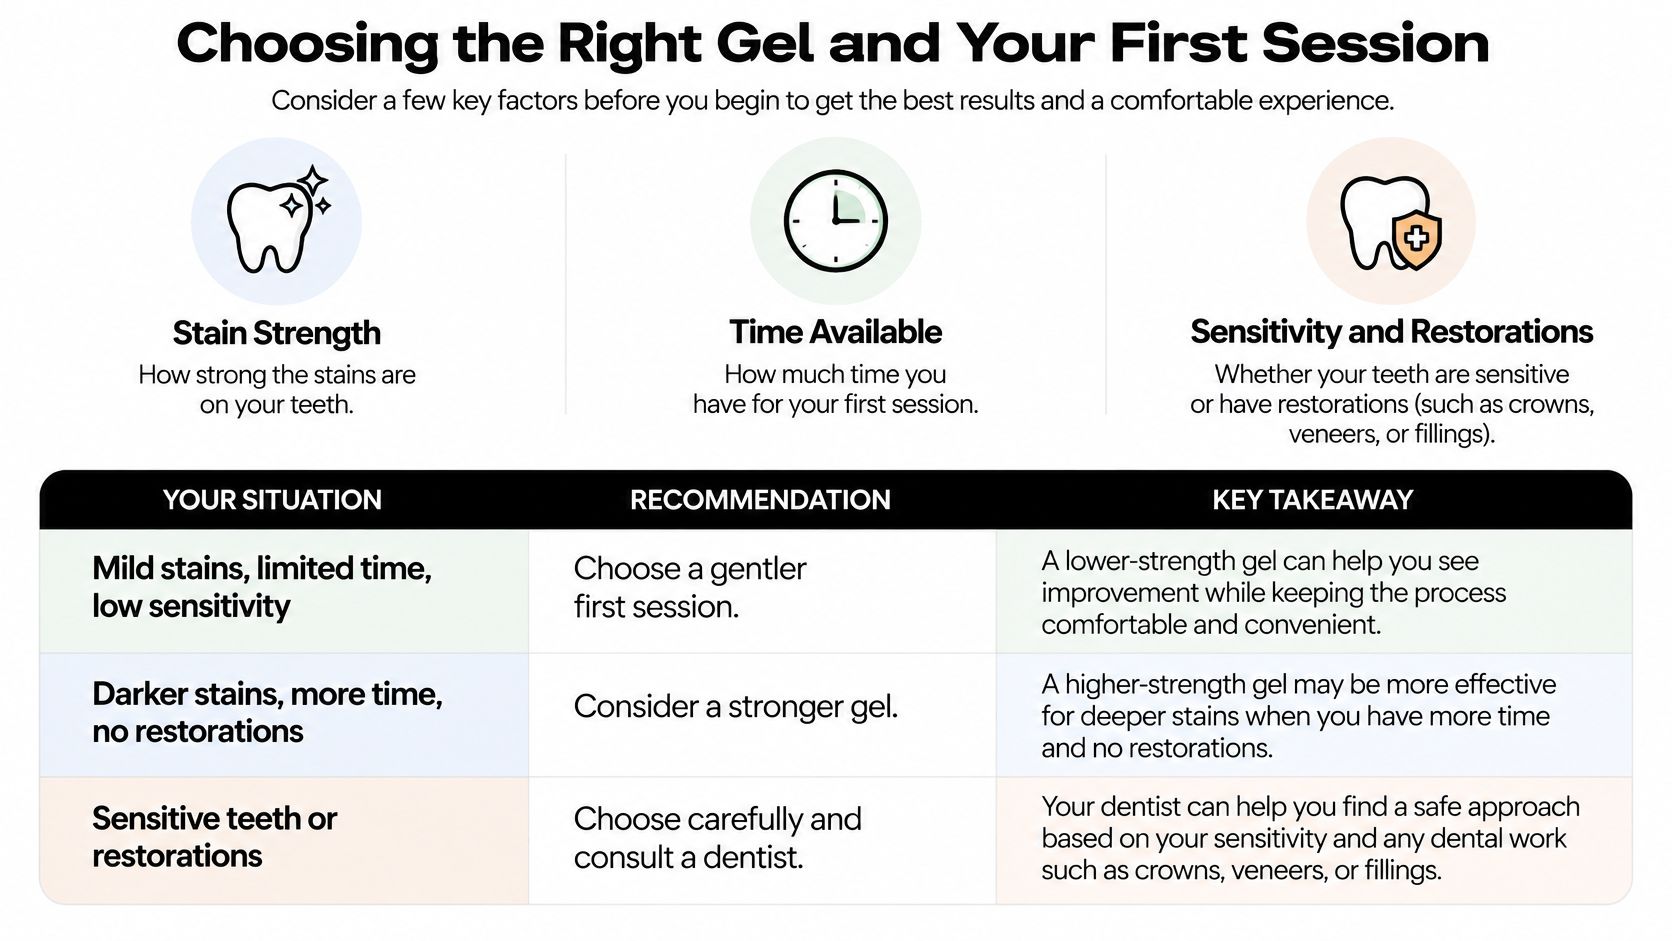
Start with stain strength, but be specific. Light surface yellowing from coffee is a different job from deep, long-standing discoloration across every front tooth. Then look at your calendar, because a gel that needs long daily wear only works if you'll wear it.
| Situation | Lower Strength, Longer Wear | Higher Strength, Shorter Session | See a Dentist First |
|---|---|---|---|
| First whitening with sensitive teeth | Yes, daily wear | No | If sensitivity persists |
| Strong stains and a short timeline | Possible but slower | Yes, with supervision | Recommended |
| Crowns, veneers or bonding present | Use caution | Avoid | Yes |
| Gum recession or untreated decay | Avoid until treated | Avoid | Yes |
| Trays that fit poorly | Refit first | Refit first | Yes, for a custom fit |
How to Read the Verdicts
For first use, start lower and wear longer. That gives you information about your own sensitivity before you commit to a stronger dose. Move up only if the shade barely changes after you finish the first course as directed, not because day two looks underwhelming in bathroom lighting.
Never raise strength to chase a match on a crown, veneer, or bonding. Natural enamel may lighten around it, but the restoration won't follow in a predictable way, so more gel usually makes the mismatch clearer. Poorly fitting trays are also a stop sign, because gel that escapes onto gums creates irritation without improving coverage on teeth.
Pack size helps you plan the course without guessing. For example, each pack of PolaNight 10 contains four syringes of whitening gel, and one syringe contains enough gel for one treatment, while a pack of PolaDay 9.5 contains 4 syringes, and each syringe holds enough gel for one whitening session. Splitting treatment into two shorter sessions uses more product. At the higher end of that tray range, PolaNight 22% whitens teeth in one 45-minute treatment, which shows how strength shortens the session.
Watching a tray being loaded and seated can make the timing and amount easier to picture before your first attempt.
Your Three Checks Before Buying
- Confirm the chemistry: Check the peroxide type and percentage, then convert carbamide peroxide before comparing.
- Confirm the tray: Check the tray style and fit, and refit or replace loose trays before you start.
- Confirm the exceptions: Check for visible restorations, untreated decay, recession, or ongoing sensitivity that needs a dentist first.
For your first session, use the lower strength and longer wear pattern that fits your row, track sensitivity each day in plain notes, and plan the next step only after the first course is complete. Don't stack extra sessions to speed things up. Your notes after a full course are far more useful than a guess after one night.
How Tray Design Changes Where the Gel Goes
A tray works like an ice cube tray. In a compartmented tray, each small compartment holds its own portion, so the contents stay where you put them. In a simpler, flatter tray, you're spreading a line along a channel, and it's easier to use too much in one spot and too little in another.
That design difference changes how you load whitening kit gel, how evenly it contacts each tooth, and how likely it is to squeeze onto your gums. Check which style you own before you open a syringe. If you're unsure how tray styles differ, this overview of teeth whitening trays and how they fit can help you identify yours.
Compartmented Trays
With compartmented trays, a drop of gel goes into each tooth compartment. The compartment does the portion control for you. You're placing a small amount where each tooth sits, instead of flooding the whole tray and hoping it spreads evenly when you bite down.
This style rewards patience. Load one compartment at a time, keep the drop on the surface that faces the front of the tooth, and stop when each visible tooth has its own portion. If a compartment looks full to the brim, you've probably used more than you need.
Simpler Trays
With simpler trays, a line of gel goes along the entire tray. Half the syringe is used for the upper tray and half for the lower. That even split matters, because loading the top generously and guessing at what's left for the bottom gives you two different treatments in the same session.
- Compartmented trays: Place one drop per tooth compartment, aimed at the front tooth surface.
- Simpler trays: Run one thin line along the tray, using half the syringe for the upper arch and half for the lower.
- Both styles: Keep gel on tooth surfaces and away from the edge that sits against your gums.
More gel doesn't mean more whitening. Once the tooth surface is covered, extra gel mostly travels to places you don't want it.
Overloading trays with gel or pushing gel firmly into teeth is not necessary and may irritate gums. After loading, each tray is tapped or pressed lightly so the gel contacts each tooth, and firm pressing is not needed. A light tap seats the tray and spreads the thin layer. Hard pressure squeezes gel out at the gum line, which wastes product and can leave your gums sore.
Your reader action is simple: name your tray style first, measure for that style, and don't fill beyond the tooth surface. If gel oozes out every time you seat the tray, reduce the amount next session rather than pressing harder or wiping and continuing with the same overloaded tray.
How to Apply Whitening Gel Step by Step
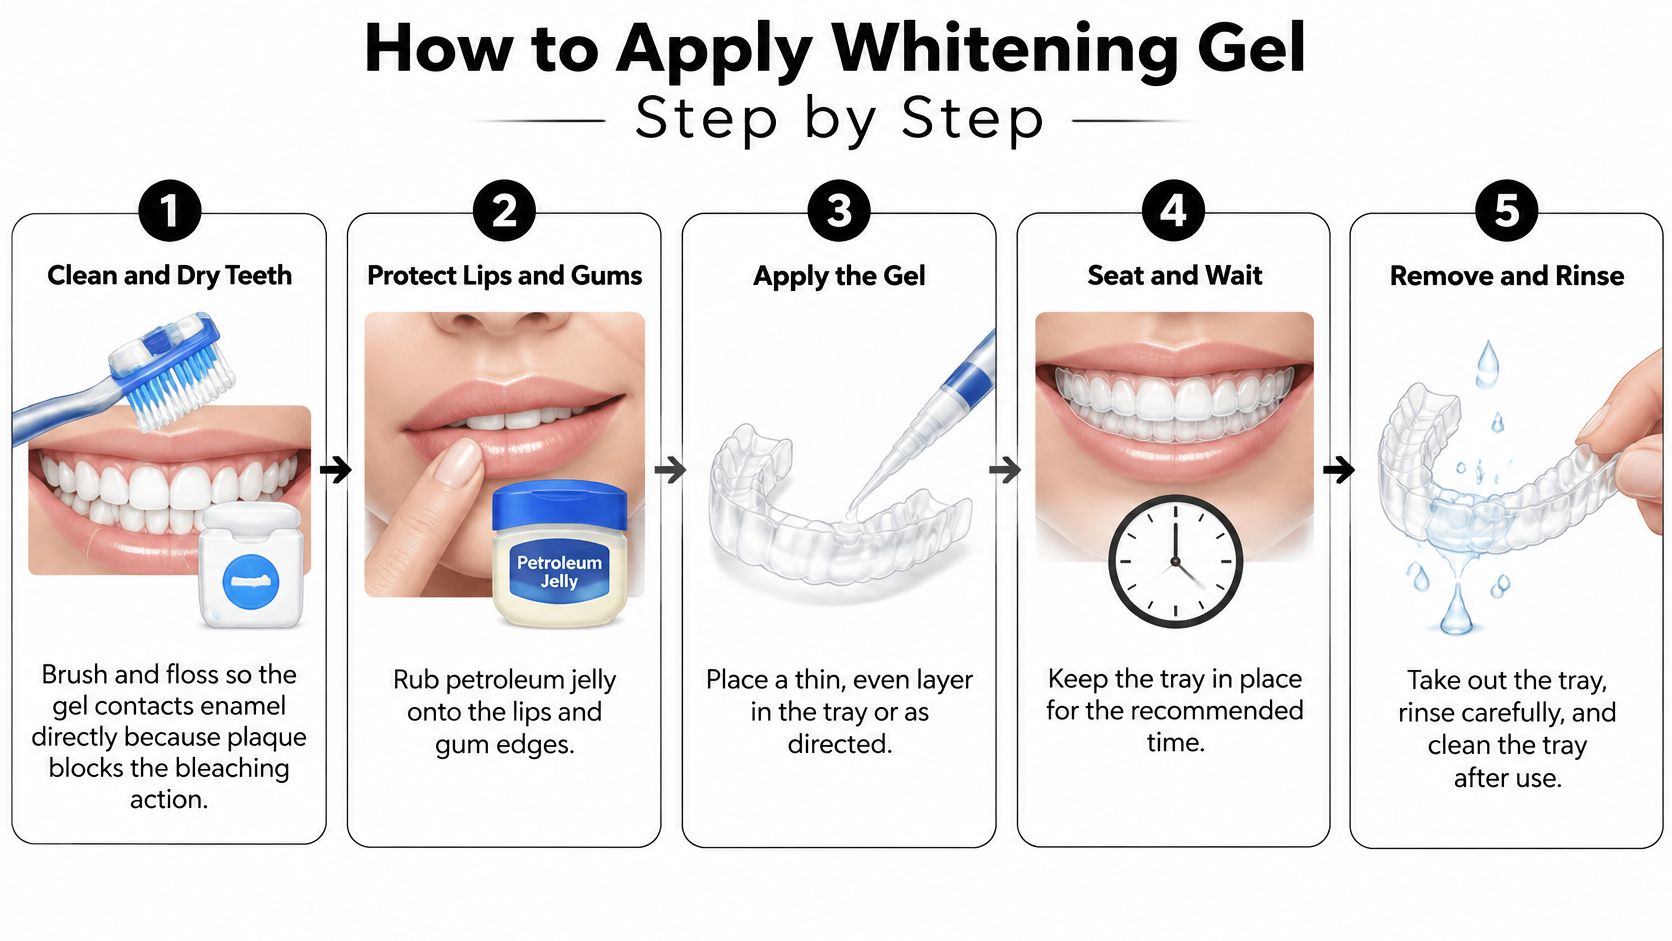
Good application is mostly portion control and clean contact. Each step below prevents a specific problem, either wasted gel, blocked bleaching, or gel sitting on soft tissue where it doesn't belong.
The process guide below shows the sequence from clean teeth to rinsed trays.
Steps 1 to 4 Prepare and Load
- Clean and dry your teeth. Brush and floss first so the gel contacts enamel directly. Plaque and debris between teeth can block contact, leaving uneven patches where the gel never really reached the surface. Pat teeth dry if your product directions ask for it, because excess saliva can dilute gel at the edges.
- Protect lips and gum edges. Rub petroleum jelly onto your lips and gum edges before the session. To protect the lips and gums, this barrier is used before each Lumibrite 22 bleaching session, and the same careful approach helps limit irritation from direct peroxide contact during tray wear. Keep the jelly on soft tissue, not smeared across the teeth you want to whiten.
- Split the syringe for both arches. Divide the amount between the upper and lower trays as your tray type dictates. Decide the split before you start loading, so you don't run short on the second tray or squeeze extra to compensate.
- Load by tray design without overfilling. Place a drop in each compartment or a thin line along a simpler tray. Thin and even is the goal. Excess gel has nowhere useful to go once the tray is seated, so it moves toward the gums.
Steps 5 to 7 Wear and Clean Up
- Seat the trays and press lightly. Put each tray in place and tap or press lightly so gel contacts each tooth. Don't bite down hard to force gel into the gum line. Wipe away any gel that escapes onto gums with a clean fingertip, tissue, or cotton swab.
- Wear for the time matched to your gel strength. Follow the label schedule for the strength you selected. Don't estimate, extend because you fell asleep on the couch, or shorten a long wear gel and then judge it as ineffective. Set a timer for daytime sessions and use overnight wear only when the product is designed for it.
- Remove, rinse, and clean the trays. Take the trays out, rinse your mouth with water, and clean the trays before storage. Rinse residue from every compartment so old gel doesn't sit against your teeth next time or dry into the tray. Let trays dry before you close the case.
If you feel gel burning on a gum during wear, remove the tray, rinse, and check for overflow instead of toughing it out. Comfort is useful feedback. It often tells you the amount or tray fit needs adjusting before the next session.
Sensitivity, Gum Irritation and Restoration Risks
A whitening result can look worse even when the gel works. Your natural teeth lighten, but a crown, veneer, or filling on a front tooth stays its original shade, so that one tooth suddenly looks darker by comparison. The gel didn't fail. It changed only the teeth it can change.
Peroxide may lighten natural enamel but does not reliably change the color of many existing restorations. According to ADA News guidance on teeth whitening, the ADA notes that whitening chemicals may react with ceramic crowns, sealants, and other dental restorations, and that aggressive bleaching can contribute to erosion or changes in tooth microstructure. It also identifies adhesive restorations as a factor influencing sensitivity risk.
Symptom to Action Map
Use what you feel or see to decide whether to pause, adjust the amount, or stop and get help. Don't treat every symptom as a reason to push through, and don't treat brief sensitivity as a reason to panic.
| Symptom | Likely Cause | What to Do |
|---|---|---|
| Short zings on cold drinks | Temporary peroxide sensitivity | Pause for a day or two and use a desensitising toothpaste |
| Gum whitening or redness | Gel touching the gums from overfilled trays | Trim the gel amount and stop until the gums settle |
| Burning lips or gums | Direct peroxide contact | Rinse and apply petroleum jelly before the next session |
| Sensitivity lasting over a week | Possible decay, cracks or restoration issues | Stop and see a dentist |
| Uneven shade after treatment | Restorations did not change with natural teeth | Consult a dentist and avoid repeated bleaching |
Brief zings that fade are different from pain that builds, lingers, or keeps returning after you stop. For readers troubleshooting discomfort, these options for teeth whitening sensitivity relief can help you decide how to pause and restart more comfortably.
Restorations Need a Plan, Not More Gel
Before you start, inventory what's visible when you smile:
- Crowns and veneers: Note any on front teeth, because shade mismatch shows most clearly there.
- Bonding and fillings: Include tooth colored repairs, even small ones at the edges of front teeth.
- Sealants and untreated problems: Note sealants, untreated decay, cracks, or areas that already hurt with cold.
Consult a dentist before treatment when crowns, veneers, bonding, sealants, untreated decay, or persistent sensitivity are present. Avoid repeated bleaching to chase a matched shade, because your natural teeth may keep lightening while the restoration stays comparatively fixed.
Timing matters if restorative work is planned. Whitening is usually completed before new fillings, crowns, or veneers are placed, so the dentist can match the new restoration to your whitened shade afterward. If you whiten after the restoration is placed, the new work may be the tooth that stands out. Uneven color after treatment is a reason to consult a dentist rather than bleach again.
Ready to choose a tray gel with the peroxide type, strength, and wear time matched to your teeth, not just the biggest number on the box? Visit DentalHealth.com to browse professional grade whitening gels and kits, sensitivity products, and practical guides that help you plan your first course and manage comfort along the way.